JSI Tomcat - Super Detailing???
-
- Officer - Major
- Posts: 867
- Joined: Tue Jul 17, 2012 11:15 am
- Location: HORSHAM, PA.
Re: JSI Tomcat - Super Detailing???
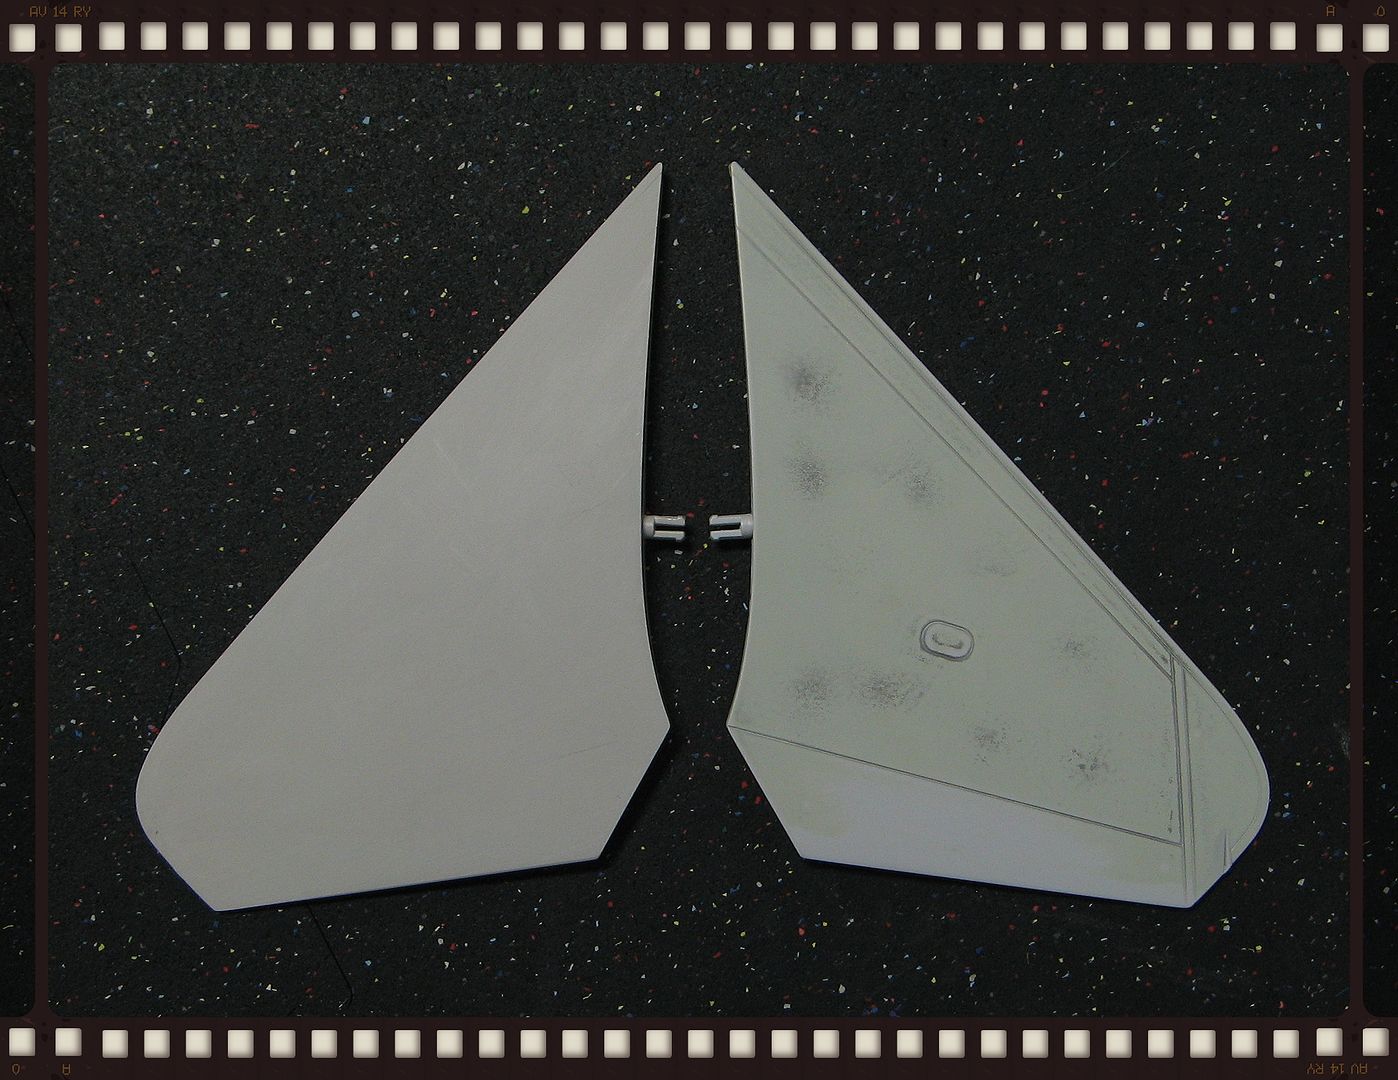
Since the plastic is very thick on these, I deceided instead of filling the seams that I would sand down the horizontal stabs. One reason because I can get the edges thinner, like mcaulk suggested and two, the real ones are all one piece boron. So, after ALOT of wet sanding the one on the left is the result, looks much better IMO.
Steve
OPERATION "DELIBERATE GUARD", "SOUTHERN WATCH", "ENDURING FREEDOM" AND, "IRAQI FREEDOM" VETERAN.
-
- Officer - Major
- Posts: 867
- Joined: Tue Jul 17, 2012 11:15 am
- Location: HORSHAM, PA.
Re: JSI Tomcat - Super Detailing???
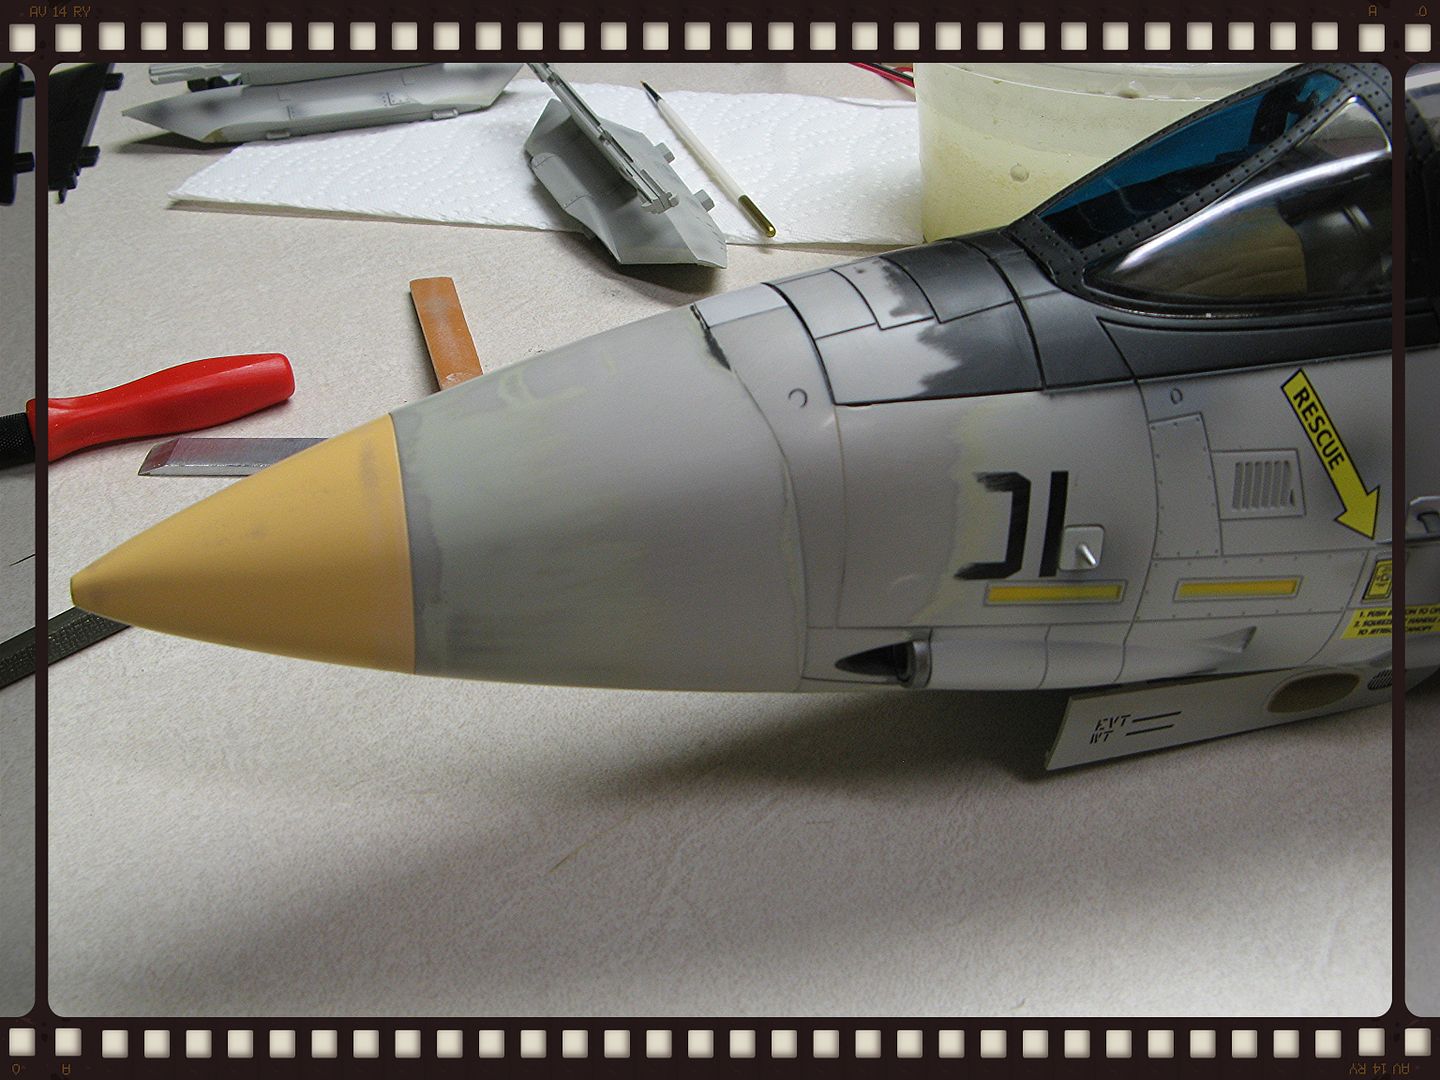
Radome fitted, glued and sanded.
Steve
OPERATION "DELIBERATE GUARD", "SOUTHERN WATCH", "ENDURING FREEDOM" AND, "IRAQI FREEDOM" VETERAN.
-
- Officer - Major
- Posts: 867
- Joined: Tue Jul 17, 2012 11:15 am
- Location: HORSHAM, PA.
Re: JSI Tomcat - Super Detailing???
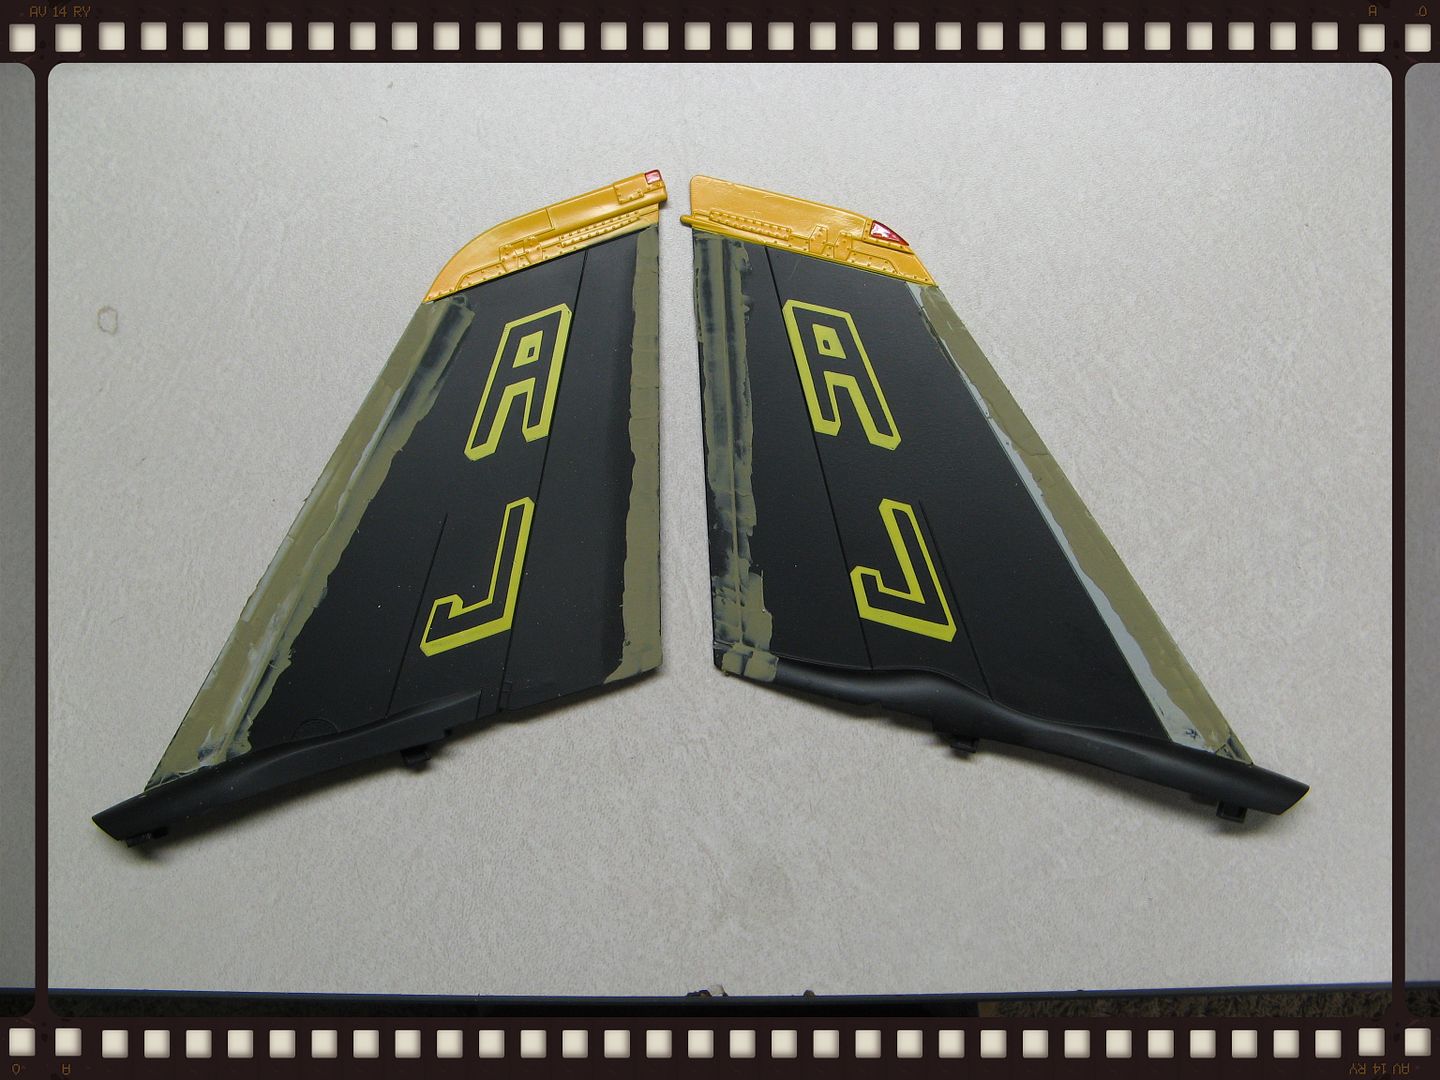
Seams filled awaiting more wet sanding.
Steve
OPERATION "DELIBERATE GUARD", "SOUTHERN WATCH", "ENDURING FREEDOM" AND, "IRAQI FREEDOM" VETERAN.
-
- Officer - Major
- Posts: 867
- Joined: Tue Jul 17, 2012 11:15 am
- Location: HORSHAM, PA.
Re: JSI Tomcat - Super Detailing???
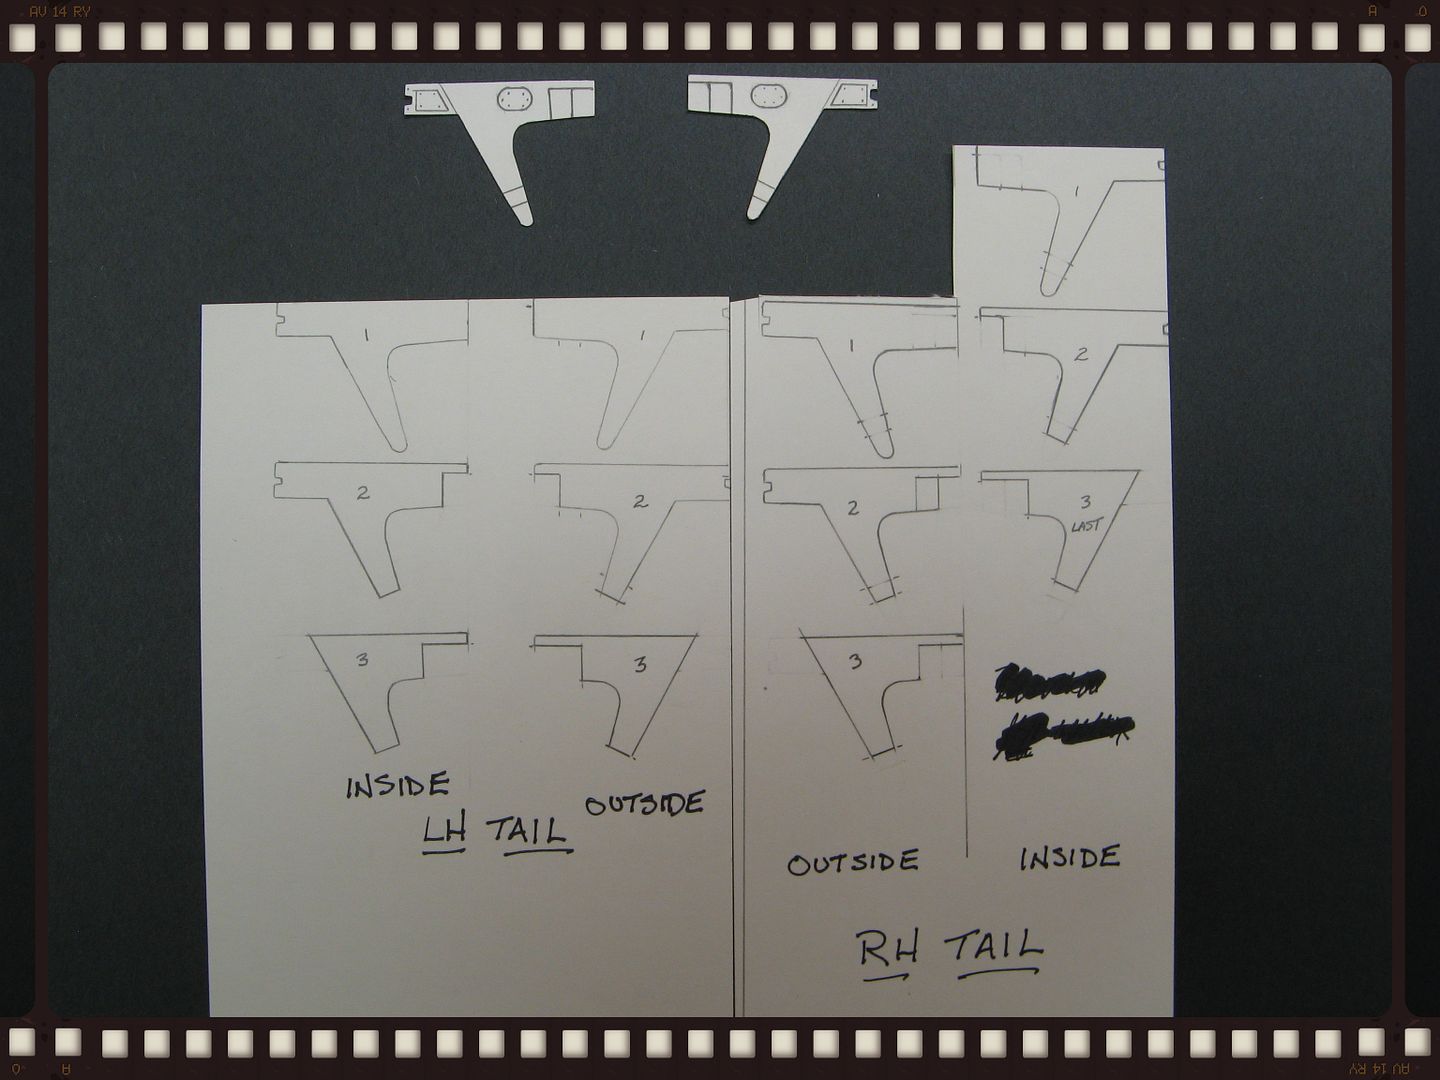
Using my book by Danny Coreman, "Uncovering the F-14A/B/D Tomcat", an awesome book for this sort of thing BTW, I made some paper templates, out of heavy paper stock, for my tail stiffeners. I will cut these out and use them to make my plastic ones. There will be 3 pieces for each side of the tails. I'll be using .010" sheet plastic.
Steve
OPERATION "DELIBERATE GUARD", "SOUTHERN WATCH", "ENDURING FREEDOM" AND, "IRAQI FREEDOM" VETERAN.
-
- Officer - Major
- Posts: 867
- Joined: Tue Jul 17, 2012 11:15 am
- Location: HORSHAM, PA.
Re: JSI Tomcat - Super Detailing???
The paper templates look pretty good, hopefully once the plastic ones are cut out and applied the results will be as good.
Steve
OPERATION "DELIBERATE GUARD", "SOUTHERN WATCH", "ENDURING FREEDOM" AND, "IRAQI FREEDOM" VETERAN.
-
- Officer - Major
- Posts: 867
- Joined: Tue Jul 17, 2012 11:15 am
- Location: HORSHAM, PA.
Re: JSI Tomcat - Super Detailing???
Looking forward to more posts and pics from Mike. His work has inspired me to get started on this conversion.
Steve
P.S. Mike, I need help with decals.
Steve
P.S. Mike, I need help with decals.
OPERATION "DELIBERATE GUARD", "SOUTHERN WATCH", "ENDURING FREEDOM" AND, "IRAQI FREEDOM" VETERAN.
-
- Officer - Brigadier General
- Posts: 9653
- Joined: Mon Jan 22, 2007 5:52 am
- Location: New Orleans
Re: JSI Tomcat - Super Detailing???
Why not just use the paper ones ?
Shoot a coat of primer on and you should be good to go .
-
- Officer - Major
- Posts: 867
- Joined: Tue Jul 17, 2012 11:15 am
- Location: HORSHAM, PA.
Re: JSI Tomcat - Super Detailing???
I think "layering" the plastic will give it better depth and make it look more realistic.
Steve
Steve
OPERATION "DELIBERATE GUARD", "SOUTHERN WATCH", "ENDURING FREEDOM" AND, "IRAQI FREEDOM" VETERAN.
-
- Officer - Major
- Posts: 867
- Joined: Tue Jul 17, 2012 11:15 am
- Location: HORSHAM, PA.
Re: JSI Tomcat - Super Detailing???
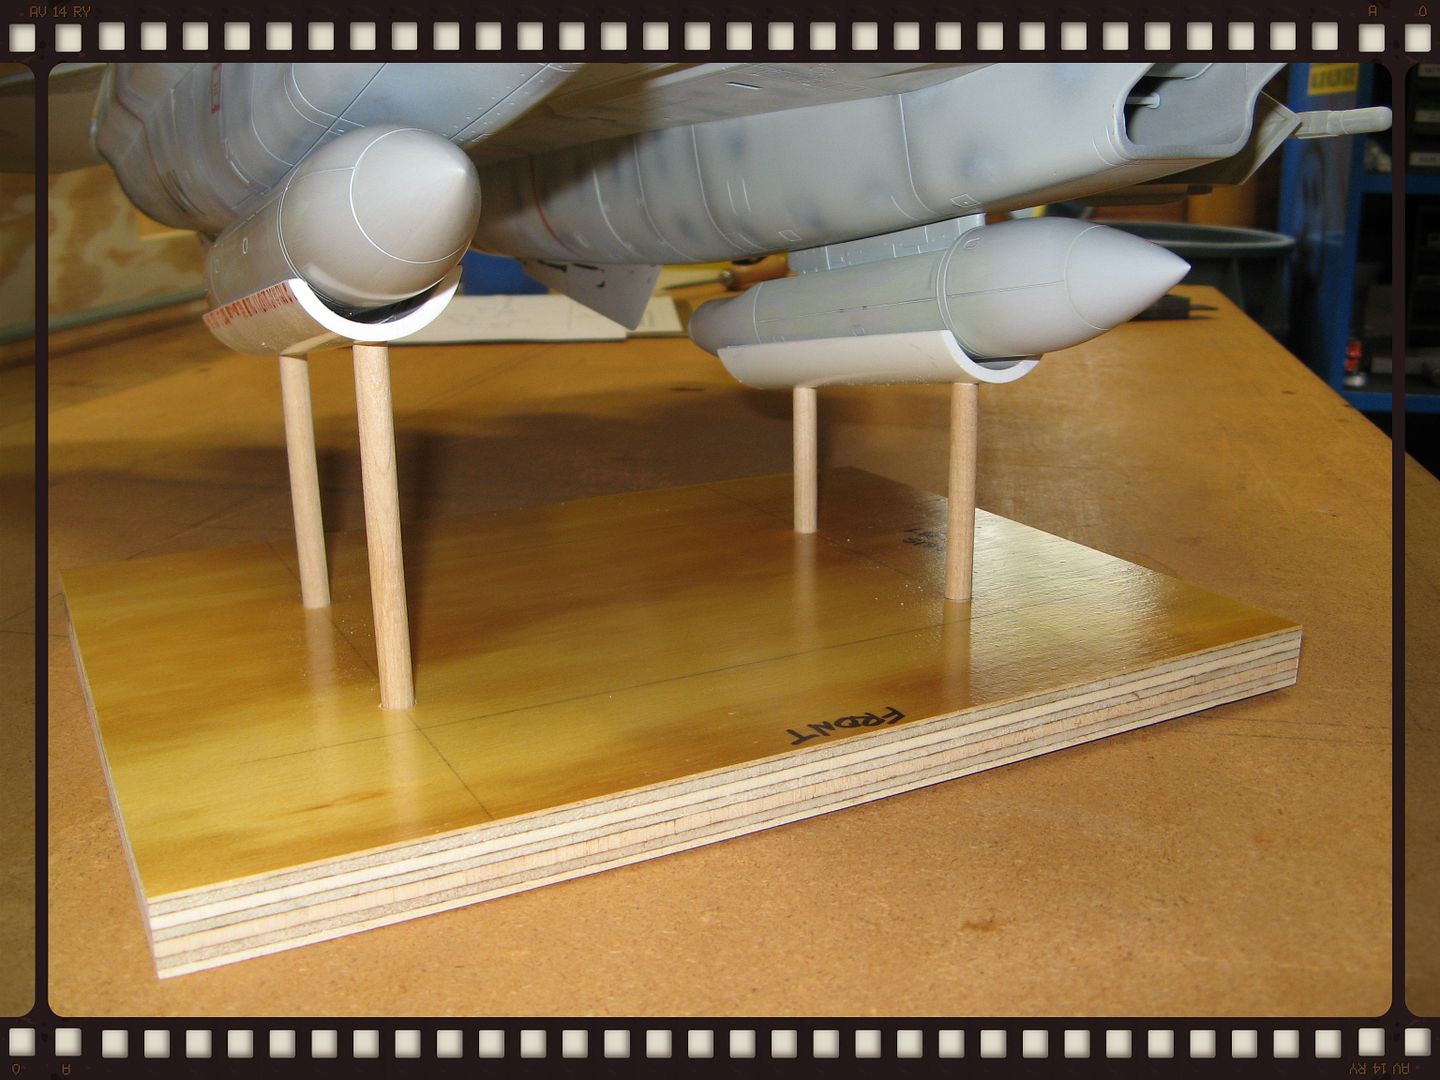
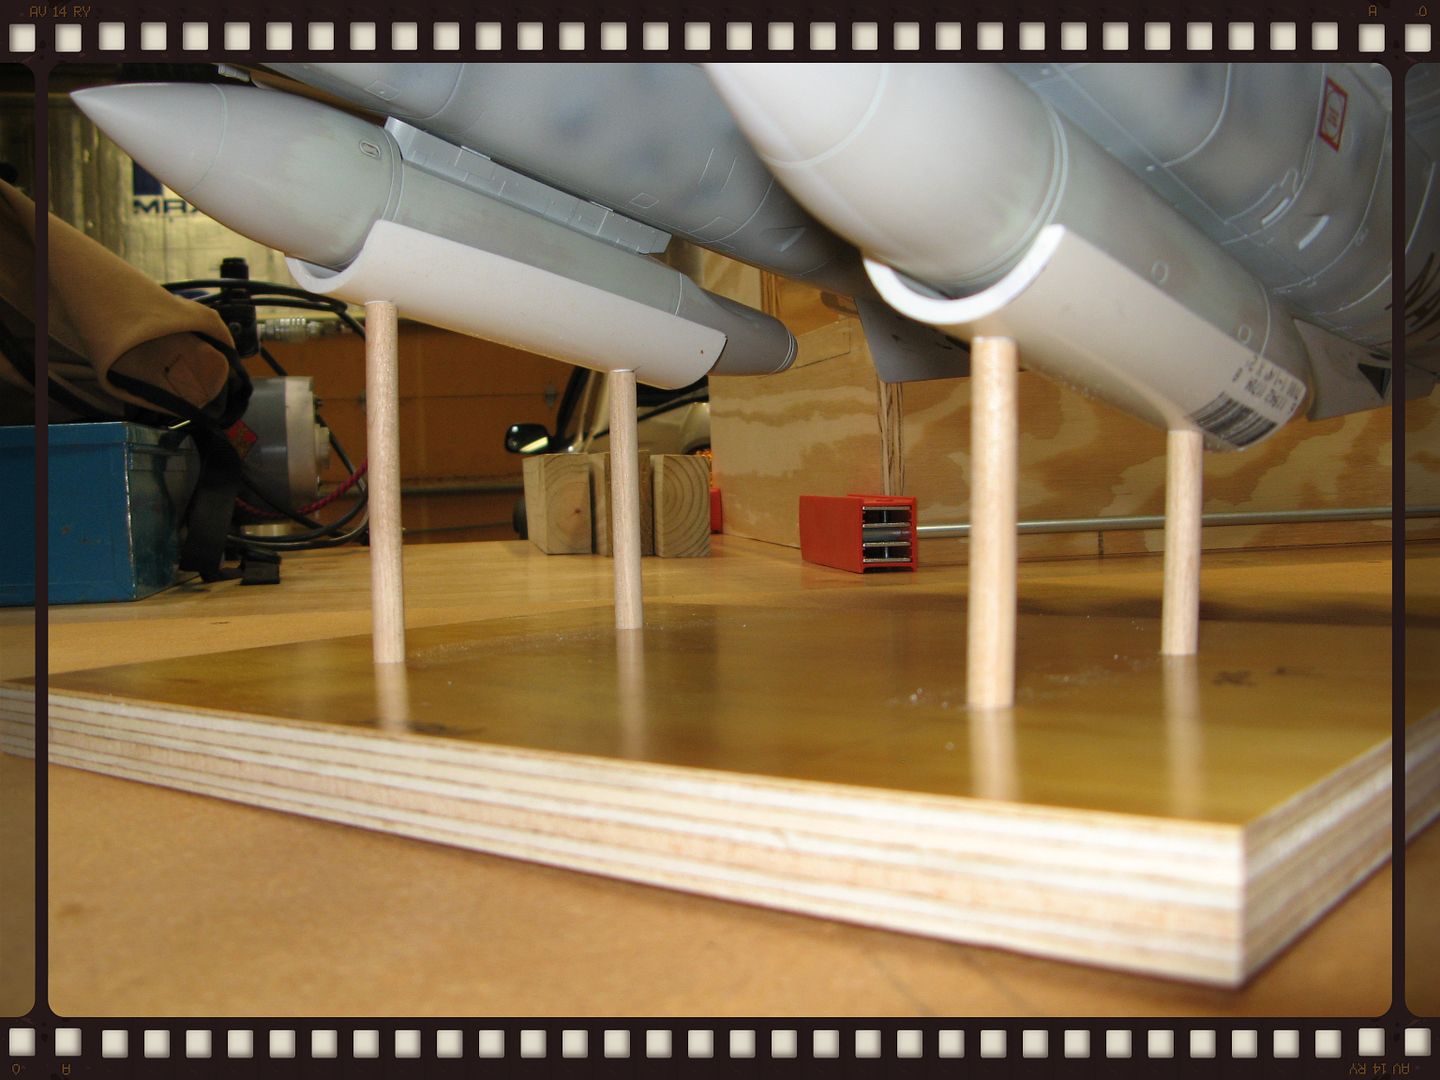
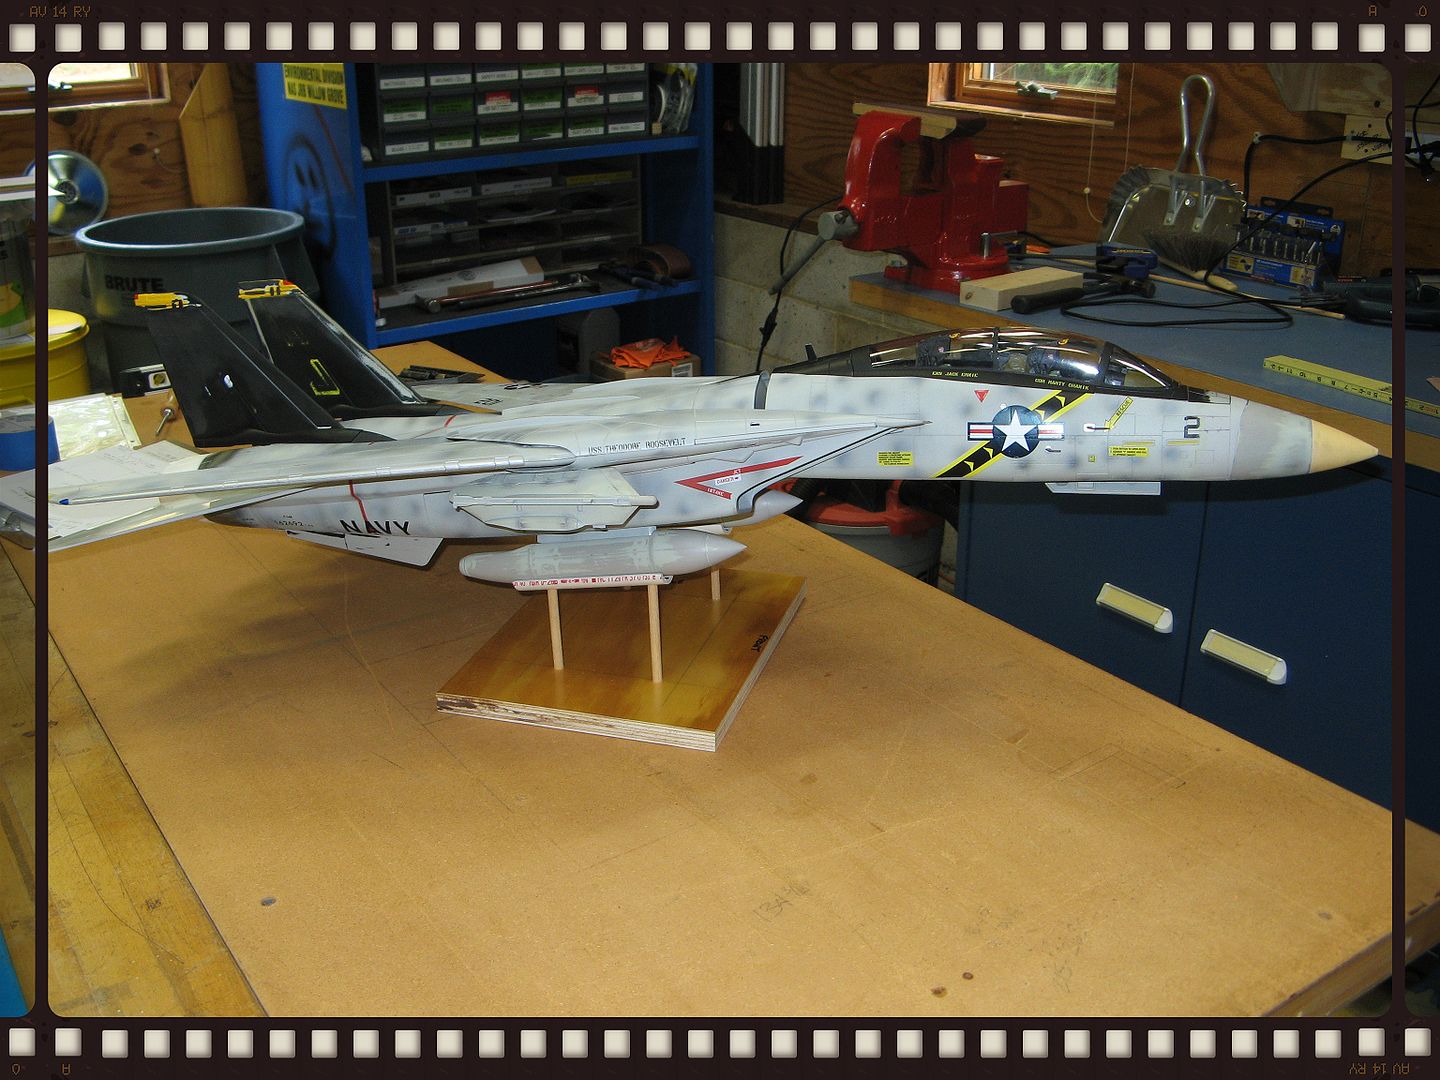
Since I am going to display my 2 F-14's, in flight when finished, I thought of doing something like shown here. This will support the Cat but, I want to have this all made out of acrylic. I plan on building 2 display cases for them and both will have acrylic covers as well. Lots of ideas in my head and on paper as well so, I think they will look awesome when finished. I just need decals for my B model conversion.
Steve
OPERATION "DELIBERATE GUARD", "SOUTHERN WATCH", "ENDURING FREEDOM" AND, "IRAQI FREEDOM" VETERAN.
-
- Officer - Major
- Posts: 867
- Joined: Tue Jul 17, 2012 11:15 am
- Location: HORSHAM, PA.
Re: JSI Tomcat - Super Detailing???
OPERATION "DELIBERATE GUARD", "SOUTHERN WATCH", "ENDURING FREEDOM" AND, "IRAQI FREEDOM" VETERAN.
-
- Officer - Major
- Posts: 867
- Joined: Tue Jul 17, 2012 11:15 am
- Location: HORSHAM, PA.
Re: JSI Tomcat - Super Detailing???
OPERATION "DELIBERATE GUARD", "SOUTHERN WATCH", "ENDURING FREEDOM" AND, "IRAQI FREEDOM" VETERAN.
-
- Officer - Major
- Posts: 867
- Joined: Tue Jul 17, 2012 11:15 am
- Location: HORSHAM, PA.
Re: JSI Tomcat - Super Detailing???
OPERATION "DELIBERATE GUARD", "SOUTHERN WATCH", "ENDURING FREEDOM" AND, "IRAQI FREEDOM" VETERAN.
-
- Officer - Major
- Posts: 867
- Joined: Tue Jul 17, 2012 11:15 am
- Location: HORSHAM, PA.
Re: JSI Tomcat - Super Detailing???
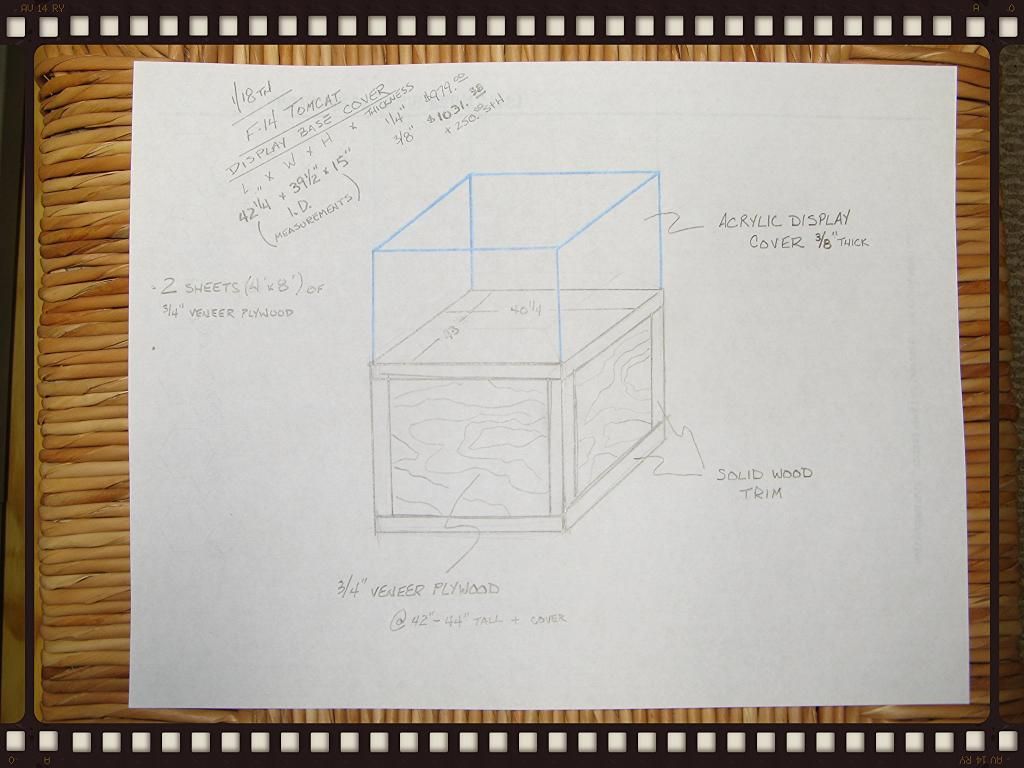
Rough idea for the display cases. Still hashing out some ideas for different things. Since my VF-154 Cat has lights I would like to adapt that to the case. Somehow get the power source out of the jet, so I don't have to depend on batteries, and have a switch on the outside of the case. Then all I have to do is plug it into an outlet and hit the switch to turn the lights on. I disconnected the wire that runs to the TCS camera since this should not light up. Stay tuned.
Steve
OPERATION "DELIBERATE GUARD", "SOUTHERN WATCH", "ENDURING FREEDOM" AND, "IRAQI FREEDOM" VETERAN.
-
- Officer - Brigadier General
- Posts: 1859
- Joined: Tue Oct 05, 2004 4:32 pm
- Location: Huntsville, AL
Re: JSI Tomcat - Super Detailing???
Wow, I'm really digging the stand you have here and looks much more stable than what I'm using. Can you post all the dimensions of materials used and how?
Thanks!
Thanks!
-
- Officer - Major
- Posts: 867
- Joined: Tue Jul 17, 2012 11:15 am
- Location: HORSHAM, PA.
Re: JSI Tomcat - Super Detailing???
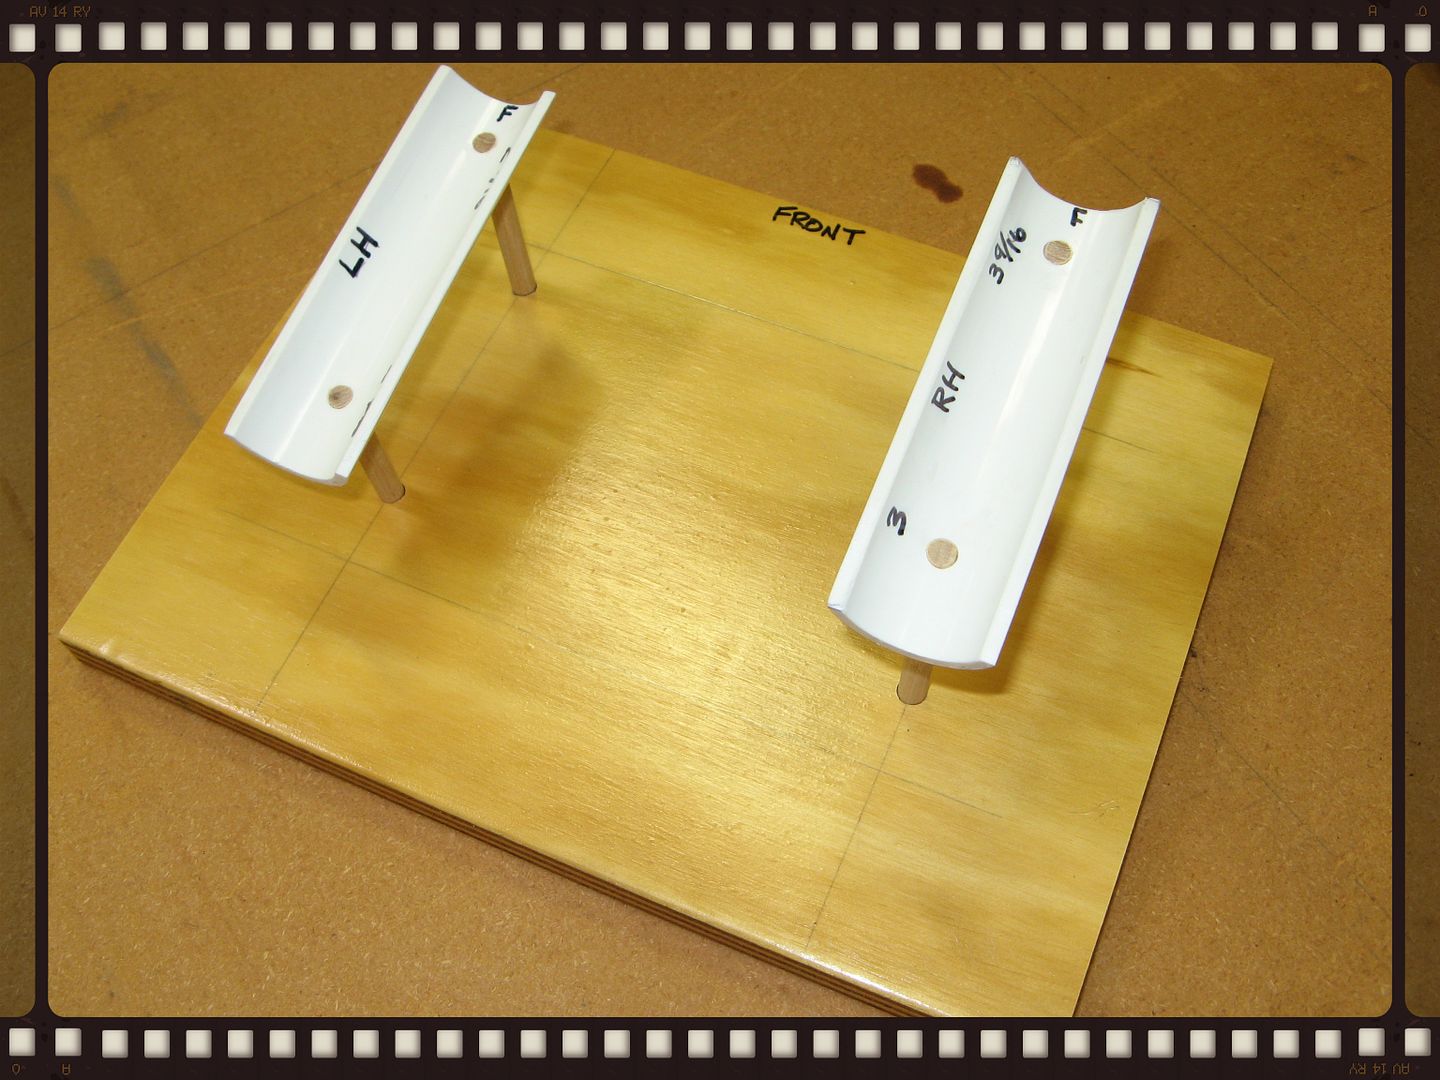
Here ya go, refer to the photos;
Wooden base 12 1/4'' wide X 9 1/2'' tall
Wooden dowel rods 5/16''
pvc halves cut from 1 1/4'' I.D. pvc pipe
This was made all from stuff I had lying around the garage. The wood base fits "the footprint" of the fuel tanks once installed on the jet. I determined that from centerline of one tank to the other one was 6 3/4'' +/-. Those are the 2 pencil lines running under the stands. Next I sliced the PVC, with my jigsaw. You'll have to use your judgement on this. I didn't want to cover up too much of the tanks sides. Refer to the photos. After I "sliced" the PVC I cut them to 5 1/4'' long. From there I determined where the tanks would lay in the PVC halves and marked that with a pencil line onto the wood base. The other pencil lines going side to side, on the base, represent the PVC halves length, 5 1/4". I measured 1'' off each end of the PVC halves and drew a mark. Then I eyeballed the center of the halves and drew a line the lenght of the pipe, giving me a centerline. I drilled the holes in the PVC slightly smaller that the dowel rod for a tight fit. Once the PVC was drilled I transfered the holes to the wood base. The holes in the base I drilled slightly bigger, allowing me some play front to back. Again, referring to the photo, I made the LH dowel rods 3 1/4'' for the front one and 2 3/4'' for the back one and for the RH dowel rods 4 1/4'' for the front one and 3 3/4'' for the back one. You can make these whatever size you'd like depending on how you want the jet to sit in the stand. I wanted a level flight, slightly banked look for mine. In order to get the rods to fit in the PVC you' ll have to bevel the ends slightly with a piece of sandpaper. You want a tight fit so they won't fall apart. Once I got all the rods sanded and fitted, and was happy with the angle, I put the dowel rods into the base. Then I put the PVC halves on top of the rods and, with a scrap piece of wood, hammered the PVC halves down on the rods until they fit nice and tight. I used my Dremel tool, with a sanding drum, to sand the rods flush with the inside of the PVC. I didn't want the rods to hit the fuel tanks. Project done. I can now take this to the people who will be making the acrylic case covers and they can use this as their template to make my stands.
I hope this helps and makes sense to you. It's kinda tough for me to explain.
Steve
OPERATION "DELIBERATE GUARD", "SOUTHERN WATCH", "ENDURING FREEDOM" AND, "IRAQI FREEDOM" VETERAN.
-
- Officer - Brigadier General
- Posts: 1859
- Joined: Tue Oct 05, 2004 4:32 pm
- Location: Huntsville, AL
Re: JSI Tomcat - Super Detailing???
Thanks Steve! Greatly appreciated!
-
- Officer - Major
- Posts: 867
- Joined: Tue Jul 17, 2012 11:15 am
- Location: HORSHAM, PA.
Re: JSI Tomcat - Super Detailing???
No problem, your welcome. Interested in hearing / seeing how you make out with yours.
Steve
Steve
OPERATION "DELIBERATE GUARD", "SOUTHERN WATCH", "ENDURING FREEDOM" AND, "IRAQI FREEDOM" VETERAN.
Re: JSI Tomcat - Super Detailing???
in the last pictures you show the nose pod is missing how did you remove it and is this to make it a d model ? it looks good.
-
- Officer - Major
- Posts: 867
- Joined: Tue Jul 17, 2012 11:15 am
- Location: HORSHAM, PA.
Re: JSI Tomcat - Super Detailing???
Rudedog, I have a jewelers saw and I used that to remove the TCS pod. I removed it for 3 reasons. First, because I wanted to sand all the seams gone. Second, I removed the painted navigation light. I am going to replace this with a clear plastic piece that I shaped and sanded and third, I removed the red platic face from the TCS camera to replace it with a clear one as well.
This one is going to be a B model, VF-103 low-viz, when I can find someone to do decals for me. I would really like a D model as well but, now your talking a total cockpit redo as well as the seats, plus other items. This A to a B is enough work already.
Steve
This one is going to be a B model, VF-103 low-viz, when I can find someone to do decals for me. I would really like a D model as well but, now your talking a total cockpit redo as well as the seats, plus other items. This A to a B is enough work already.
Steve
OPERATION "DELIBERATE GUARD", "SOUTHERN WATCH", "ENDURING FREEDOM" AND, "IRAQI FREEDOM" VETERAN.
Re: JSI Tomcat - Super Detailing???
under stand sounds good please post pictures when done i'm having one modifyed right now by dave miller his work is awsome. i also know 3 people who make decales if you want there emails let me know. i have been watching your build the detail is just amazing. i also i'm building a full bomb cat from a black knight pizza guy is doing the molds.
-
- Officer - Major
- Posts: 867
- Joined: Tue Jul 17, 2012 11:15 am
- Location: HORSHAM, PA.
Re: JSI Tomcat - Super Detailing???
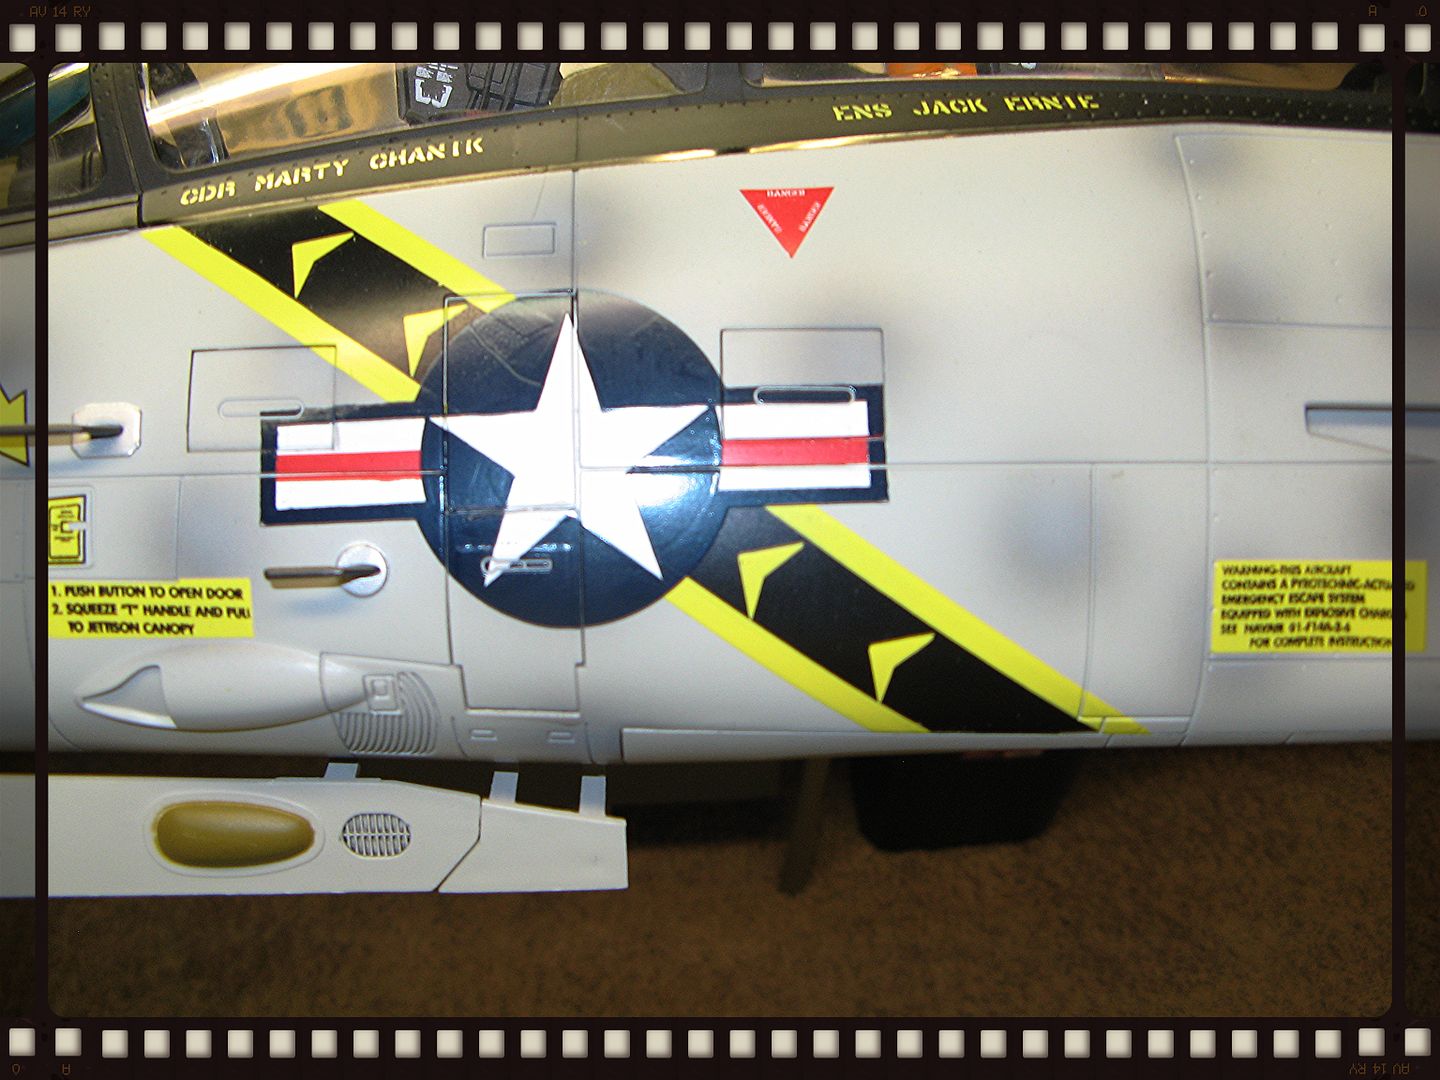
Started to work on the stiffners today. Deceided to do the easy one first, the one that goes around the rear boarding step. This was made using.010" sheet plastic. This photo is a before pic.
Steve
OPERATION "DELIBERATE GUARD", "SOUTHERN WATCH", "ENDURING FREEDOM" AND, "IRAQI FREEDOM" VETERAN.
-
- Officer - Major
- Posts: 867
- Joined: Tue Jul 17, 2012 11:15 am
- Location: HORSHAM, PA.
Re: JSI Tomcat - Super Detailing???
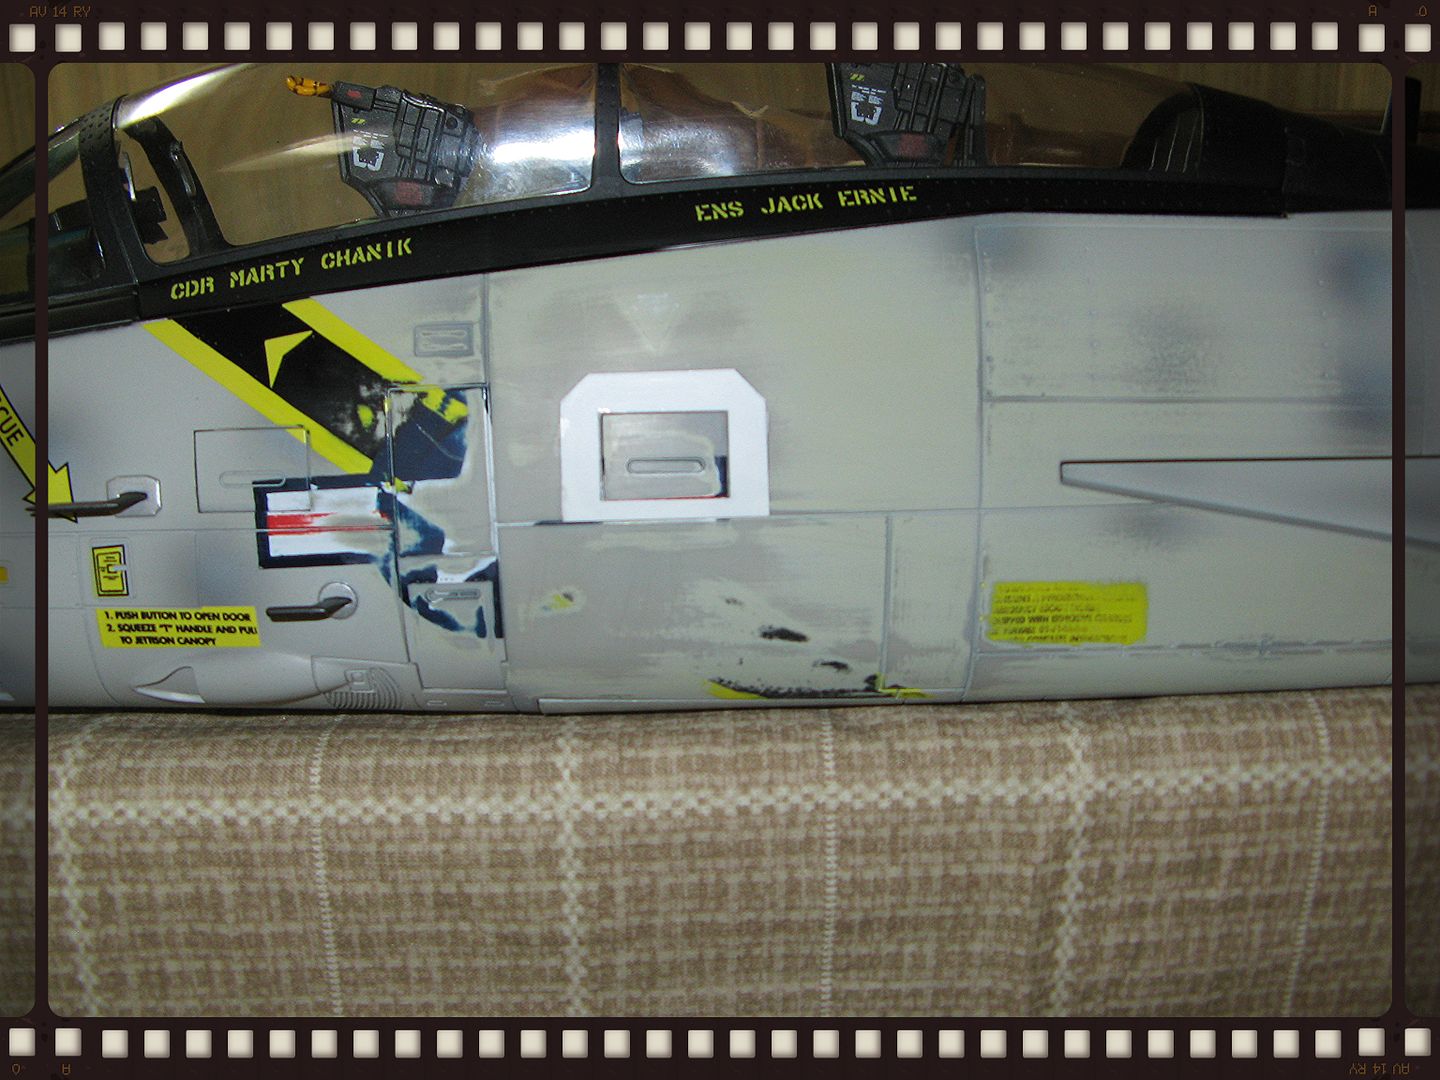
Here is the finished result after wet sanding the area and gluing the steps in the closed position. Now to tackle the tail stiffners.
Steve
OPERATION "DELIBERATE GUARD", "SOUTHERN WATCH", "ENDURING FREEDOM" AND, "IRAQI FREEDOM" VETERAN.
Re: JSI Tomcat - Super Detailing???
sent the email to you for decals hope this helps. rudedog
-
- Officer - Major
- Posts: 867
- Joined: Tue Jul 17, 2012 11:15 am
- Location: HORSHAM, PA.
Re: JSI Tomcat - Super Detailing???
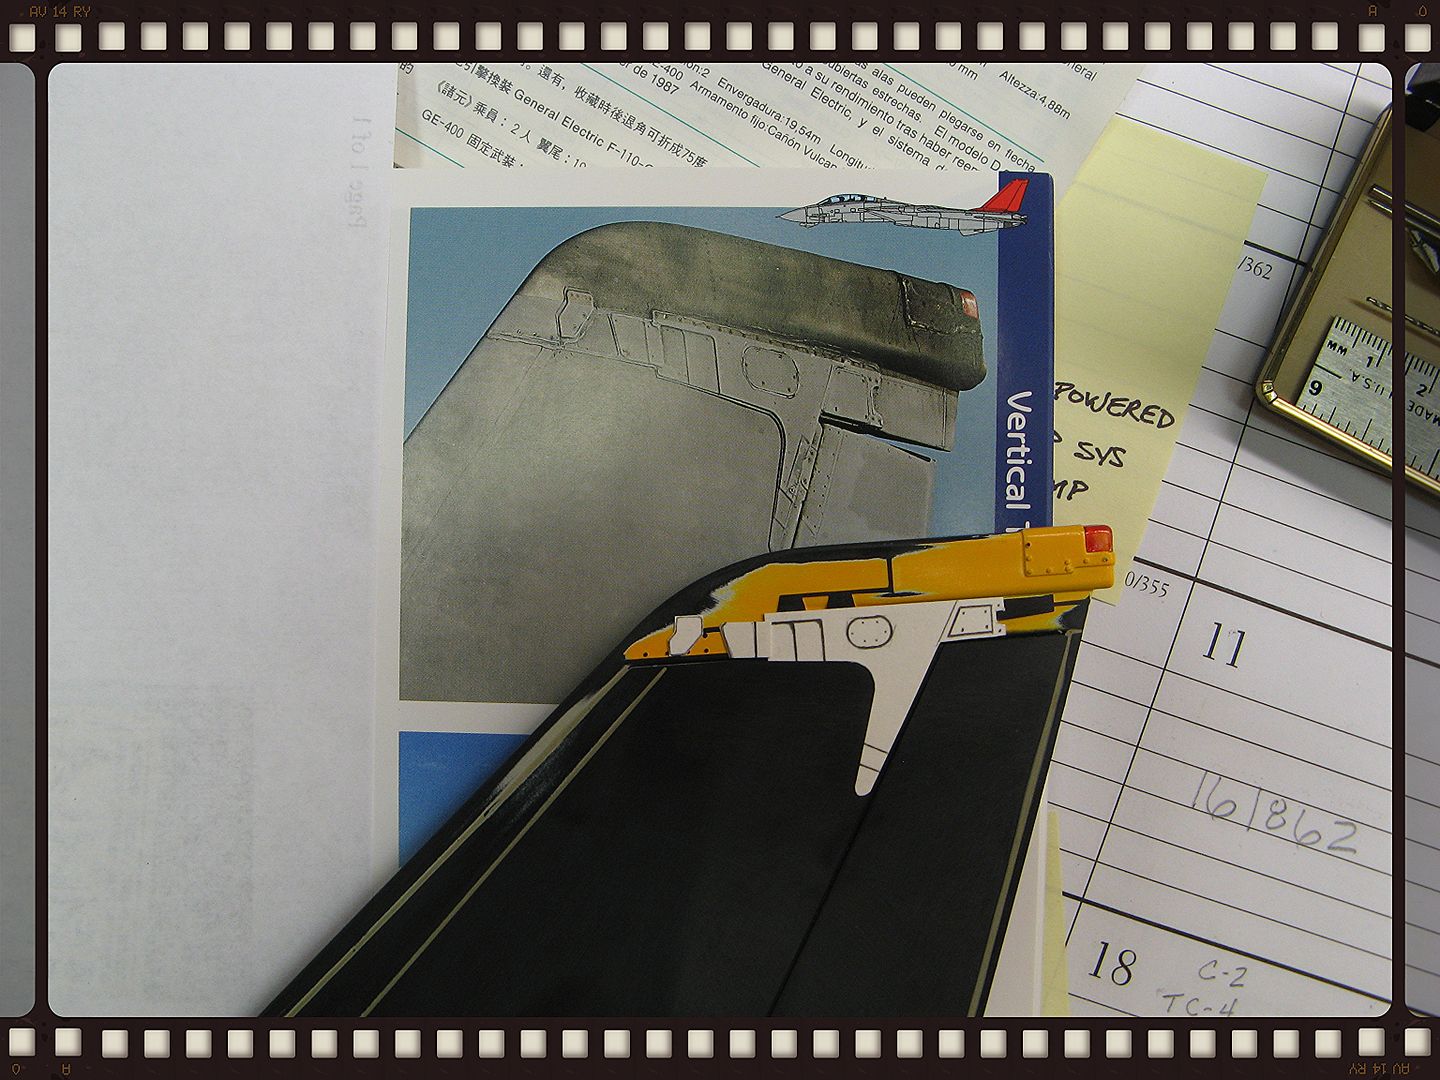
These tail stiffners aren't working out like I thought they would. I made one set (3 pcs. glued together) using .010" sheet plastic. They look great "laminated" together but, the finished product is too thick for the scale.
I tried another one using just one piece of sheet plastic. I scribed the piece to give the illusion of the layers. I don't know how this will look after being primed and painted ??
Another thought would be to make another one, glue it to the tail and , after primer and paint, draw the lines, panels and, rivets with a mechanical pencil to give it the right look. My question is will clear gloss and flat stick to the area with the pencil ?? Has anyone tried this effect before and what were your results ?
Steve
OPERATION "DELIBERATE GUARD", "SOUTHERN WATCH", "ENDURING FREEDOM" AND, "IRAQI FREEDOM" VETERAN.
Re: JSI Tomcat - Super Detailing???
The clear should stick to the pencil and pen areas just fine. Problem is...depending on what clear you are using (spray paint or Future?), the paint can actually "eat" the pen or pencil marks. When I made my stiffeners, I had the same too thick problem. I use a single sheet and scrapped away a small layer in the appropriate places to give it that stacked appearance. With a new #11 blade, it just takes seconds. You could probably do the same with a file.
US Army MP Corps combat veteran Operation Desert Shield/Desert Storm