
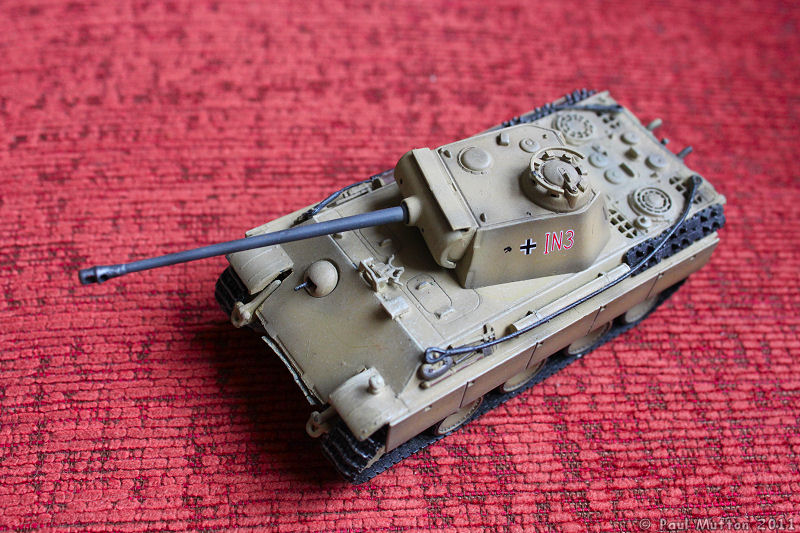
So when I got a mega-cheap 1:72 Panther with a missing wheel, I thought I'd have a go at making a dug-in Panther. For this conversion, I used a Dragon Armor Panther #60009, one of the early releases with a metal hull which is no longer in production (they usually cost quite a bit on eBay, but obviously not when they're broken!)
Here's what I started with - Dragon Armor #60009. Notice the lower hull is already separated from the upper hull at the front of the Panther.
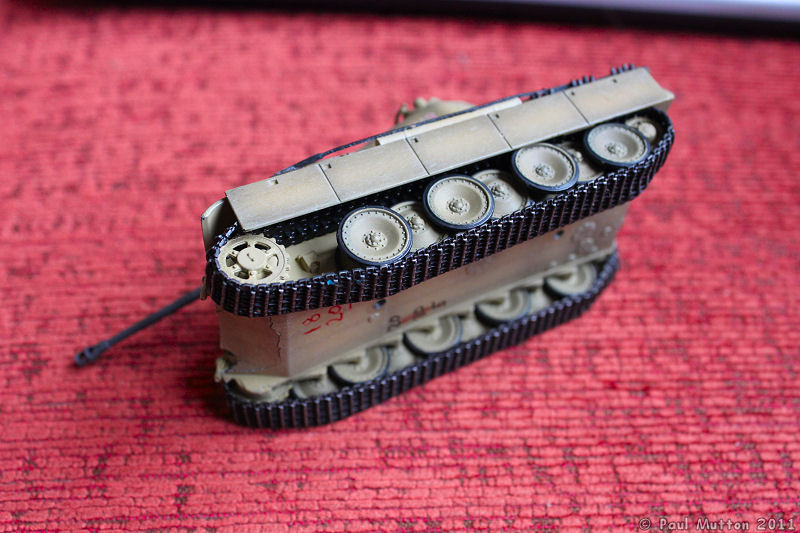
Underneath, you can see the hull damage more clearly, plus the obvious missing wheel. The numbers on the bottom show it was previously used for wargaming.

The rest of the wheels came off quite easily. Most could just be snapped off by hand. I thought I'd save some of these for later...

With all the wheels off, I tried to pull the lower hull off. I'm not entirely sure what this was made of, but it was rather crumbly. Some of it stayed attached where it was screwed into the upper hull. Only the upper hull seems to be made of proper sturdy metal.
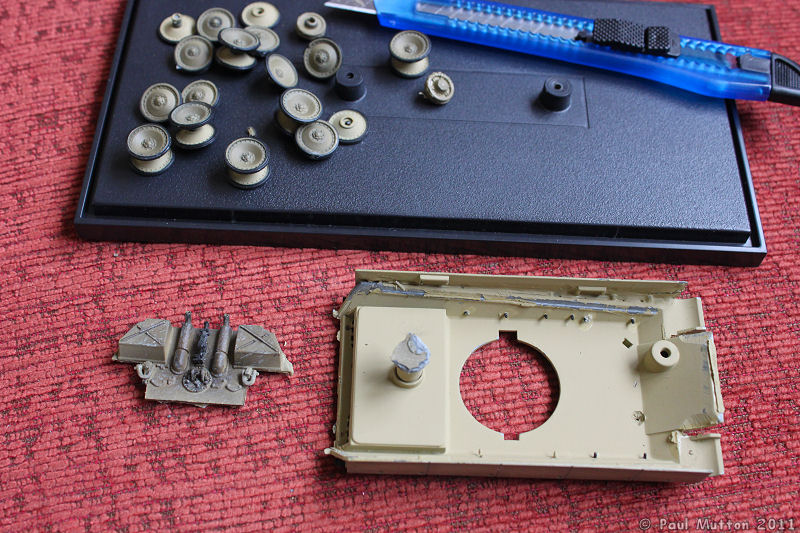
Using a pair of pliers, I removed the rest of the lower hull. The rear hull and storage boxes are plastic. All I really need is the upper hull, though.
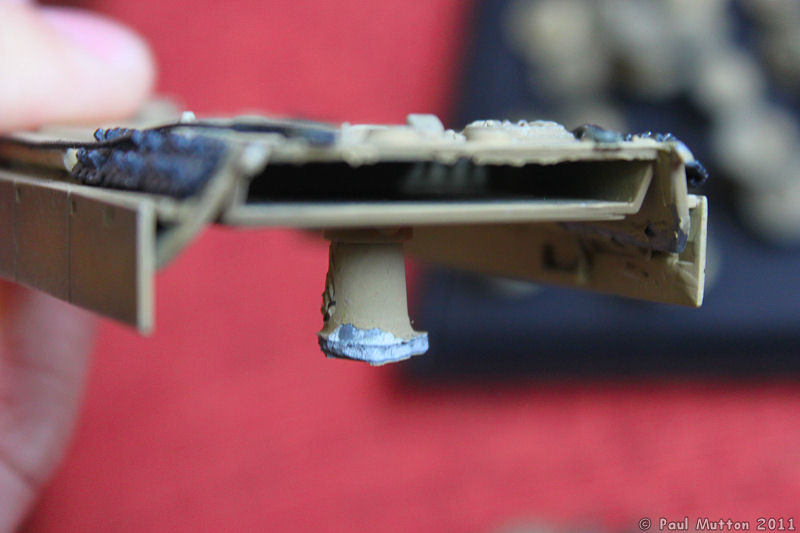
Getting this part off was probably the hardest job. I couldn't unscrew it without removing the plastic engine panel cover, but I was reluctant to do that as it would have caused some paint to flake off.
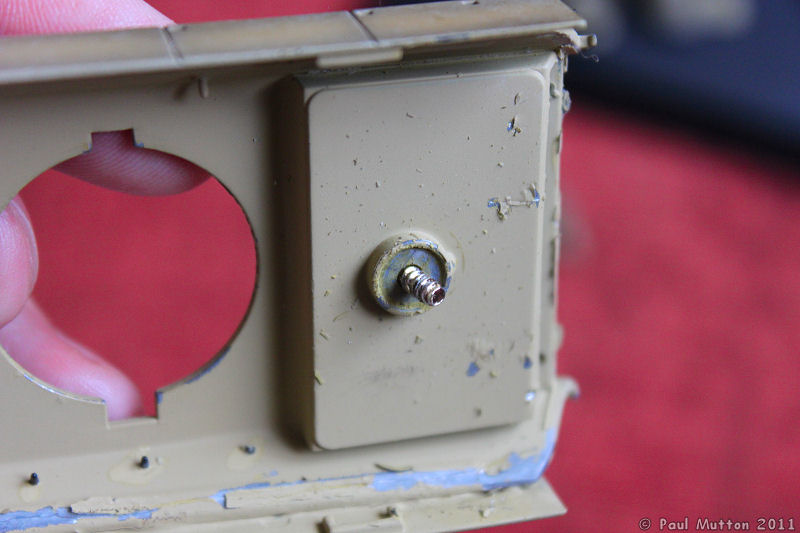
After lots of tugging with a pair of pliers, it eventually crumbled away and left me with this screw. I couldn't get this out, as there wasn't enough room in the gap between the metal chassis and the engine panel deck. Still, it's small enough to not get in the way now.
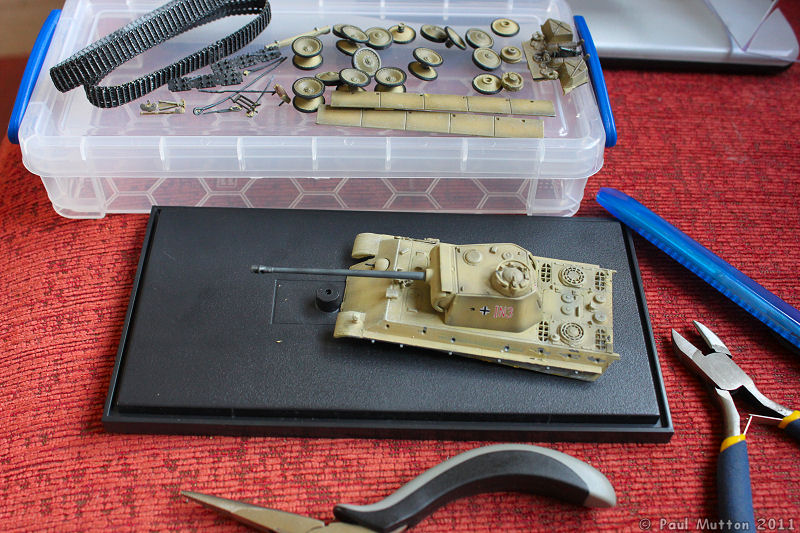
After removing the side skirt armour, the "dug-in" tank can now sit quite low on its display case base. I've also taken all of the spare track links, cables and tools off the tank. I'm sure I'll find something useful to do with them
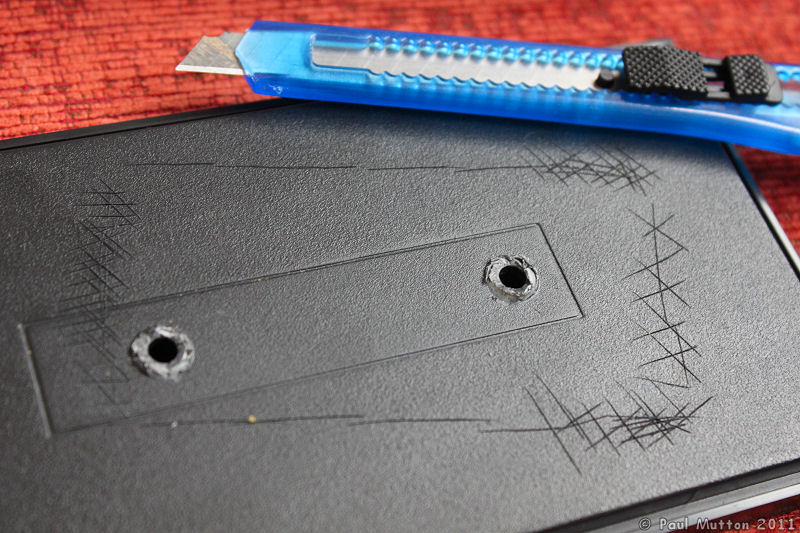
I nibbled the protruding mounts off the base using a pair of cutters and scored the area around the base of the tank. This will help the hot glue gun stick more securely.
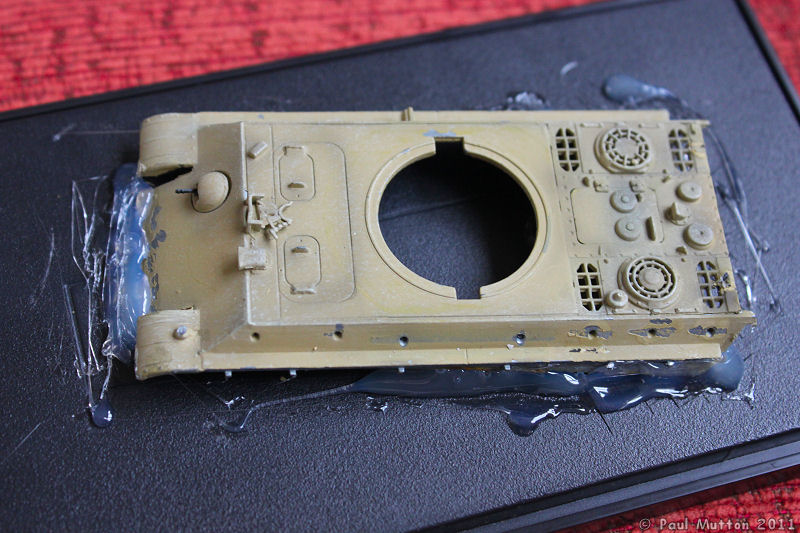
The upper hull was then glued directly to the base with a hot glue gun. Some of the paintwork is missing, but this will soon be covered up!
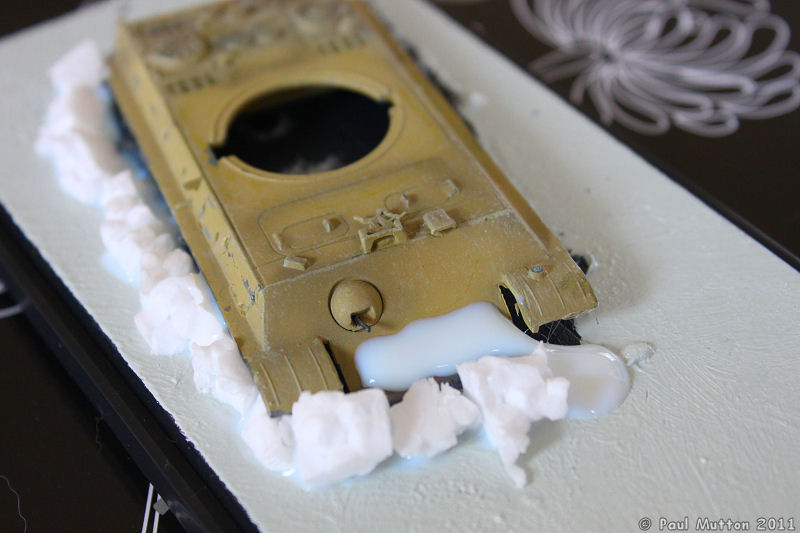
After painting the base gray, I spread plenty of PVA glue around the edge of the semi-dug-in tank and stuck down some chunks of foam to build up the mounds of material that will ultimately protect the tank's hull.
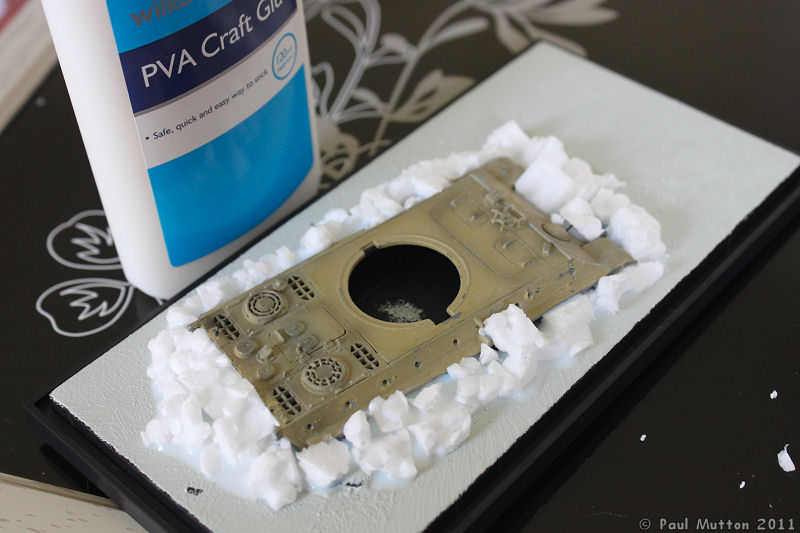
Adding some more polystyrene foam.
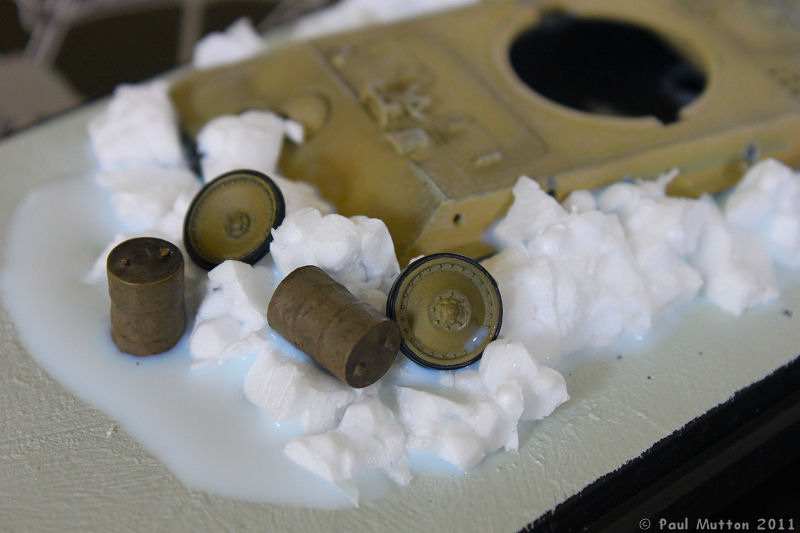
I used a couple of the wheels from earlier on (an outer one and a middle one) to act as additional armour. I also added a couple of rusty-looking oil drums, which I think came from a Forces of Valor set.
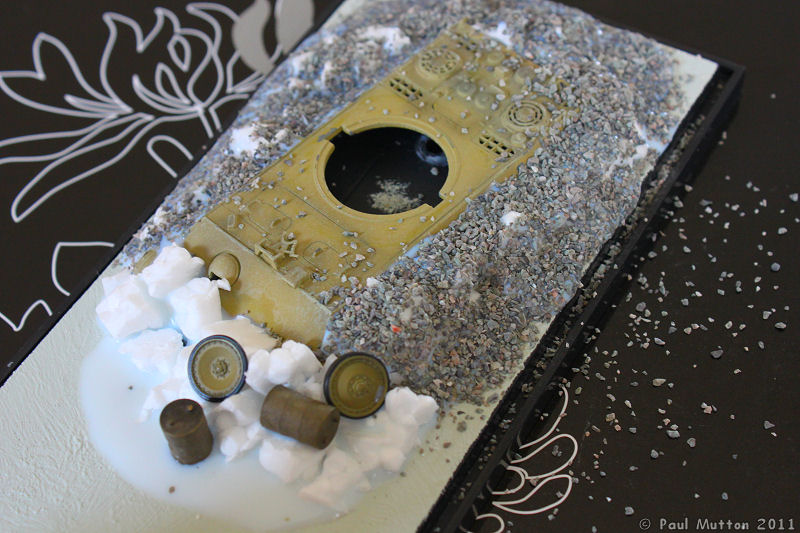
I then painted more glue on top of the foam and sprinkled on some fine gravel.
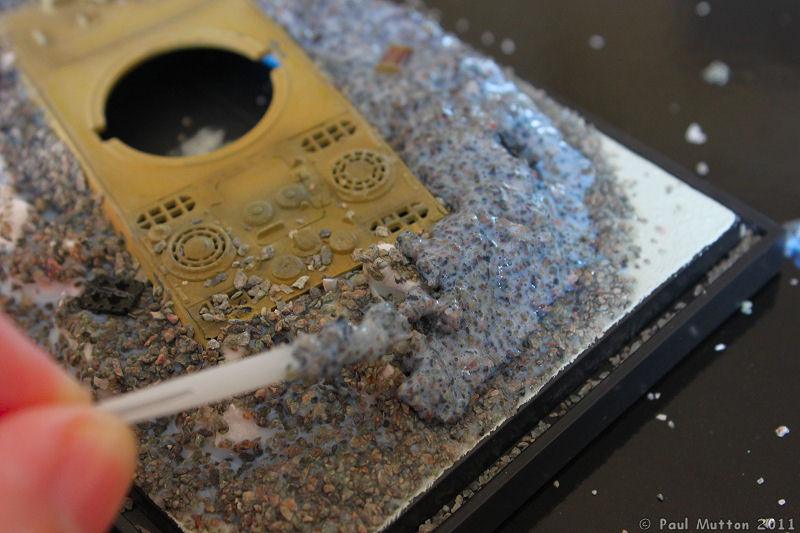
The sprinkled-on gravel didn't really give the coverage I wanted, so I poured the gravel straight into a pot of PVA glue and mixed it all up into a sort of paste. I spread this around the tank using a plastic toothpick.
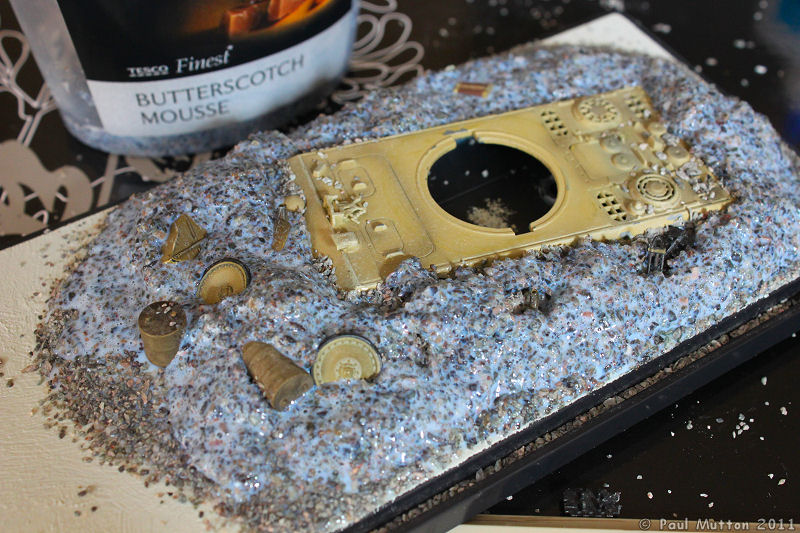
At this point, I added a few more parts that I took off the tank earlier on.

And here's the final result. Considering I only spent £1.20 on the tank, I'm quite pleased with it!


