What color will you paint your PH 222?

-
Fritzkrieg
- Officer - Captain

- Posts: 835
- Joined: Sun Mar 09, 2008 3:49 pm
-
Razor17019
- Officer - Brigadier General

- Posts: 4890
- Joined: Thu Oct 07, 2004 5:17 am
- Location: Northern Kentucky


-
pickelhaube
- Officer - Brigadier General
- Posts: 9704
- Joined: Mon Jan 22, 2007 5:52 am
- Location: New Orleans
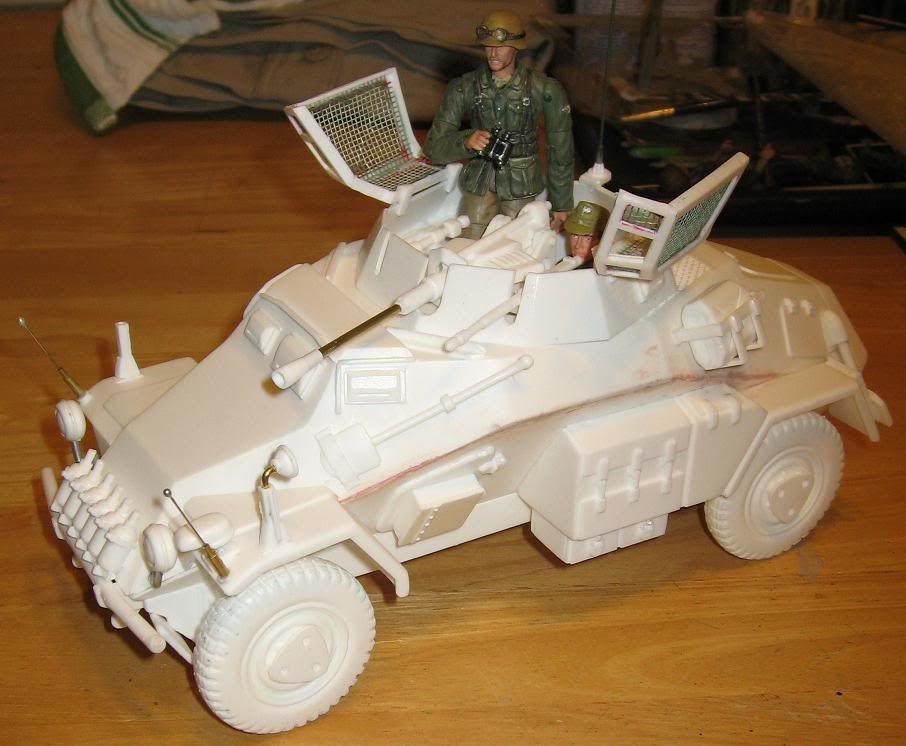
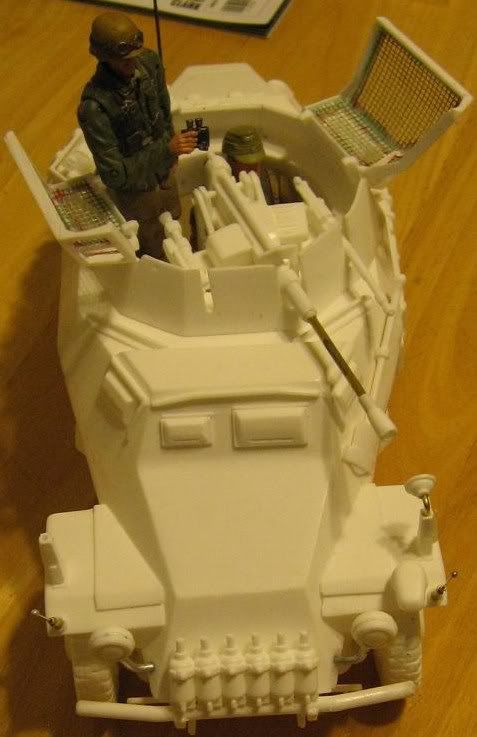
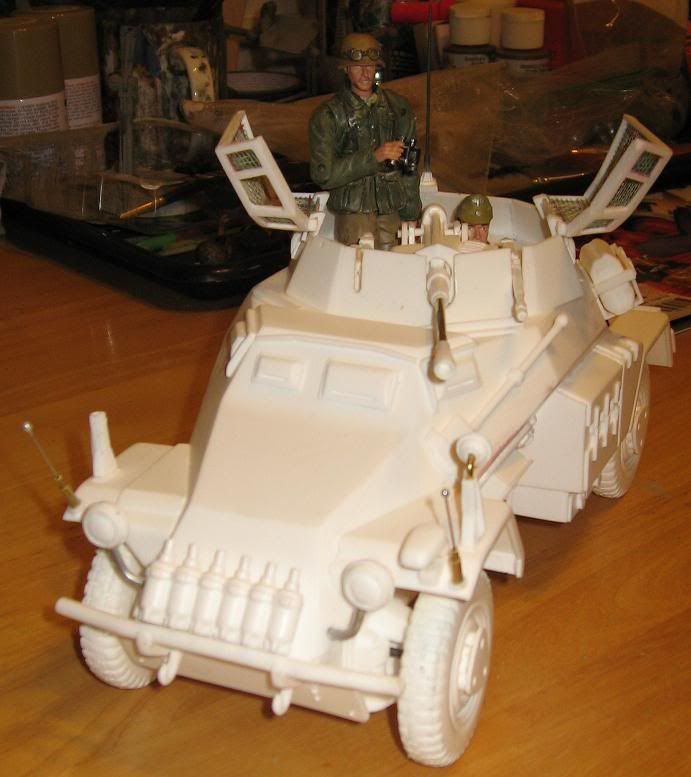
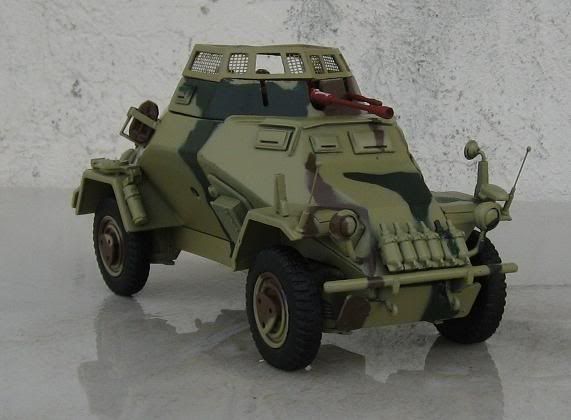
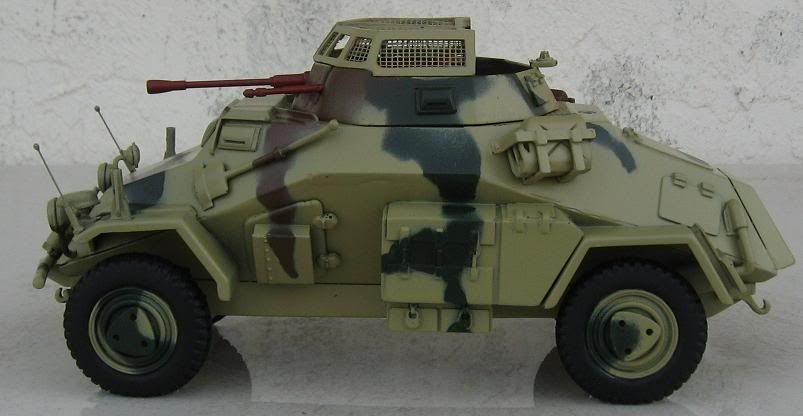
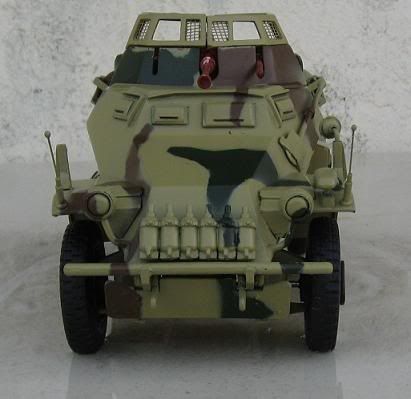
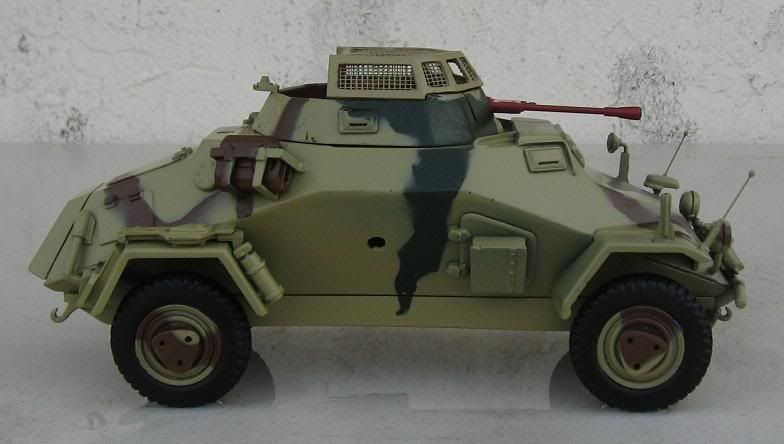
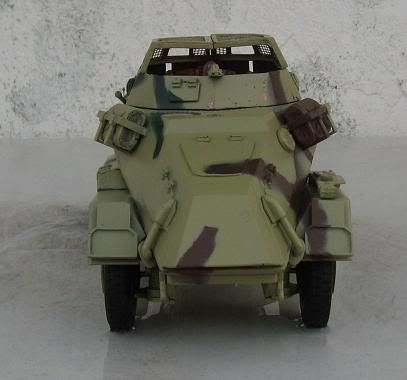
Fritzkrieg wrote:Here are some pics of the Kit assembled. Unfortunatly most of the detail is washed out, due to the white color, of the resin. I was hoping to have a coat of primer on it today but the weather would not cooperate.
SWEEEEEET !!!!!!
How long did it take you to build ?
What was the toughest part to do ? Mate the hulls ?
Your figs look great in that buggy !!!
Kirk Douglas : Mine hit the ground first
John Wayne : Mine was taller

John Wayne : Mine was taller
-
Fritzkrieg
- Officer - Captain
- Posts: 835
- Joined: Sun Mar 09, 2008 3:49 pm
No the figs don't really fit. The gunner's waist and legs have been removed. I may try customizing some seated figures to fit, but for now haf a figure is better than no figure atall.
I'd say I have about 4 hours in on assembly tops. If I had another, I could probably put the second one together in about 2 hours, now that I know what I'm doing.
I had a few little hick-ups durring assembly. I don't really really make model kits, so these may be no brainers, for some of you more experienced model guys. Hopefully, someone can learn from my mistakes.
1. Make sure before you glue the 2 main pieces of the hull together. shave down the support ribs just enogh for the turret seats to clear. This will be nearly impossible to do once the hull is glued together. If you don't do this your seats will catch on the ribbing an possibly snap-off.
2. I thought the turret and gun assembly, could not be removed once the hull was glued to gether. I glued the two pieces of the hull to gether, with the turret and gun assembly already plugged in. When I did this I put too much preasure on the turret, and accedently snapped off my MG. Only after that I figured out I could plug the turret assemble into the the hull, by angleling in the seatsfirst.
3. I followed the tamaiya instructions for order of assembly. In hindsight, I should have assembled the main hull first before adding the extra griblies. Right now I have the fenders and tool boxes, in the way, while I try to bondo the seem that runs along the main hull.
4. The muffler pipes are a super tight fit. I suggest, smoothing them with sand paper, before doing, the dry fit. My first muffler assembly, siezed up on me, as I was tring to turn it into possition. I could not get it to budge, so I left the tail-pipe as it was stuck rather than risking it snapping-off.
Hope that is helpful
-
Fritzkrieg
- Officer - Captain
- Posts: 835
- Joined: Sun Mar 09, 2008 3:49 pm
-
Fritzkrieg
- Officer - Captain
- Posts: 835
- Joined: Sun Mar 09, 2008 3:49 pm
I finished, most of the detail last night. I Gave it some scratches and dings, painted the interior, guns, and added some German crosses, trimmed from a 1/48 BF-109 decal sheet. I'm trying to figure out a way to make headlight covers, for this scale, I don't think painting them on will look very good. Now, I just need to muddy-up the tires, and find some plate decals. Hopefullly, I'll get some pics up Wed.
-
Fritzkrieg
- Officer - Captain
- Posts: 835
- Joined: Sun Mar 09, 2008 3:49 pm