New PTE/True Heroes F-22 Raptor not quite 1/18 at TRU

Your Main Forum For Discussing 1:18 Scale Military Figures and Vehicles.
tmanthegreat
Officer - Brigadier General
Posts: 11239
Joined: Tue Oct 05, 2004 7:38 pm
Location: Central California

Post by tmanthegreat » Mon Oct 20, 2008 9:42 pm

These aren't Britt Deitz quality, but here are a few photos of the PTE/True Heroes F-22. I am in the process of customizing the plane and it has been repainted from its solid black stock form. I have yet to add national insignia and unit markings.

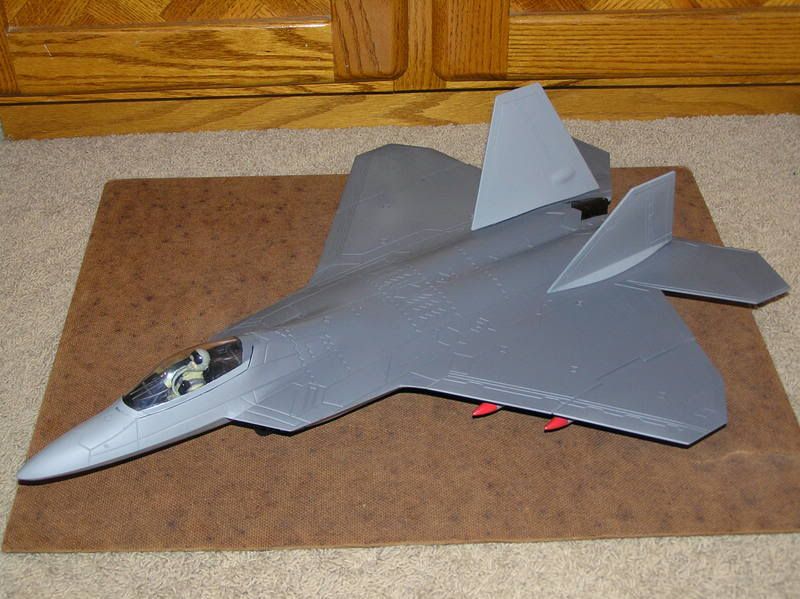
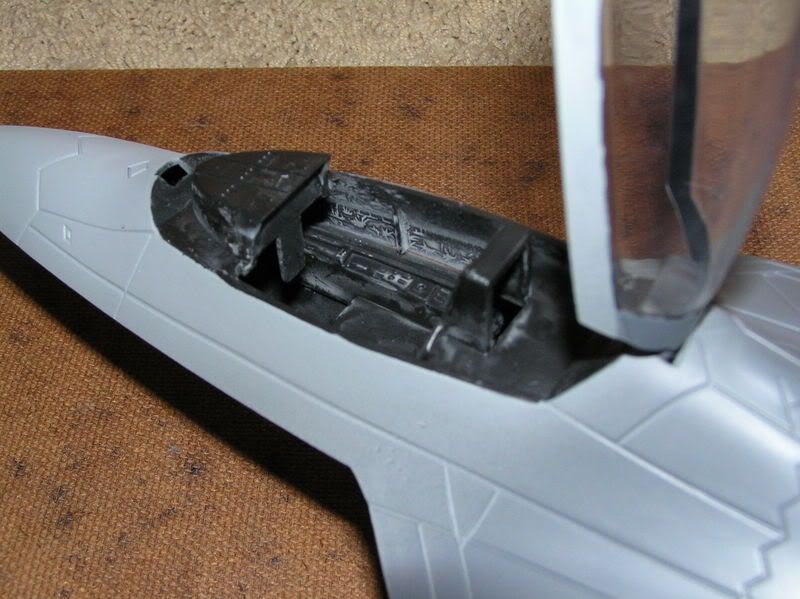
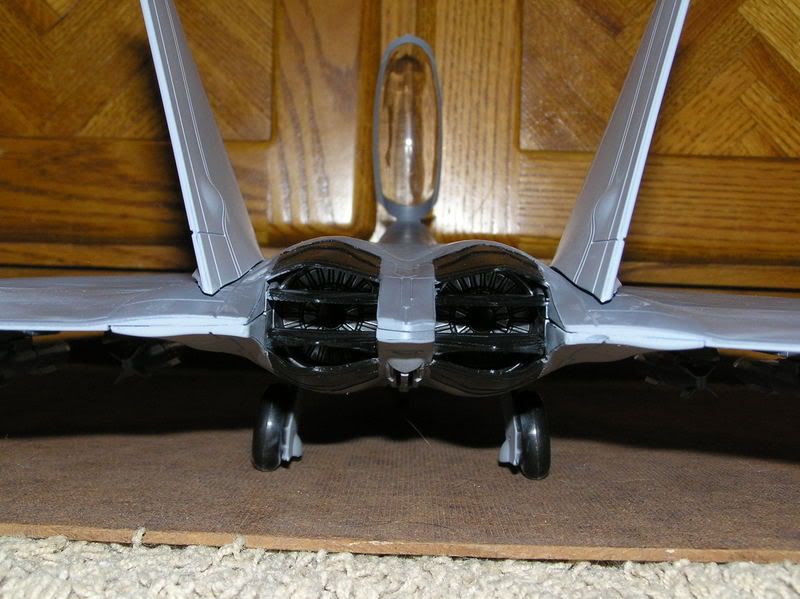
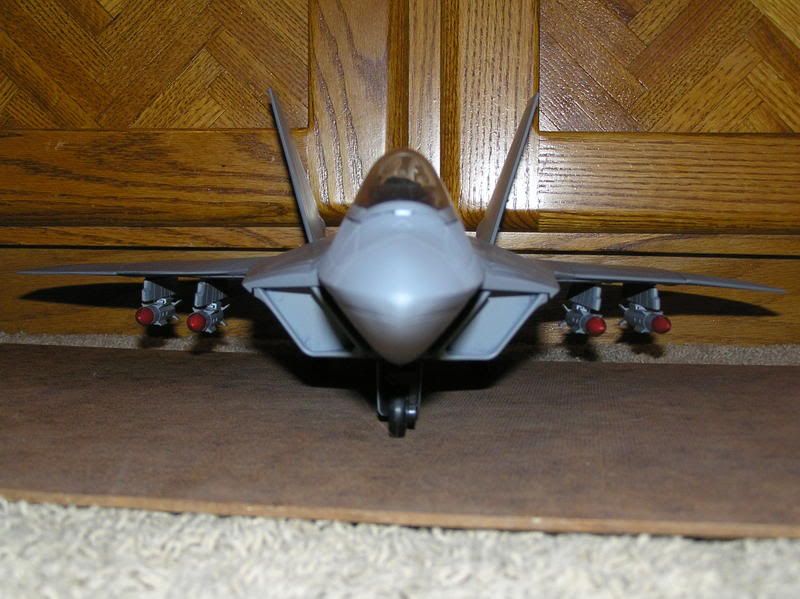
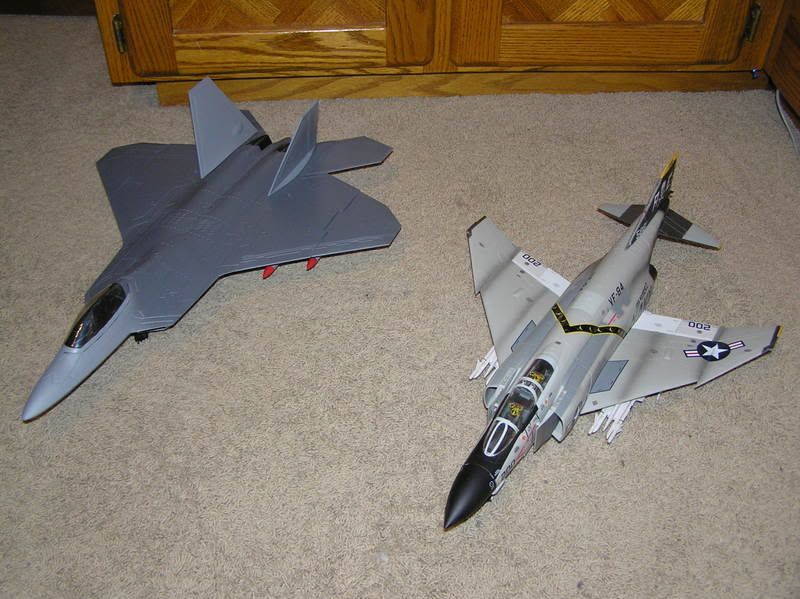
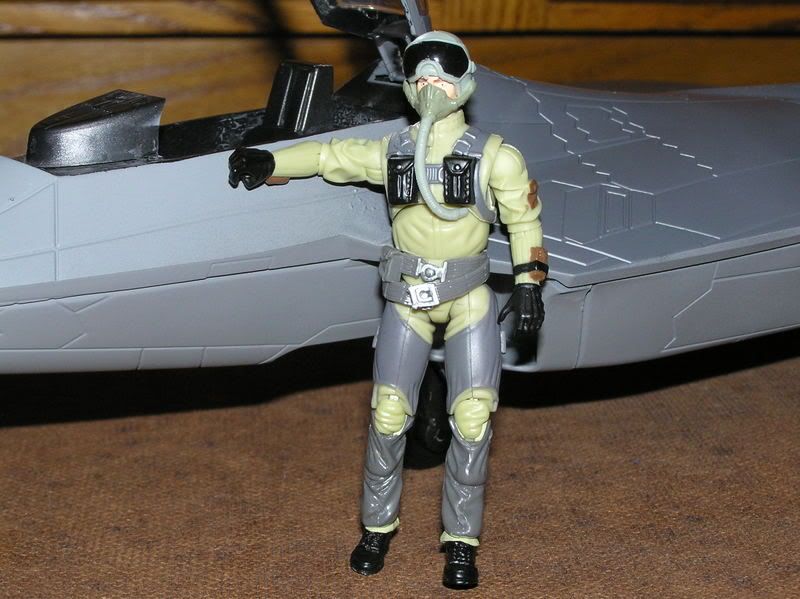
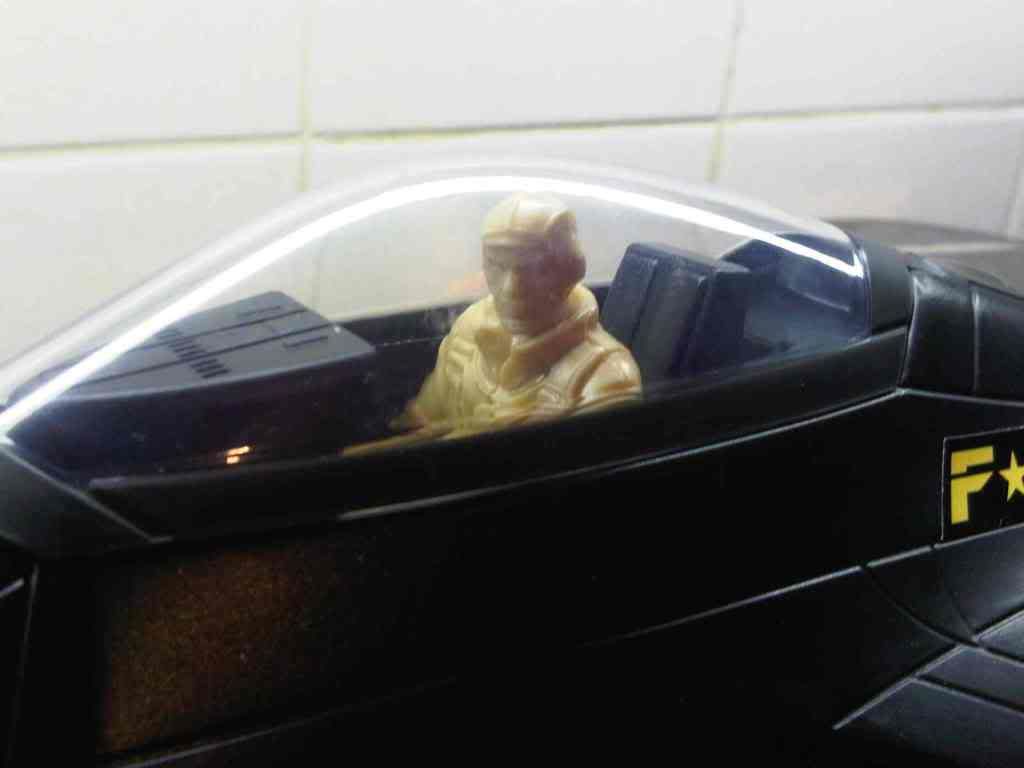
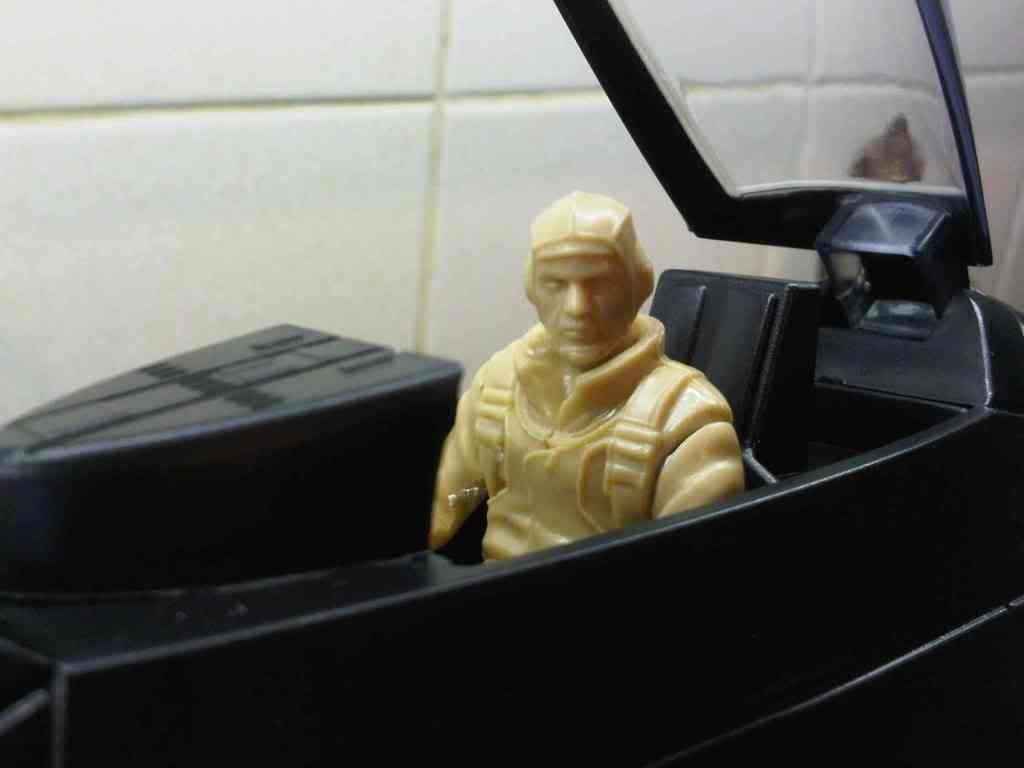
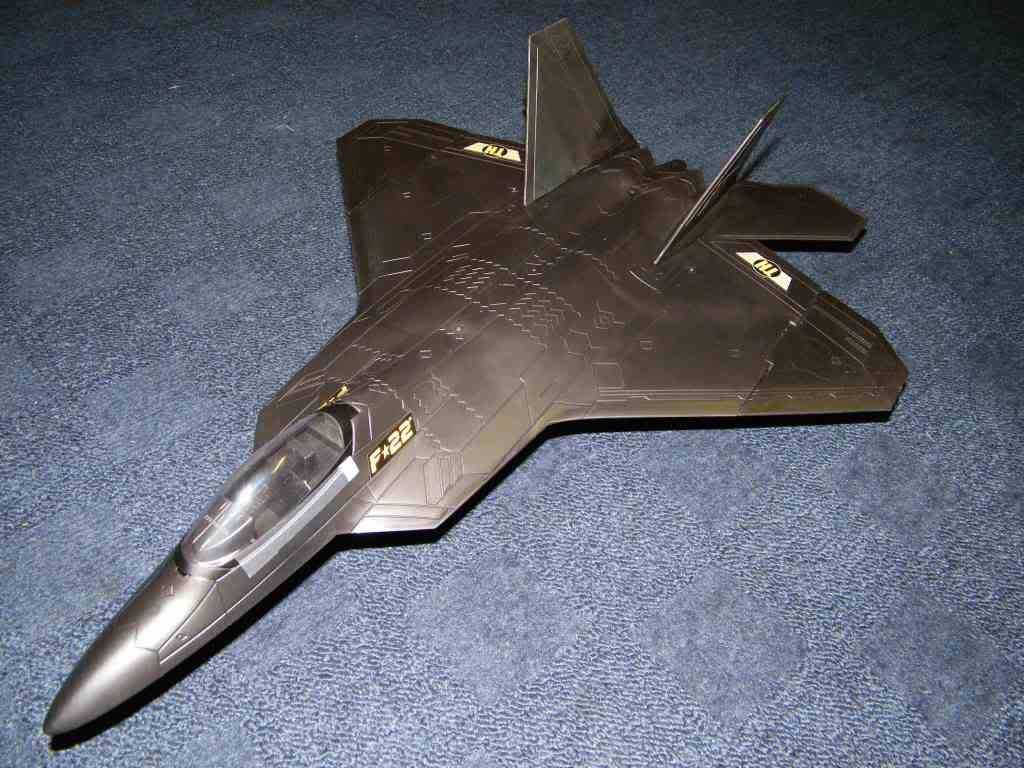
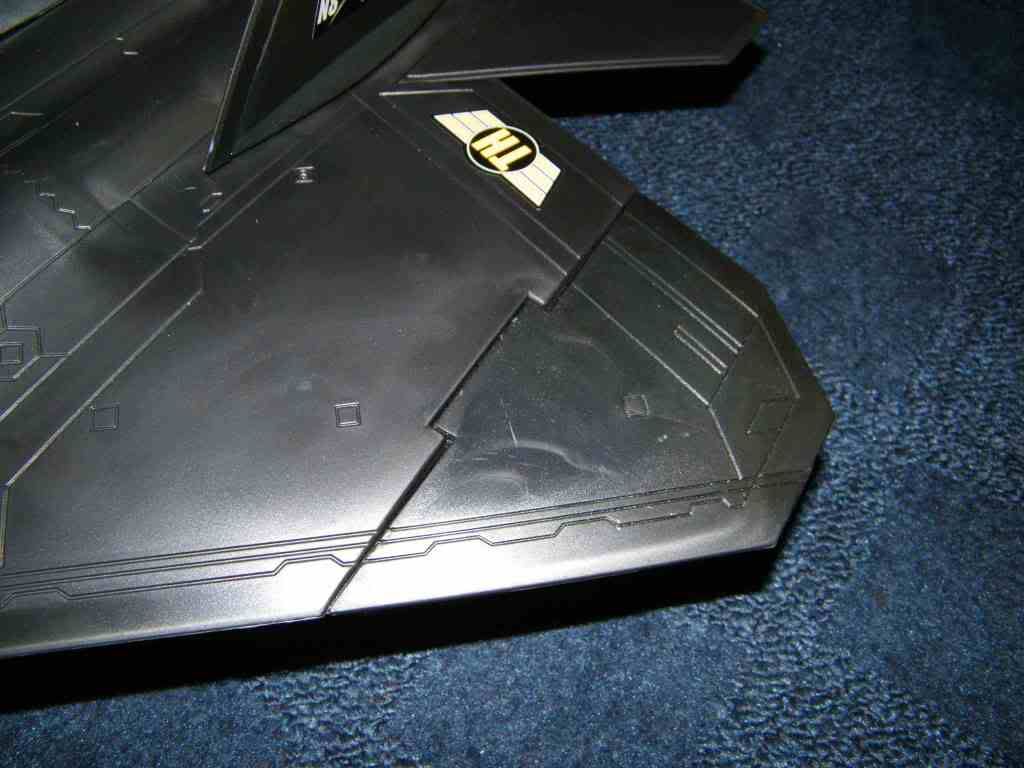
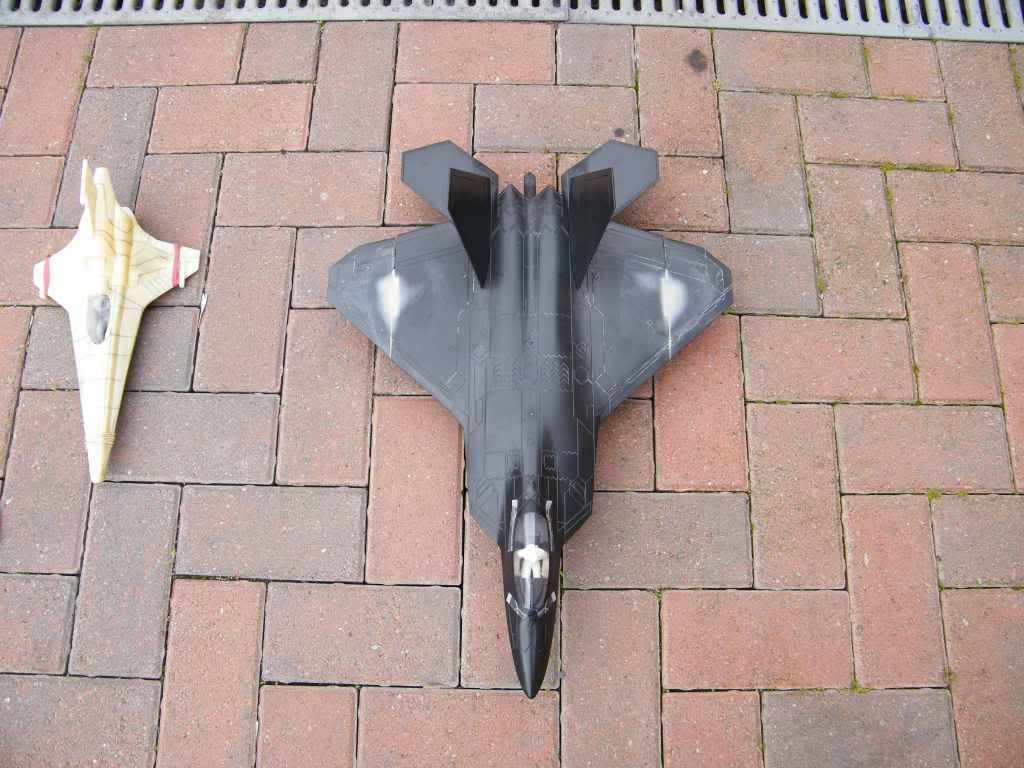
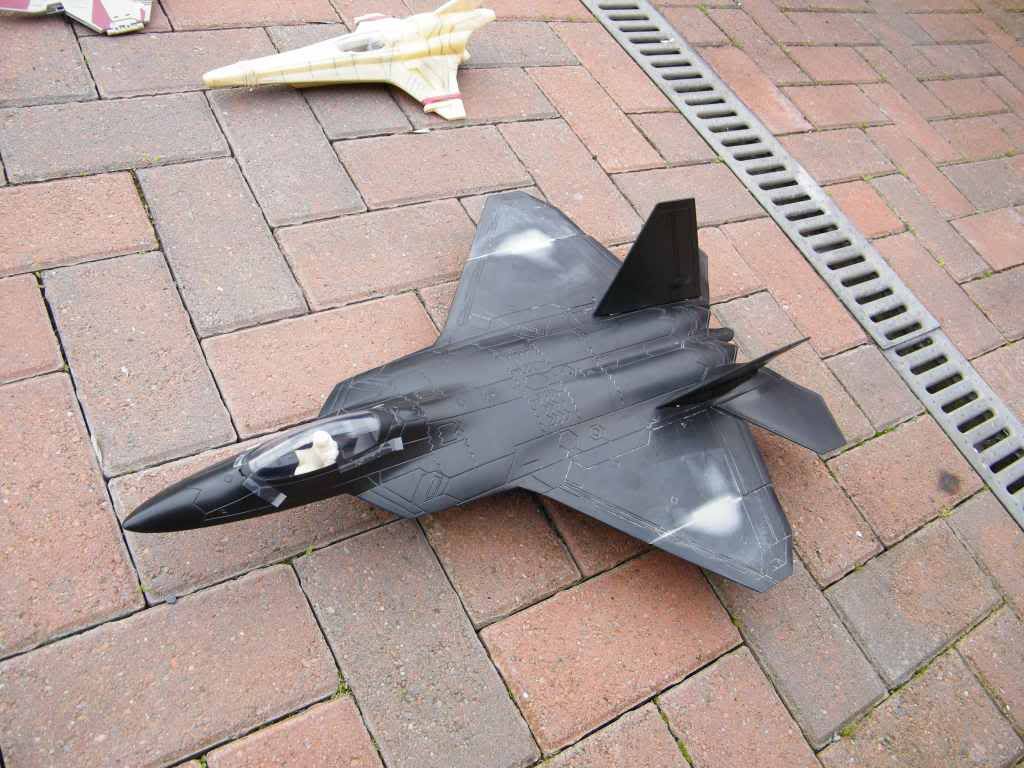
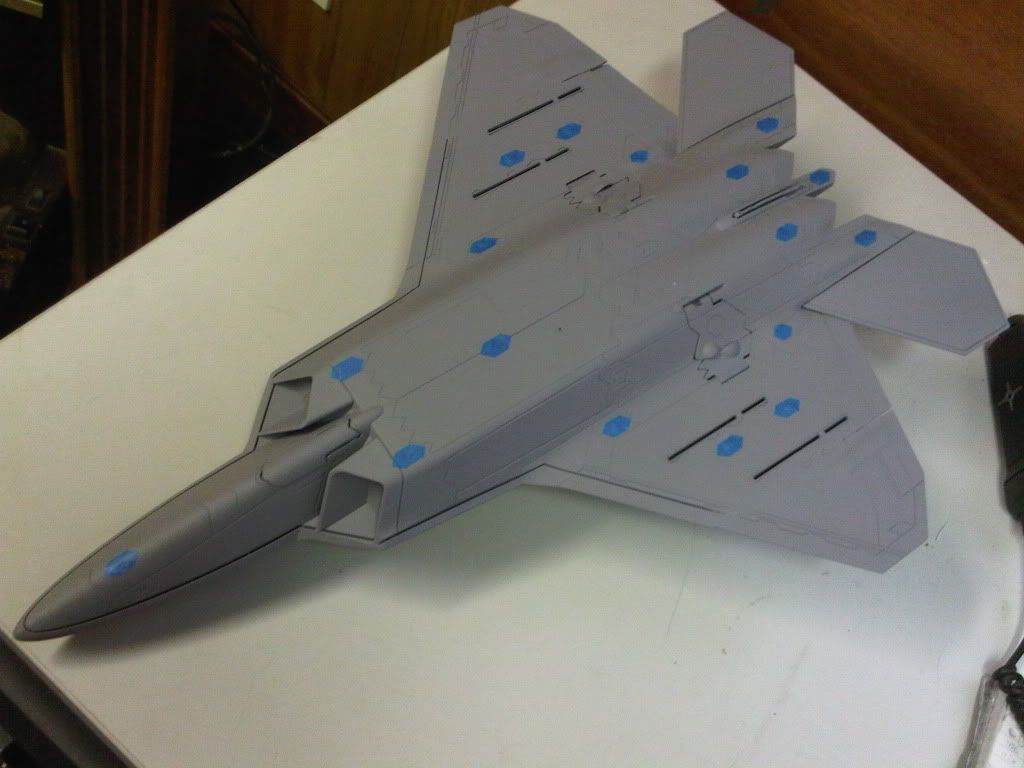
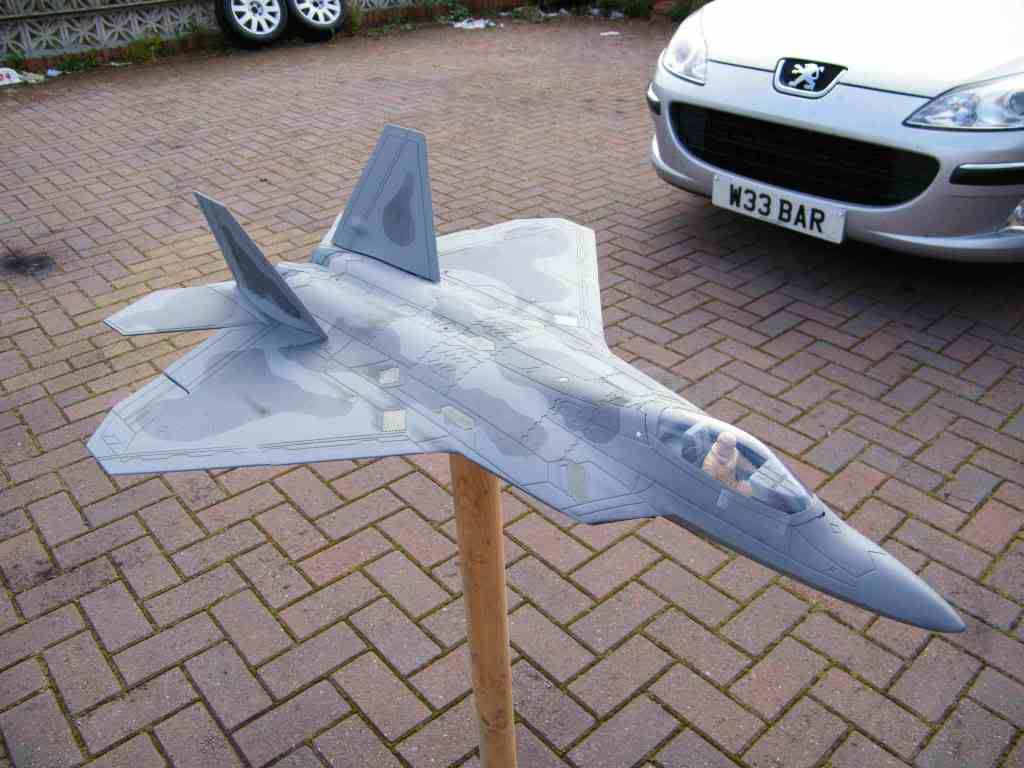
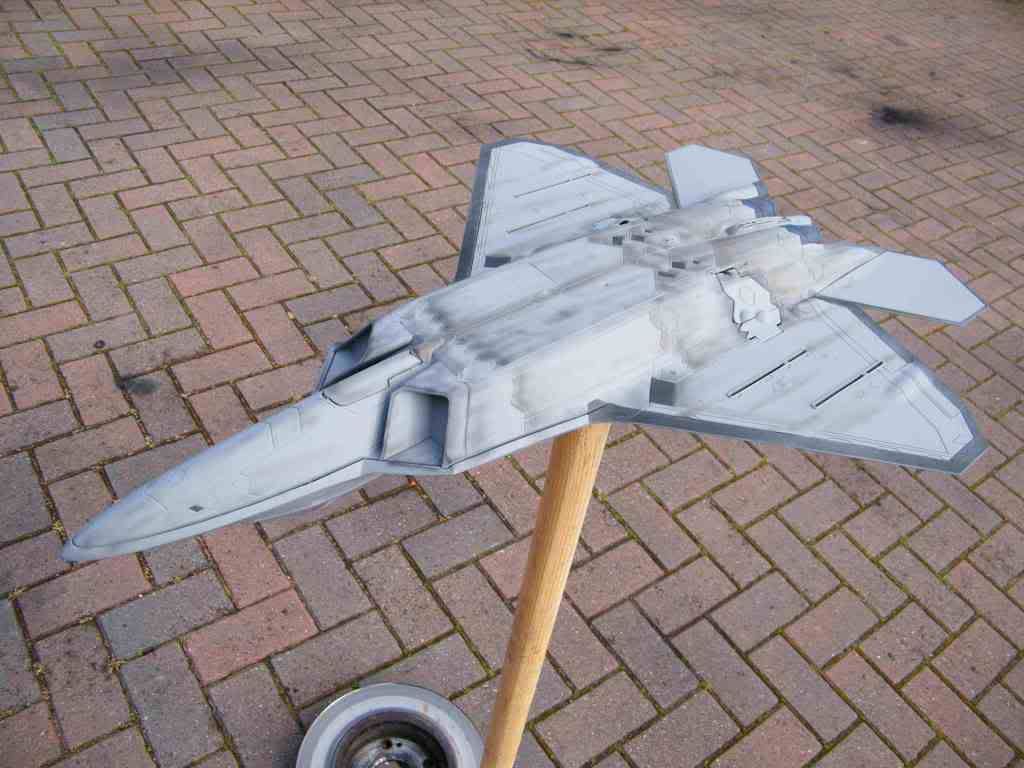
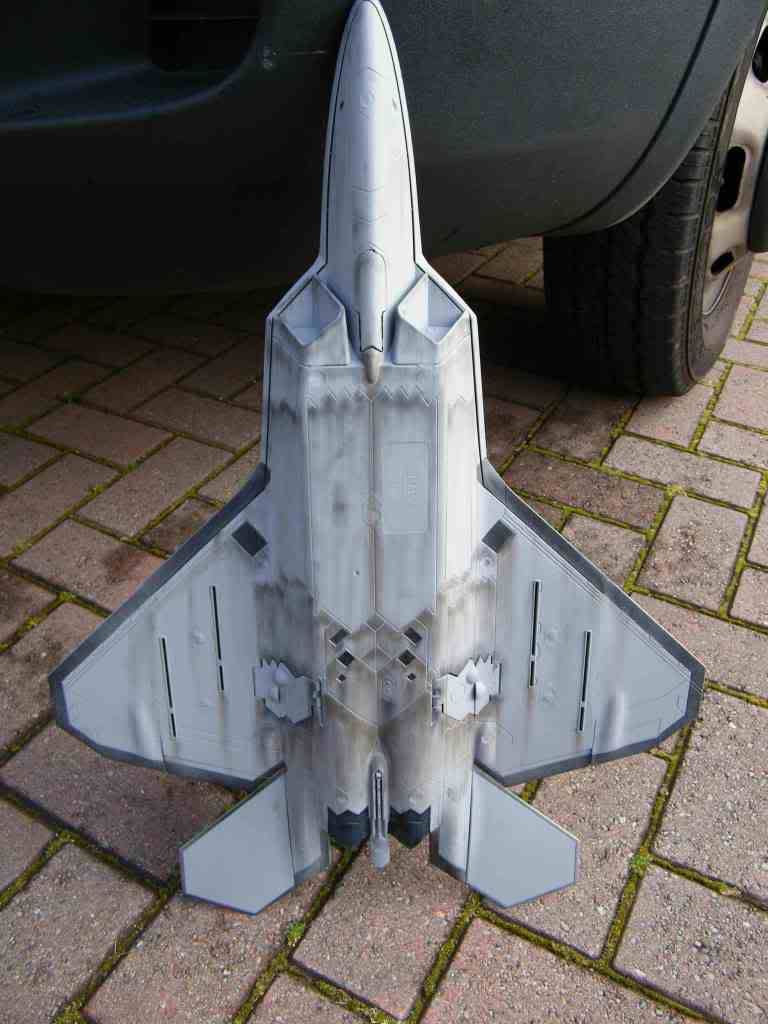
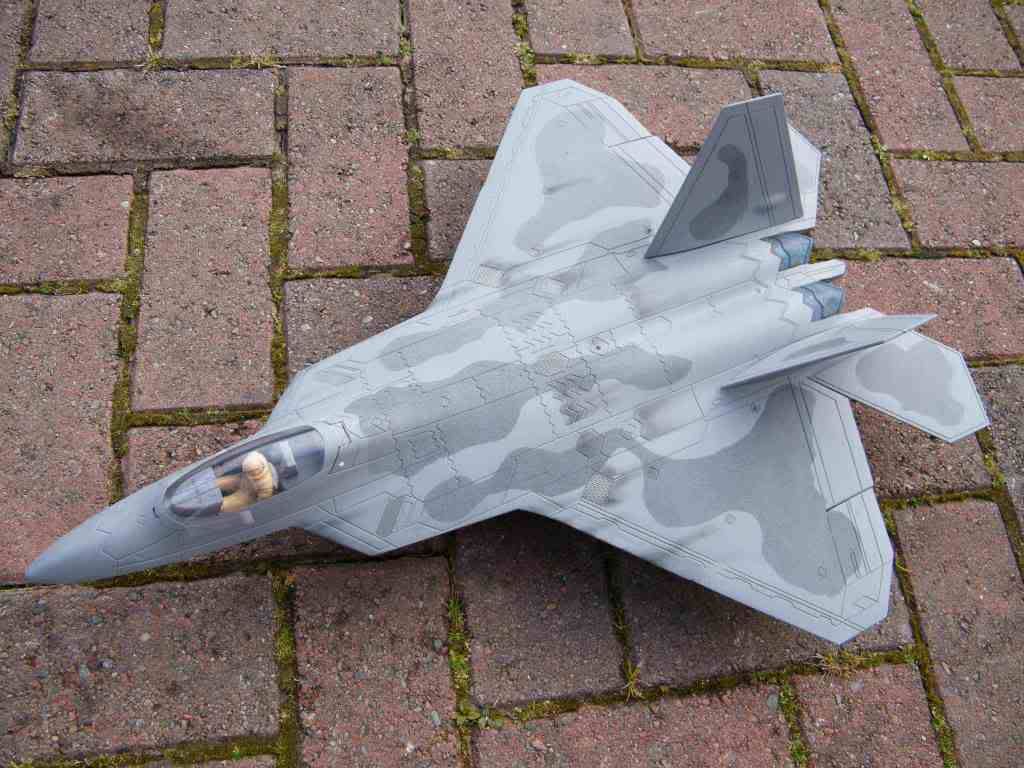
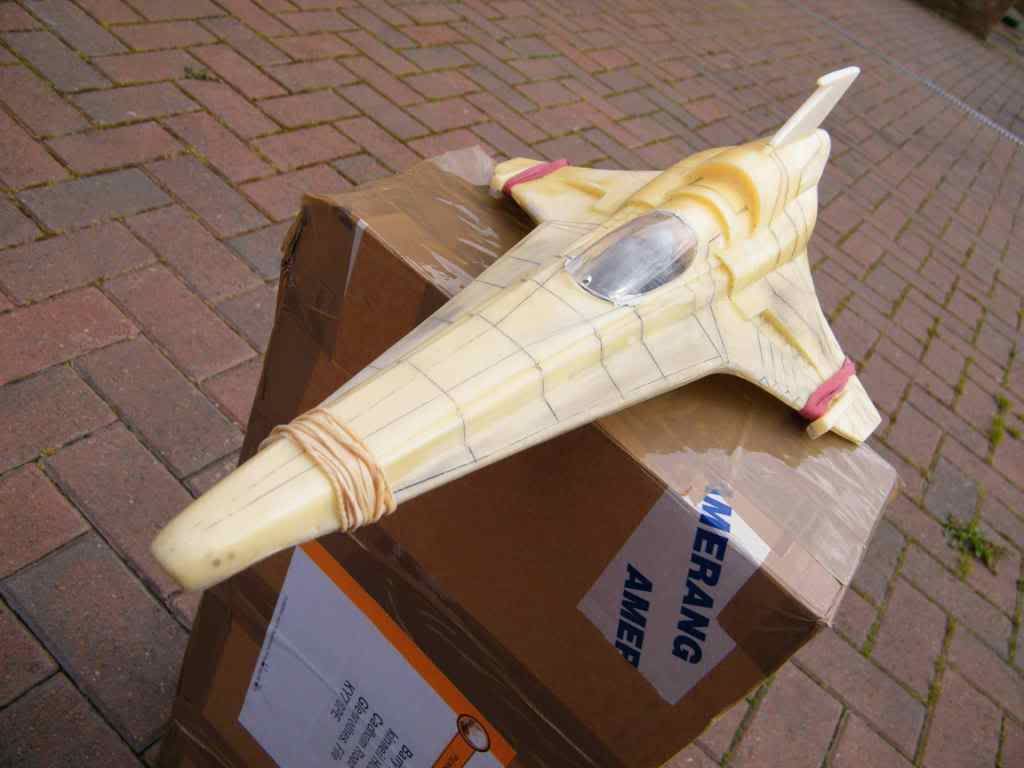
I'm going to currently use it for my 25th Anniversary GI Joe figures, but may eventually rework the plane into a proper 1:32 scale model. It is most certainly 1:32 scale as a 1:18 figure (in this case, my custom GI Joe Ace figure) is way too large standing next to the plane. The construction of the plane is pretty good for what it is. It is quite solid. The landing gear retract very nicely and the exhaust nacelles are quite detailed. Cockpit detail leaves a little to be desired, but it is not too bad. The ordinance mounts to wing hardpoints, which I believe the F-22 can actually make use of.

Enjoy the photos 8)

Image

Image

Image

Image

Image

Image

Image

Image

Image
"If you fail to plan, you plan to fail."

User avatar
p51
BOARD ADMINISTRATOR
BOARD ADMINISTRATOR
Posts: 1711
Joined: Wed Dec 31, 1969 5:00 pm
Location: Southern California
Contact:

Post by p51 » Mon Oct 20, 2008 10:57 pm

It honestly doesn't look that bad, especially painted like that it looks pretty darn great. Aside from the overly disporportioned cockpit, it's the largest Raptor I've seen yet aside from super expensive RC or Wood models.

Thanks for posting the photos! Keep posting updates of your repaint, would love to see how it turns out!

Image

AlloySkull
Officer - Brigadier General
Posts: 1564
Joined: Sun Sep 30, 2007 4:34 pm
Location: Houston, Texas
Contact:

Post by AlloySkull » Tue Oct 21, 2008 4:08 pm

It looks pretty good next to that F-4. I might pick one of these up. :D
[img]http://i83.photobucket.com/albums/j317/alloyskull101/siggygpxd-1.gif[/img]
Good Traders:
KAMIKAZE
Ruger
Olifant
Panzer M

popeye357
Officer - Colonel
Officer - Colonel
Posts: 1453
Joined: Wed May 24, 2006 5:14 pm
Location: chesapeake, Va.

Post by popeye357 » Wed Oct 22, 2008 2:44 pm

I picked up two for my nephews yesterday, they are definitley a great looking toy! I cant wait to see it in 1/18 glory!!!!!!!!!!!!!!!!

User avatar
p51
BOARD ADMINISTRATOR
BOARD ADMINISTRATOR
Posts: 1711
Joined: Wed Dec 31, 1969 5:00 pm
Location: Southern California
Contact:

Post by p51 » Wed Nov 05, 2008 2:13 am

Finally found and picked up the Raptor today. Looks pretty darn good, definietly 1/32 scale though or about that size. Still the biggest F-22 Raptor I have thus far. The detail is nice, very accurate considering the brand. I was very surprised at how great it actually does look. I wish the wings were one piece and connected at the wing root, like the F-18 or F-16... this little wingtip piece you snap on seems flimsy, and the gap annoys me a bit. I don't really have the knowledge on doing custom work to these things, otherwise I'd totally customize it and make it more accurate. But overall, looking beyond the missile racks, flimsy wing attachment, awkward landing gear, color, and oversized cockpit... it's a pretty DARN good F-22 Raptor.

STARMAN 352
Corporal
Corporal
Posts: 47
Joined: Sat Apr 18, 2009 1:37 pm
Location: CALIF

Post by STARMAN 352 » Sat Jun 20, 2009 1:29 pm

Ok, I picked one of these up today and will do a repaint as well..
Now where do i find a nice set of decals for this ?
Thanks guys.
JP

Bar
Sergeant
Sergeant
Posts: 107
Joined: Sat Oct 21, 2006 2:27 am
Location: Scotland. Where else?
Contact:

Post by Bar » Fri Aug 14, 2009 9:42 am

Hey guys.
These only JUST made it to the UK.
I picked up a bootfull of them just in case they don't sell for long.
I have taken the ordnance pylons off the first one i opened, and i have filled in the gap between the wing ends with Aves magic sculpt.
Next up will be the sanding flush of the parts.
I am using a Maschinen Krieger 1/20 figure, and although he isn't too much smaller than a GiJoe, he is a good 2cm shorter, and looks a bit better in scale.
I can post pics if anyone's interested.
Bar.
E-mail(And MSN Messenger): vipermark7@googlemail.com

pcoughran
Officer - 1st Lieutenant
Posts: 596
Joined: Mon Jun 30, 2008 10:58 am
Location: 1, USA, MO, St. Louis

Post by pcoughran » Fri Aug 14, 2009 10:46 am

Bar wrote:Hey guys.
These only JUST made it to the UK.
I picked up a bootfull of them just in case they don't sell for long.
I have taken the ordnance pylons off the first one i opened, and i have filled in the gap between the wing ends with Aves magic sculpt.
Next up will be the sanding flush of the parts.
I am using a Maschinen Krieger 1/20 figure, and although he isn't too much smaller than a GiJoe, he is a good 2cm shorter, and looks a bit better in scale.
I can post pics if anyone's interested.
Bar.
Post away - would love to see pics. I'm actually finally finishing the repaint of mine for my son. He got it for Christmas last year and I told him I'd paint it to make it look more realistic and match the BBI modern stuff. I'll post mine when I'm done as well.
"Where's dat waskily wabbit?"
____________________________________________
Good Trades: Ostketten, Pickelhaube, Cornbreadfred, Sledgehammer, Pizzaguy, caesarbc3,jwcarpenter

Bar
Sergeant
Sergeant
Posts: 107
Joined: Sat Oct 21, 2006 2:27 am
Location: Scotland. Where else?
Contact:

Post by Bar » Fri Aug 14, 2009 11:15 am

pcoughran wrote:
Post away - would love to see pics. I'm actually finally finishing the repaint of mine for my son. He got it for Christmas last year and I told him I'd paint it to make it look more realistic and match the BBI modern stuff. I'll post mine when I'm done as well.
Okay.
Here goes.
The figure is from a Hasegawa Model kit in the Maschinen Kreiger universe. He is in a WWII-style flight suit with a skull cap(But i just like the look!).
Anyway, here are pics of the filler i added on the top and bottom surfaces to hide the wingtip joint, and also a couple of closeups of the unpainted pilot in the cockpit:


Image

Image

Image

Image
E-mail(And MSN Messenger): vipermark7@googlemail.com

pcoughran
Officer - 1st Lieutenant
Posts: 596
Joined: Mon Jun 30, 2008 10:58 am
Location: 1, USA, MO, St. Louis

Post by pcoughran » Fri Aug 14, 2009 11:50 am

I think it will make a big difference (on the plus side) with the gaps filled in once you paint it. I've decided to leave the gaps alone as my son would probably knock off the tip of the wing playing with it anyway, this way I can just put it back on and not worry about re-filling, sanding and painting again. Although, I did take off the armament pylons and fill those gaps.
I'll post pics in the next couple days. Still have a couple gloss coats and decals to add.
"Where's dat waskily wabbit?"
____________________________________________
Good Trades: Ostketten, Pickelhaube, Cornbreadfred, Sledgehammer, Pizzaguy, caesarbc3,jwcarpenter

Bar
Sergeant
Sergeant
Posts: 107
Joined: Sat Oct 21, 2006 2:27 am
Location: Scotland. Where else?
Contact:

Post by Bar » Sat Aug 15, 2009 5:41 am

pcoughran wrote:I think it will make a big difference (on the plus side) with the gaps filled in once you paint it. I've decided to leave the gaps alone as my son would probably knock off the tip of the wing playing with it anyway, this way I can just put it back on and not worry about re-filling, sanding and painting again. Although, I did take off the armament pylons and fill those gaps.
I'll post pics in the next couple days. Still have a couple gloss coats and decals to add.
Sweet.
I have a lot of good reference for Raptor colour schemes from the US military galleries.
I have plans to accurise the landing gear slightly. The current gear sits the plane too low to the ground. I will attach a mount into the "gear doors" as they are, and make longer more accurate gear that can slot into place when the doors are down.
Also, as regards the durability of the wingtips(for kiddie play), i just picked mine up by the wing ends and TRIED to break the tips off by swinging the plane around by the tip. I couldn't... It also has a certain amount of elasticity, so it gives slightly without breaking the molecular bond of the parts.
So Apoxie Paste is stronger than you might give it credit for. I never used any other adhesive. Just Apoxie Paste smoothed into the gaps.
Bar.
E-mail(And MSN Messenger): vipermark7@googlemail.com

pcoughran
Officer - 1st Lieutenant
Posts: 596
Joined: Mon Jun 30, 2008 10:58 am
Location: 1, USA, MO, St. Louis

Post by pcoughran » Sat Aug 15, 2009 4:59 pm

Thanks for the tip about the Apoxy paste. Unfortunately for my Raptor, the final paint is already on. I'm just adding the last few clear coats to it now so not going back to the beginning on this one. Besides, I have a pavehawk Picklehaube upgrade to do to my BBI pavehawk.
"Where's dat waskily wabbit?"
____________________________________________
Good Trades: Ostketten, Pickelhaube, Cornbreadfred, Sledgehammer, Pizzaguy, caesarbc3,jwcarpenter

pcoughran
Officer - 1st Lieutenant
Posts: 596
Joined: Mon Jun 30, 2008 10:58 am
Location: 1, USA, MO, St. Louis

Post by pcoughran » Sat Aug 15, 2009 6:55 pm

I finally finished this repaint. My son got this for Christmas last year so I'm only 8 months late getting it repainted for him. I was in a hurry so didn't use the airbrush as I didn't want to spend time cleaning between shades - I know the spray cans cost me more but didn't have to clean up.
It was the first time I used the "tint" black spray and I know it came out too dark - maybe one day I'll strip it off and redo it. It didn't look that dark until I took the masking tape off.
I used 4 shades of Grey and a final top coat of Satin clear to get a "little" shine as the pics I was using as a model all seemed to have a little shine to them. I also added a HUD and decals in the cockpit as well. I also know I didn't "sand" the armament rail holes well enough so don't beat me up over that.
First what I started with.
Image

What I was aiming for:
Image Image
Image Image

End Result sorry - they are more blurry than I intended. Probably needed more light but the flash washed everything out.
Image Image
Image Image
Image Image
Image
"Where's dat waskily wabbit?"
____________________________________________
Good Trades: Ostketten, Pickelhaube, Cornbreadfred, Sledgehammer, Pizzaguy, caesarbc3,jwcarpenter

digger
Officer - Brigadier General
Posts: 4009
Joined: Sat Oct 16, 2004 2:51 pm
Contact:

pte

Post by digger » Sun Aug 16, 2009 4:41 am

Great job on that repaint.

I saw on another board some new PTE stuff, including an APC and new desert building which looks cool. Apologies if this was posted elsewhere.

http://www.sears.ca/gp/product/images/B ... =397890011

http://www.sears.ca/gp/product/images/B ... =397890011

and the bridge again:
http://www.sears.ca/gp/product/images/B ... =397890011

Bar
Sergeant
Sergeant
Posts: 107
Joined: Sat Oct 21, 2006 2:27 am
Location: Scotland. Where else?
Contact:

Post by Bar » Sun Aug 16, 2009 10:33 am

Good find digger!

And pcoughran, excellent work on the paintwork redo!
I have saved the pics for reference!
I also agree about the smoke effect being a bit too severe, but it's not the end of the world.
I think a ghosting with a metallic gold would also be in order on the canopy, based on the reference i have.
Did this same company ever relase an F-15-a-like at all?
E-mail(And MSN Messenger): vipermark7@googlemail.com

Bar
Sergeant
Sergeant
Posts: 107
Joined: Sat Oct 21, 2006 2:27 am
Location: Scotland. Where else?
Contact:

Post by Bar » Wed Aug 26, 2009 2:06 pm

Ok. No pics right now, but a small update on mine.
I sanded the Apoxie paste flush with the wing and found a small dip on each side. I have since applied a NEW layer of paste to fill the dip.
i should get it sanded on friday and i'll be set to add primer to see how it looks.
I will have pics on friday!
E-mail(And MSN Messenger): vipermark7@googlemail.com

Bar
Sergeant
Sergeant
Posts: 107
Joined: Sat Oct 21, 2006 2:27 am
Location: Scotland. Where else?
Contact:

Post by Bar » Mon Sep 21, 2009 2:31 am

Did i say friday???
I clean forgot.
I had this thing sanded and filled for about three weeks, and only got the chance to paint on friday.
I painted it grey primer and masked off the cammo, giving it one 15% filter pass of matt black to darken the grey primer enough(The cammo is just a misting of black over the grey). After the first grey coat, i cut out a handful of "diamond" Stealth-shaped pieces of blue masking tape and covered all the screw holes with them, to take away from the toy-like look of the thing a bit.
I also misted some black onto the panel lines on the underside, and painted a few panels on the underneath full on black, along with the exhauts.
Then i ran some tamiya weathering master sets over the paint in differing layers. Several layers of soot and oil stain. The reference i have for a flying Raptor shows curiously clean gear bay doors(I expect they just clean those more...). I totally went to town on the underside weathering, in accordance with the image linked above. I wanted this to be a well-used example...
I also took some decadry detailing sheets and cut them to fit some panels on the plane(Nothing "canon", just to break the surface up and look a bit cool).
The rest speaks for itself.
Anyone know where i can get decals for squadron markings for this thing???
Enjoy the pics!


Image


Image


Image


Image


Image


Image


Image


Image


Image


Image


Image


Image


Image


Image


Image


Image


Image


Image


Image


Image


Image


Image


Image


Image


Image


Image


Image


Image


Image


Image


Image


Image


Image


Image
E-mail(And MSN Messenger): vipermark7@googlemail.com

User avatar
p51
BOARD ADMINISTRATOR
BOARD ADMINISTRATOR
Posts: 1711
Joined: Wed Dec 31, 1969 5:00 pm
Location: Southern California
Contact:

Post by p51 » Mon Sep 21, 2009 10:40 am

Looks AMAZING!! Great great job!

Bar
Sergeant
Sergeant
Posts: 107
Joined: Sat Oct 21, 2006 2:27 am
Location: Scotland. Where else?
Contact:

Post by Bar » Mon Sep 21, 2009 1:01 pm

Thanks! I appreciate it!
I am just trying to source decent 1/32 decals now!
E-mail(And MSN Messenger): vipermark7@googlemail.com

paulpratt
Sergeant
Sergeant
Posts: 245
Joined: Sat Jun 28, 2008 9:46 am
Location: Scott AFB, IL.
Contact:

Post by paulpratt » Mon Sep 21, 2009 1:39 pm

@ BAR,

Can i ask where you got the Mk VII Viper?
Best,
-Paul

Bar
Sergeant
Sergeant
Posts: 107
Joined: Sat Oct 21, 2006 2:27 am
Location: Scotland. Where else?
Contact:

Post by Bar » Mon Sep 21, 2009 2:03 pm

paulpratt wrote:@ BAR,

Can i ask where you got the Mk VII Viper?
Sure.
I made it.
It's not 100% accurate, and i never got around to making the guns, the engines or the landing gear, but it's decent enough.
I have LOADS of WIP images of how i made it if you want me to PM them to you, but here are a few of the build:


Image


Image


Image


Image


Image


Image


Image


Image


Image


Image
E-mail(And MSN Messenger): vipermark7@googlemail.com

parrish333
Officer - 2nd Lieutenant
Posts: 360
Joined: Tue Oct 05, 2004 10:13 am
Location: NE Chicagoland, Illinois

New Paint Scheme for F-22

Post by parrish333 » Wed Sep 23, 2009 7:36 am

First of all - great job BAR on repainting the F-22! Looks superb!

Secondly, I read over on JoeCustoms that they are now re-releasing the F-22 in two-tone grey:

http://www.joecustoms.com/forums/viewto ... 0&start=60

http://www.flickr.com/photos/kelvin255/3907487182/
http://www.flickr.com/photos/kelvin255/3907487362/

For those of us w/o the mad skills of BAR, this excites me!

Bar
Sergeant
Sergeant
Posts: 107
Joined: Sat Oct 21, 2006 2:27 am
Location: Scotland. Where else?
Contact:

Re: New Paint Scheme for F-22

Post by Bar » Wed Sep 23, 2009 9:43 am

parrish333 wrote:First of all - great job BAR on repainting the F-22! Looks superb!

Secondly, I read over on JoeCustoms that they are now re-releasing the F-22 in two-tone grey:

http://www.joecustoms.com/forums/viewto ... 0&start=60

http://www.flickr.com/photos/kelvin255/3907487182/
http://www.flickr.com/photos/kelvin255/3907487362/

For those of us w/o the mad skills of BAR, this excites me!
Lol! Thanks for your kind words!!!
I honestly didn't do ANYTHING that you guys couldn't do.
And seriously, i heartily ENCOURAGE you to find a black one and alter that as opposed to buying the grey one...
The reason being that the canopy on the grey one is smoked nearly solid black.
Although the real F-22 is slightly tinted to allow virtually no light to reflect, you can still see in the canopy.
Also, by epoxying the wings as i did, it makes the joint between the parts virtually unbreakable.
It's totally solid on the one i made and painted above, and the seam is invisible.
Just some things to think about!
Has anyone here seen the new grey one yet?
E-mail(And MSN Messenger): vipermark7@googlemail.com

Sky Ray
Officer - 2nd Lieutenant
Posts: 313
Joined: Mon Feb 11, 2008 4:41 pm
Location: Los Angeles, CA, USA

Re: New Paint Scheme for F-22

Post by Sky Ray » Wed Sep 23, 2009 3:31 pm

Bar wrote:Has anyone here seen the new grey one yet?
It has already shown up in SoCal a few weeks ago, for those that are local, I've seen it only at the Torrance TRU, about 5.

User avatar
p51
BOARD ADMINISTRATOR
BOARD ADMINISTRATOR
Posts: 1711
Joined: Wed Dec 31, 1969 5:00 pm
Location: Southern California
Contact:

Post by p51 » Wed Sep 23, 2009 6:07 pm

Oooooo, looks like a trip to TRU is in order!

Post Reply