Customs by Fritzkrieg Update 06-12-2016
-
Fritzkrieg
- Officer - Captain

- Posts: 835
- Joined: Sun Mar 09, 2008 3:49 pm
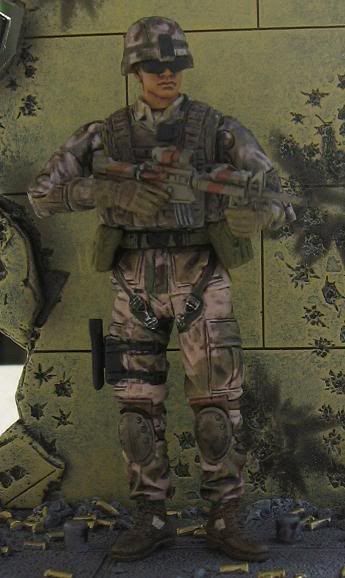
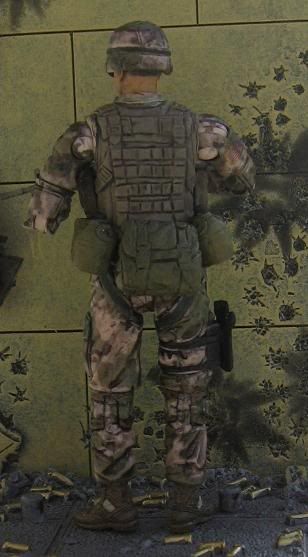
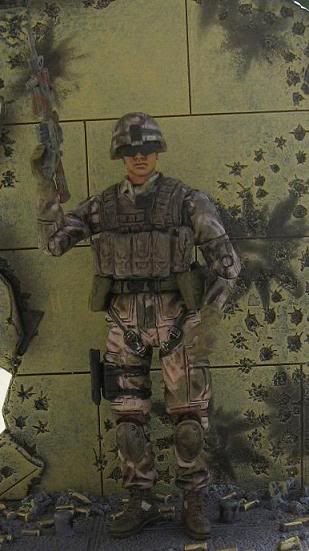
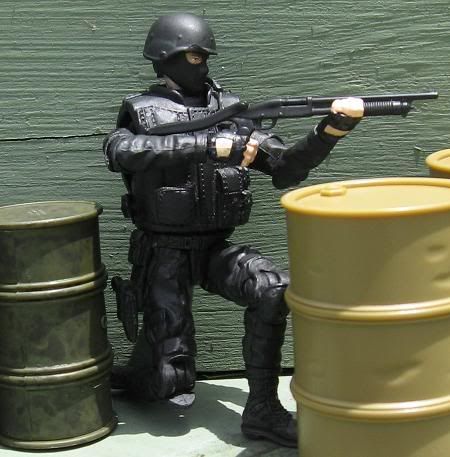
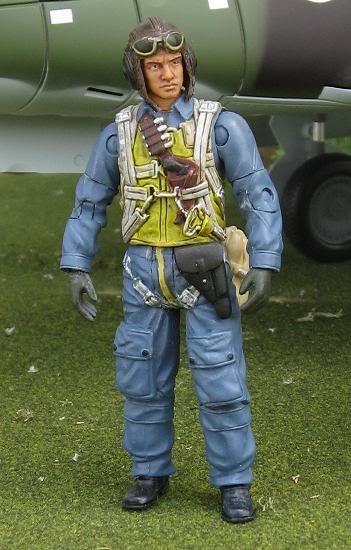
101st Afghanistan
Here my latest BBI FOV Hybrid, The parts married together very well. LMK what you think.

-
Fritzkrieg
- Officer - Captain
- Posts: 835
- Joined: Sun Mar 09, 2008 3:49 pm
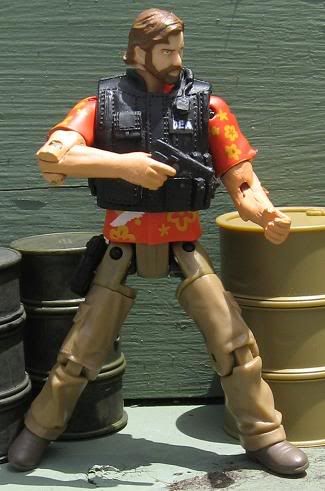
Civil War Era Terminator
Not sure if the Double Barrel shotgun was around durring the Civil war, but, I thought it looked cool. LMK what you think.
Confederate Terminator
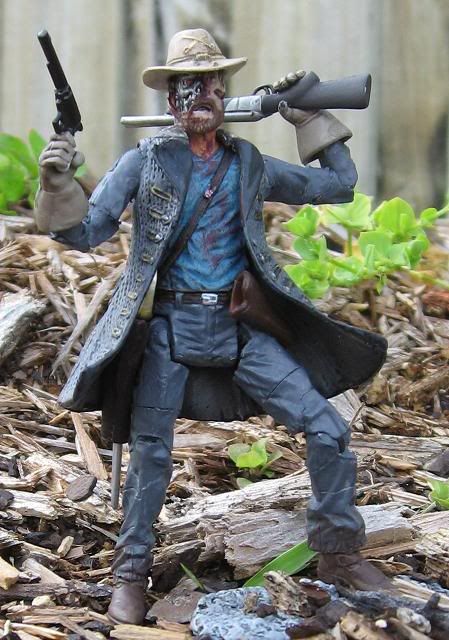
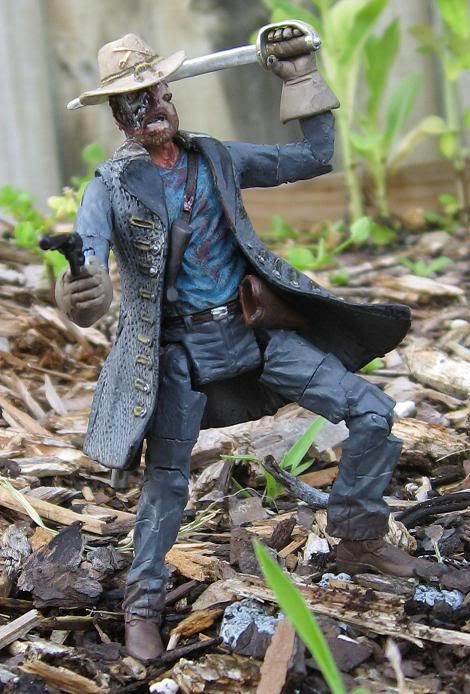
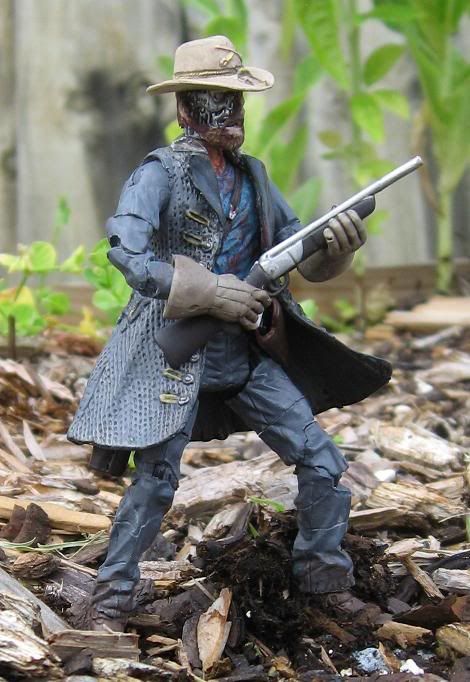
Confederate Terminator
-
Black_Dragon_One
- Officer - Brigadier General

- Posts: 2032
- Joined: Sat Dec 11, 2004 1:23 pm
- Location: California
Re: Civil War Era Terminator
Fritzkrieg wrote:Not sure if the Double Barrel shotgun was around durring the Civil war, but, I thought it looked cool. LMK what you think.
Confederate Terminator
how you add the terminator face onto the figure?
i wanted to make cyborg superman..
whats up doc....
-
Fritzkrieg
- Officer - Captain
- Posts: 835
- Joined: Sun Mar 09, 2008 3:49 pm
-
Fritzkrieg
- Officer - Captain
- Posts: 835
- Joined: Sun Mar 09, 2008 3:49 pm
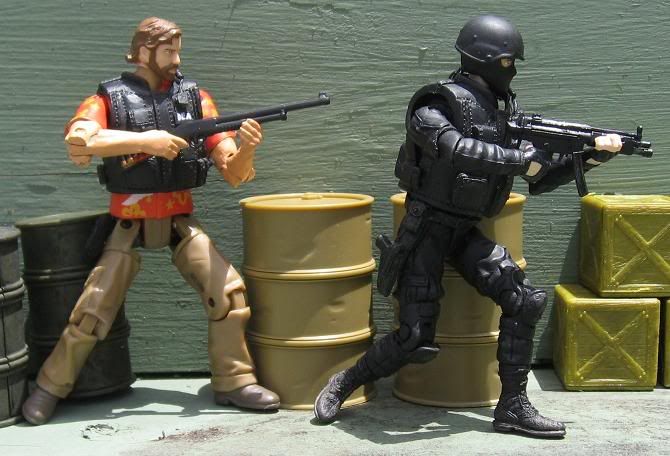
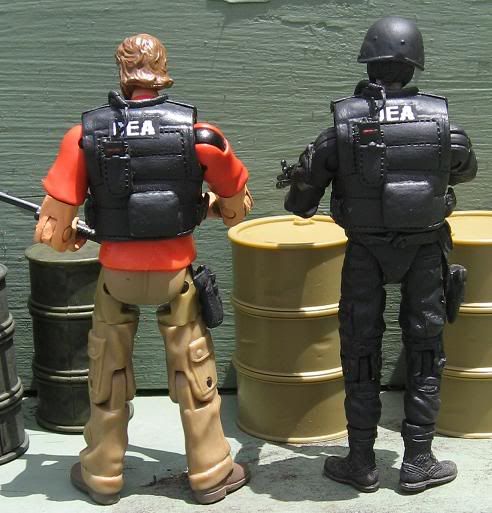
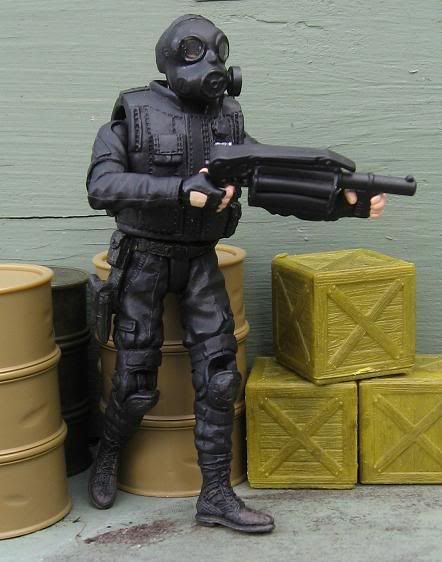
DEA Agents
I had a leftover body from a Dragonball Movie figure, I used to make one of my Japanese customs. The legs were pretty cool, and had some unique articulation. I wanted to utilize them for a merc custom, but I could not figure out how to seperate the legs from the goofy Hawian shirt wearing torso. Then it hit me it would make for a sweet undercover DEA agent. Here's the results LMK what you think.
Having been working undercover for over a year, DEA agent Ben Koby, had been going deep, to bust a Bahama base drug smuggling operation. Having a reputation, for doing what it takes to get the job done, the other guy's in the department joked, that he had done more blow, than all the criminals he'd busted over the years combined.
DEA Agents
-
blaster_e11
- Officer - Captain
- Posts: 681
- Joined: Tue Feb 14, 2006 5:24 am
- Location: paris- france
- Contact:
-
Fritzkrieg
- Officer - Captain
- Posts: 835
- Joined: Sun Mar 09, 2008 3:49 pm

-
blaster_e11
- Officer - Captain
- Posts: 681
- Joined: Tue Feb 14, 2006 5:24 am
- Location: paris- france
- Contact:
-
Fritzkrieg
- Officer - Captain
- Posts: 835
- Joined: Sun Mar 09, 2008 3:49 pm
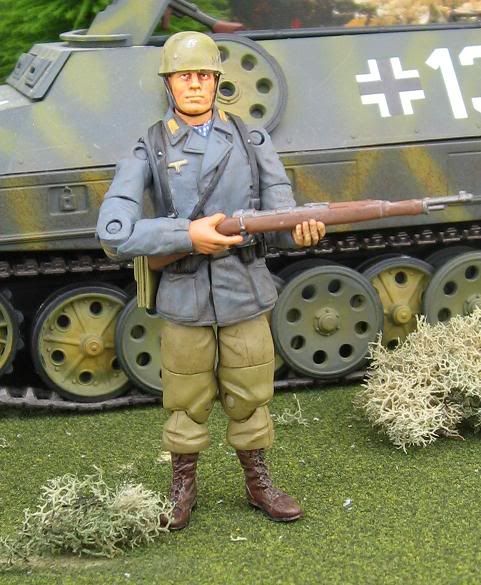
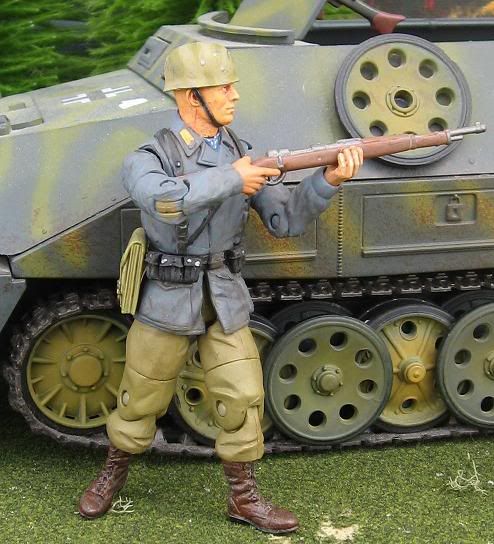
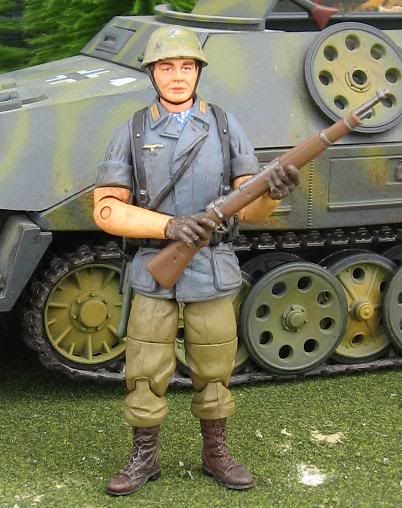
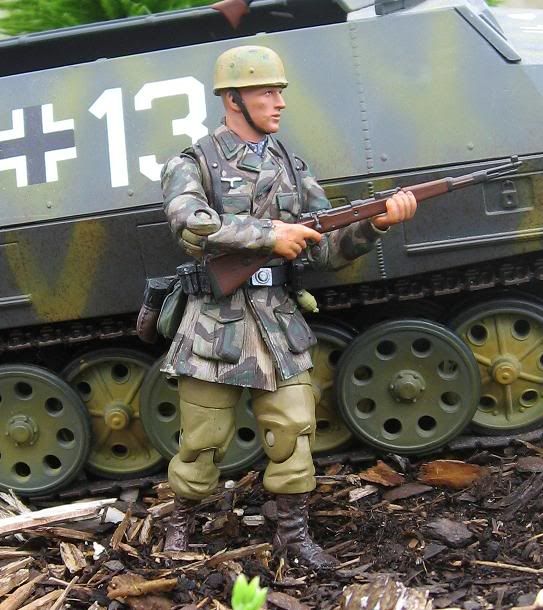
Fallschirmjagers
I have to give credit to Flyboy Fox, for helping crack the nut on these guys. His idea of shaving down a standard German helmet and putting them is their luftwaffe Blue-grey tunics was the perfect way to get out of having to canabalize rare Fallschirmjager figures. Hope you don't mind me stealing your idea Flyboy 
Fallschirmjagers
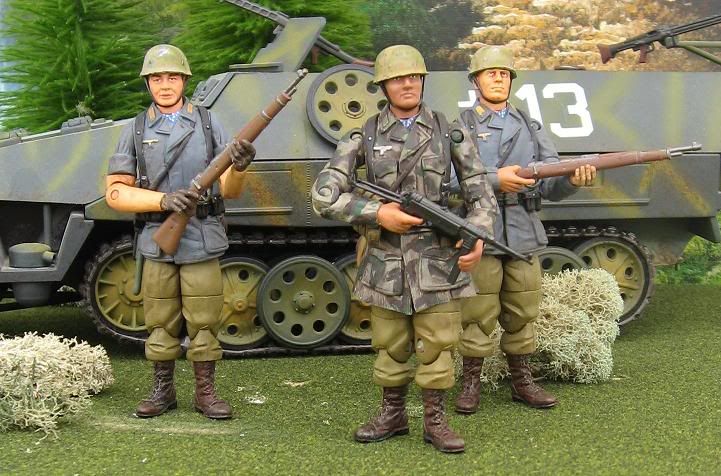
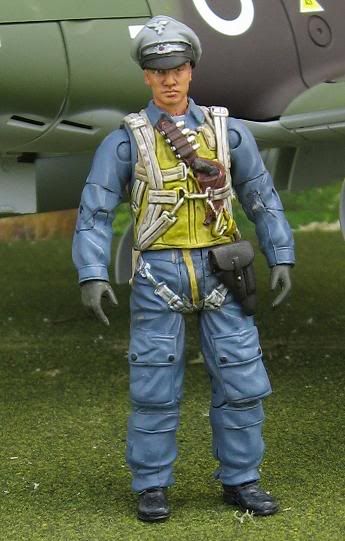
Luftwaffe Ace
Fallschirmjagers
Luftwaffe Ace
-
TEXAS_HOSS
- Corporal

- Posts: 46
- Joined: Sat Jul 04, 2009 11:59 am
- Location: DFW, Texas
-
Light.Inf.Scout
- Officer - Brigadier General
- Posts: 2053
- Joined: Wed Jan 24, 2007 11:51 am
- Location: Central Illinois
-
Fritzkrieg
- Officer - Captain
- Posts: 835
- Joined: Sun Mar 09, 2008 3:49 pm
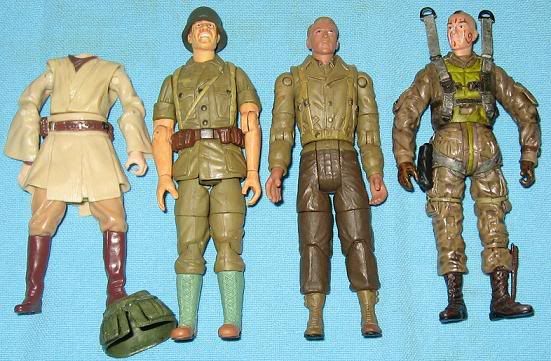
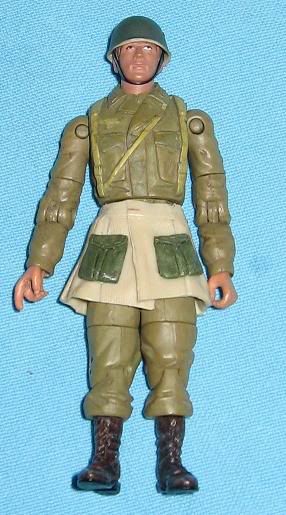
Fallschirmjager Tutorial
Thanks to Flyboy Fox's FJ Helmet advise, I was able to come up with a respectable Fallschirmjager Recipe.
Step 1
Assemble your fodder figs.
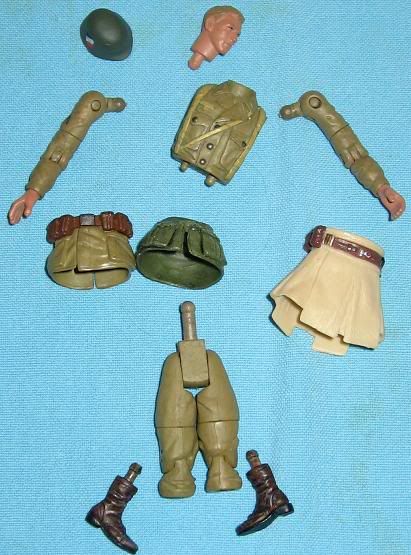
Step 2
Using know methods, disasemble your figures into their key components.
Step 3
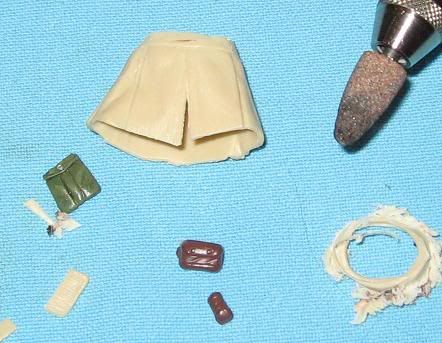
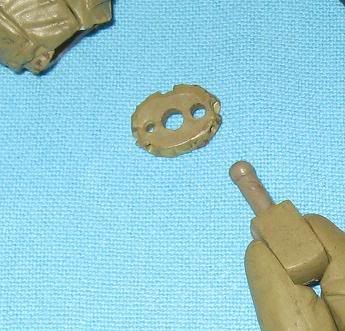
Trim Down the Jedi Tunic so it more closely resembles the bottom of a FJ smock. Also cut the pockets from the the standard German Tunic. I use a pair of wire cutters to do this.
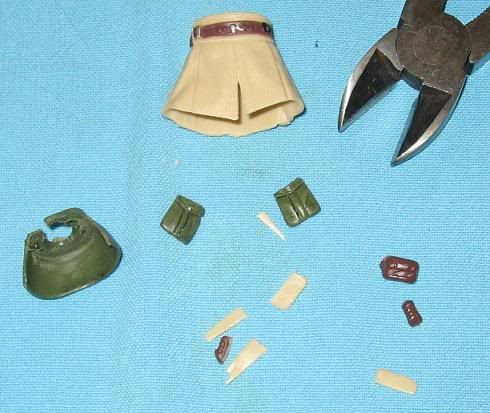
Step 4
Using a grinding bit trim the belt form the Jedi Tunic. I also suggest ruffing the plastic up with the grinding bit where you are going to glue the pockets to the Tunic bottom.
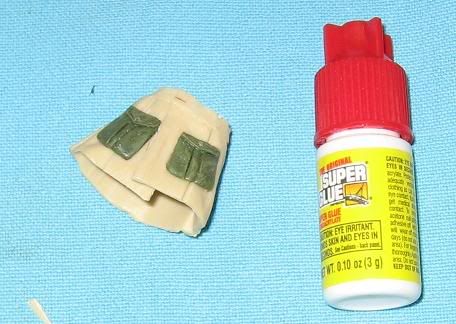
Step 5
Glue the pockets to the tunic bottom. I use Superglue, because it bonds super fast, but I'm sure you can use other types adhesives.
Step 6
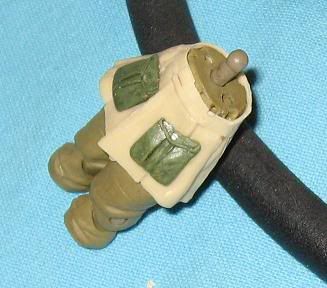
Cut the plastic spacer from the original German tunic.
Step 7
Assemble legs and tunic bottom as shown.
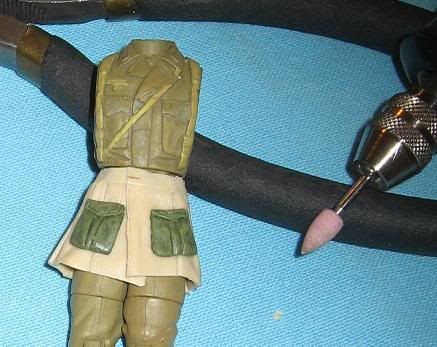
Step 8
Sand down the buttons on torso and tunic bottom. I use a super fine grinding bit and finish it with a light sanding with a fine grain sandpaper.
Step 9
Cut the pegs from the Jump boots.
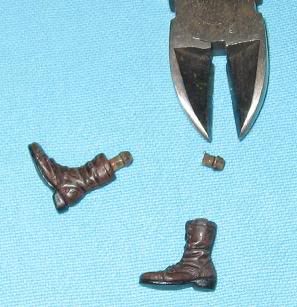
Step 10
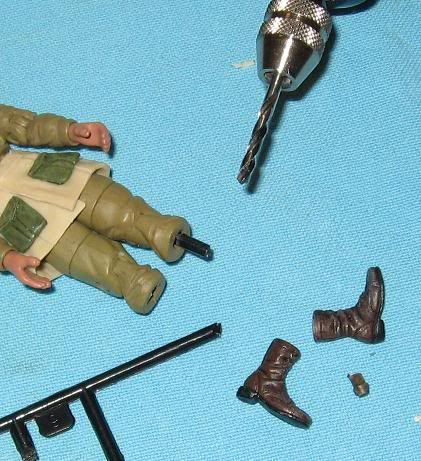
Using molding trees and a drill bit create dowel holes and dowels to marry the jump boots to the DAK legs. Be care not to drill too deep into the bottom of the DAK legs are you'll scew-up the articulation. Secure the dowels to the bottom of the DAK legs using Superglue. This allows for the boots to pivot maintaining articulation, and a stable joint.
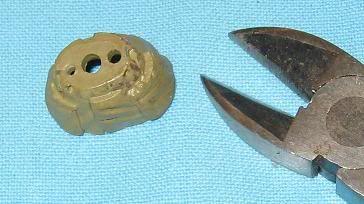
Step 11
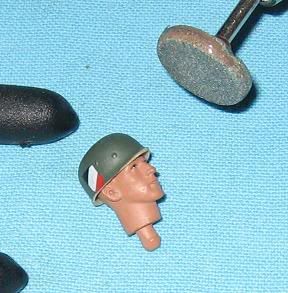
Using a grinding bit, trim down your standard German Helmet. Remove most of the brim leaving just a small lip around the helmet base. I have a flat grinding bit that works perfectly for this.
Step 12
Assemble the parts to assure proper proportions. I had to shorten the neck and counter sink the hands, to keep the figure from looking off.
Step 13
Paint and Accessorize
Step 1
Assemble your fodder figs.
Step 2
Using know methods, disasemble your figures into their key components.
Step 3
Trim Down the Jedi Tunic so it more closely resembles the bottom of a FJ smock. Also cut the pockets from the the standard German Tunic. I use a pair of wire cutters to do this.
Step 4
Using a grinding bit trim the belt form the Jedi Tunic. I also suggest ruffing the plastic up with the grinding bit where you are going to glue the pockets to the Tunic bottom.
Step 5
Glue the pockets to the tunic bottom. I use Superglue, because it bonds super fast, but I'm sure you can use other types adhesives.
Step 6
Cut the plastic spacer from the original German tunic.
Step 7
Assemble legs and tunic bottom as shown.
Step 8
Sand down the buttons on torso and tunic bottom. I use a super fine grinding bit and finish it with a light sanding with a fine grain sandpaper.
Step 9
Cut the pegs from the Jump boots.
Step 10
Using molding trees and a drill bit create dowel holes and dowels to marry the jump boots to the DAK legs. Be care not to drill too deep into the bottom of the DAK legs are you'll scew-up the articulation. Secure the dowels to the bottom of the DAK legs using Superglue. This allows for the boots to pivot maintaining articulation, and a stable joint.
Step 11
Using a grinding bit, trim down your standard German Helmet. Remove most of the brim leaving just a small lip around the helmet base. I have a flat grinding bit that works perfectly for this.
Step 12
Assemble the parts to assure proper proportions. I had to shorten the neck and counter sink the hands, to keep the figure from looking off.
Step 13
Paint and Accessorize
-
Fritzkrieg
- Officer - Captain
- Posts: 835
- Joined: Sun Mar 09, 2008 3:49 pm
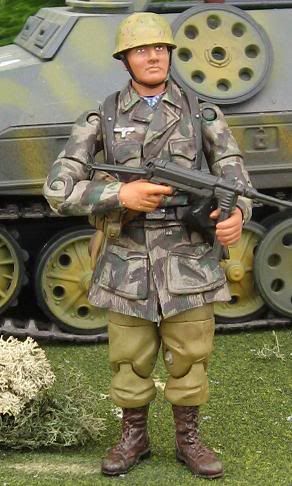
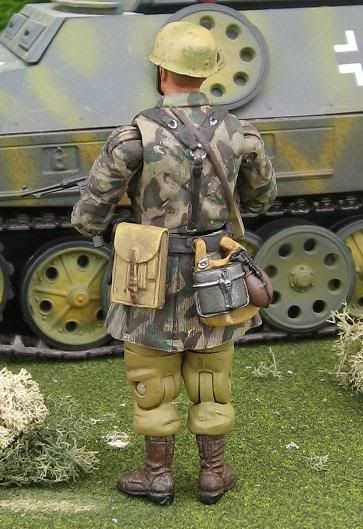
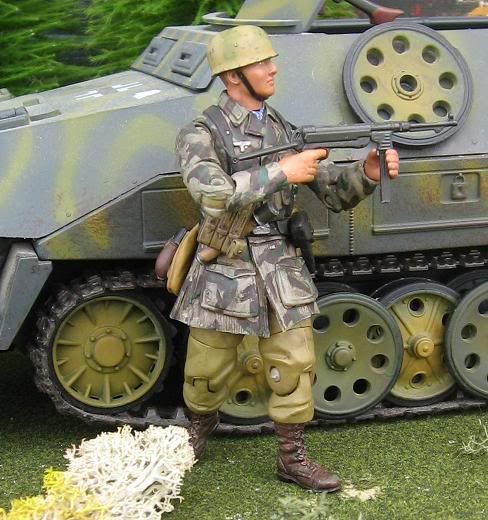
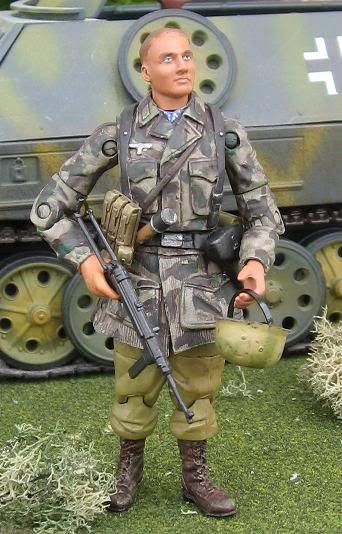
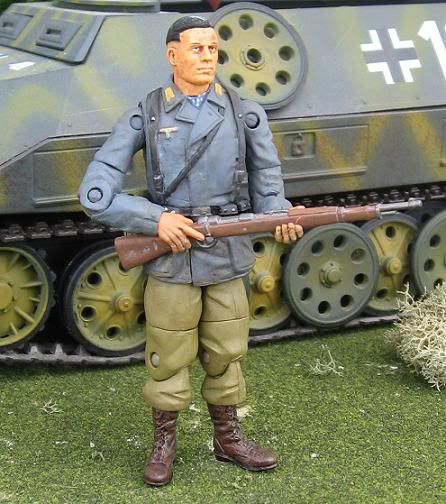
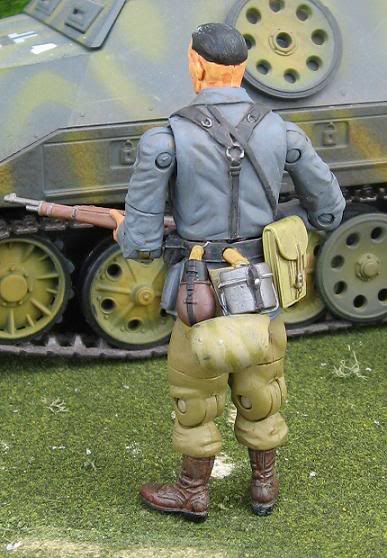
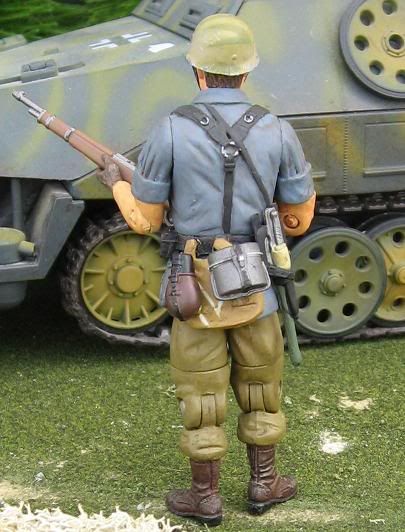
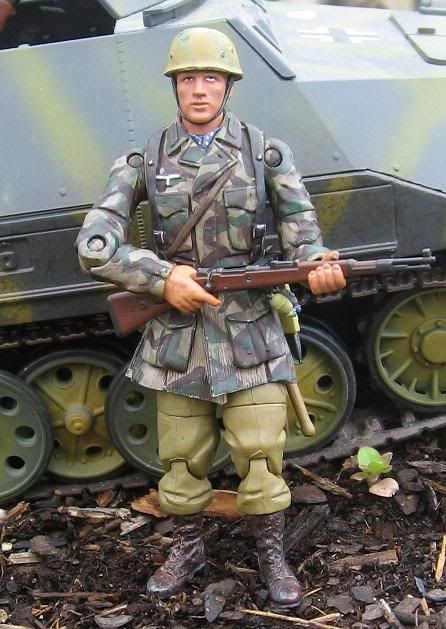
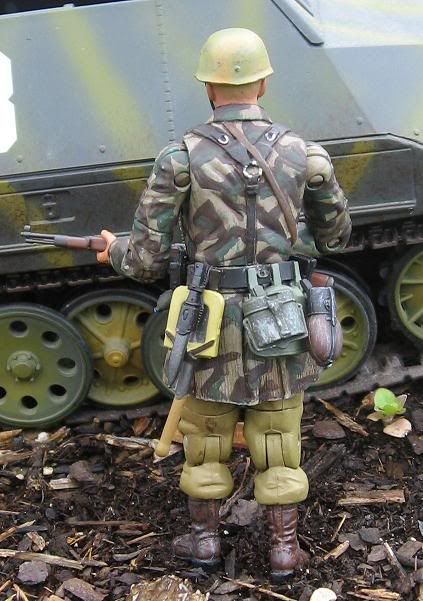
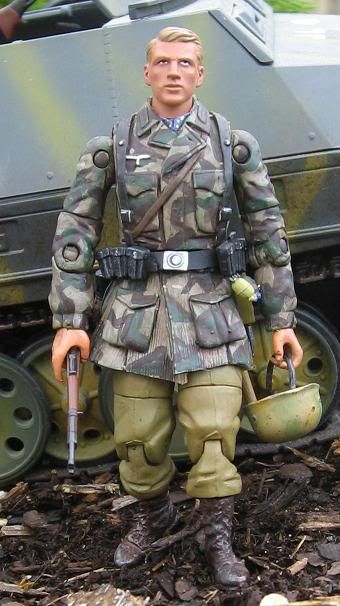
More Pics of My FJ Project
Here are some more shots of my finished Fallschirmjager. LMK what you think.
-
flyboy_fx
- Officer - Brigadier General
- Posts: 4336
- Joined: Thu Nov 20, 2008 12:42 pm
- Location: North Carolina,USA
nice what brand paints do you use?
What color is the base?
So far i have only done the splinter with the greener base color used by some of the FJs in normandy and also the tan base so I am going to make some tan base ones soon.
And how do you paint the little lines in the splinter? Is there an easier way of doing it other than each line buy hand?
Looks great.
"Ever tried. Ever failed. No matter. Try Again. Fail again. Fail better."
--Samuel Beckett
--Samuel Beckett

-
Razor17019
- Officer - Brigadier General
- Posts: 4890
- Joined: Thu Oct 07, 2004 5:17 am
- Location: Northern Kentucky


Re: More Pics of My FJ Project
LOVE IT! Really good work! What you working on next?
Fritzkrieg wrote:Here are some more shots of my finished Fallschirmjager. LMK what you think.
-
Fritzkrieg
- Officer - Captain
- Posts: 835
- Joined: Sun Mar 09, 2008 3:49 pm
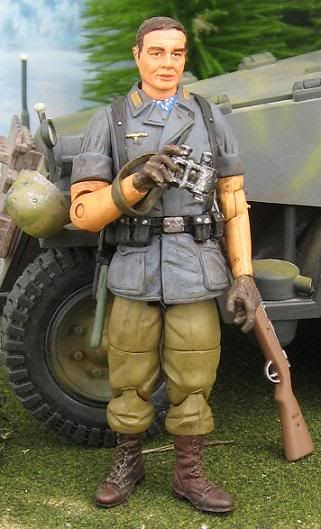
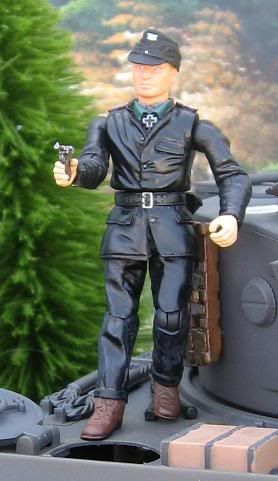
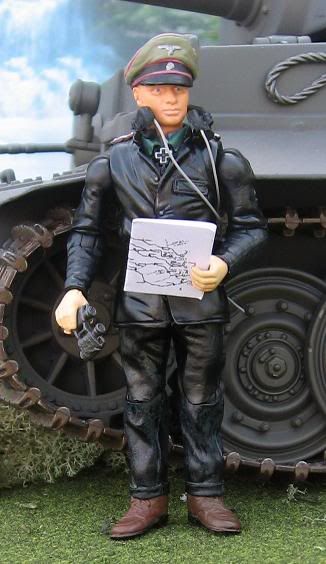
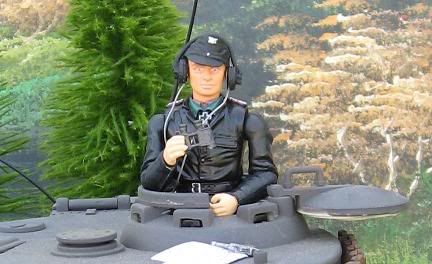
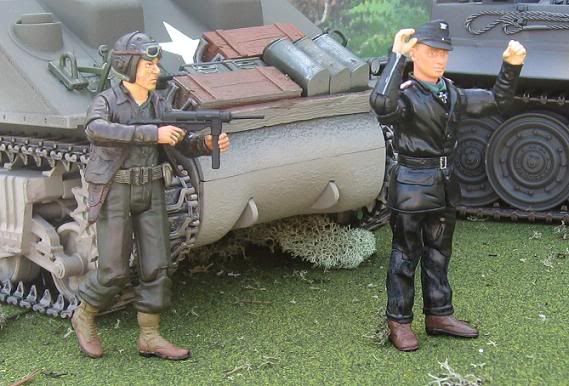
Sherman Tank
I gave the FOV Camo Sherman a touch-up. I also through together another SA Panzer Ace. LMK hwt you think.
Sherman
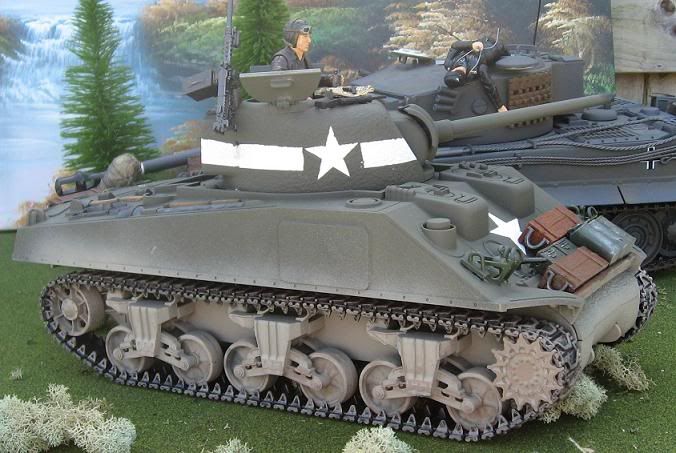
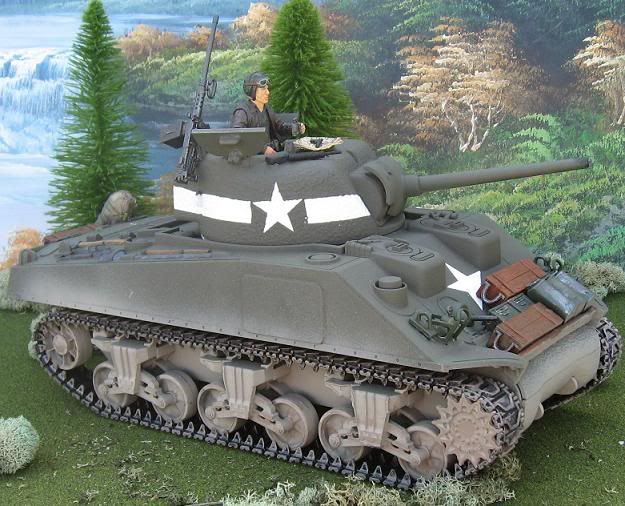
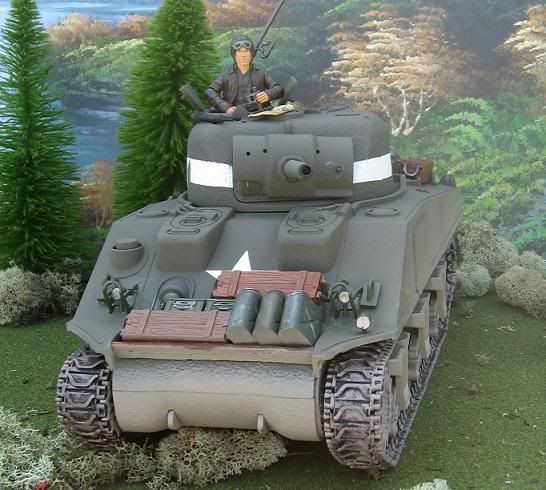
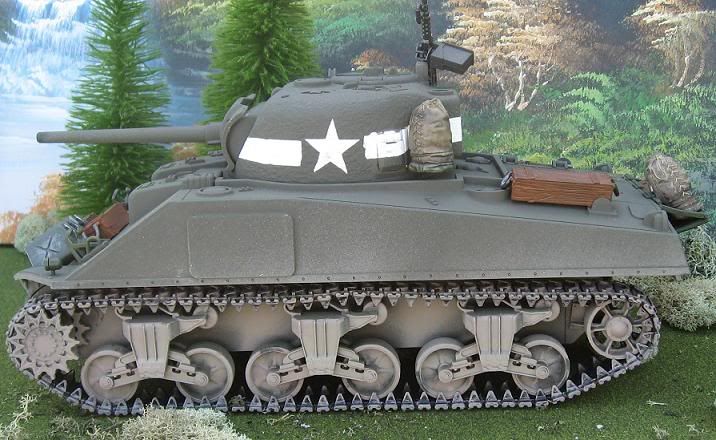
Couldn't resist giving this tank a unique commander.
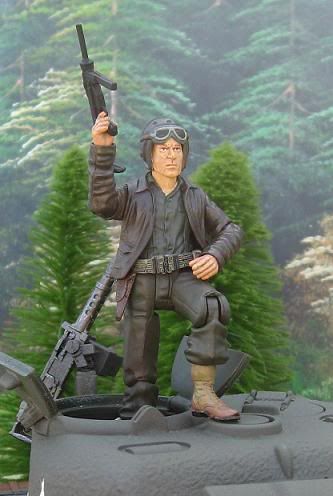
Panzer Ace
Sherman
Couldn't resist giving this tank a unique commander.
Panzer Ace
-
Fritzkrieg
- Officer - Captain
- Posts: 835
- Joined: Sun Mar 09, 2008 3:49 pm
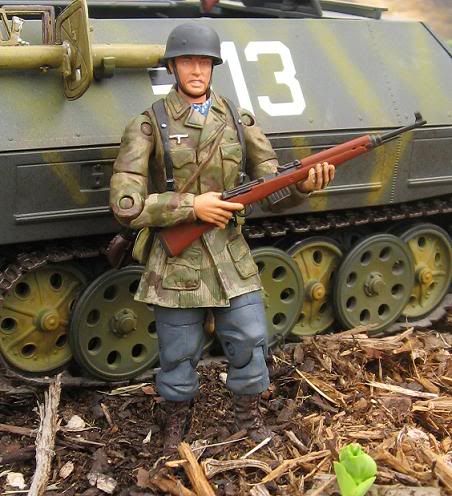
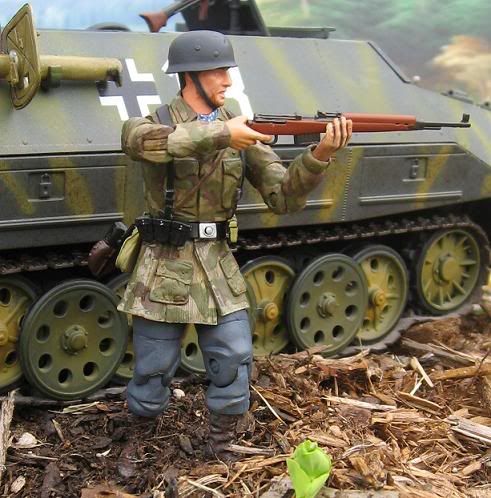
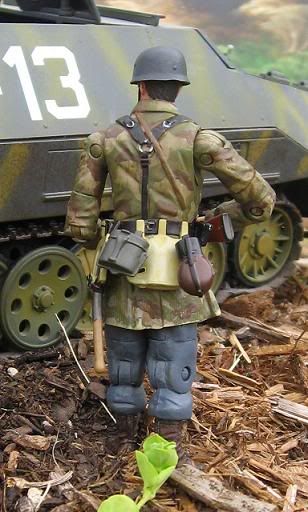
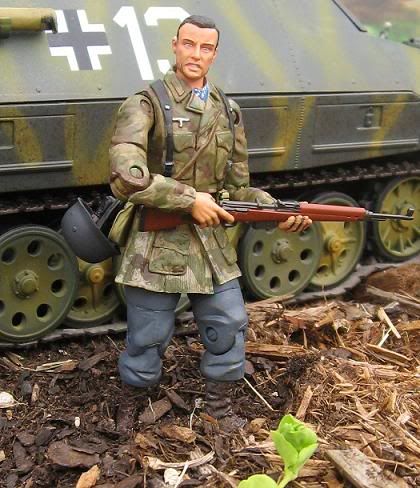
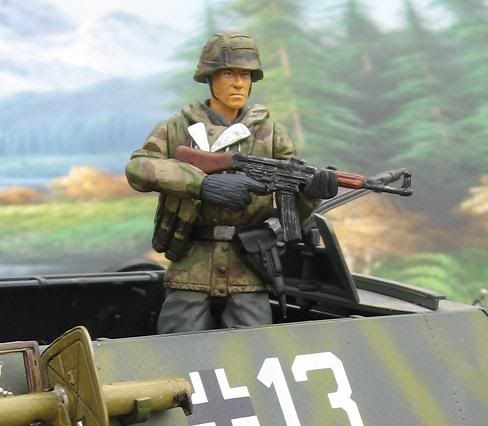
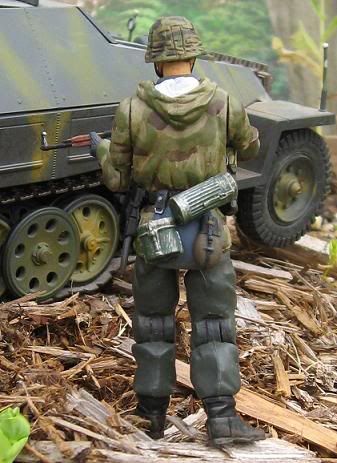
My attempt at German water/marsh camo
This is my second attempt at a marsh/water camo. Looking at it now, I should have applied the red-brown more sparsly. It looks more like Italian cammo, in the pics, than the marsh it was suposed to be. LMK what you think.
Fallschirmjager

Fallschirmjager