1/18 M-10 Custom Rebooted
-
pickelhaube
- Officer - Brigadier General

- Posts: 9698
- Joined: Mon Jan 22, 2007 5:52 am
- Location: New Orleans
Thanks guys for all of the kind remarks.
I cheated on the barrel I used a cut down Panther barrel. But when I scratch the barrels like I did with my Stuka cannons and my 1/6 scale Stuart tank I use tubes of styreen , brass and copper . What ever size works. I get the smallest tube for the muzzel and larger tube at the largest base end. Then I get wax paper wet it down with denatred alcohal. I mix up bondo spread it on the tube , roll the tube on the wax paper and that is how I get the taper. You may have to do it a few times and sand, sand ,sand.
As far as the angles I measure everything in mm. I get a 1/35 model and just measure in mm and multiply by 1.94 that brings you up to 1/18 scale. The scale I use is actually a small square with mm printed on it and I keep a caculator handy.
The Wirbelwind's angles were a snap the M-10 turret was a snap . Those counter weights on the rear of the M-10 were a SOB. Again it TOOK ME 2 DAYS TO MAKE THEM. I do everything the hard way measure and mark.
I use styreen for all of my builds and bondo as shaper filler. It sets quick sands easy and it is cheap. But smells real bad. You can't use it in the house but I work out in the shed/shop anyway.
There are no secrets to building just a lot of hard work and a good magafying lamp is a must.
-
Threetoughtrucks
- Officer - Brigadier General

- Posts: 5405
- Joined: Tue Oct 05, 2004 9:46 am
- Location: SOUTH JOISEY
- Contact:
A M-10 is available in 1/6 as a kit. I have one but I haven't had the time top start it. Here is are a few pics of one 1/6 that was completed by one of the model makers extroadiares...: http://img140.imageshack.us/img140/5203/m10d.jpg
http://img140.imageshack.us/img140/4584/im10b.jpg
http://img140.imageshack.us/img140/4584/im10b.jpg
Sometimes I am the windshield, sometimes, I am the bug.
-
exether_mega
- Officer - Colonel

- Posts: 1314
- Joined: Thu Dec 09, 2004 10:35 am
- Location: Belgium
- Contact:
-
parrish333
- Officer - 2nd Lieutenant

- Posts: 360
- Joined: Tue Oct 05, 2004 10:13 am
- Location: NE Chicagoland, Illinois
Price?
pickelhaube wrote:
This is be a major custom. The top hull will be the biggest mold/pour that I will have done to date. The mold itself will be the size of a shoe box. Probably about $350 - $500 worth of RTV on the hull alone.
So just to be clear (I very much trust your prices to be fair considering what goes into them), is $350-500 the price for a full M-10 kit?
-
MG-42
- Officer - Brigadier General

- Posts: 3583
- Joined: Thu Sep 15, 2005 10:42 am
- Location: Pleasant Ridge , Ohio
* M-10 turret custom
* Gulp ! ! ! *  ... $350 - 500 ... Nice work though , Matt.
Mitch v MG
Mitch v MG
" I love it , God help me ,.. I do love it so". * * * * PATTON * * * *
* In memory of ram04 - 7/15/12 *
* In memory of ram04 - 7/15/12 *
-
flpickupman
- Officer - Lt. Colonel

- Posts: 1230
- Joined: Wed Nov 09, 2005 7:58 pm
- Location: South Florida
-
pickelhaube
- Officer - Brigadier General

- Posts: 9698
- Joined: Mon Jan 22, 2007 5:52 am
- Location: New Orleans
Re: Price?
No that was for the RTV.parrish333 wrote:pickelhaube wrote:
This is be a major custom. The top hull will be the biggest mold/pour that I will have done to date. The mold itself will be the size of a shoe box. Probably about $350 - $500 worth of RTV on the hull alone.
So just to be clear (I very much trust your prices to be fair considering what goes into them), is $350-500 the price for a full M-10 kit?
I will be trying my best to come in at $200 - $250 for the cutom kit. I need to make an entire top hull , turret and gun. So for $200 -$250 is one heck of a good price. It will probably take a whole unit of resin to cast one kit. A unit of resin is now up to $36
Thanks guys for the compliments. This is actualy my first piece of armor. I know the wirbelwind is in the armor catagory but it is an anti aircraft gun. When done this will be a compleatly new piece of armor.
I like the way this is turning out. I almost have the top hull roughed in. It was not too bad like I hoped it would be. If I have the chance to put 2 more full days on it the build will be done. I will try to post pics tomorrow or Thursday.
-
pickelhaube
- Officer - Brigadier General

- Posts: 9698
- Joined: Mon Jan 22, 2007 5:52 am
- Location: New Orleans
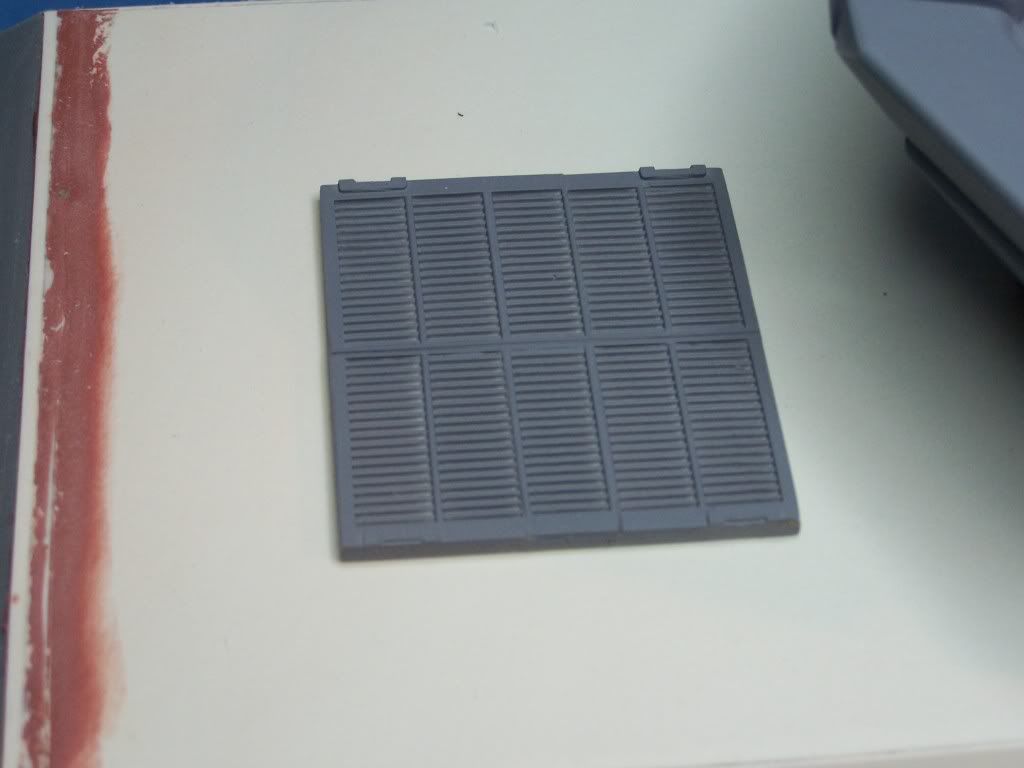
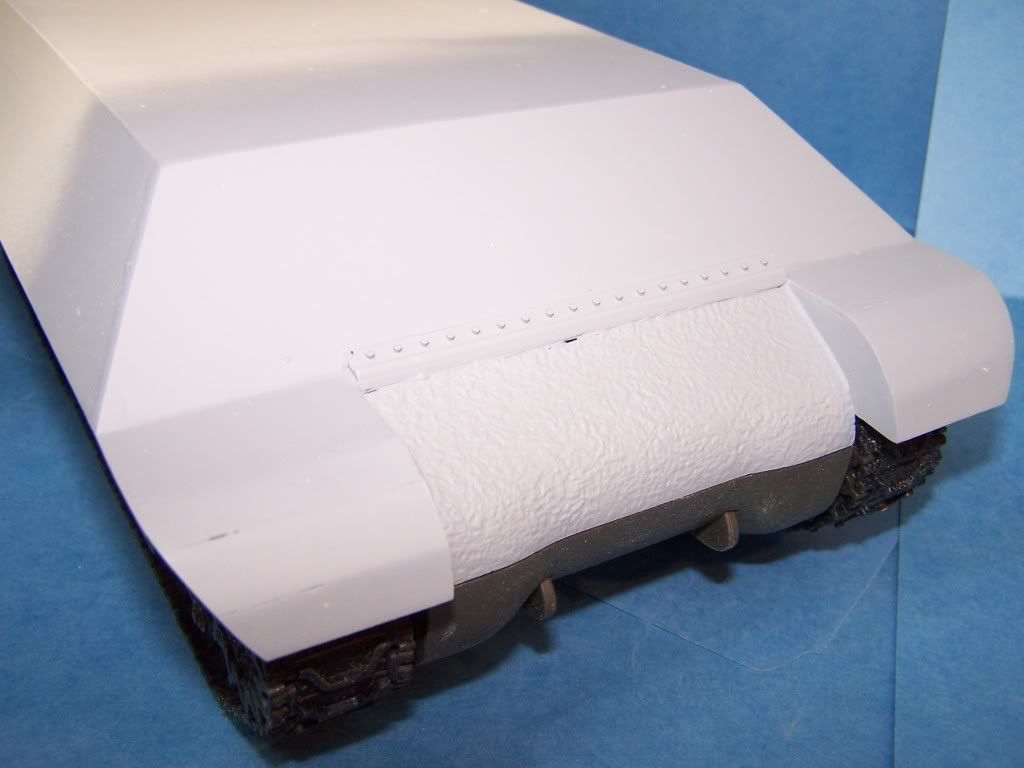
I am moving right along with the project. I could not find ant rear deck photos of the M-10 A1 . The one with the larger rear grill so I went ahead and made the smaller one. I made 2 casts of the FOV Sherman. Spit it both ways added a middel vent one way and cut it down the other.
Here is the roughed in hull. I think I got the shape of the fenders right . I am using sand filler paint which is lighter than the grey sealer primer paint. So it makes for a very light pic. The hull was fairly easy to do . Now for details and sanding filling and more sanding and filling and detaling.
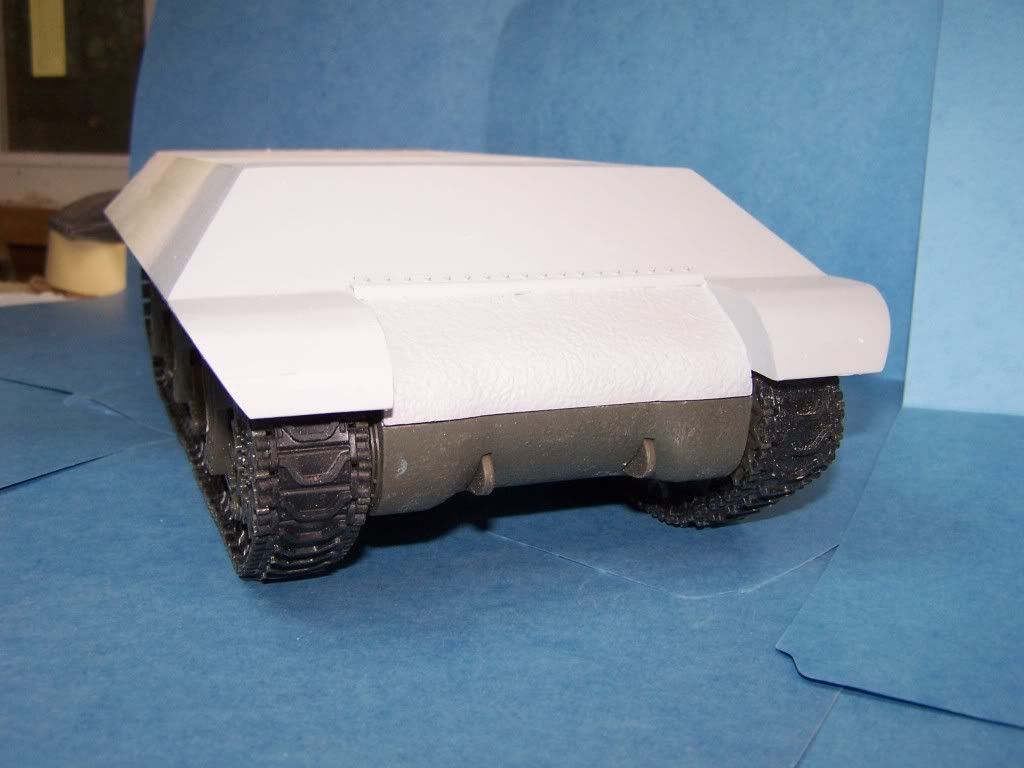
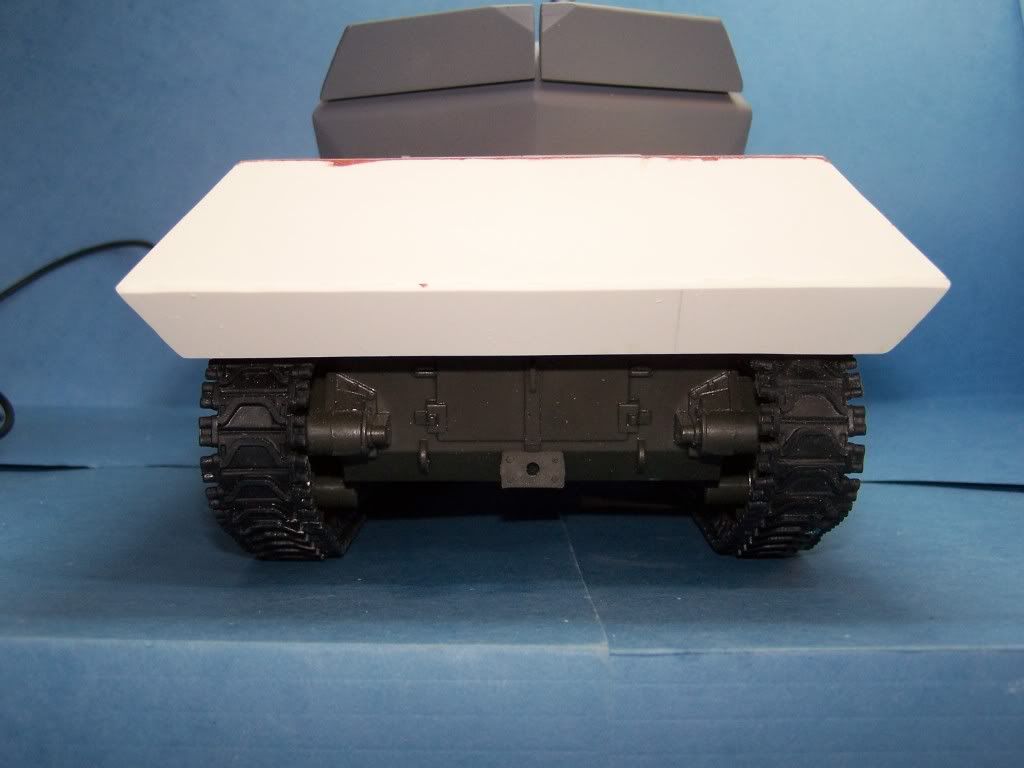
Mock up with turret.
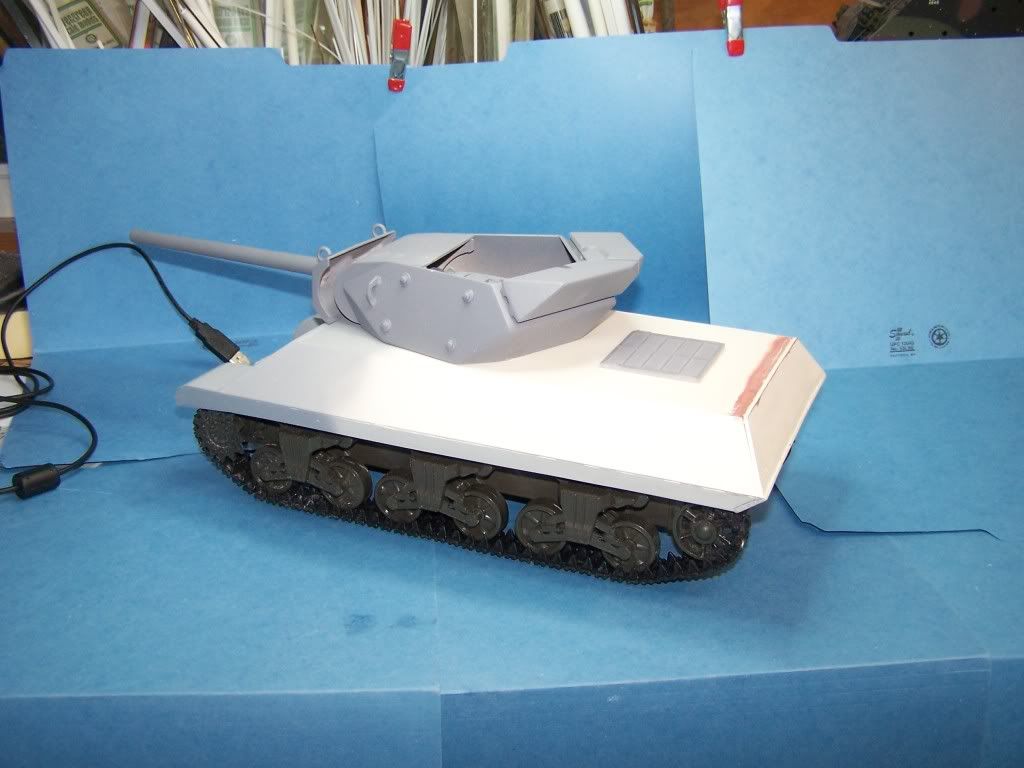
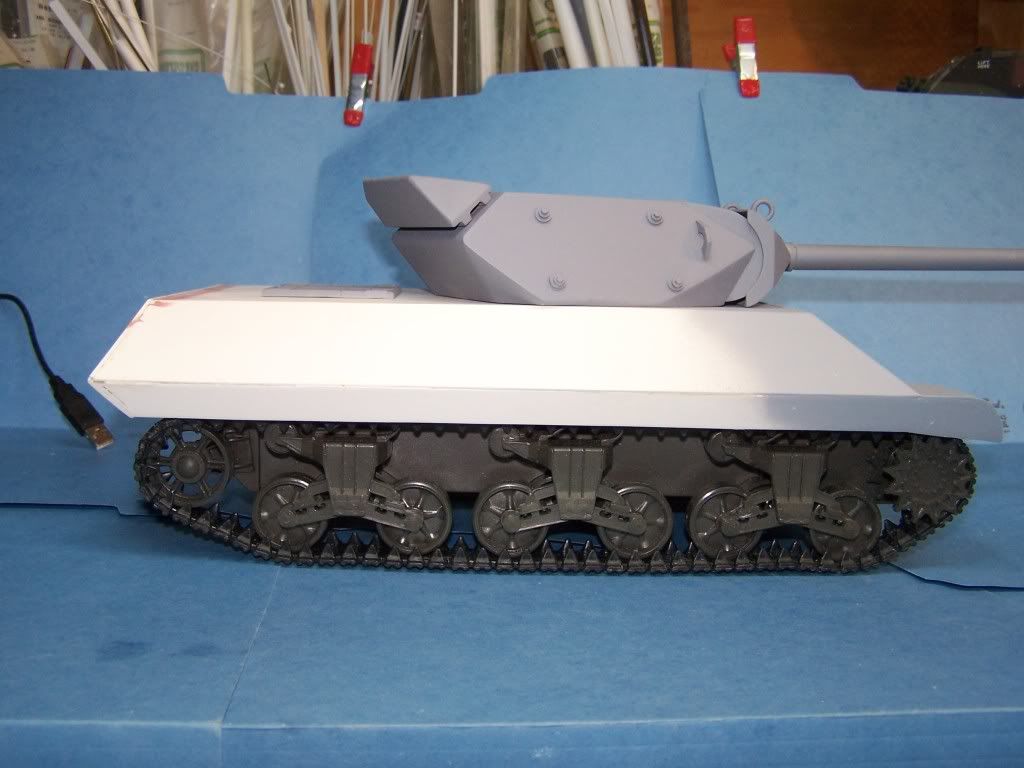
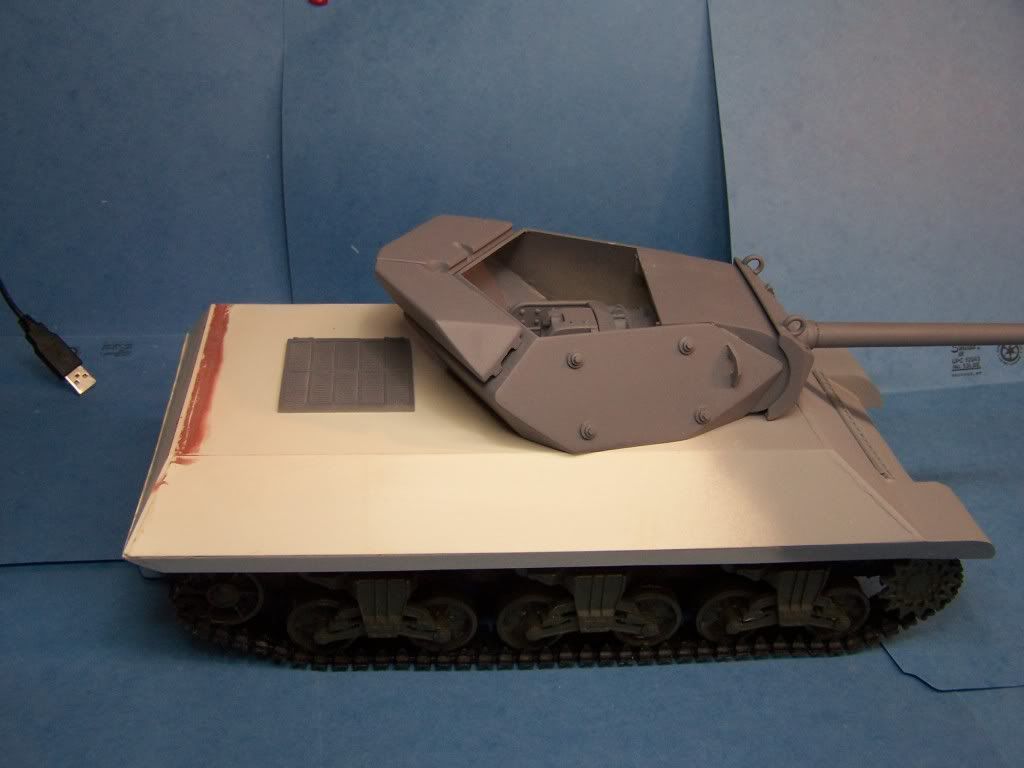
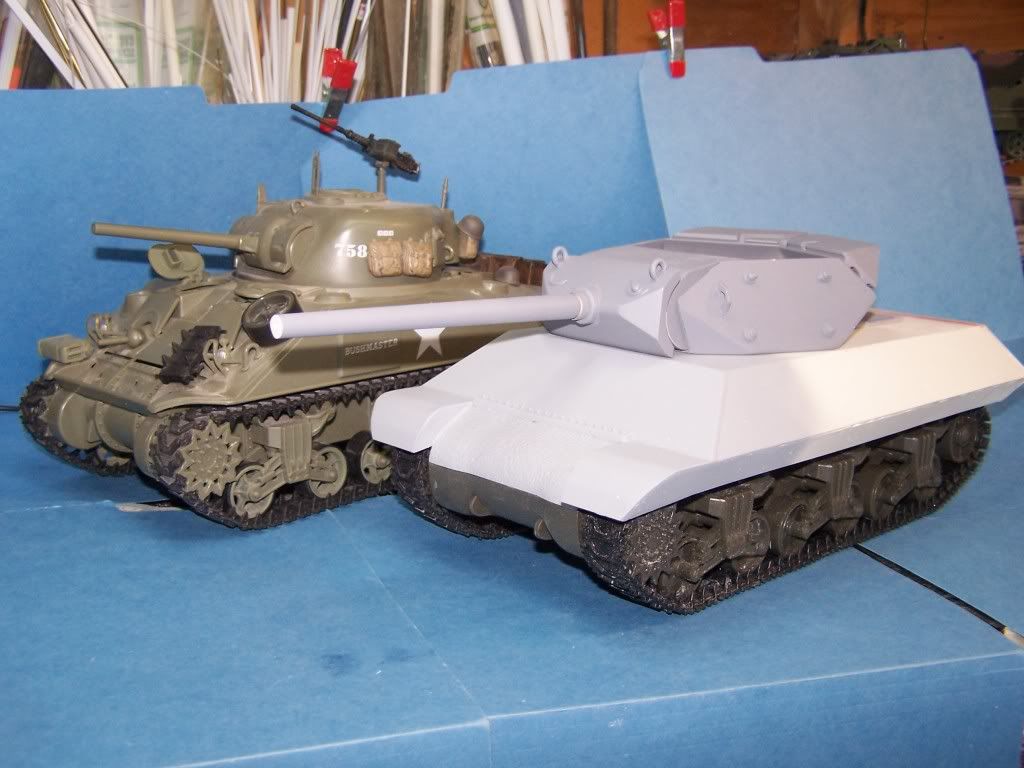
The M-10 next to a Sherman.
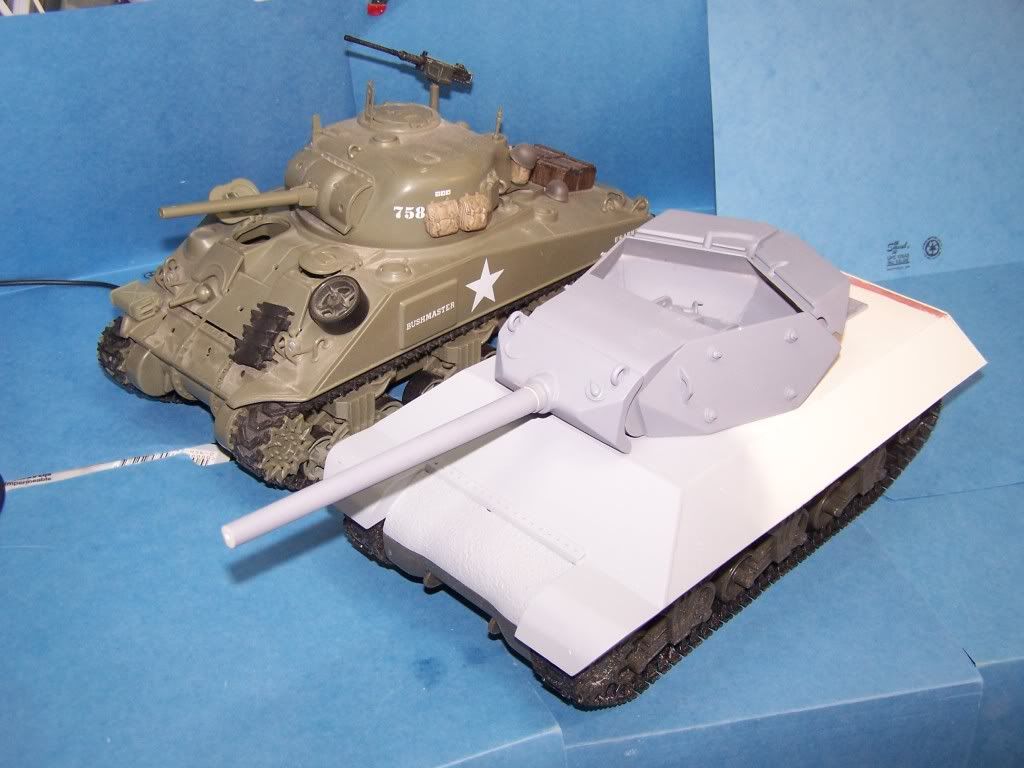

Here is the roughed in hull. I think I got the shape of the fenders right . I am using sand filler paint which is lighter than the grey sealer primer paint. So it makes for a very light pic. The hull was fairly easy to do . Now for details and sanding filling and more sanding and filling and detaling.


Mock up with turret.


The M-10 next to a Sherman.


-
pickelhaube
- Officer - Brigadier General

- Posts: 9698
- Joined: Mon Jan 22, 2007 5:52 am
- Location: New Orleans
Thanks for the compliment.one-o-nine wrote:Stunning work pickelhaube.. Absolutely stunning...
On another unrelated note - Was your Ju-87D/G conversion ever destined to be sold as a kit? I am interested in converting my Ju-87B to a D, so if your project can be sold as a kit I'm interested!
Sorry to change the subject - Your M-10 is looking fantastic
Yes the Ju-87 kit is for sale. I have sold a few of them already.
PM me for details if you want.
-
usmcchet9296
- Officer - 2nd Lieutenant

- Posts: 349
- Joined: Thu Feb 19, 2009 12:45 pm
- Location: So Cal
- Contact:
-
pickelhaube
- Officer - Brigadier General

- Posts: 9698
- Joined: Mon Jan 22, 2007 5:52 am
- Location: New Orleans
Well there are a few things that I need opions on the M-10. Everybody wants as much detail as possible but detail invites price inflation and I am trying to keep the price down on this project.
1. Pioneer tools . The Fov has simple cast on tools lacking detail. The 21st tools are seperate and removable.The easiest way to go is cast the tools like the FOV. One cast minimal detail and let it go. If I cast the 21st way. The tools will be VERY FRAGILE. If I make the little clips like are used on the 21st to hold the tools down as soon as you try to clip one of the tools to the hull, either the tool will break or one of the clips will break.
2. Spuds / Grousers w/ racks. Some photos of the M-10 were plain w/o them . Some one side only . Some a single rack, some with racks down the whole sides. This will be a whole other little kit within a kit. Then I will have to make between 12 to 60 grousers per kit. YIKES !!!!! So I rather just omit them altogether and let the modeler do them himself. Unless this is a " must have " deatil.
3. This is a tough one. Lights , light brush gaurds and lift hooks. These things are all on the FOV Sherman ( EXCEPT THE ONES ON THE TURRET) It will be another pain to make and cast these. Plus locator holes and what not. If I make them , this will drive the cost up.Plus I will have to make the holes were they go. If I do not cast them I should not make the holes because when you cut them off of the mother tank, there is no telling what kind of stub you will end up with. The lights and all bring this project to life because of the details. But details = more money and if they are there for the taking , take them.
So anybody who would like to get this projects please way in and I will consider everyones opinions on this matter. Even if you are not going to get one I will still like your opion.
-
exether_mega
- Officer - Colonel

- Posts: 1314
- Joined: Thu Dec 09, 2004 10:35 am
- Location: Belgium
- Contact:
-
pickelhaube
- Officer - Brigadier General

- Posts: 9698
- Joined: Mon Jan 22, 2007 5:52 am
- Location: New Orleans
I don't know. I used the FOV which has the correct one piece casted tranny cover. The 21st has the 2 piece. I will fit it on the 21st and if everything lines up you are good to go. You will just have to grind off the bolted part.exether_mega wrote:just a question : will it fit on a 21st Century Sherman base hull ?
If yes then we can pick all details from the upper hull (lift rings, tools, lights and so on).
phil
If not I can make an adapter so it does. I will check into that today.
-
pickelhaube
- Officer - Brigadier General

- Posts: 9698
- Joined: Mon Jan 22, 2007 5:52 am
- Location: New Orleans
OK Phil here you go.exether_mega wrote:just a question : will it fit on a 21st Century Sherman base hull ?
If yes then we can pick all details from the upper hull (lift rings, tools, lights and so on).
phil
Here is the FOV with the M-10 hull a perfect fit.
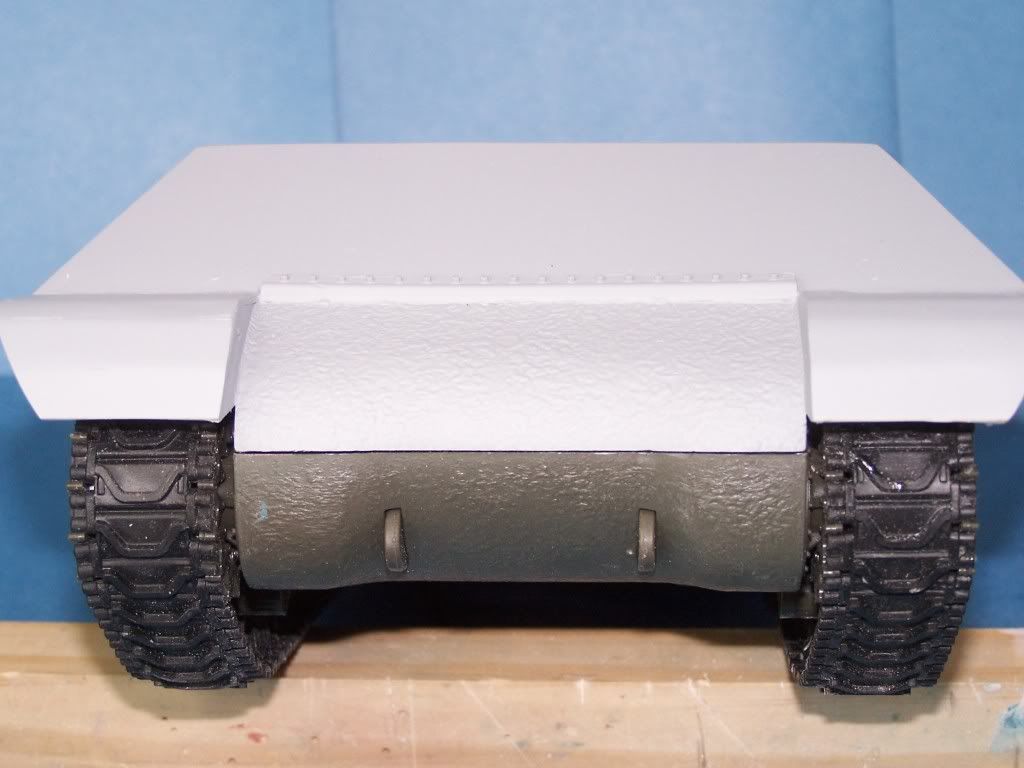
Here it is with a BBI Shermy. It will work as well. You just need to cut two little bits off of the bottom hull to close in the space. This should be easy to do.
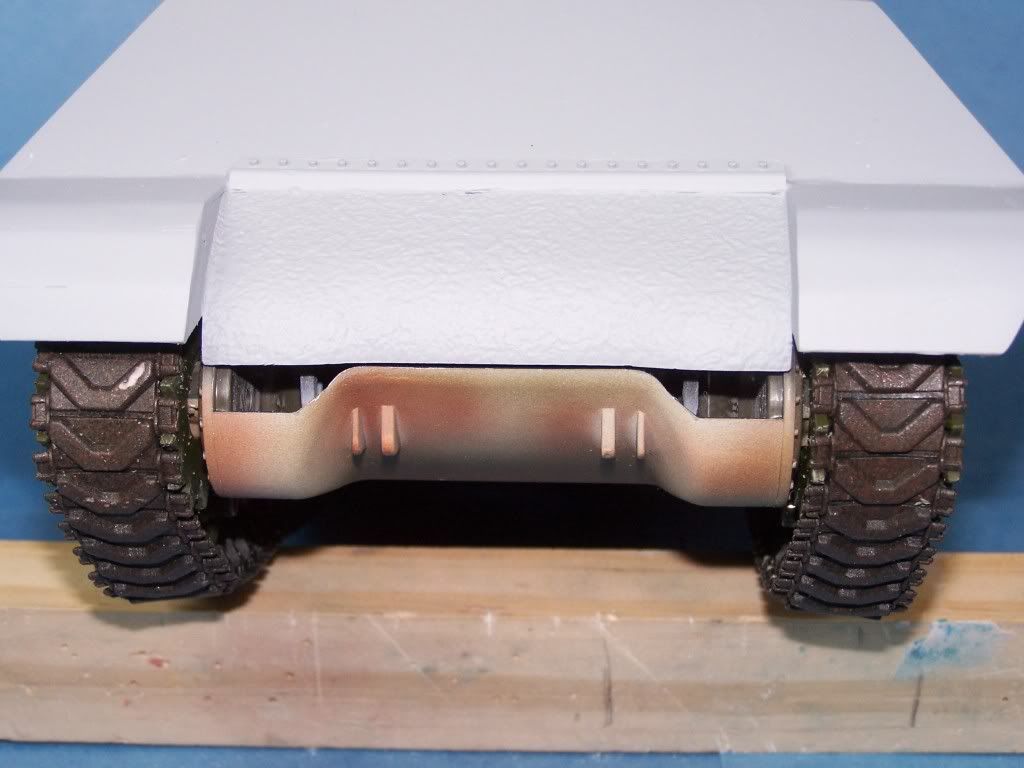
Here it is on top of a metal diecast hull. I am not sure if the all plastic is the same as the dicast. Regardless it will work. But you need to do a lot of modification for it to fit.
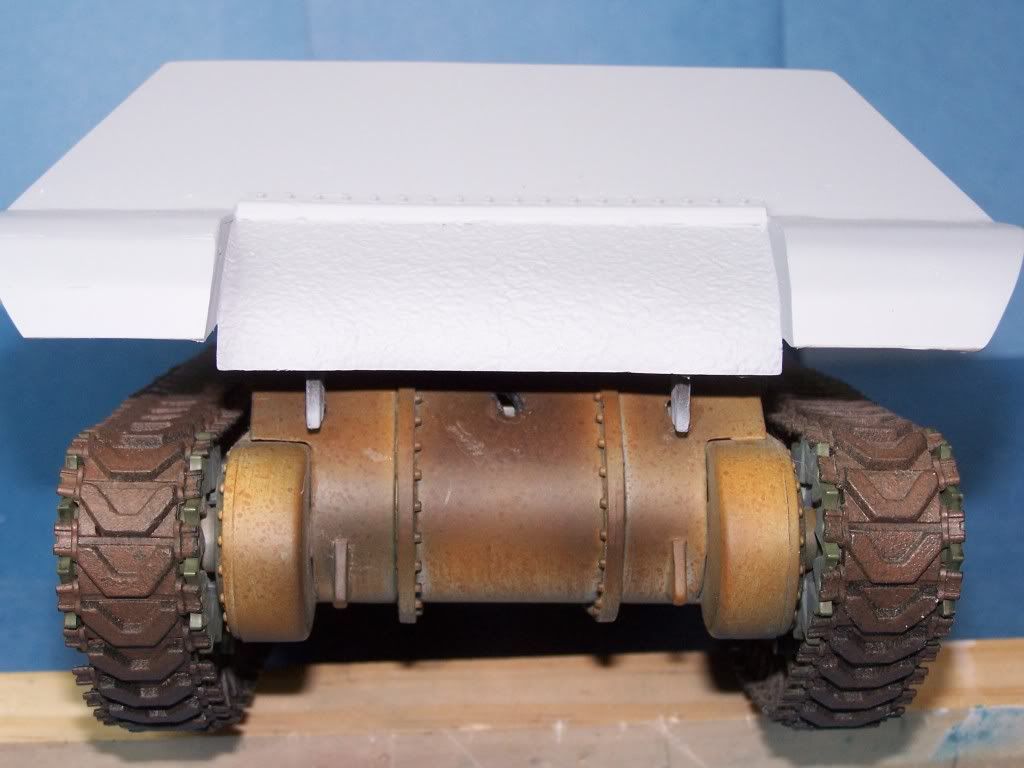
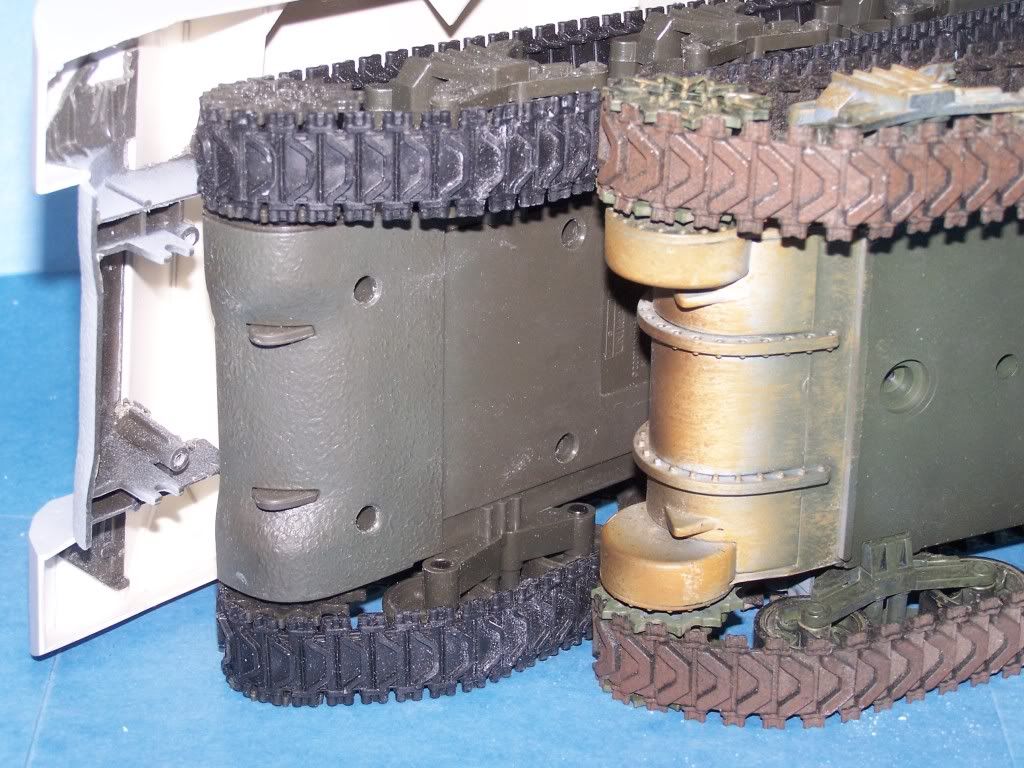
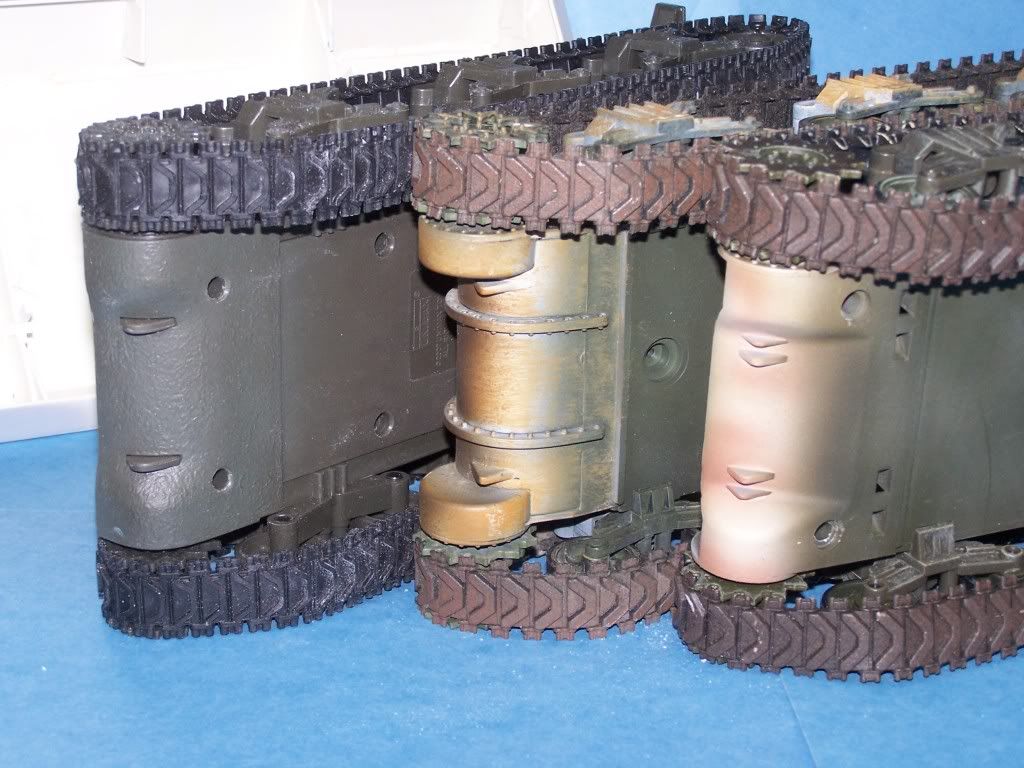
Here is the bottom of the FOV. What I can do is cast the FOV bottom and you can wittle down the 21st till it seats itself. The 3 piece with the bolts is actualy a cap.It will pop right off and the FOV will fit in there but you will have to grind down the axel casings till you get it to fit. This should not be that hard to do.
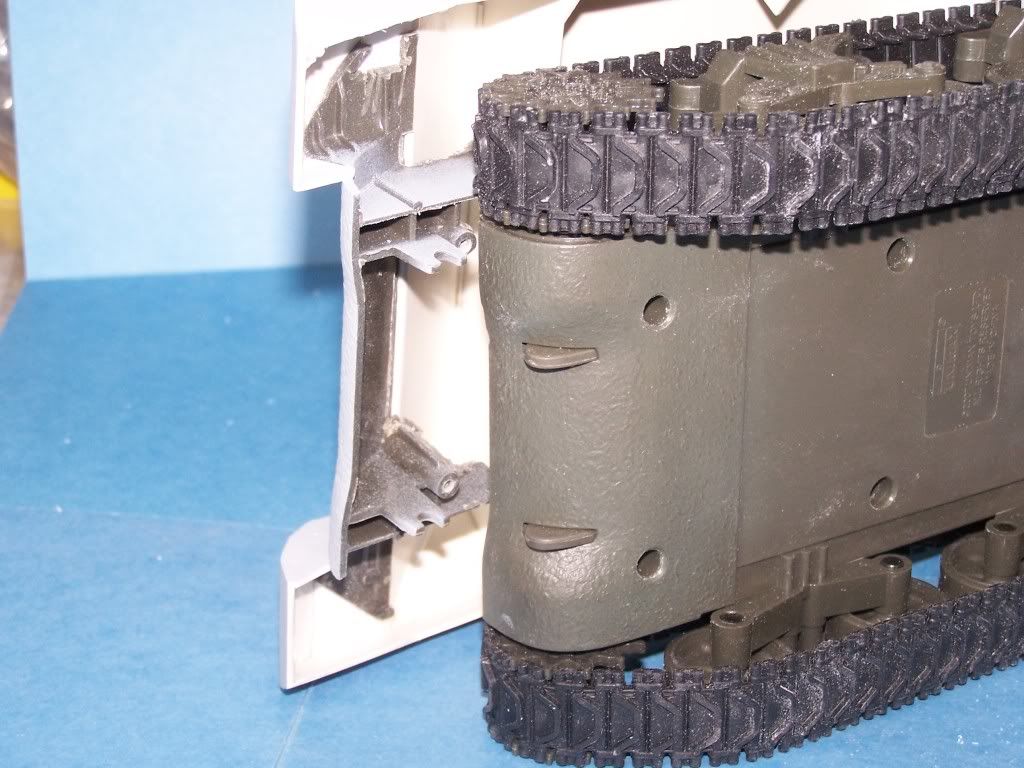
Here is the 21 and Fov bottoms for comparison. You need to pop off the tranny cover.
Here are all 3 for comparison. I am not sure about availability. But the BBI is the best to use for deatails but the drive sprocket is wrong. The 21st running gear has the best detail BUT YOU NEED TO BLANK IN THE WHEEL SPOKES. I used the FOV because you can still get them and they are the cheapest of the 3. But dthe etail is lacking.
So that is what I can do I can cast the bottom of the hull and sell it with the kit for those who will need it.
So Maybe that takes care of the lights and such. What about the groussers ?
Thanks Andrew on the Stuka parts. I am glad you like them.
Last edited by pickelhaube on Sat Apr 04, 2009 6:09 am, edited 1 time in total.
-
usmcchet9296
- Officer - 2nd Lieutenant

- Posts: 349
- Joined: Thu Feb 19, 2009 12:45 pm
- Location: So Cal
- Contact:
-
exether_mega
- Officer - Colonel

- Posts: 1314
- Joined: Thu Dec 09, 2004 10:35 am
- Location: Belgium
- Contact:
Thanks a lot Pickel !pickelhaube wrote:OK Phil here you go.exether_mega wrote:just a question : will it fit on a 21st Century Sherman base hull ?
If yes then we can pick all details from the upper hull (lift rings, tools, lights and so on).
phil
Here it is with a BBI Shermy. It will work as well. You just need to cut two little bits off of the bottom hull to close in the space. This should be easy to do.

I will choose the BBI option
Far better than the FOV.
phil
-
HardenSteel
- Sergeant

- Posts: 230
- Joined: Mon Oct 04, 2004 6:47 pm
- Location: Victoria, BC
Looks Great!
Wolverine on the way!
HD
Wolverine on the way!
HD
Last edited by HardenSteel on Sun Mar 15, 2009 7:51 pm, edited 1 time in total.
-
HardenSteel
- Sergeant

- Posts: 230
- Joined: Mon Oct 04, 2004 6:47 pm
- Location: Victoria, BC
I think a 17 pdr would be a good addition
to the fold. Can you do a 17 pdr to make
SP Achilles? It works for Firefly conversions,
as well. I think I'd go for that.
Just wanted to give a plug for the Stuka
guns and the M113 kits - Fabulous!
You don't realize how big everything
is until you get it. Plus, you get to
do some 1/18 scale modeling.
Shipping was very fast and packing brilliant.
I tend to think in 1/24th & 1/35 scale -
even though I've been doing 1/18 scale
for years. These Stuka guns are very big
and the detail is great! You definitely
are getting your money's worth on a
custom kit that is not going to appear
any other way.
This kind of custom work that we're seeing
by various board members really helps
to keep 1/18 scale alive and interesting.
Looking forward to getting the Pave Hawk custom kits.
Well done and thanks!
-
pickelhaube
- Officer - Brigadier General

- Posts: 9698
- Joined: Mon Jan 22, 2007 5:52 am
- Location: New Orleans
Hey Zelda,1958Zelda wrote:I think just the basic turret and hull is fine,it looks great!
Thanks for the compliment. I think your right I will let the modeler take the handels and stuff off of their mother tank. this will keep the cost down and maybe get this project out quicker.
I have been busy all this week with my real job, just at the right time. The down side is that I have not worked on this as much as I liked. But I have made the panel lines and bolts to the rear of the hull. I also have the hull turret ring worked out along with the actual turret ring sleave .
The only major thing left to do is work out the front hatches. I am on the fence about making them static or able to open. Any opinions on this ?
Harden Steele,
Thanks for the compliment on the Stuka kit as well. I am glad you like it.
If you can get me some info on the 17 pounder , maybe I could do a Britsh version. I NEED TO SEE IT FIRST . Do you have a model of the Wolvereen ?
-
HardenSteel
- Sergeant

- Posts: 230
- Joined: Mon Oct 04, 2004 6:47 pm
- Location: Victoria, BC
The Wolverine is the USA M10 armed with the 76mm ( 3") gun.
The Achilles is the 17pdr (76.2mm) gun version of the M10.
These are the best references I could find for the moment :
http://en.wikipedia.org/wiki/17pdr_SP_Achilles
http://www.toadmanstankpictures.com/achilles.htm
http://www.aircraftwalkarounds.be/Image ... index.html
http://www.hyperscale.com/galleries/200 ... esfd_1.htm
Both Academy and AVR Club have produced 1/35 scale models of the Achilles (as well as the M10!).
Funny, that you don't see more models pictures or review of it on-line.
Anyway, I hope this helps!
HD


