I agree with Tman , your prices are reasonable. The amount of time, money, materials and labor it takes a project to
go from an idea to a kit is what collectors and modelers need to keep in mind.
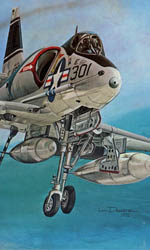
Your Focke-Wulf Ta 183 is quality all the way, so the Me 163 will be a welcomed addition to my collection.
1/18 Me163B-1

Re: 1/18 Me163B-1
Wow Nathan, I've been away for a while, this is looking great! Price seems fair.
"There are some people who disagree with me, they are wrong." --Gen George S. Patton

Re: 1/18 Me163B-1
You really seem to have nailed the shape! Beautiful work as usual! Price certainly is very reasonable!! Great work!!!!
-
pizzaguy
- Officer - 1st Lieutenant

- Posts: 518
- Joined: Mon Oct 16, 2006 8:25 pm
- Location: Illinois
- Contact:
Re: 1/18 Me163B-1
Trying to use flickr now that photobucket has screwed things up. Can't get anything for free anymore  .
.
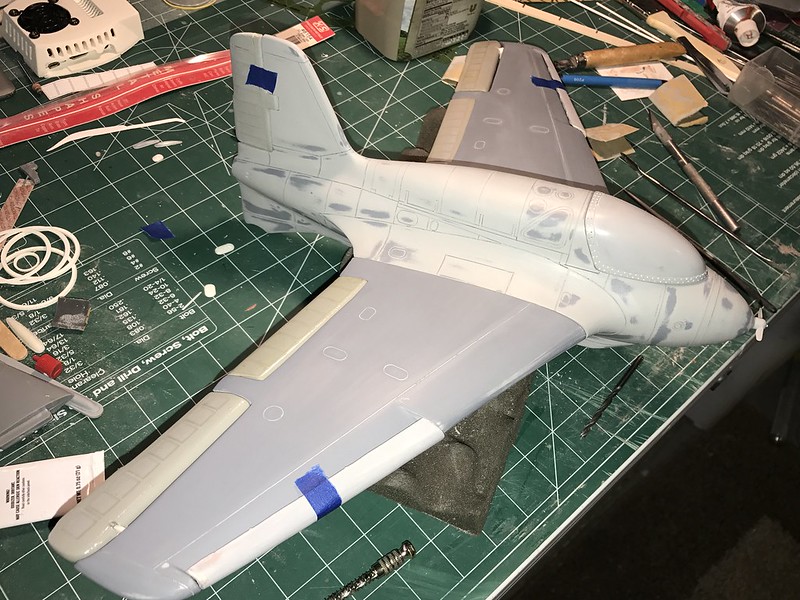
After hours of sanding and filling I finally got to the point where I could add some panel line stencils. Few coats of primer, little sanding and panel lines. Then on to fiberglass molding.
Who is interested in the in flight version kit? No cockpit and static skid. Not much else. I can get those versions out before I start work on the full kit components. Prices in earlier posts.
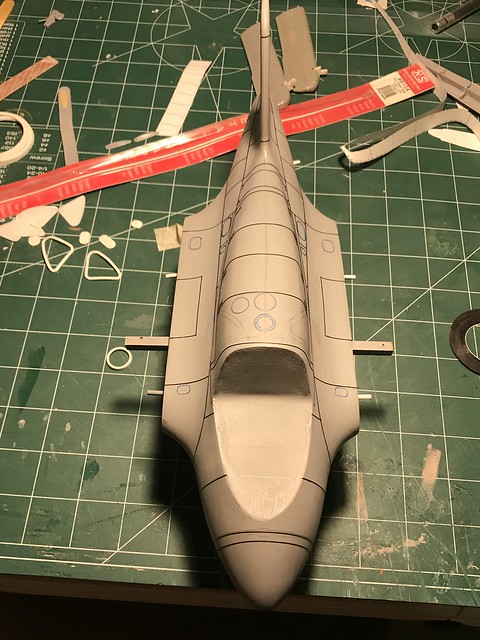
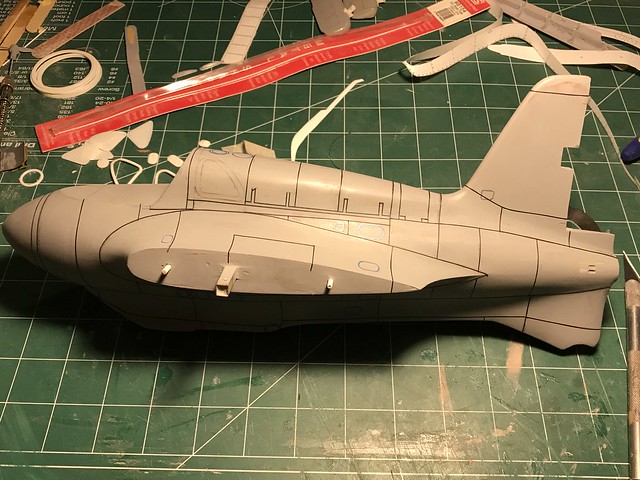
-
normandy
- Officer - Brigadier General

- Posts: 6028
- Joined: Mon Oct 04, 2004 6:30 pm
- Location: Atlantic Coast
Re: 1/18 Me163B-1
WOW, coming along nicely Nathan. I'd like to order one of each kit.
Another idea for a diorama...
Another idea for a diorama...
Last edited by normandy on Thu Jul 27, 2017 12:35 pm, edited 1 time in total.
-
tmanthegreat
- Officer - Brigadier General
- Posts: 11240
- Joined: Tue Oct 05, 2004 7:38 pm
- Location: Central California
Re: 1/18 Me163B-1
Nathan,
I am interested in the full kit with cockpit details. Thanks and the model is looking really good
I am interested in the full kit with cockpit details. Thanks and the model is looking really good
"If you fail to plan, you plan to fail."
Re: 1/18 Me163B-1
That looks absolutely super!!!! You're a true artist!!! My greatest admiration! I'm definitely in for one full kit at least!
Re: 1/18 Me163B-1
I'll want the in flight version.
"There are some people who disagree with me, they are wrong." --Gen George S. Patton
-
pizzaguy
- Officer - 1st Lieutenant
- Posts: 518
- Joined: Mon Oct 16, 2006 8:25 pm
- Location: Illinois
- Contact:
Re: 1/18 Me163B-1
Panel Lines are complete. Debating on adding panel rivets/screws. Ya or Na?
Few more small details to complete before molds. Please point out any fixable issues. I'm going cross eyed looking at this for weeks.
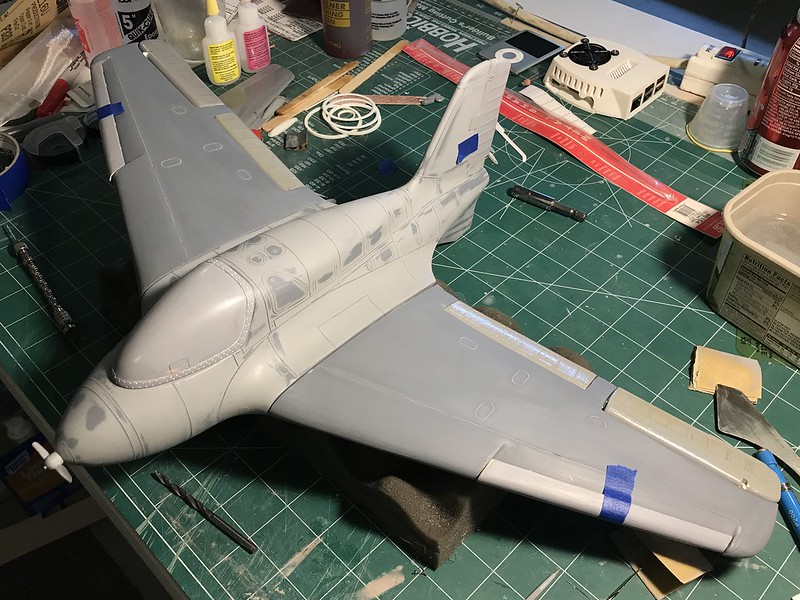

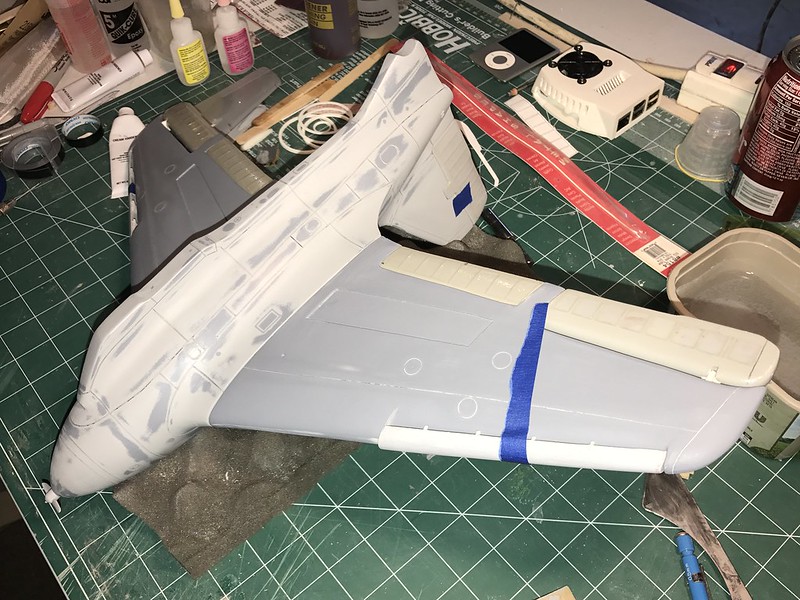

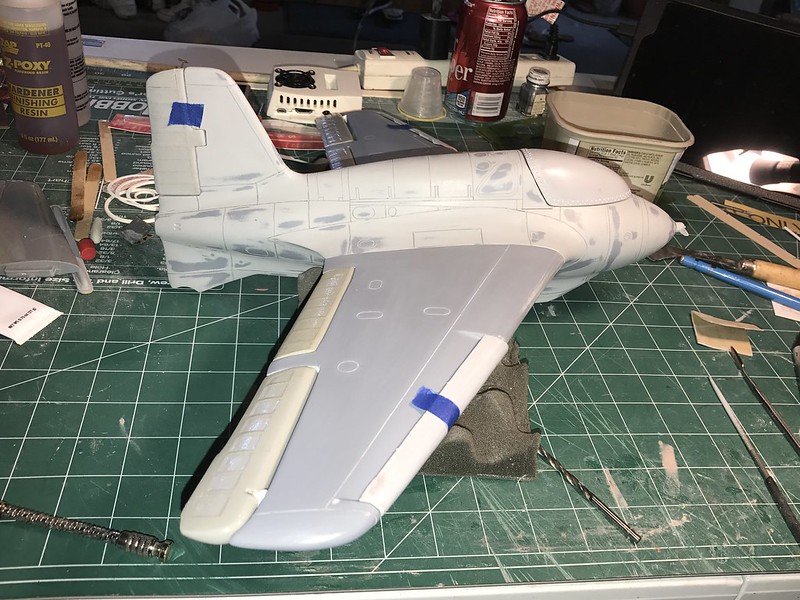

Few more small details to complete before molds. Please point out any fixable issues. I'm going cross eyed looking at this for weeks.
Re: 1/18 Me163B-1
More detail is always nice.
"There are some people who disagree with me, they are wrong." --Gen George S. Patton
-
normandy
- Officer - Brigadier General
- Posts: 6028
- Joined: Mon Oct 04, 2004 6:30 pm
- Location: Atlantic Coast
Re: 1/18 Me163B-1
Out standing job Nathan!
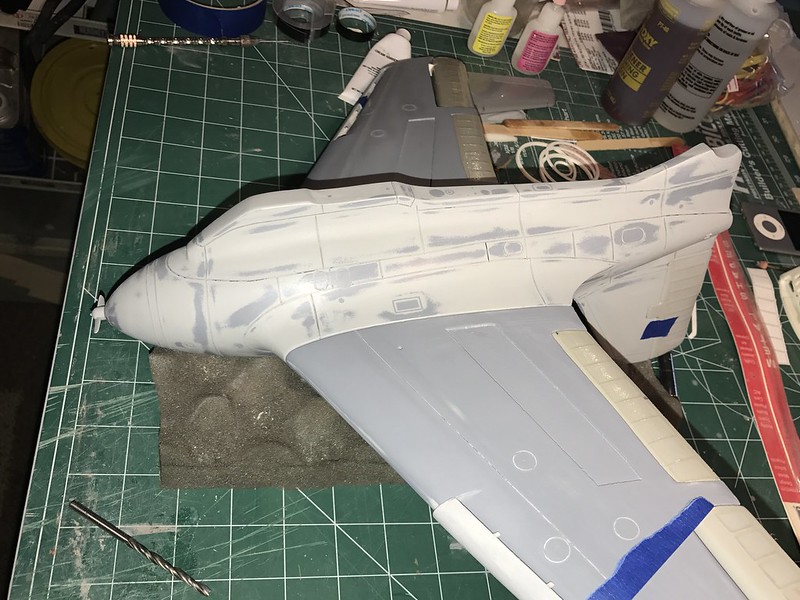
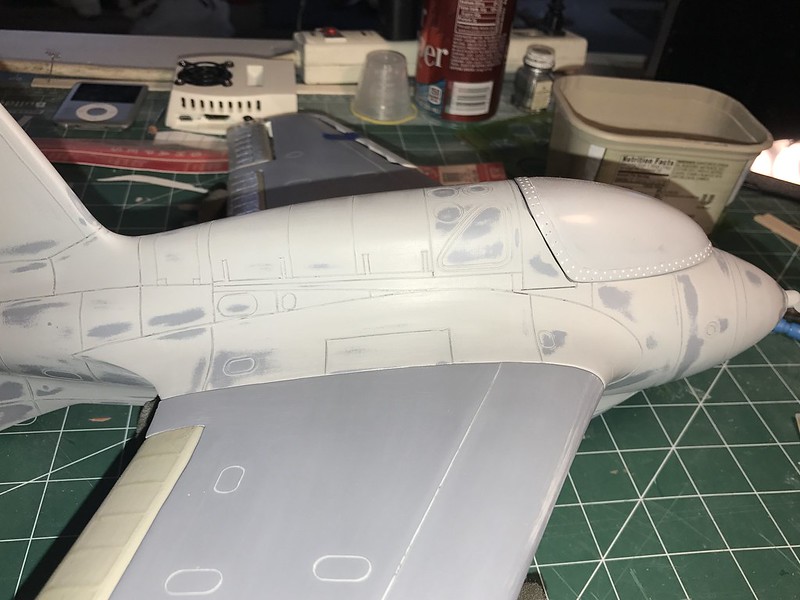
The only thing I see is the Canopy/windscreen, at the front of the Komet...it looks as if it starts to
go straight up before it starts to curve or angle back towards the rear of the Komet or is it the pictures?
Here is a pic from the National Museum of the United States Air Force, which shows the difference.

Looking closer at the second to last picture in your post, I see I was mistaken. From that pic it seems fine.
The only thing I see is the Canopy/windscreen, at the front of the Komet...it looks as if it starts to
go straight up before it starts to curve or angle back towards the rear of the Komet or is it the pictures?
Here is a pic from the National Museum of the United States Air Force, which shows the difference.
Looking closer at the second to last picture in your post, I see I was mistaken. From that pic it seems fine.
-
pickelhaube
- Officer - Brigadier General
- Posts: 9706
- Joined: Mon Jan 22, 2007 5:52 am
- Location: New Orleans
Re: 1/18 Me163B-1
The panel lines look great !!!
Kirk Douglas : Mine hit the ground first
John Wayne : Mine was taller

John Wayne : Mine was taller
-
pizzaguy
- Officer - 1st Lieutenant
- Posts: 518
- Joined: Mon Oct 16, 2006 8:25 pm
- Location: Illinois
- Contact:
Re: 1/18 Me163B-1
Thank you for the compliments.
Norm, Thank you for pointing that out. I will confirm the canopy is close to the drawings. I had a canopy issue with the 183 project, so I want to do better on this one. I'm with you, the angle might be playing tricks.
Norm, Thank you for pointing that out. I will confirm the canopy is close to the drawings. I had a canopy issue with the 183 project, so I want to do better on this one. I'm with you, the angle might be playing tricks.
Re: 1/18 Me163B-1
You are an absolute artist! That just looks fabulous!!!
I'd tend to agree with the comment on the shape of the canopy. Two other very minor things you may want to consider:
- The small vents just ahead of the exhaust should sit in the middle; in the photos, it appears they're positioned just above the midline.
- It seems the pitch of the blades of the small generator prop is a bit flat, they should be a bit more vertical.
You can use the Bentley drawings you've got to check for shape and position - these drawings are very accurate. There's also an unrestored Me 163B-1a on display at the NASM Udvar-Hazy Center in Chantilly, Va if you'd want to have a look at the real thing. Otherwise, it all looks spot on!
As regards rivets / screws: I'd add the screws around the fairings for the skid, and middle and rear parts of the wing root. These fairings were held in place with screws and were intended to be easily removable - so these screws are quite visible. I wouldn't bother with rivets, though: rivets on high performance aircraft are counter-sunk, and generally hard to see even on a real aircraft, especially when they're covered with paint. Also, on high speed aircraft like the Me 262, He 162 and Me 163, rivets and certain panel lines tended to be filled in with putty and sanded smooth, to reduce aerodynamic drag to a minimum - so in that case, they wouldn't be visible at all. In addition, the Me 163 wing was largely constructed of wood, so no rivets there.
I'm really astounded at the quality of your work. This is really a piece of art!
-
pizzaguy
- Officer - 1st Lieutenant
- Posts: 518
- Joined: Mon Oct 16, 2006 8:25 pm
- Location: Illinois
- Contact:
Re: 1/18 Me163B-1
Thank you for the input. Three things isn't bad. Mr. Bentley was kind enough to scale his drawings down to 1/18 scale. They have been huge help. I have been getting a lot of requests for stands, so I am going to take the opportunity to stock the war chest. I hope to be back to work on the 163 in a couple weeks. It's good to step away from a project for a while and come back with fresh eyes.
-
pizzaguy
- Officer - 1st Lieutenant
- Posts: 518
- Joined: Mon Oct 16, 2006 8:25 pm
- Location: Illinois
- Contact:
Re: 1/18 Me163B-1
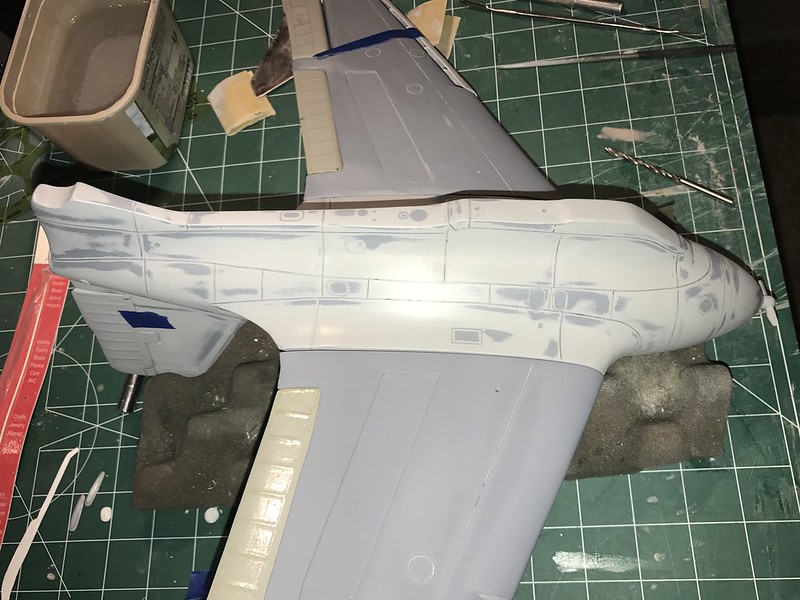
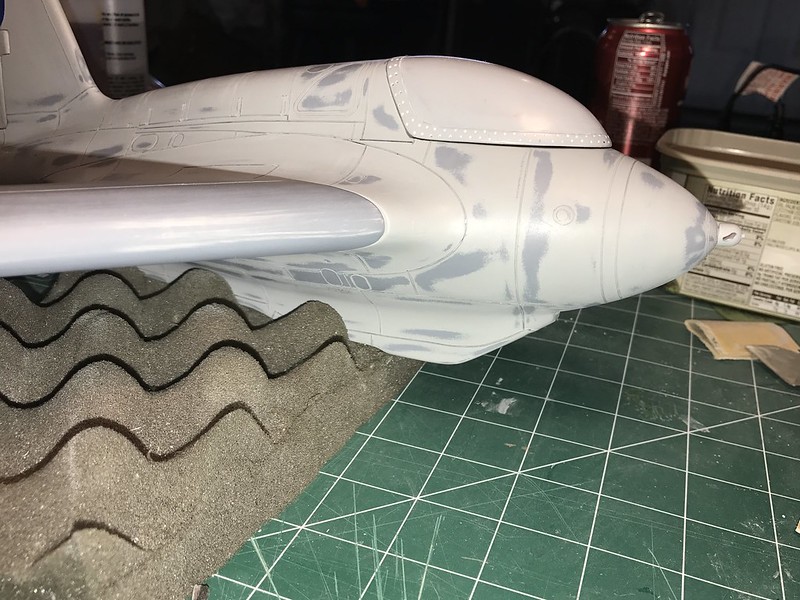
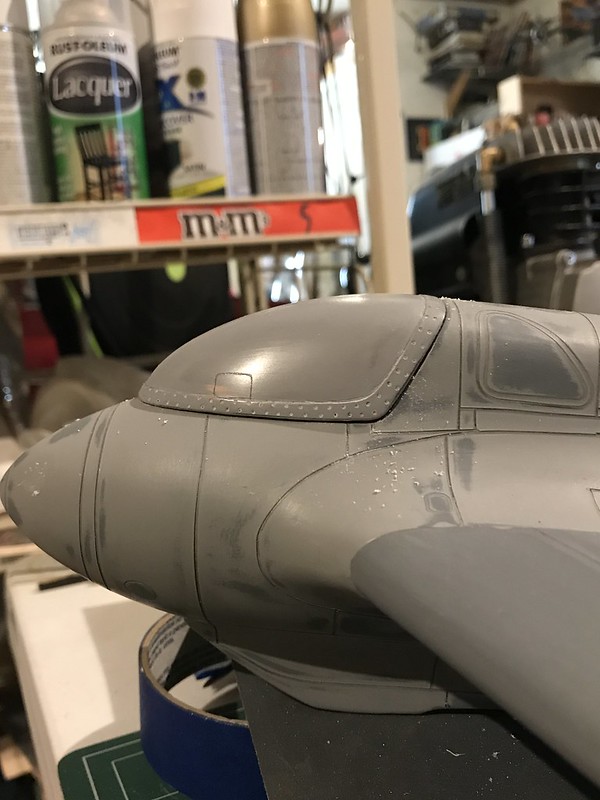
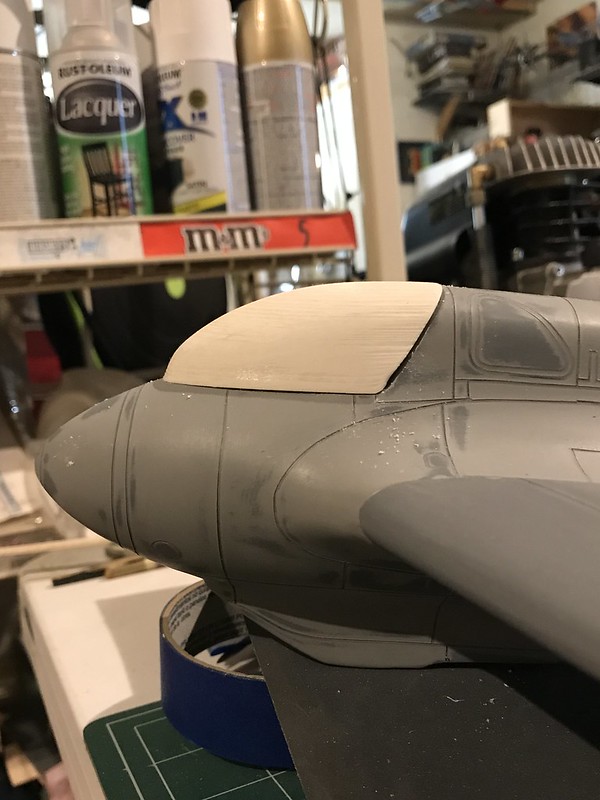
The new profile is very close to the Bentley drawings. How's it look?
Before:
After:
Before:
After:
-
normandy
- Officer - Brigadier General
- Posts: 6028
- Joined: Mon Oct 04, 2004 6:30 pm
- Location: Atlantic Coast
Re: 1/18 Me163B-1
The shape of the Canopy in the first picture marked (before) looks good. 
Re: 1/18 Me163B-1
Actually, the 'before' canopy in picture 1 is a bit too sloped.
The 'after' canopy in picture 2 looks great to my eye, except in its lowest, forward-most part: there's a bit of a break in the slope, whereas it should be a flowing line. Some quick sanding should take care of that.
Great work!!!
The 'after' canopy in picture 2 looks great to my eye, except in its lowest, forward-most part: there's a bit of a break in the slope, whereas it should be a flowing line. Some quick sanding should take care of that.
Great work!!!
Re: 1/18 Me163B-1
My eye likes the look of the before, but the after is definitely more accurate looking I would say.
How much longer on this one before you start pouring and selling?
How much longer on this one before you start pouring and selling?
-
pizzaguy
- Officer - 1st Lieutenant
- Posts: 518
- Joined: Mon Oct 16, 2006 8:25 pm
- Location: Illinois
- Contact:
Re: 1/18 Me163B-1
Hoping to get the fiberglass mold made next week of the fuselage.
I am going to make a silicone mold of the canopy and cast with clear resin.
Slow but I am making some progress.
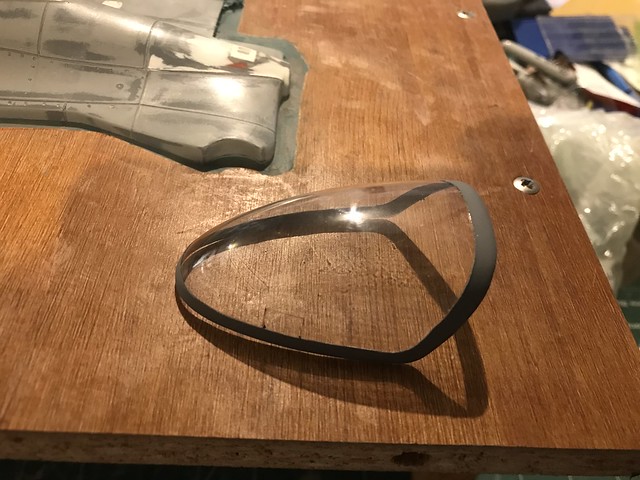
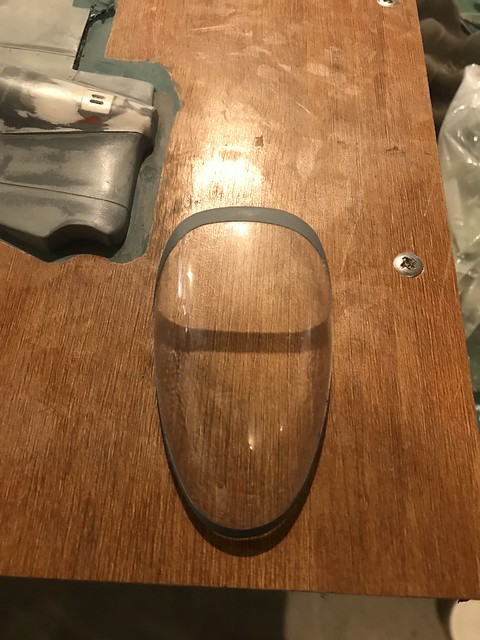
I am going to make a silicone mold of the canopy and cast with clear resin.
Slow but I am making some progress.
Re: 1/18 Me163B-1
Looks great! Saw the real deal yesterday.


"There are some people who disagree with me, they are wrong." --Gen George S. Patton
-
normandy
- Officer - Brigadier General
- Posts: 6028
- Joined: Mon Oct 04, 2004 6:30 pm
- Location: Atlantic Coast
Re: 1/18 Me163B-1
Nice progress on the 163!!
YT, is that the National Air and Space Museum? Cool to see it in its orignal (?) paint scheme.
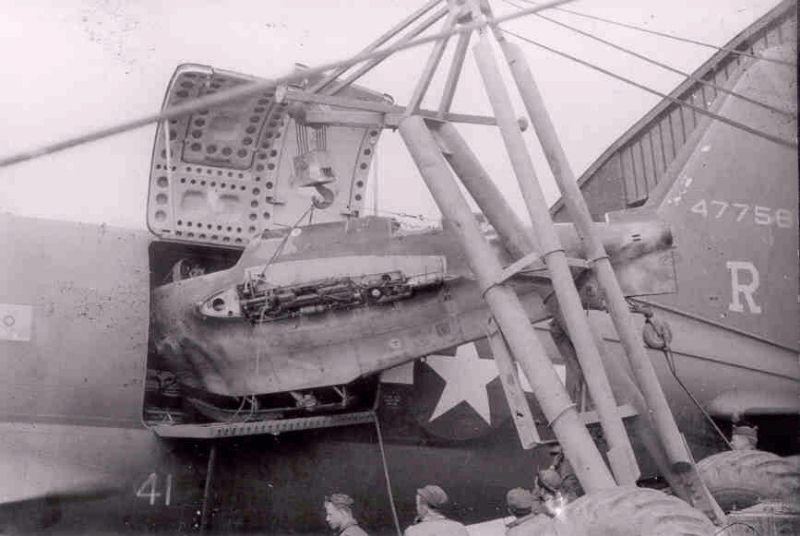
This is a Komet arriving at Freeman Field...

YT, is that the National Air and Space Museum? Cool to see it in its orignal (?) paint scheme.
This is a Komet arriving at Freeman Field...
Re: 1/18 Me163B-1
Yes sir, visited the annex this week.
"There are some people who disagree with me, they are wrong." --Gen George S. Patton
-
pizzaguy
- Officer - 1st Lieutenant
- Posts: 518
- Joined: Mon Oct 16, 2006 8:25 pm
- Location: Illinois
- Contact:
Re: 1/18 Me163B-1
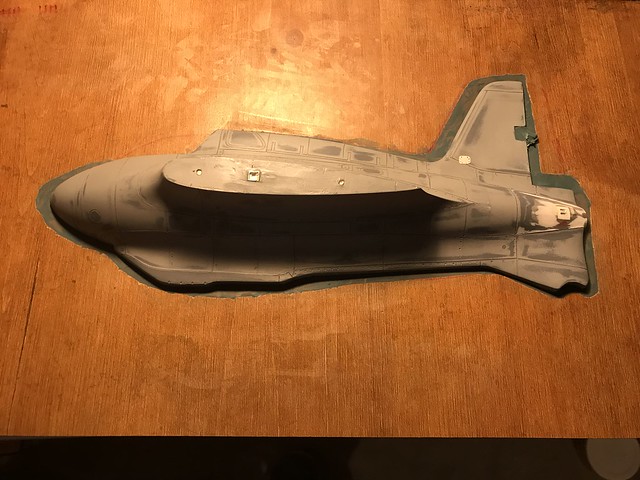
Fuselage mold is complete. Few coats of wax and it's ready to start producing.
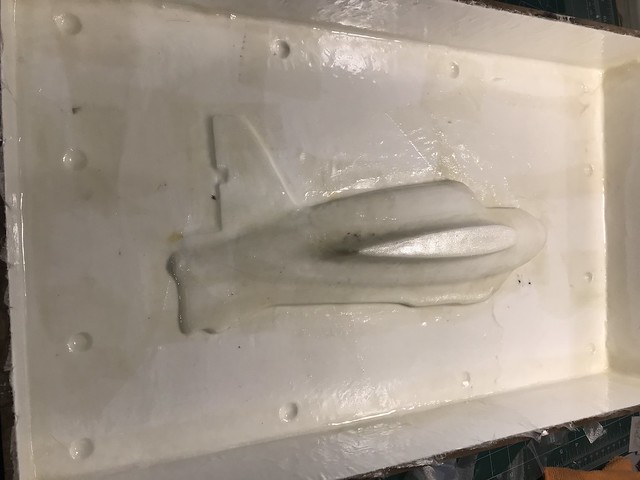
Plug removed and cleaned

Plug didn't survive the flight. Lesson don't skimp on the partall.

Moving on to the wings.
Plug removed and cleaned
Plug didn't survive the flight. Lesson don't skimp on the partall.
Moving on to the wings.
-
normandy
- Officer - Brigadier General
- Posts: 6028
- Joined: Mon Oct 04, 2004 6:30 pm
- Location: Atlantic Coast
Re: 1/18 Me163B-1
You had me with partall 
 ahh Mold Release.
Very impressive work, the details on the Komet and the molds....thats a ton of work!
Well Done!
Just wanted to say, a few years ago I was making a 2 part mold of a Verlinden 1:16 street
lamp and the mold release I used was not compatible with the RTV rubber. So I ended up with a nice
block of rubber with all the lamp parts inside.
Can't wait to get started on the Komet.