
Thanks for the comment and the info. I also noticed a Velspar spray paint at Lowes that looked like the proper Seafoam green. I have a NAPA near me so I will look and compare the colors for future conversions.
I will be adding another update tomorrow.
Back dated a M113A2 to a Vietnam era M113A1 with 106mm
Re: 1/18 custom Vietnam era M113 with 106mm recoilless rifle
**UPDATE #10** I primed the exterior hull. I will touch up some areas before I put the first coat of paint on.
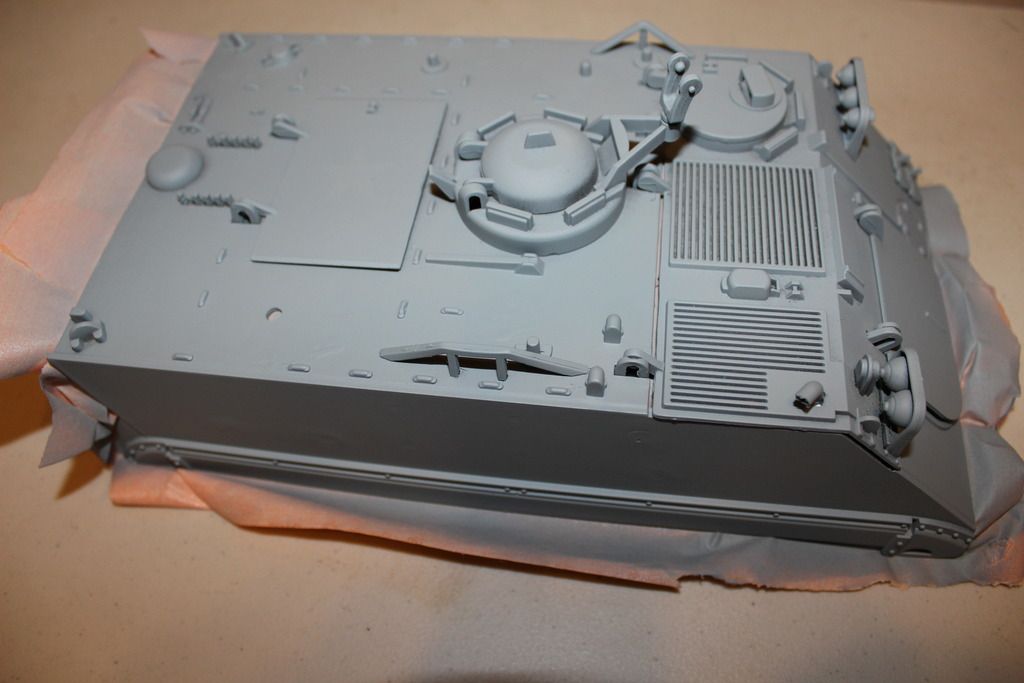

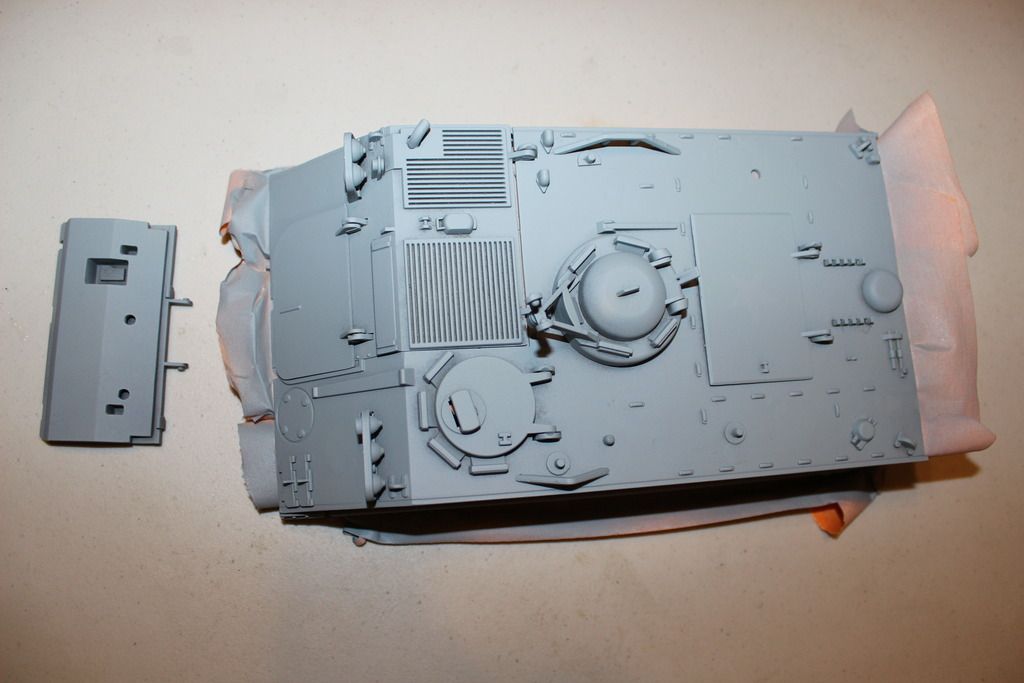
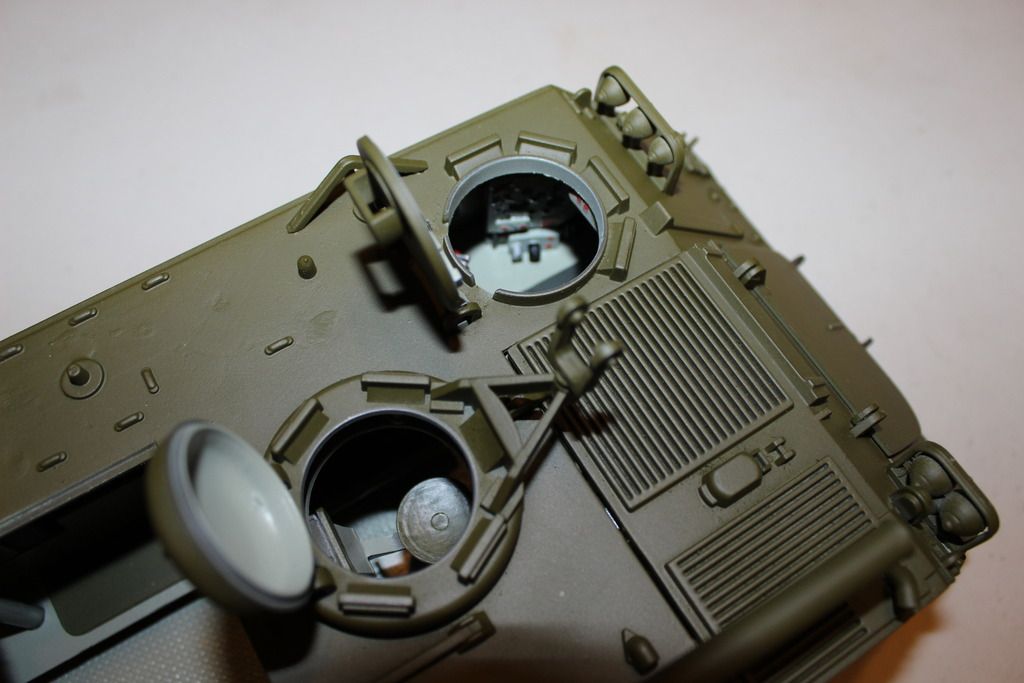
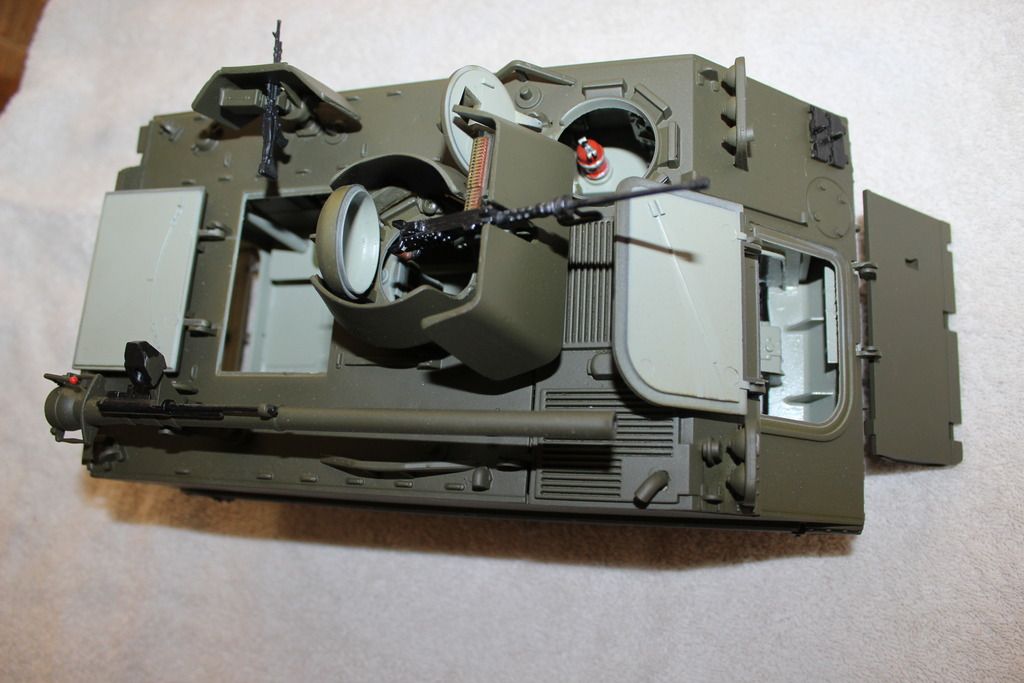
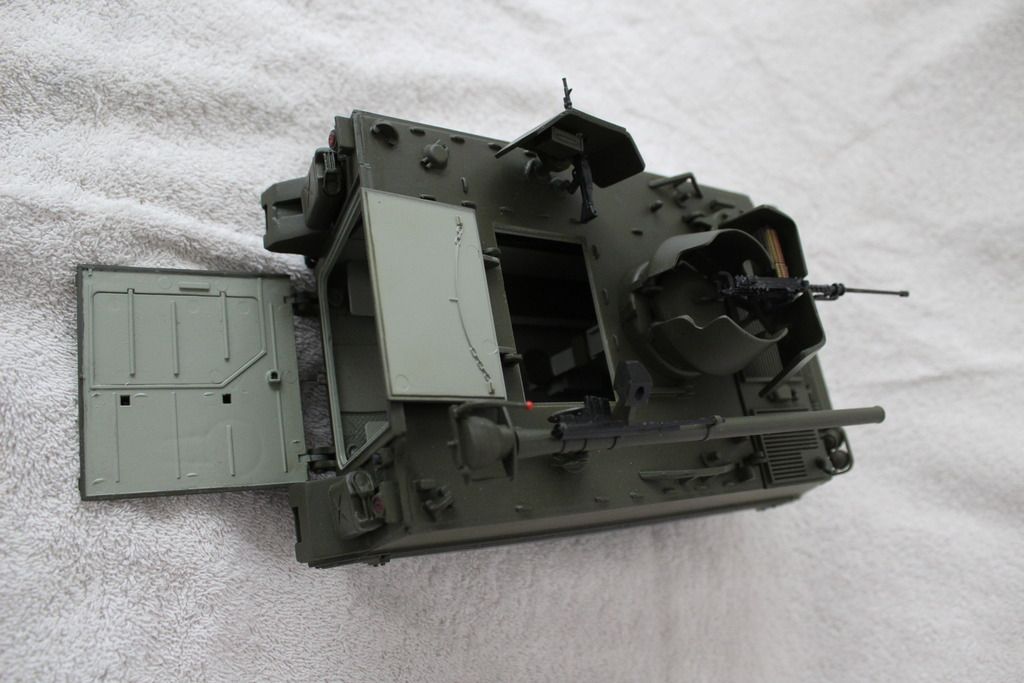
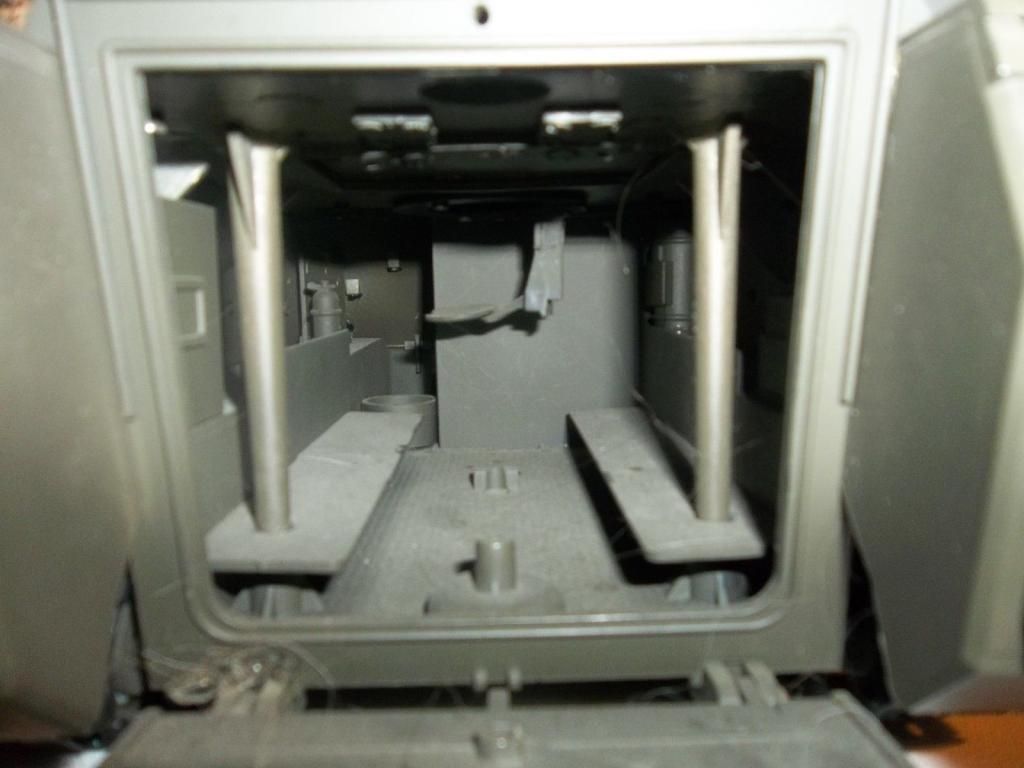
I went ahead and glued in the cargo for the interior.
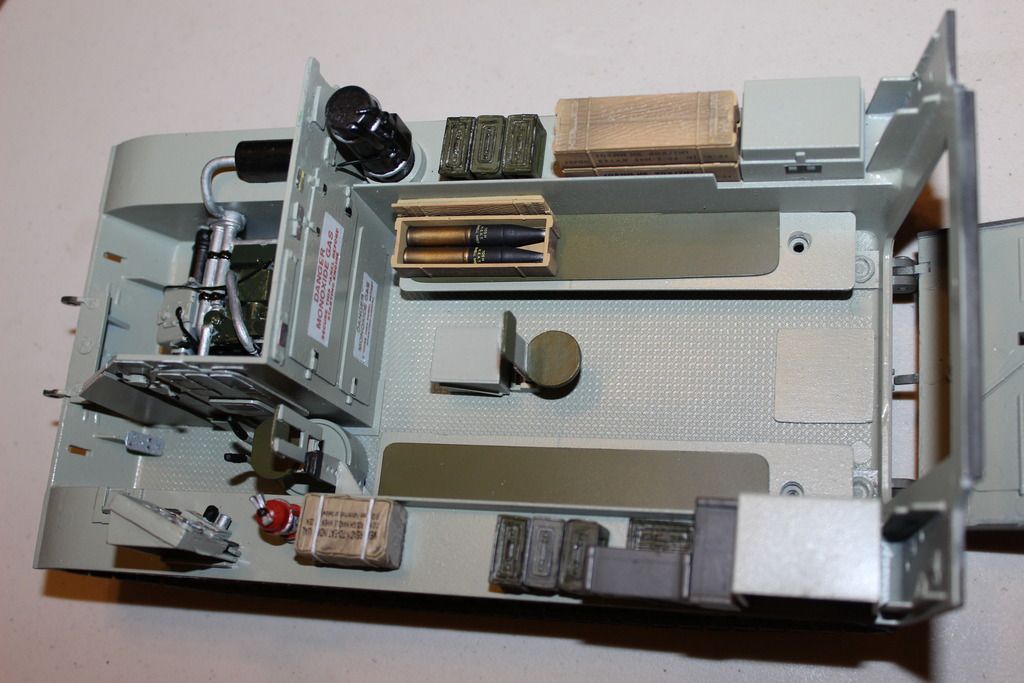
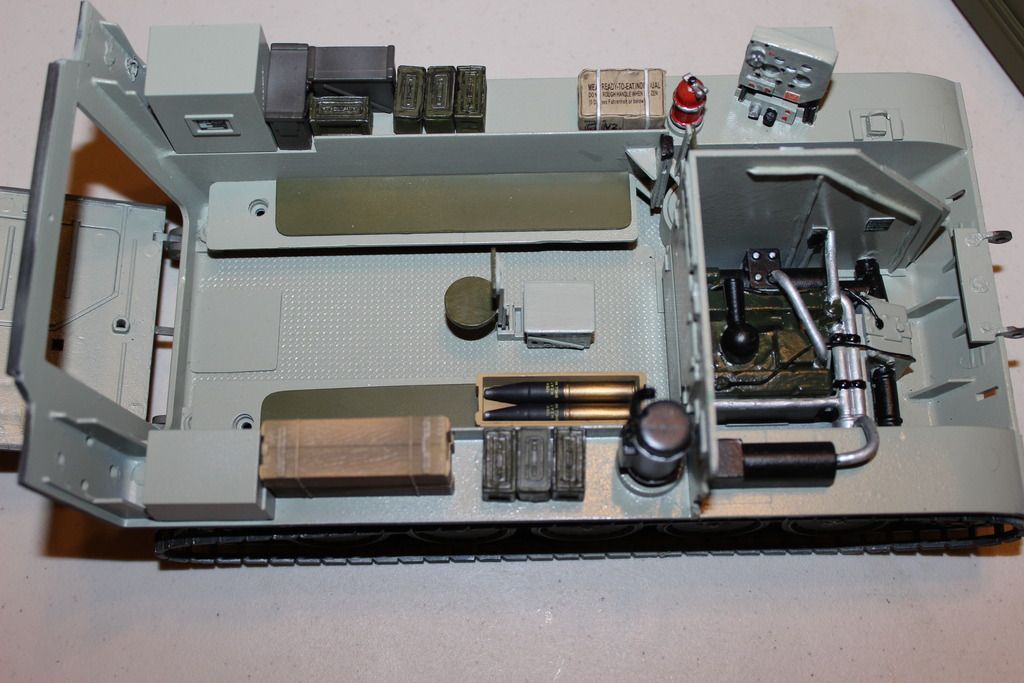
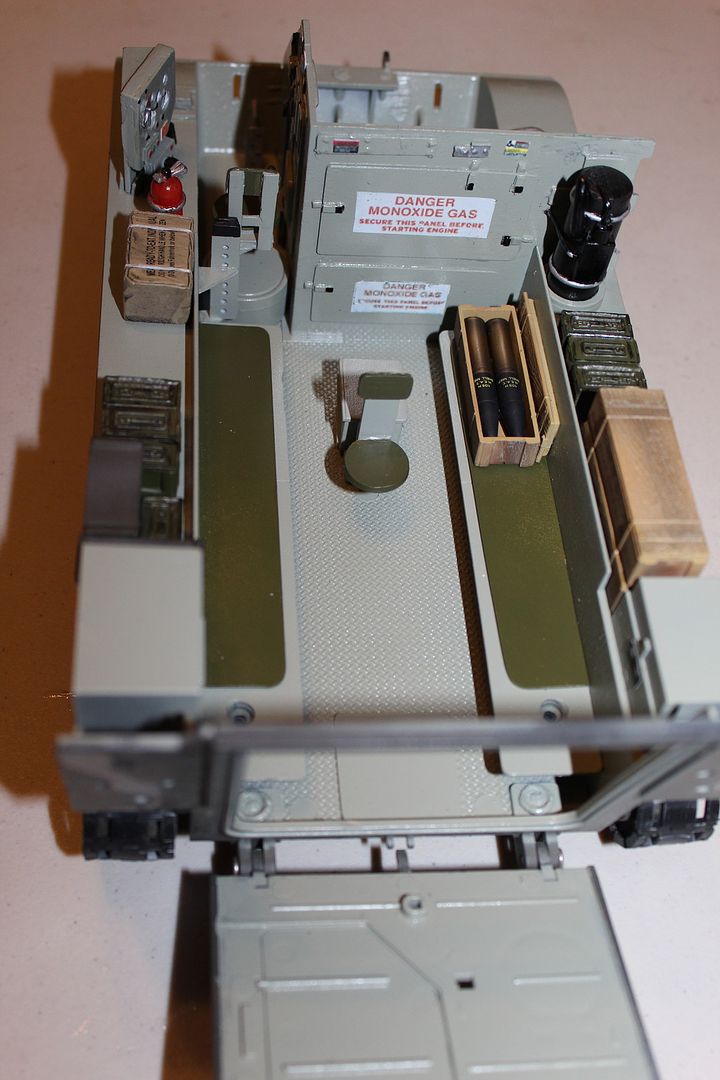
I put the hull on and photographed how it would look inside the hull assembled.
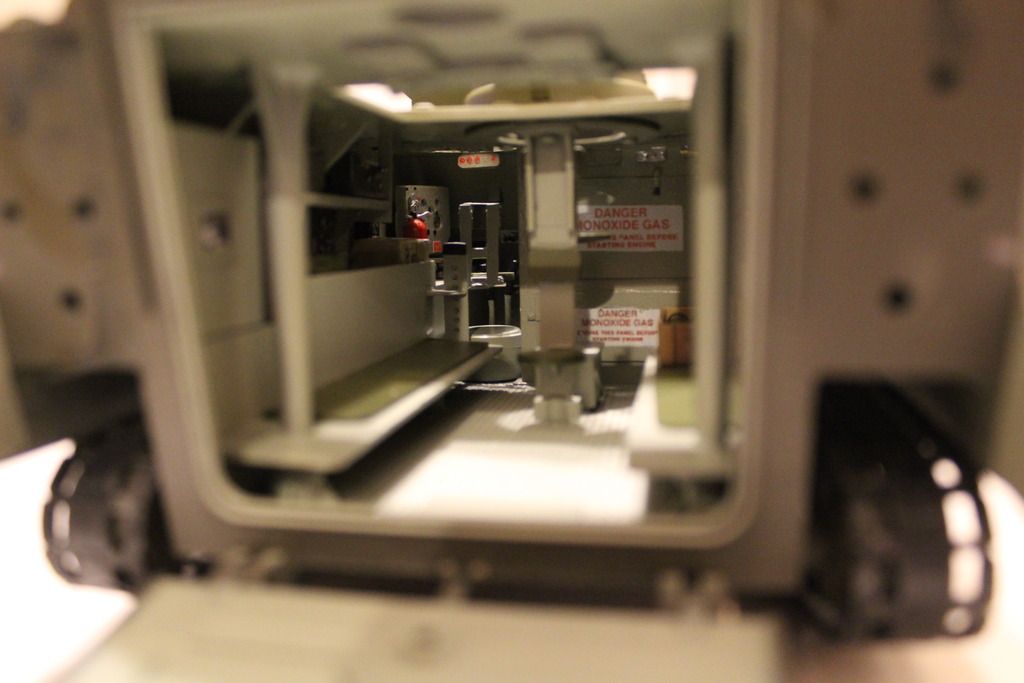
Next I will paint the first coat of the exterior paint and start making the fenders for the rear of the APC.


I went ahead and glued in the cargo for the interior.


I put the hull on and photographed how it would look inside the hull assembled.


Next I will paint the first coat of the exterior paint and start making the fenders for the rear of the APC.
Last edited by rschaap on Tue Mar 24, 2015 9:28 am, edited 1 time in total.
Re: 1/18 custom Vietnam era M113 with 106mm recoilless rifle
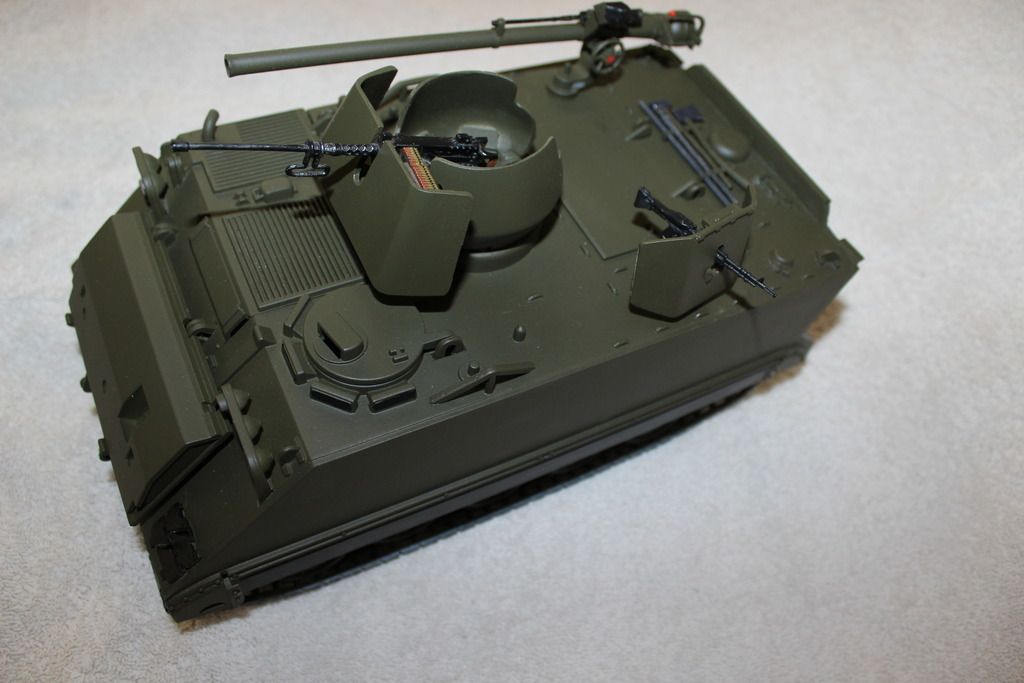
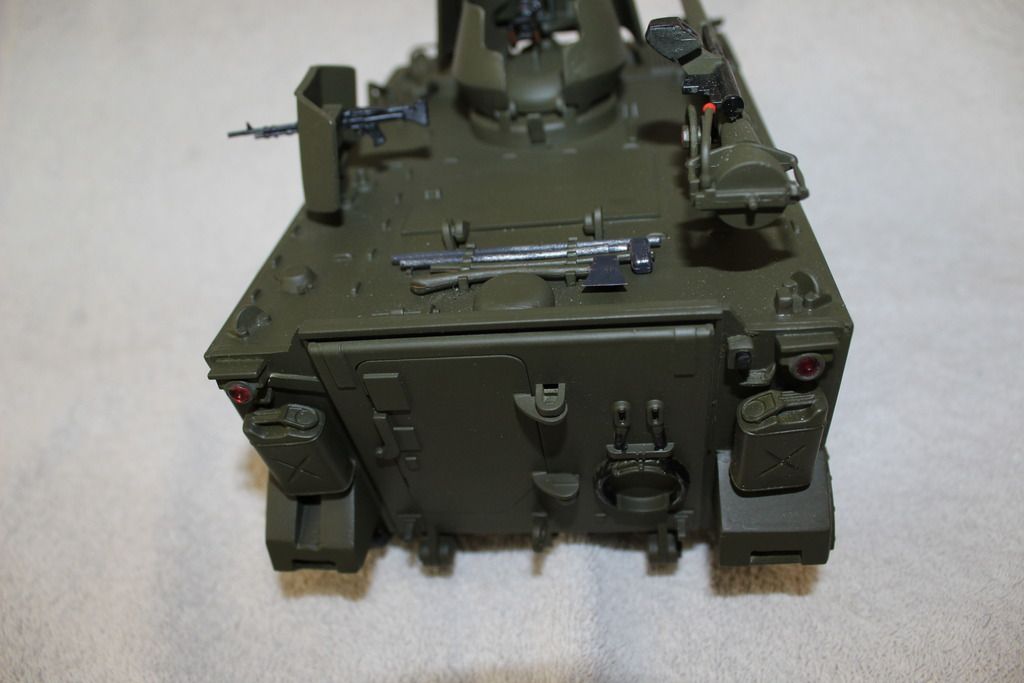
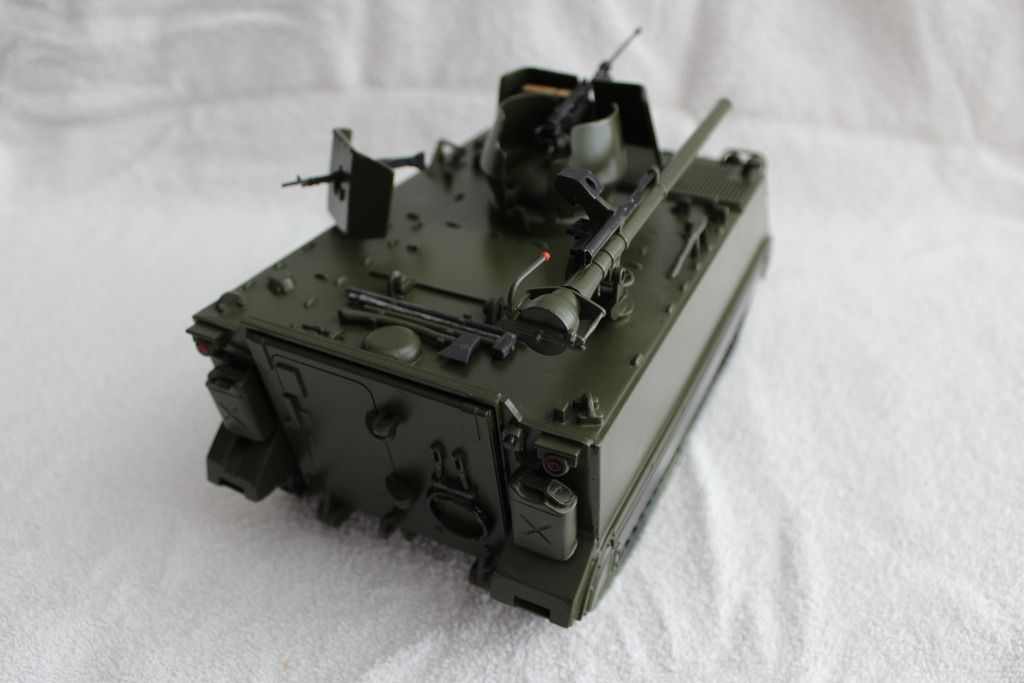
**UPDATE #11** I painted the hull with Testors Dark Olive Drab #1610. I attached the 106mm recoilless rifle to the hull and installed the hull to the chassis.
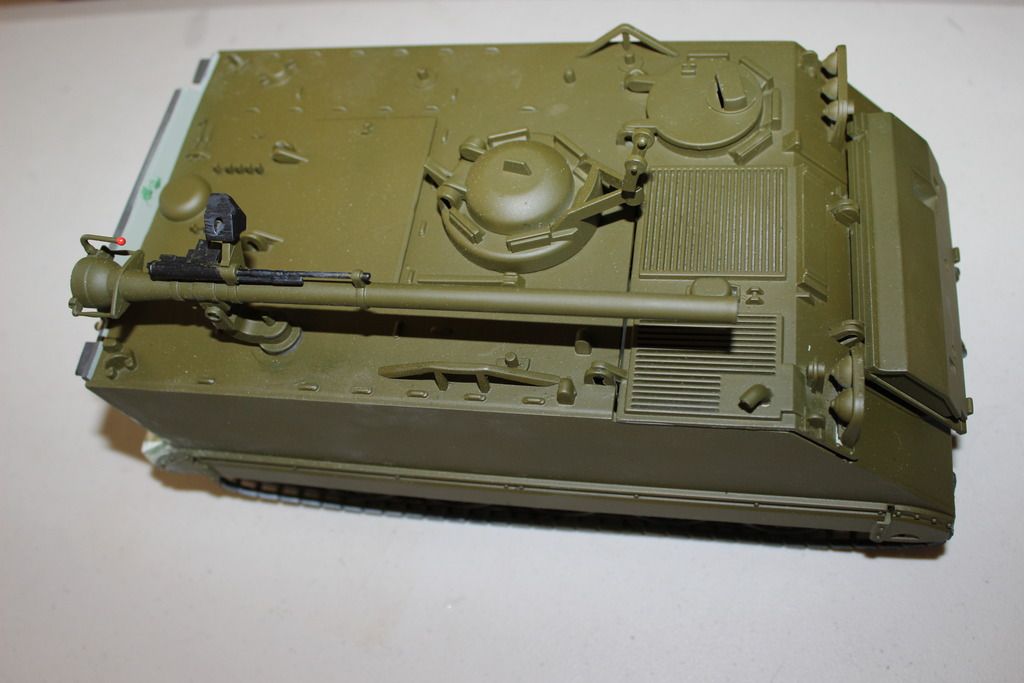
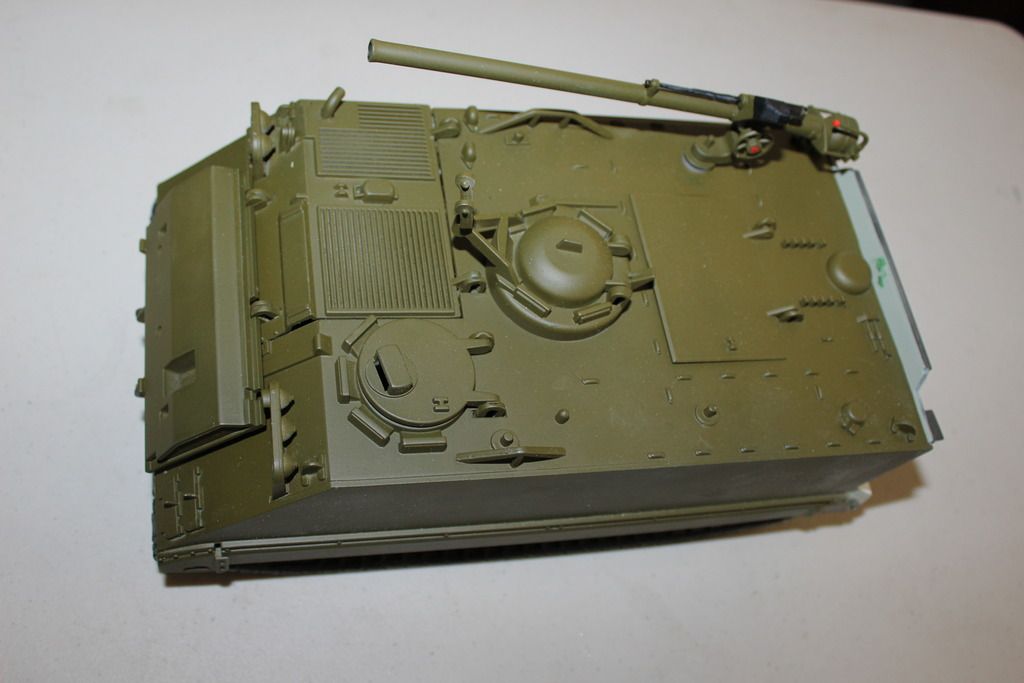
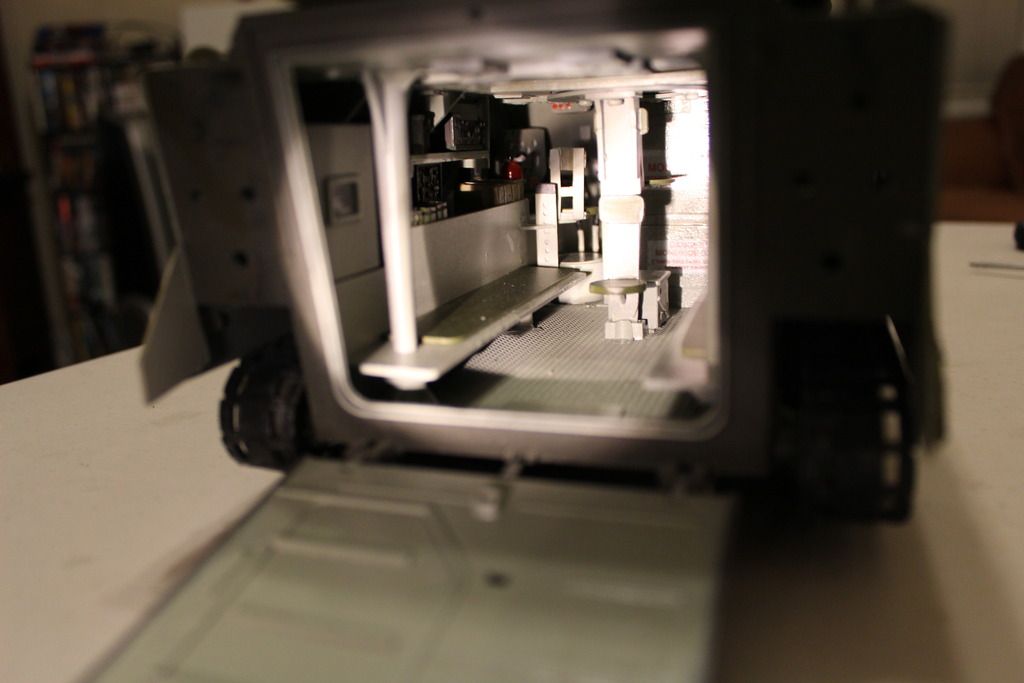
I took a photo of the engine compartment with the hull assembled. I'm actually thinking about making the radiator and air cleaner for the engine compartment (#6-9 in the last picture).
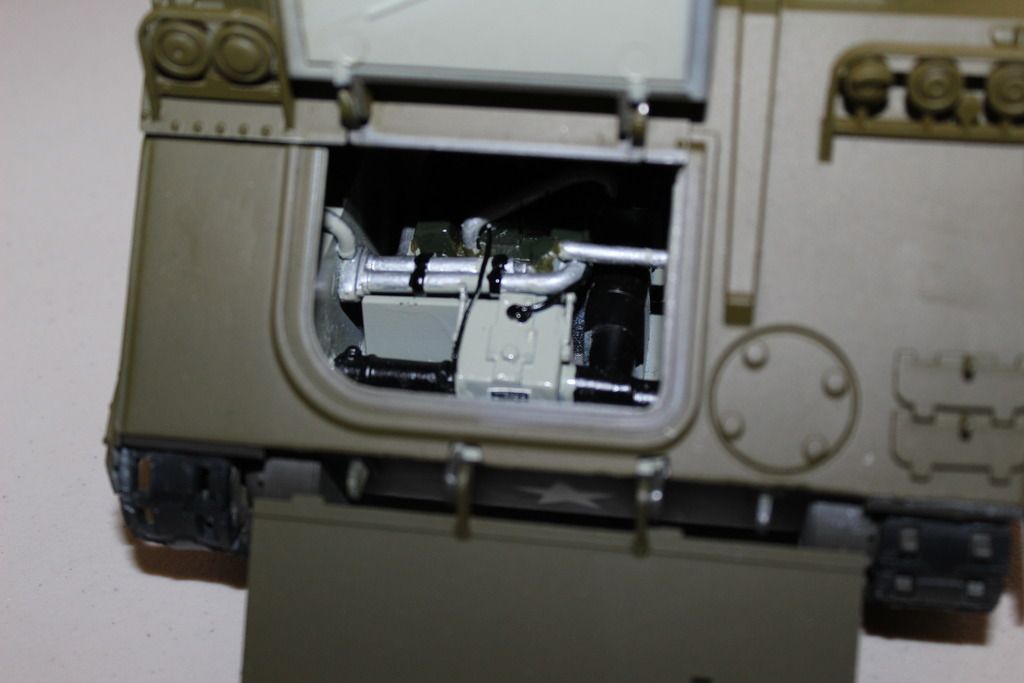
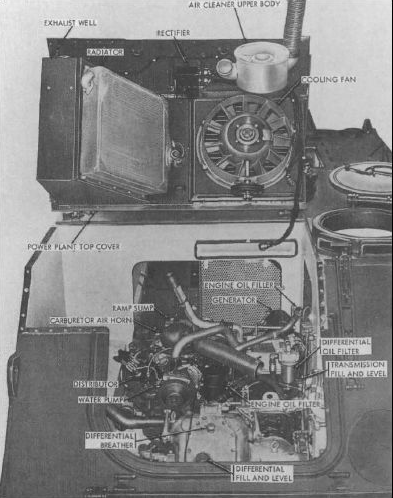
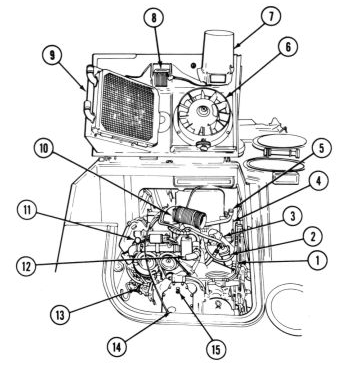
My next update I will show the fenders and some of the parts for the rear of the APC prior to primer and painting.


I took a photo of the engine compartment with the hull assembled. I'm actually thinking about making the radiator and air cleaner for the engine compartment (#6-9 in the last picture).


My next update I will show the fenders and some of the parts for the rear of the APC prior to primer and painting.
Re: 1/18 custom Vietnam era M113 with 106mm recoilless rifle
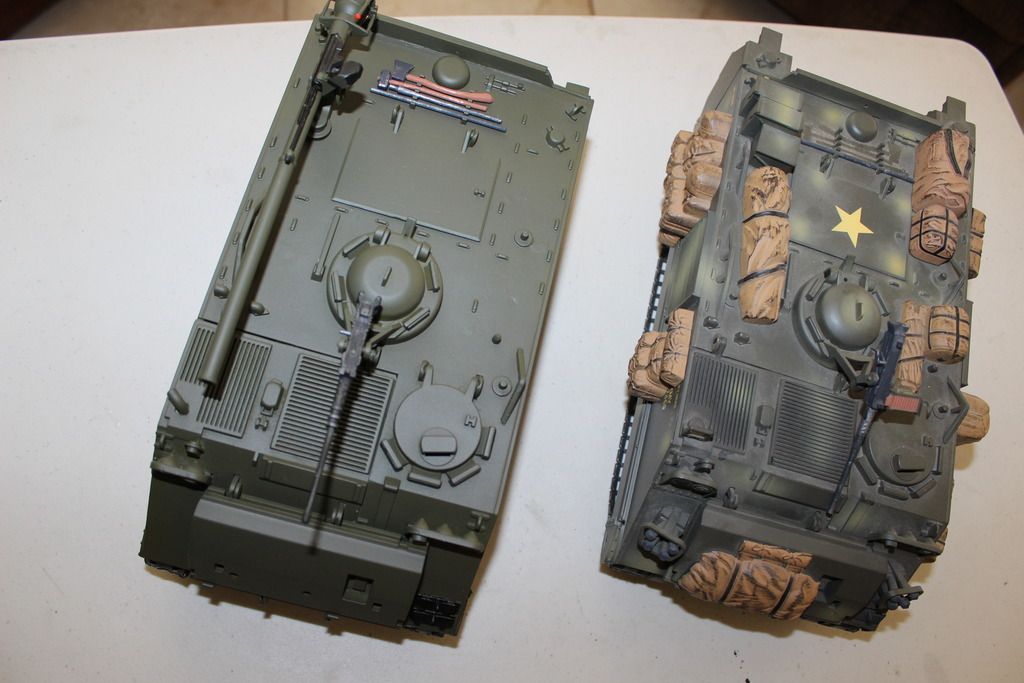
**UPDATE 12** I worked on the equipment for the rear of my Vietnam M113 to match what I am seeing in some of my reference photos. I plan on trying a different color for the overall tank based on feedback I have received from other members.

I can see the finish line. Thanks for all the input.


I can see the finish line. Thanks for all the input.
Re: 1/18 custom Vietnam era M113 with 106mm recoilless rifle
I changed the color since it appeared to light. I was given some helpful information on the correct color and resprayed the APC. I will post some photos soon.
Re: 1/18 custom Vietnam era M113 with 106mm recoilless rifle
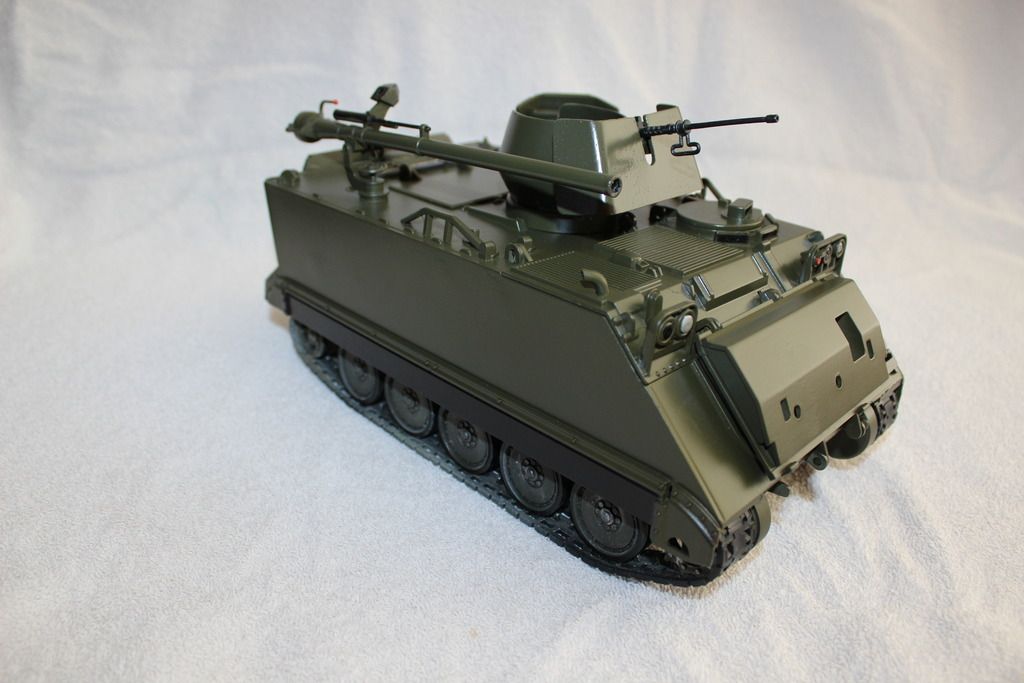
**UPDATE #13** I repainted the M113 using the suggestions made by members in order to properly mimic the Vietnam color I was hoping for.
Thanks to the help of Pickelhaube's M113 conversion parts I was able to obtain the bell turret, .50 cal shield and the M60 shield needed for my conversion.
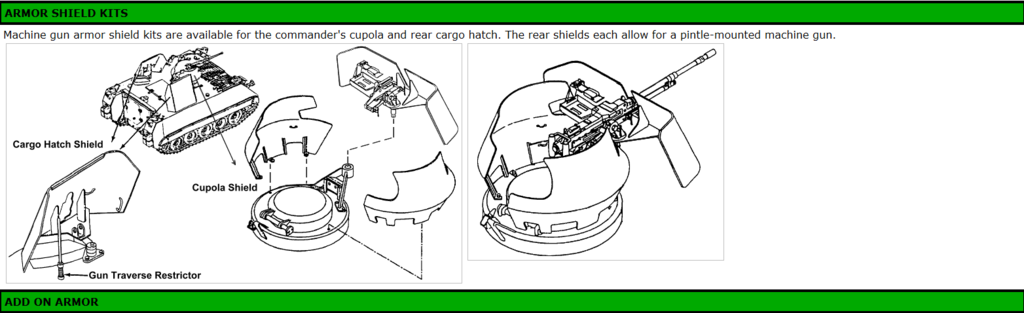
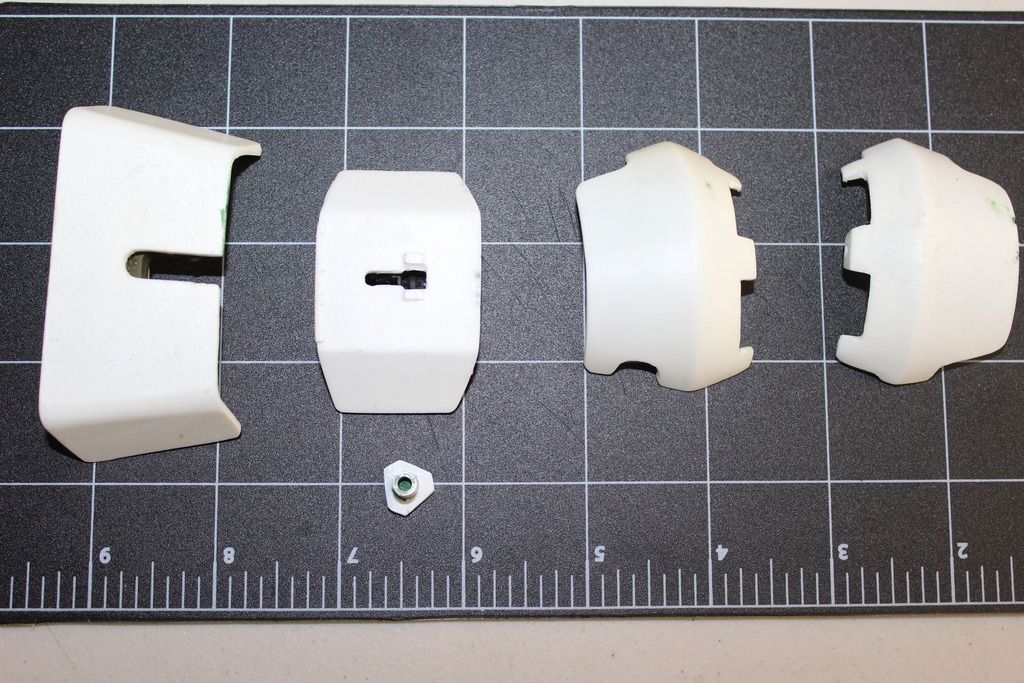
I puttied the holes left from the mold process before I primed the pieces.
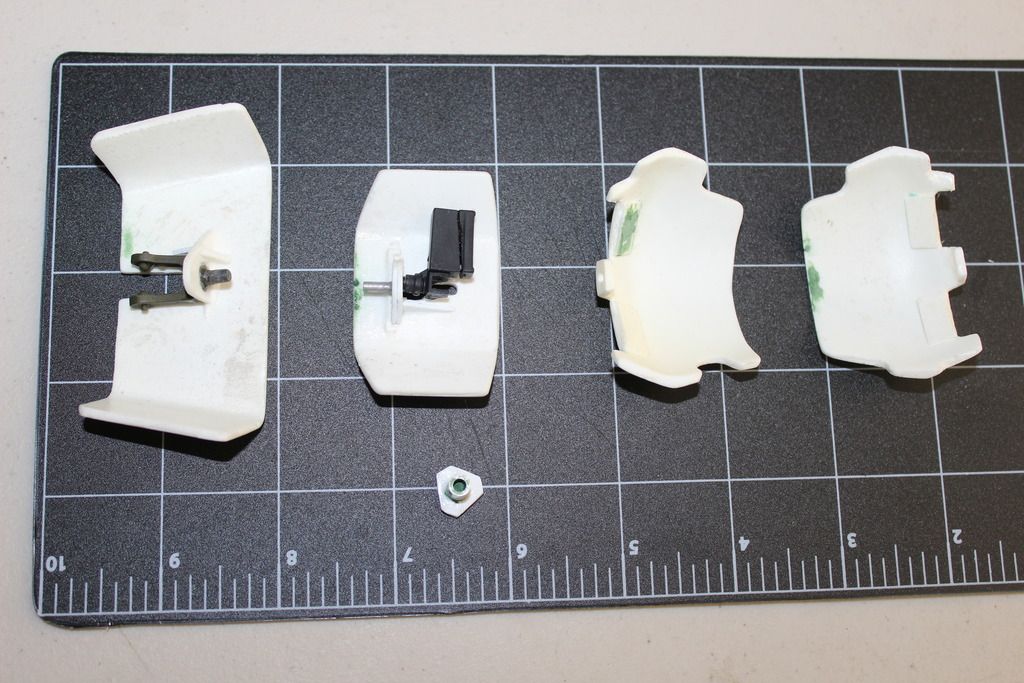
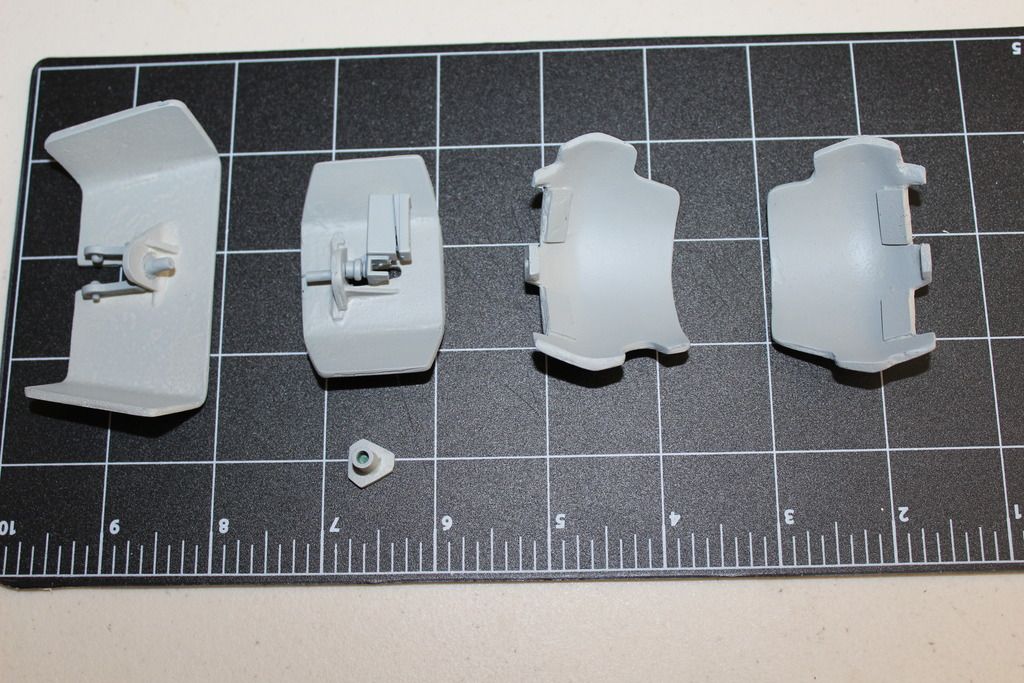
The next photos should be of the assembled model.


Thanks to the help of Pickelhaube's M113 conversion parts I was able to obtain the bell turret, .50 cal shield and the M60 shield needed for my conversion.


I puttied the holes left from the mold process before I primed the pieces.


The next photos should be of the assembled model.
Last edited by rschaap on Sun Apr 12, 2015 10:07 am, edited 1 time in total.
Re: 1/18 custom Vietnam era M113 with 106mm recoilless rifle
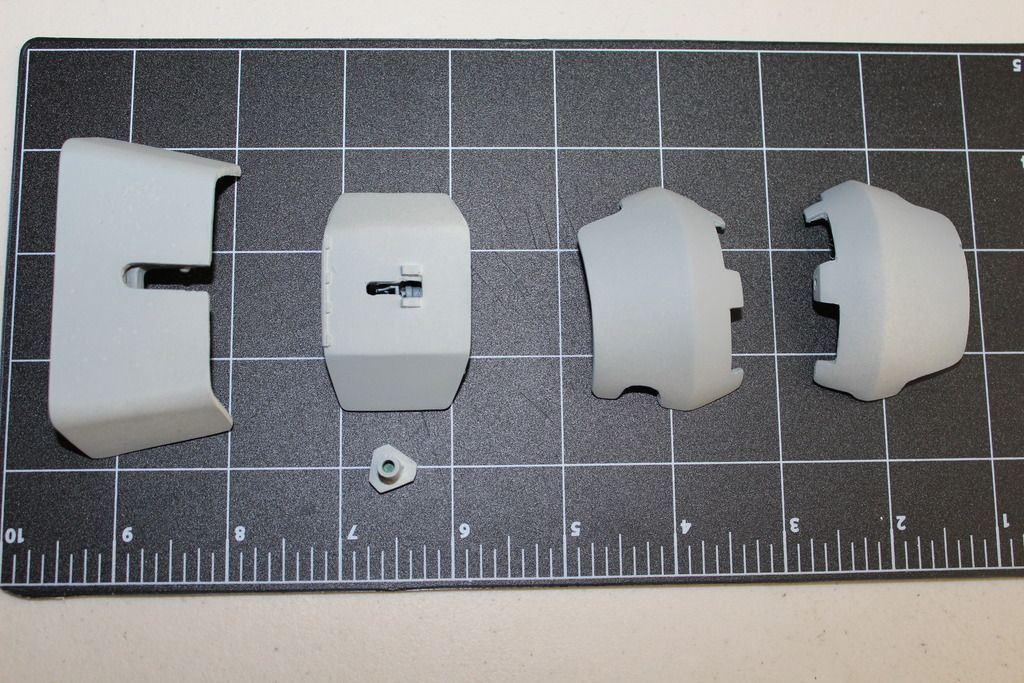
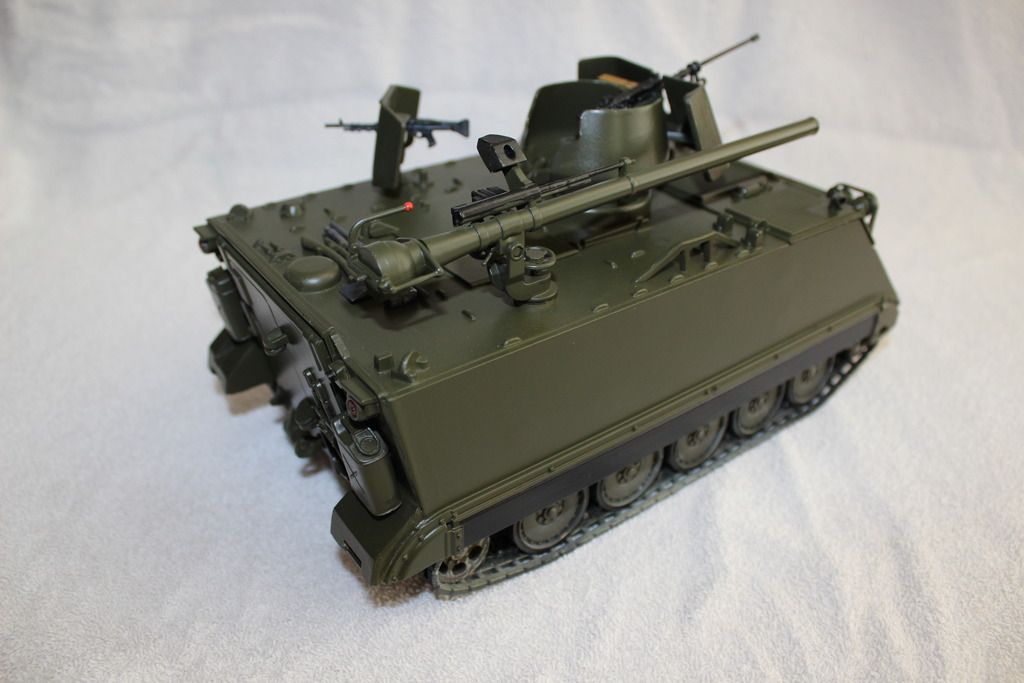
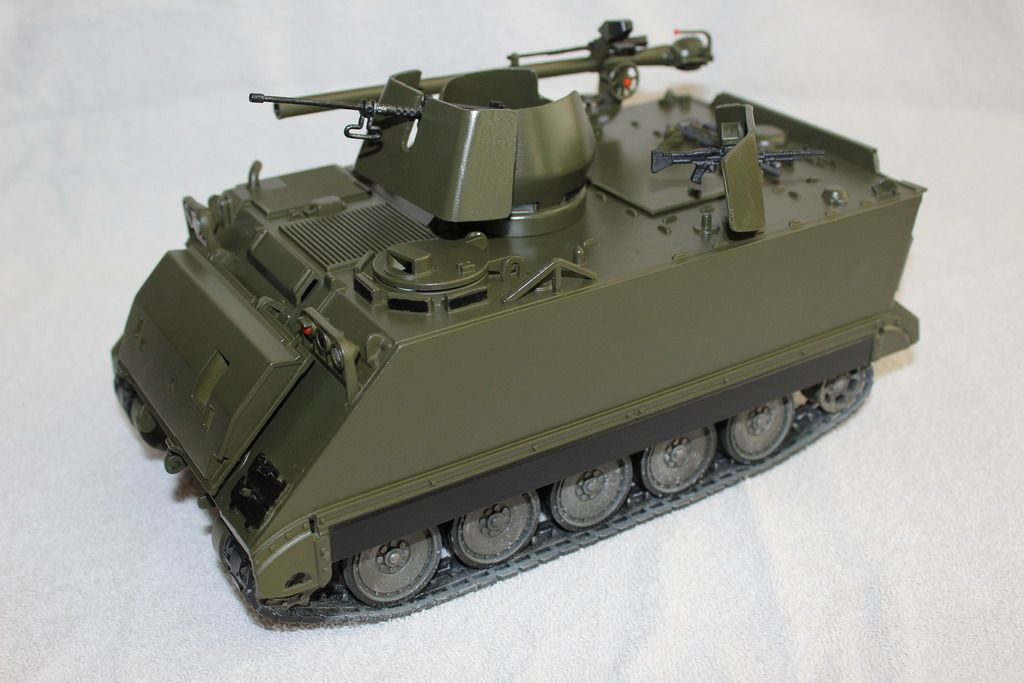
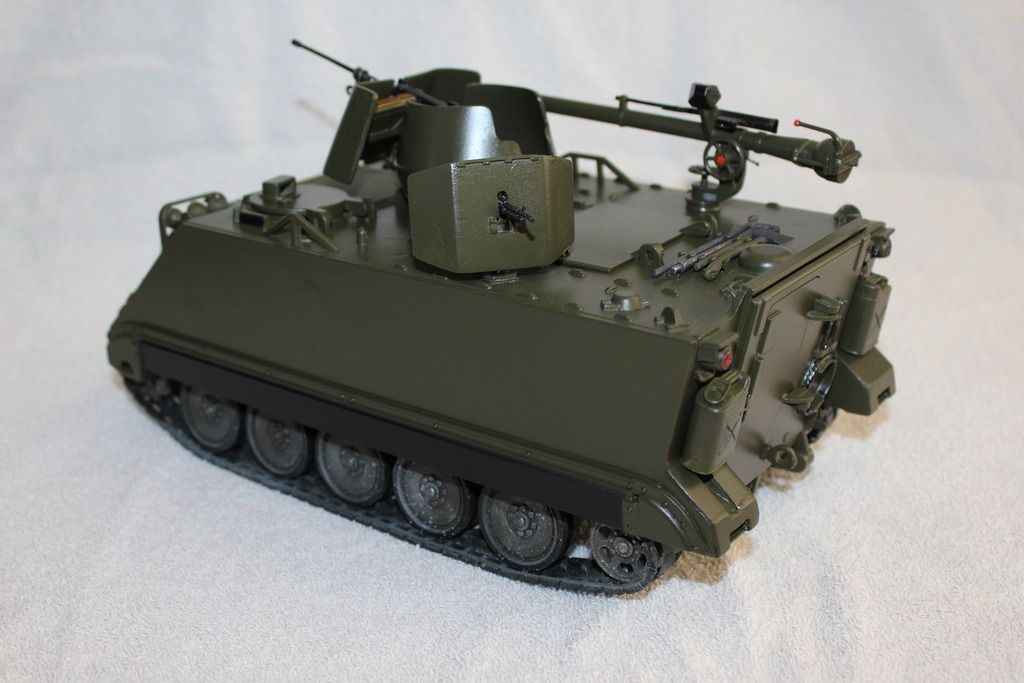
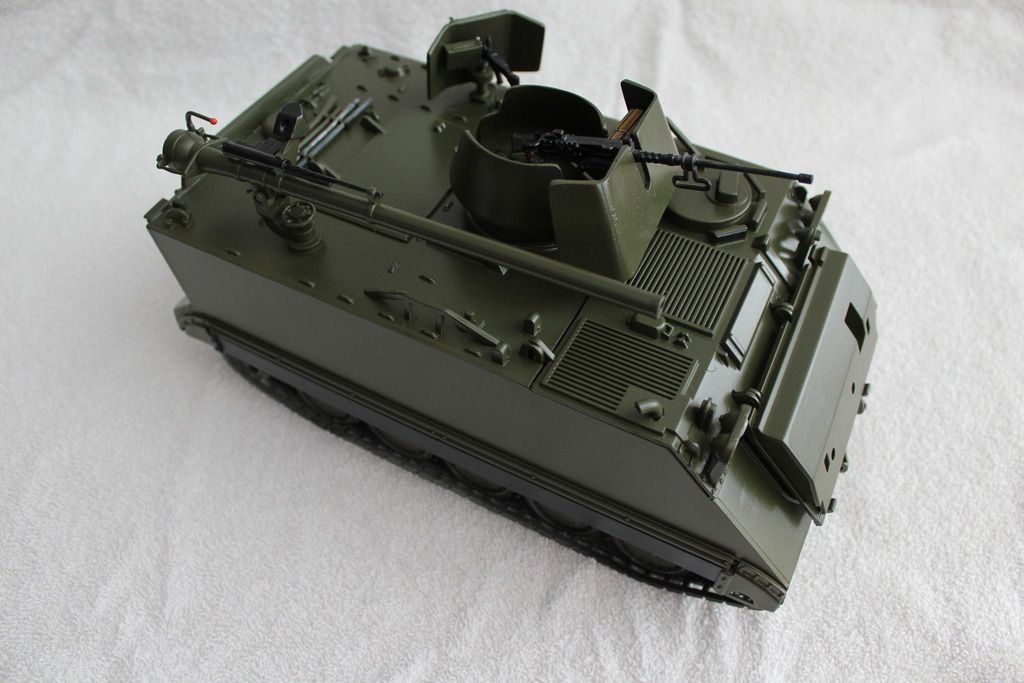
**UPDATE #14** I painted the bell turret, shields and water cans for final assembly.

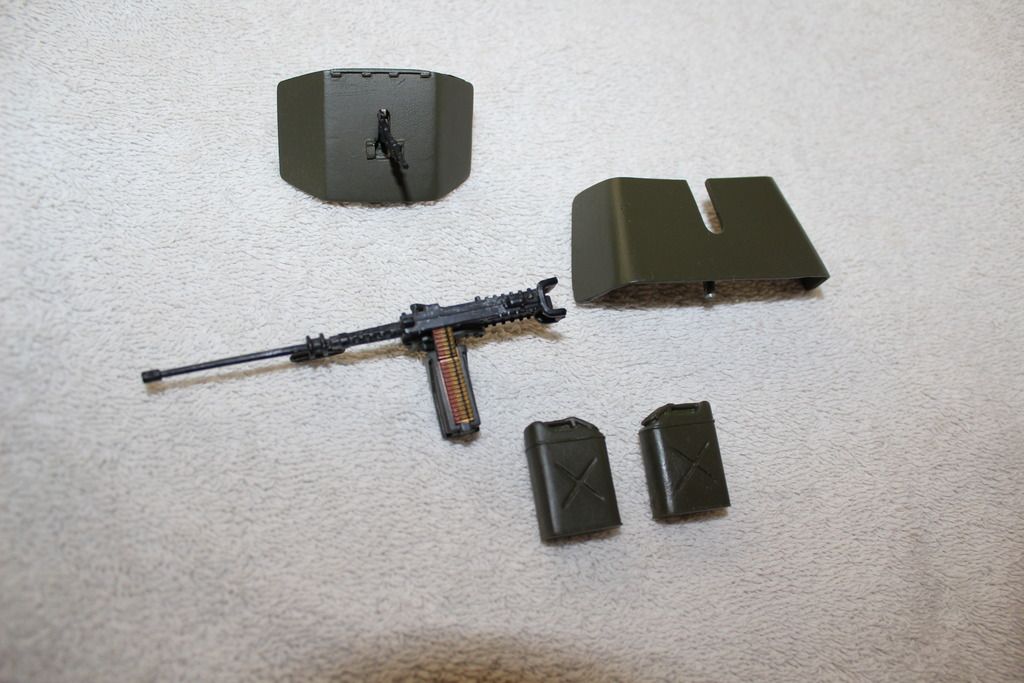
I assembled the shields and placed them on my M113.
My next step is to do an over spray of semi-gloss which should give it a little darker shade.


I assembled the shields and placed them on my M113.


My next step is to do an over spray of semi-gloss which should give it a little darker shade.
Last edited by rschaap on Sun Apr 12, 2015 10:07 am, edited 1 time in total.
Re: 1/18 custom Vietnam era M113 with 106mm recoilless rifle
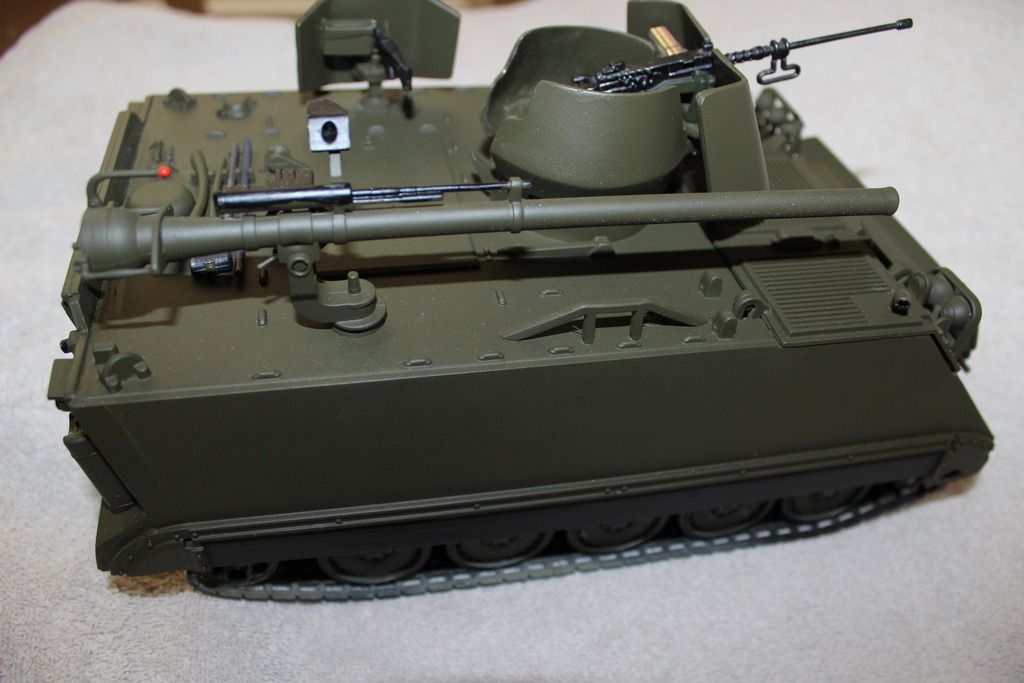
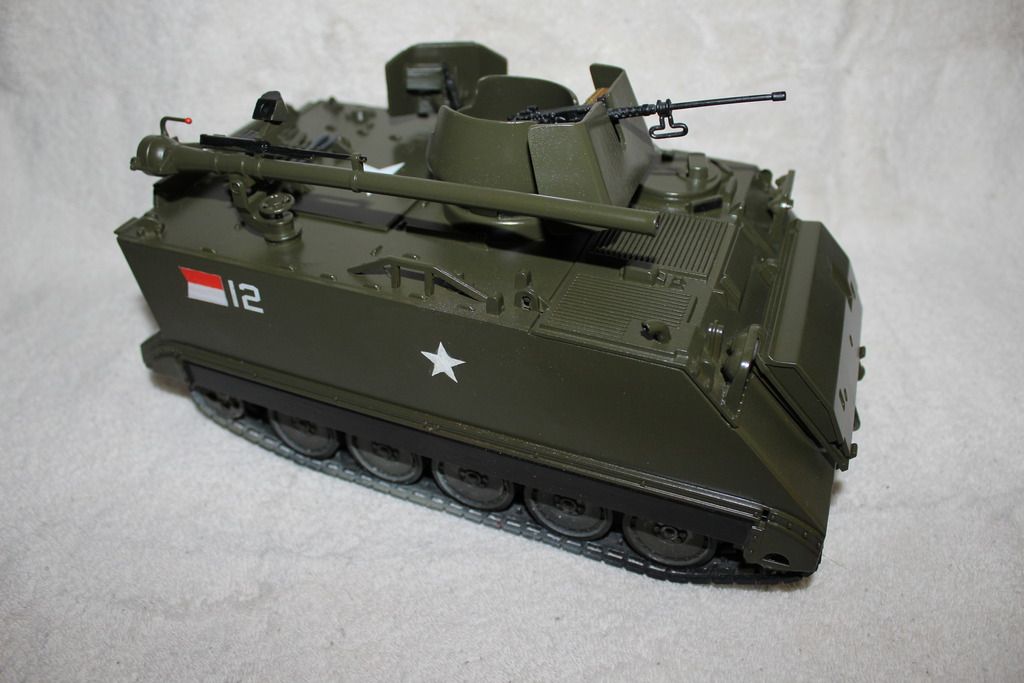
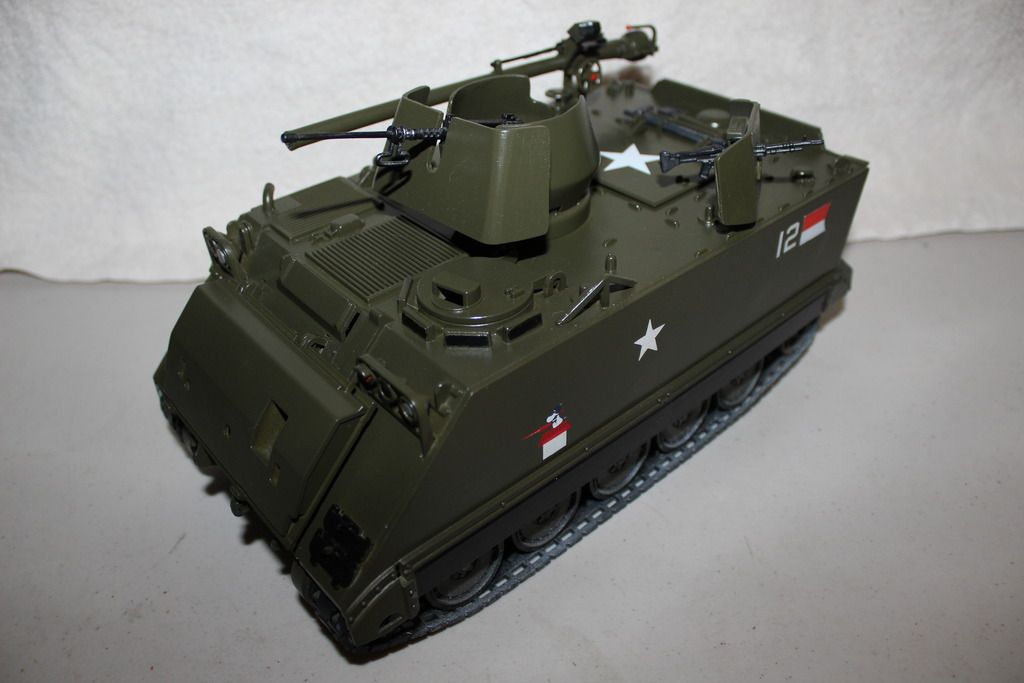
**UPDATE #15** I sprayed two coats of Tamiya semi-gloss on my M113. It did make it a shade darker.
Last step will be the decals and whether or not I decide to give it the battle field look.


Last step will be the decals and whether or not I decide to give it the battle field look.
Last edited by rschaap on Tue May 05, 2015 10:54 am, edited 1 time in total.

Re: 1/18 Vietnam M113 with 106mm recoilless rifle **BUILT**
Very nice work. Did you mention where the 105mm came from? Who is the manufacturer?
Re: 1/18 Vietnam M113 with 106mm recoilless rifle **BUILT**
The 106mm recoilless rifle was an optional weapon from the 1/18 scale BBI USMC Super Humvee.

I removed the 106mm from it's base (pulls apart from the base very easily). Using reference photos I figured out where the gun needed to be mounted and drilled a hole in the hull of my M113. I used a threaded nut to hold it in place with a plastic washer at the base of the gun so it would swivel smoothly. I drilled out the business end of the barrel then primed and painted it to match the color of my M113.

I removed the 106mm from it's base (pulls apart from the base very easily). Using reference photos I figured out where the gun needed to be mounted and drilled a hole in the hull of my M113. I used a threaded nut to hold it in place with a plastic washer at the base of the gun so it would swivel smoothly. I drilled out the business end of the barrel then primed and painted it to match the color of my M113.
Re: 1/18 Vietnam M113 with 106mm recoilless rifle **BUILT**
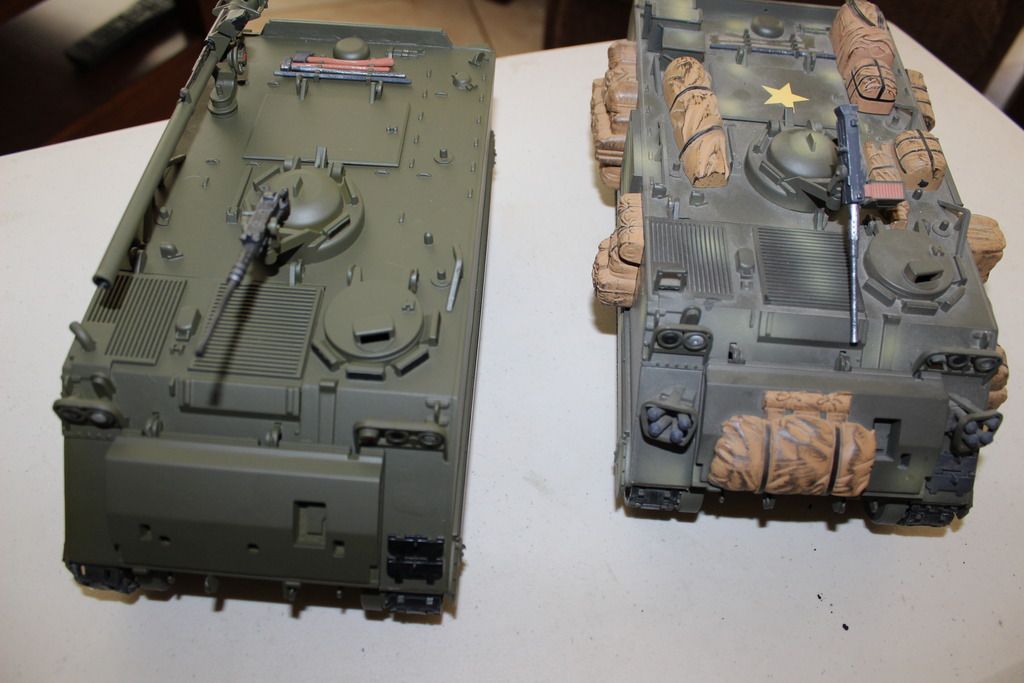
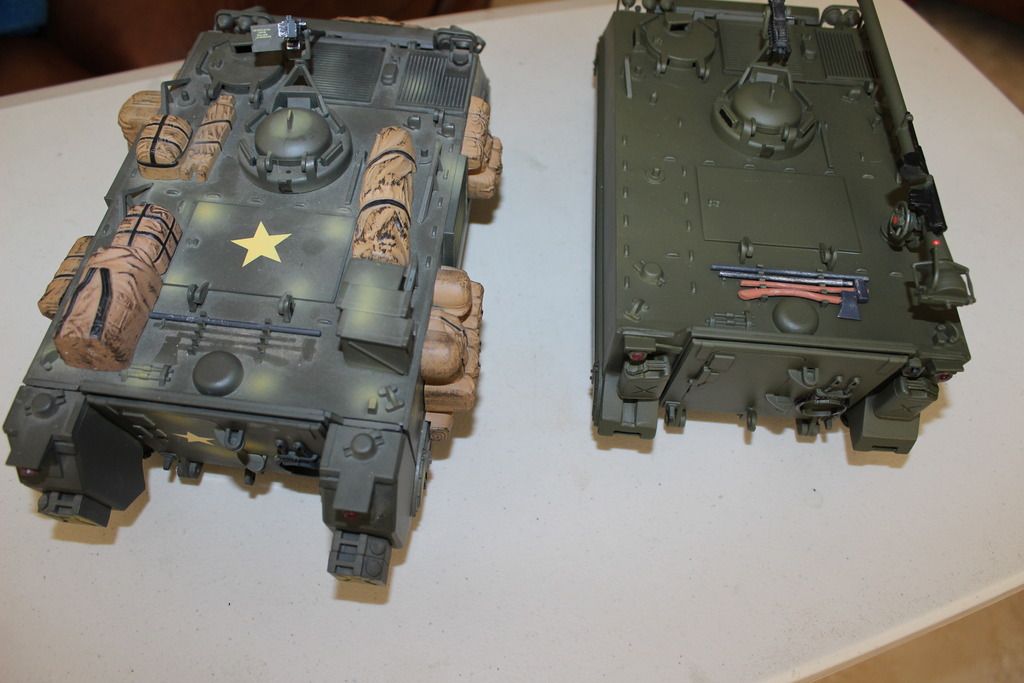
Here is the before and after.
Interior


Interior


Re: 1/18 Vietnam M113 with 106mm recoilless rifle **BUILT**
Re: 1/18 Vietnam M113 with 106mm recoilless rifle **BUILT**
Thanks for the compliments. My conversion would not have been possible if it had not been for the heads up from you. So thank you sir.
Re: 1/18 Vietnam M113 with 106mm recoilless rifle **BUILT**
Wonderfull piece! But would like to see it combat dirty, with some crew...
Re: 1/18 Vietnam M113 with 106mm recoilless rifle **BUILT**
Understood. I am still deciding on how I want to decal it. Once that is done I have decided to give it an actual Vietnam "wear and tear" look since I believe the addition of the 106mm was a field application. It just so happens that I have a number of volunteers waiting to be assigned to this M113.
-
pickelhaube
- Officer - Brigadier General

- Posts: 9647
- Joined: Mon Jan 22, 2007 5:52 am
- Location: New Orleans
Re: 1/18 Vietnam M113 with 106mm recoilless rifle **BUILT**
Totally cool looking !!!!

Kirk Douglas : Mine hit the ground first
John Wayne : Mine was taller

John Wayne : Mine was taller
Re: 1/18 Vietnam M113 with 106mm recoilless rifle **BUILT**
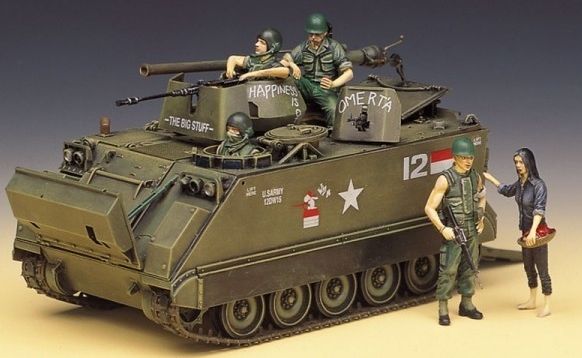
I decided to go with these markings for my M113. The picture is of a 1/35 scale model. I actually located some decals and dry transfers I can use for the majority of the M113. I am going to hand paint the words on the gun shields and bell turret. I already started decaling my M113 and will post progress photos soon.

Re: 1/18 Vietnam M113 with 106mm recoilless rifle **BUILT**
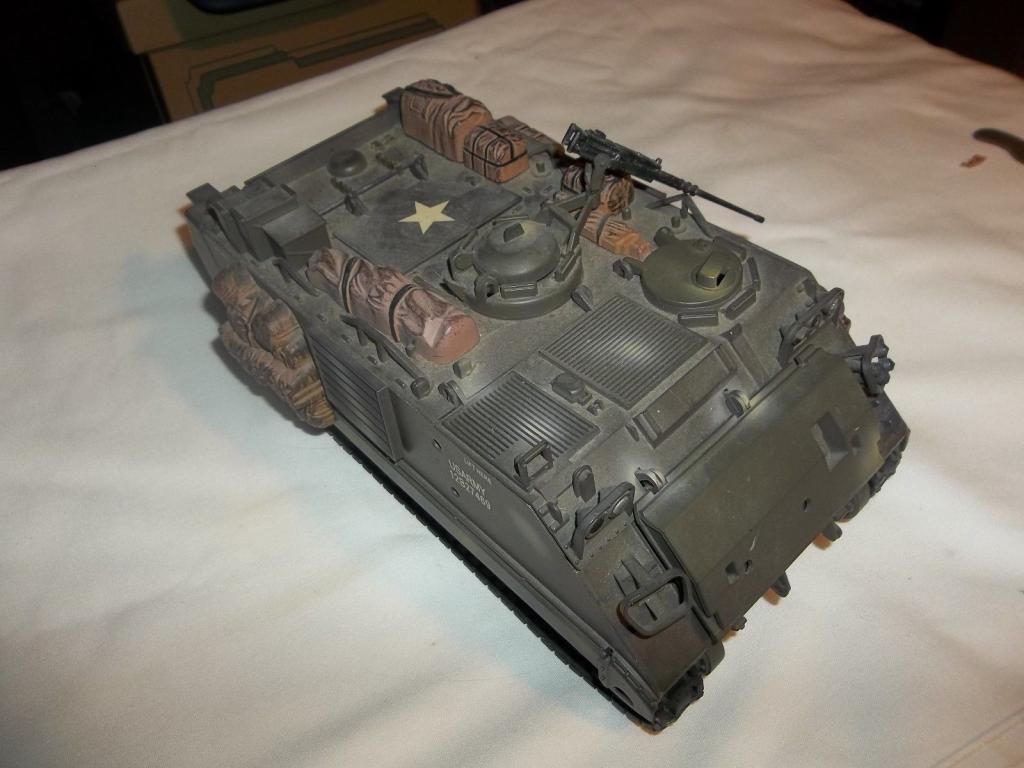
**UPDATE #16** Here are the first decals and transfers I put on the M113. The decals I used were from my past modeling. I used an Archer dry transfer from a 1/16 M26 tank for the star on the large hatch next to the recoilless rifle and m60. The remainder of the decals were from different aircraft decal sheets. The Snoopy on the dog house was a combination of five cut-up decals. I spray painted the red and white insignia flag. I tried different methods for the "U.S. ARMY 12DW19" and the "LIFT HERE" wording without any luck. Any suggestions would be greatly appreciated. I still have to hand paint the words on the gun shields and bell turret as soon as time permits.
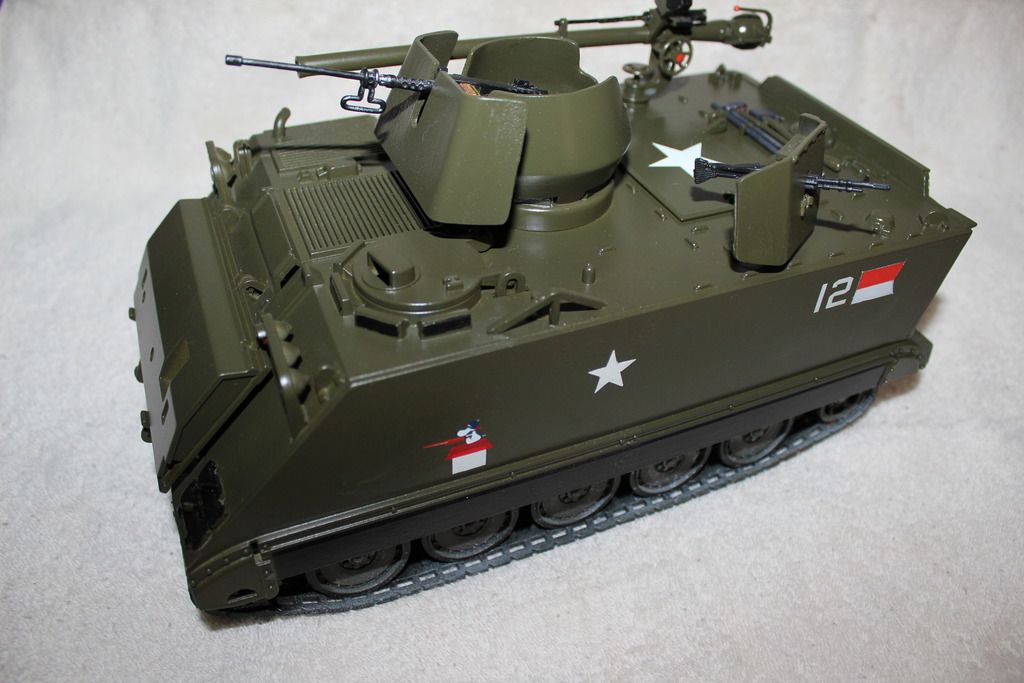
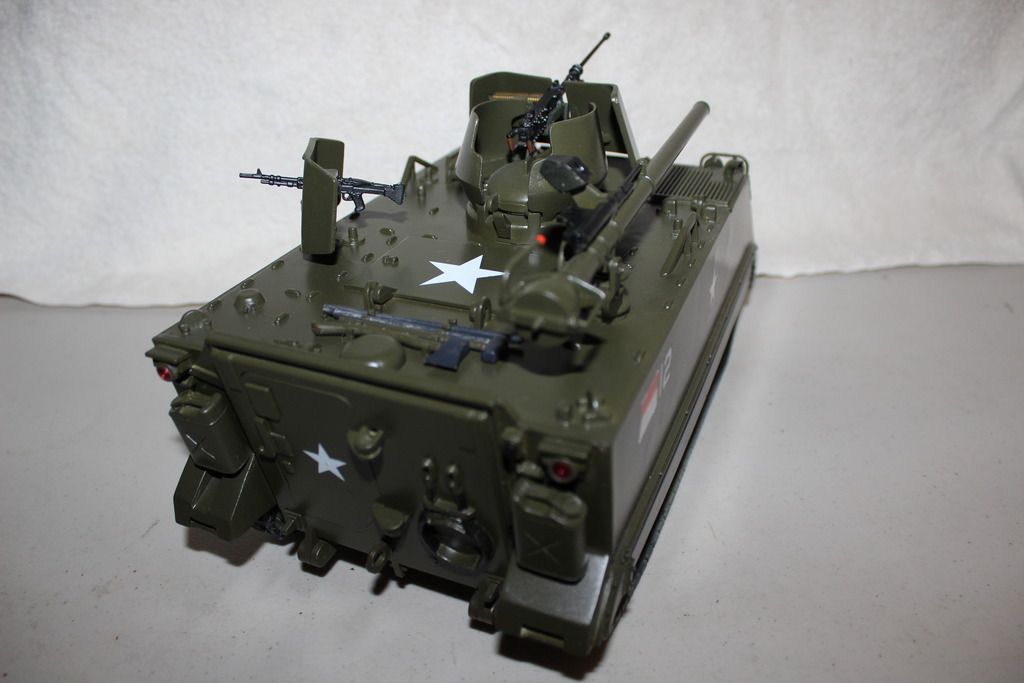
Almost there...


Almost there...
-
pickelhaube
- Officer - Brigadier General
- Posts: 9647
- Joined: Mon Jan 22, 2007 5:52 am
- Location: New Orleans
Re: 1/18 Vietnam M113 with 106mm recoilless rifle **BUILT**
You could try stick on lettering from Michaels or Hobby Lobby.
They may have them the correct size could be worth trying.
If they do have the correct size you could use the back ground of the lettering as stencils.
Or the stickers themselves.
They may have them the correct size could be worth trying.
If they do have the correct size you could use the back ground of the lettering as stencils.
Or the stickers themselves.
Kirk Douglas : Mine hit the ground first
John Wayne : Mine was taller
John Wayne : Mine was taller
Re: 1/18 Vietnam M113 with 106mm recoilless rifle **BUILT**
Thanks Matt, I will give it a shot.
Re: 1/18 Vietnam M113 with 106mm recoilless rifle **BUILT**
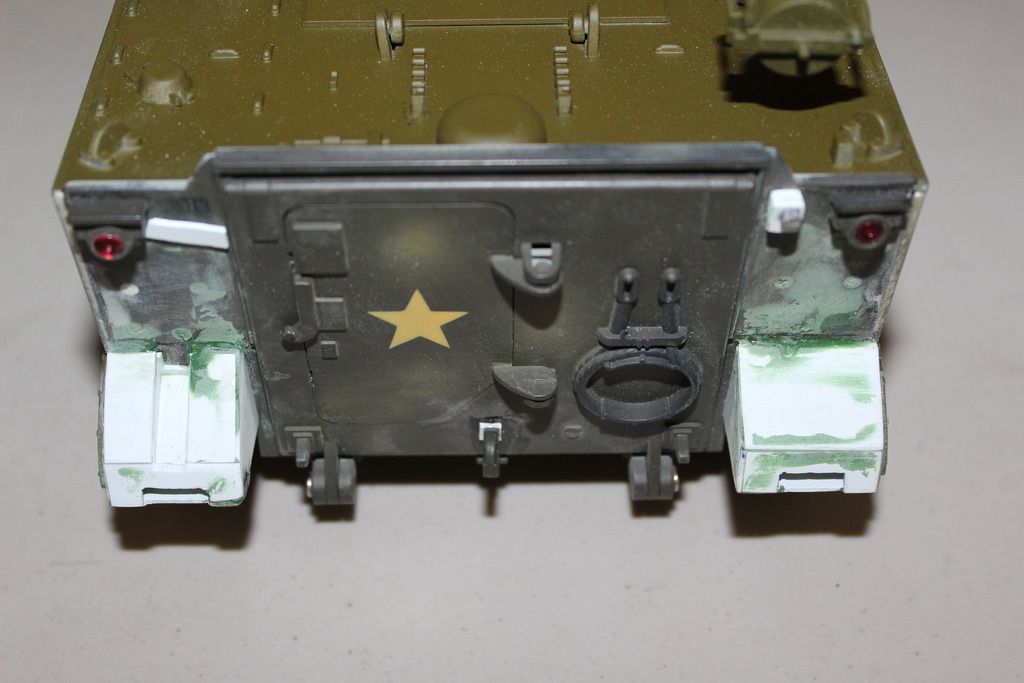
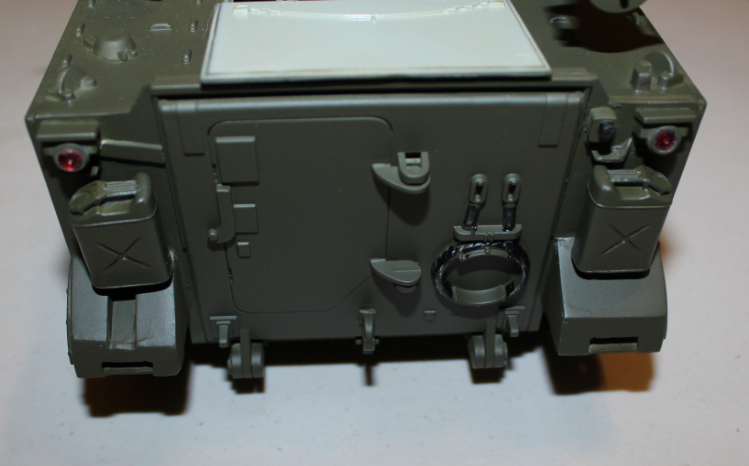
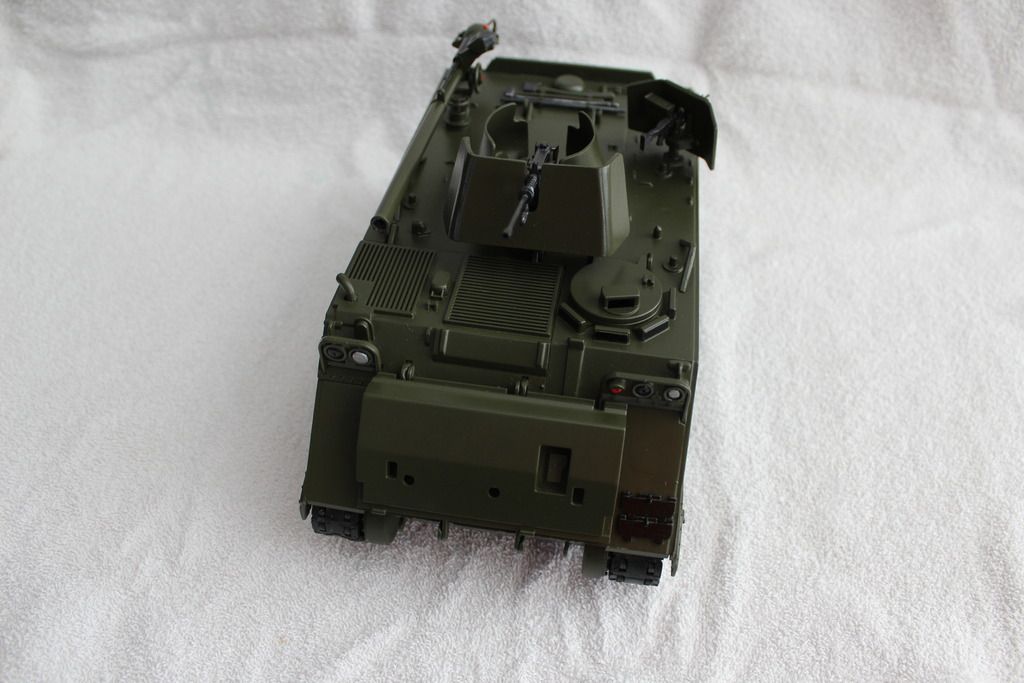
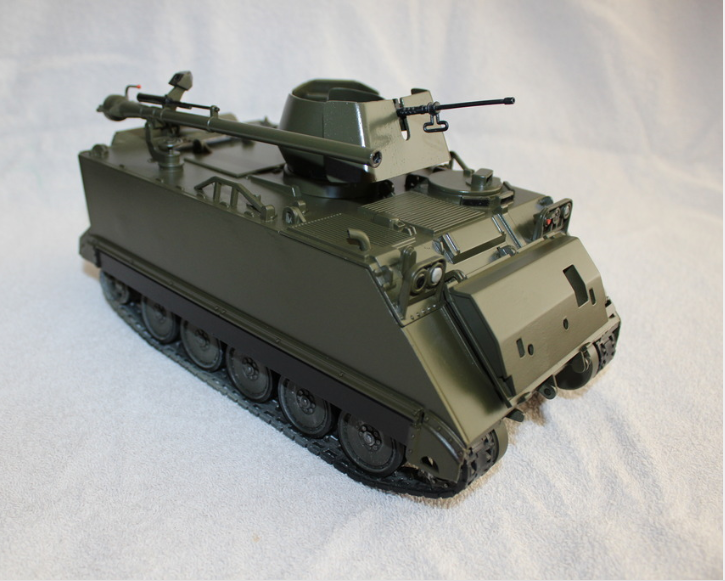
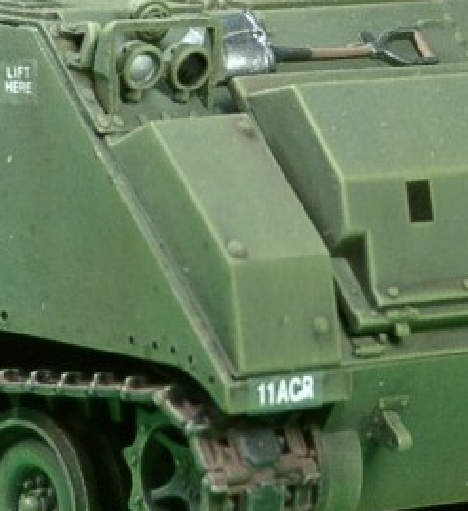
**UPDATE #17** I will be posting new photos of my Vietnam M113A1. I worked on making decals for some of the letters and numbers that I could not duplicate. I also made new red and white Calvary flag decals, since I was not happy with the way the painted on ones turned out. This meant I had to sand off some of the ones I sprayed or hand painted on and repaint and coat the tank (for the 5th time  ). I also made the blisters for the front of the tank above the tracks. I have no idea what blisters are for and can't find them in any reference photos of any M113A1 from Vietnam. If someone out there knows what they are for I would be interested for just personal knowledge. Here is a photo of what I am talking about.
I will start weathering the tank some time this week.

I will start weathering the tank some time this week.
Last edited by rschaap on Fri Aug 28, 2015 10:02 pm, edited 1 time in total.
-
supersonicfifi
- Officer - Colonel

- Posts: 1269
- Joined: Wed Jun 01, 2005 2:47 pm
- Location: FRANCE
Re: 1/18 Vietnam M113 with 106mm recoilless rifle **BUILT**
NOT an armor guy but i begin seriuously thinking to turn my interest in this kind of vehicule !
AMAZING WORK !
Post as much pictures as possible all along ....
thank you for sharing your beautifull custom
again WELL DONE !
philippe
AMAZING WORK !
Post as much pictures as possible all along ....
thank you for sharing your beautifull custom
again WELL DONE !
philippe
1/18 mirage 2000 & RAFALE should i say more ?
-
Threetoughtrucks
- Officer - Brigadier General
- Posts: 5405
- Joined: Tue Oct 05, 2004 9:46 am
- Location: SOUTH JOISEY
- Contact:
Re: 1/18 Vietnam M113 with 106mm recoilless rifle **BUILT**
Sorry for being no help to you this AM, but I got curious and checked and the "blisters" are extra flotation cells found on M113A1's.
Pics of the flotation cells are found in David Doyle's "M113 APC in Action, In Action" - Squadron Signal, on pages 25 and 43.
The pics are from two different divisions in VN so they are not field mods.
TTT
Pics of the flotation cells are found in David Doyle's "M113 APC in Action, In Action" - Squadron Signal, on pages 25 and 43.
The pics are from two different divisions in VN so they are not field mods.
TTT
Sometimes I am the windshield, sometimes, I am the bug.
Re: 1/18 Vietnam M113 with 106mm recoilless rifle **BUILT**
Thanks for the info. It was bothering me, since I had no idea what I was making and could not locate any reference photos or information.Threetoughtrucks wrote:Sorry for being no help to you this AM, but I got curious and checked and the "blisters" are extra flotation cells found on M113A1's. Pics of the flotation cells are found in David Doyle's "M113 APC in Action, In Action" - Squadron Signal, on pages 25 and 43.The pics are from two different divisions in VN so they are not field mods.TTT
Re: 1/18 Vietnam M113 with 106mm recoilless rifle **BUILT**
I was asked what I did to backdate my M113A3 to a M113A1 Vietnam era APC with recoilless rifle. Here is a list.
Removed from exterior
External fuel tanks
All storage gear and added cargo
Rear cleats
Exhaust
Smoke launchers
CIP panels
Spare track
Removed metal hull and plugged and filled holes (around 35-40)
Scratchbuilt for exterior
Rear fenders
Exhaust tube
Flotation devices (front above tracks) not pictured yet
Rear accessories as seen in update #12, prior to paint.
relocated gas cap to top of hull
Removed from interior
Fire extinguisher (for detailing)
Instrument panel (for detailing)
Heater (for detailing)
Cut out molded stand at rear of bay
Exhaust canister (to reposition and detail)
Scratchbuilt for interior
New instrument panel cover with instrument decals
Engine access hatches
Extended bulkhead
Added steering handles and gas pedal
Added shelves
Added radio equipment
Plumbed and added detail to heater
Made drivers seat and rear facing jump seat
Passengers seat cushions
Decaled interior after painting
Added drive shafts
Detailed engine (wired and plumbed)
Main exterior Conversion Parts
Rear fenders (Scratchbuilt)
Two gas cans used as water containers (Parts box)
Shovel for front of APC (Parts box)
Straps for water containers and shovel (folded tin foil, painted)
.50 caliber gun shield (Pickelhaube)
.60 caliber gun shield ( Pickelhaube)
Bell turret for .50 caliber (Pickelhaube)
106mm recoilless rifle (from BBI Super Humvee)
Decals
Interior
1/35 scale M113 decals, enlarged and printed onto decal paper
Exterior
Some decals provided by Apache26 and the rest from miscellaneous decal sheets.
Finally
A lot of planning, reference material, advice and help from forum members, patience and an understanding wife.
Last edited by rschaap on Tue Nov 03, 2015 8:23 am, edited 1 time in total.