pcoughran wrote:Mathew,
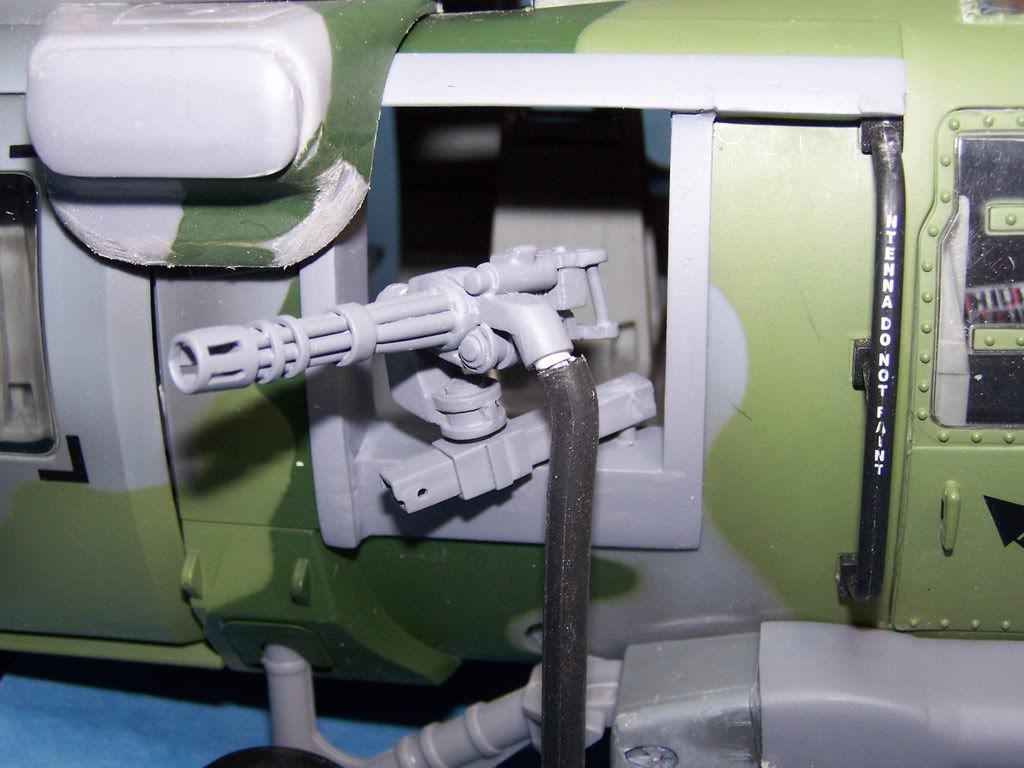
Hate to go off topic, but had a question about the miniguns. I got a couple a while back and am just now getting to them. Do I need to cut the end of the barrel off (the solid part with no holes for flash suppression) and then glue on the flash suppressors that were included? At first I thought the flash suppressor part would just get glued on top of the current barrel but that appears to be too long afterwards. Looking at yours it appears the barrel end should have holes in it and my bag of parts that came with the guns has what looks like flash suppressor ends with holes in it.
Phil
No just glue on the flash surpressure. You had one of the first ones I guess were I tried to put the slots. I gave up and just made the flash a solid tube.
That is how the current ones are made anyway..
The tube just needs to slide on about 1/16 of an inch.
BTW the whole mini is about 1/4 inch long. I made it that way. When I designed it scale looked a little short. So I made it a little long. I stated this in the build way back when.
Almost ALL of .50 cals out there are about 1/4 TOO long as well.
Sometimes it is a big line between scale and looking scale.
As long as it looks right go with it.