Wow. I really had high hopes for this, and I'll tell you as soon as I saw those pics of the cowling so beautifully hand-crafted, I knew this was going to exceed my expectations...
Just... amazing. You, sir, are my new god.
(you'll be given an alter, I just need a face photo, so I can get a gold cast...)
P-36A Curtiss step by step build is done !!!! 5-7-08
-
AlloySkull
- Officer - Brigadier General

- Posts: 1564
- Joined: Sun Sep 30, 2007 4:34 pm
- Location: Houston, Texas
- Contact:
-
Birddog
- Officer - Brigadier General
- Posts: 1919
- Joined: Tue Dec 07, 2004 10:06 pm
- Location: Georgia
- Contact:
Awesome Job Pickelhaube!!!
That is first class hands down. After reading the breakdown on your cost of time spent and costs of materials used, it should be easy for everyone to see why thos custom 190s are going to be sold for the price they are on MTS.
Again, outstanding job!!!!
That is first class hands down. After reading the breakdown on your cost of time spent and costs of materials used, it should be easy for everyone to see why thos custom 190s are going to be sold for the price they are on MTS.
Again, outstanding job!!!!
Go Ugly Early in 1/18!!
Still waiting and wishing for a 1/18 A-10 Warthog.
Still waiting and wishing for a 1/18 A-10 Warthog.
-
supersonicfifi
- Officer - Colonel

- Posts: 1269
- Joined: Wed Jun 01, 2005 2:47 pm
- Location: FRANCE
fantastic
fantastic ! as a French i can't wait to see the FRENCH Battle hawk you will do !!!!!!!!!!!!!!!!!!!!!!!!!!! truly amazing !!!!!!!!!!!!! 
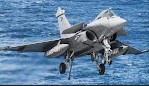
1/18 mirage 2000 & RAFALE should i say more ?
-
pickelhaube
- Officer - Brigadier General
- Posts: 9647
- Joined: Mon Jan 22, 2007 5:52 am
- Location: New Orleans
I have started molding the fusalage. Man I did not get enough RTV. I got 3 units and have used up 2 already on only half of one . YIKES !!!!!! It looks like I will need 4 units per half. 'Dem units are $36 each. that will be 8 units total for the fuse alone. I feel like Frankenstein. My god what have I done ?
Kirk Douglas : Mine hit the ground first
John Wayne : Mine was taller

John Wayne : Mine was taller
-
olifant
- Officer - Brigadier General
- Posts: 2537
- Joined: Fri Jan 14, 2005 2:51 am
- Location: 1, USA, Olympia, Washington
PH, for clarity is the RTV used to create a mold you can use with your vacuum former and create new fuselages?
[url=http://imageshack.us][img]http://img375.imageshack.us/img375/5374/sshqvdjx0.jpg[/img][/url]
[url=http://g.imageshack.us/g.php?h=375&i=sshqvdjx0.jpg][img]http://img375.imageshack.us/img375/5374/sshqvdjx0.937d18e174.jpg[/img][/url]
[url=http://g.imageshack.us/g.php?h=375&i=sshqvdjx0.jpg][img]http://img375.imageshack.us/img375/5374/sshqvdjx0.937d18e174.jpg[/img][/url]
-
pickelhaube
- Officer - Brigadier General
- Posts: 9647
- Joined: Mon Jan 22, 2007 5:52 am
- Location: New Orleans
No not really. I will make the fusalage out of resin like I have used for the rest of the project. When you vacuform it does not get all of the details like casting does. It is a lot cheaper though. And there are a lot of vacuform plane kits out there but they do lack detail. Expesially the panel lines. Here is how I made the molds. Of cousre I have only made a partial one so far. I ran out of RTVolifant wrote:PH, for clarity is the RTV used to create a mold you can use with your vacuum former and create new fuselages?
RTV Means: Room Temperature Vulcanizing. it is a 2 part laytex when mixed becomes rubber. To make the new fusalages I :
1. Roll out tiny lines of clay.
2. Stick them to the back of one of the fuse halves so when I press it down to the pour area it creates a sill to the work service.
3. Make a mold box around the fuse. I use Legos . In this case I did not have enough Legos so i used a 1/4 inch piece of luwon ply wood.
4. Spray the mold box with fuse inside of it with mold release.
5. Mix and pour RTV.
6. Wait 4 hrs.
7. Turn finished pour over.
8. Scape all of the clay off of the back side of fuse that you used for a seal and clean it up good.
9. Stack more Legos on the form box. This now becomes the top.
10. Spray more mold release.
11. Mix and pour RTV for the back side of the fuse.
12 Wait 4 more hours.
13. Pull the rubber molds apart and pull master fuse have out. Check everything out to see if it looks good. If it does , mix resin and start casting.
Kirk Douglas : Mine hit the ground first
John Wayne : Mine was taller
John Wayne : Mine was taller
-
olifant
- Officer - Brigadier General
- Posts: 2537
- Joined: Fri Jan 14, 2005 2:51 am
- Location: 1, USA, Olympia, Washington
Thanks PH. Sounds like an extremely expensive way to build a fleet of Hawks.
[url=http://imageshack.us][img]http://img375.imageshack.us/img375/5374/sshqvdjx0.jpg[/img][/url]
[url=http://g.imageshack.us/g.php?h=375&i=sshqvdjx0.jpg][img]http://img375.imageshack.us/img375/5374/sshqvdjx0.937d18e174.jpg[/img][/url]
[url=http://g.imageshack.us/g.php?h=375&i=sshqvdjx0.jpg][img]http://img375.imageshack.us/img375/5374/sshqvdjx0.937d18e174.jpg[/img][/url]
-
pickelhaube
- Officer - Brigadier General
- Posts: 9647
- Joined: Mon Jan 22, 2007 5:52 am
- Location: New Orleans
Re: P-36A Curtiss step by step build is done !!!! 5-7-08
Man I did this custom almost 7 years ago .
To my knowledge it was one of the first ever customs done on our beloved XD .
The original mold making was all new and I did not know what I was doing.
Now I almost do know what I am doing .
I still have the molds but they are long gone past the time of being usable.
To my knowledge it was one of the first ever customs done on our beloved XD .
The original mold making was all new and I did not know what I was doing.
Now I almost do know what I am doing .
I still have the molds but they are long gone past the time of being usable.
Kirk Douglas : Mine hit the ground first
John Wayne : Mine was taller
John Wayne : Mine was taller