Hello AAE 83,
I did do a scale blow up of the drawings. If you choose to do so as well the fuse should be right at 19 inches . From prop hud to rudder trailing edge. The 21st model could be way out of scale. When I placed the model on the prints I took a long look and I moved it here and there to get the best overlay. The wing was one thing that I thought should be on the money. Also the rear bulkhead of the cockpit was used as a alighment spot as well. So the issues with the empanage are lagit.
If you can find some better drawing that would be great. The one I used were from a Russian sight and are farley close. I also had a Squadron Signal P-40 walk around that had a real good profile of the P-36. When you overlay them they are close to each other with some minor differences. The tail all worked out the same. The rear wheel was a little off and the rear glass was the major difference between the two. The Russian drawing was a little smaller and actual did not look as bad as the Squadron drawing.
Hey Spud ,
Bring the drawings on. The Russian prints look to be close to the Squadron drawings but it sure would be nice to have another set when it will be cowling time.This is were the real scale will have to be. When digging for more info on the subject I came across a web link that was done by a modeler. He built a bunch of 1/48 sclae P-36s in all kind of paints. His one comment on the model was about the wrong shape of the cowling opening. He said that they were too oval. I think the Russian is close. I guess the real way is to break down and get the 1/32 scale model that is reportbly spot on for scale. They can be had off of e-bay for around $54 witch is more money than the 21st model. That is why I have been holding back on getting one. I am trying to do this as cheaply as possible. But true to scale as I can make without taking 1 year to do the project.
Matthew
P-36A Curtiss step by step build is done !!!! 5-7-08
-
pickelhaube
- Officer - Brigadier General

- Posts: 9646
- Joined: Mon Jan 22, 2007 5:52 am
- Location: New Orleans
-
pickelhaube
- Officer - Brigadier General
- Posts: 9646
- Joined: Mon Jan 22, 2007 5:52 am
- Location: New Orleans
Hey AAE 83,
It is totally cool the way you did the photo overlay. I barley know how to post pics . Thanks to Corey, VMF 115 and my nephew. I am able to come out of the dark ages of the pc. You are the Gran Wizard of photo adjustment. My hat is off to you.
And if it were not to the Spud. I would not have my avatar. Thanks buddy.
Matthew
Kirk Douglas : Mine hit the ground first
John Wayne : Mine was taller

John Wayne : Mine was taller
-
pickelhaube
- Officer - Brigadier General
- Posts: 9646
- Joined: Mon Jan 22, 2007 5:52 am
- Location: New Orleans
Ok guys I will stick to the plan spliting the rear empanage.
I would like to ignore the length of the rear glass . Would this be the wrong decision? Cutting the plastic and reworking the window well should not be too hard to do. New glass could be made using either a 2 liter coke bottle or a thick plastic like a Future floor wax bottle. The Future bottle would probably work the best. I do not believe the color (clear) would be a problem matching the original canopy because the area behind will be painted and that will natural throw the diff. off anyway.
Another detail is the rear wheel. It needs to be moved back about 1/2 inch or so. Is this a must do or not ?
Give me some feed back and I will try to start cutting plastic ASAP.
Kirk Douglas : Mine hit the ground first
John Wayne : Mine was taller
John Wayne : Mine was taller
-
pickelhaube
- Officer - Brigadier General
- Posts: 9646
- Joined: Mon Jan 22, 2007 5:52 am
- Location: New Orleans
Hey you guys,
My vacation is coming up on the 25. I had to make up time this weekend at work to cover. So I did not get a chance to cut plastic. This sucks because I wanted to post some progress before I left. I guess it just wasn't ment to be.
I did get some feedback from a few of you guys and the general overlook is this.
KISS Keep It Simple Stupid.
1. Most everybody said don't split the body. This I must do , it just bugs me.
2. Don't relocate the rear wheel just make the bump. This is wise because the relocation of the rear wheel will be a major engineering feat . Especialy makeing the wheel retractable . Yikes !!
3. Do not change the rear glass. Tell you the truth I am still on the fence with this one.
4. Do not change the wing guns. OK with me.
All the major work and skill ( ? ) if any will be on the front cowling. There will be major slicing and diceing on this. The nose of the P-40 will have to be sliced like a salami twice split like a banana from top to bottom. Spread about 1/2 inch glued back together and reworked. Not for the faint of heart but if done slowly we will prevail.
I will be leaving on Thurs. Sorry to bail on you guys but work does suck and I do need to get away from it. I will be happy to answer all questions before I go on THURSDAY.
Matthew
Kirk Douglas : Mine hit the ground first
John Wayne : Mine was taller
John Wayne : Mine was taller

Antenna faring
I like your idea...wish I had thought of it before too. But I believe you have the antenna faring wrong. The aireal wire actually ran from the top of the vertical stab to both outter main wing panels (upper surface). The wire from the stab to the right wing had a "Y" off that attached to the upper fuselage radio faring where you have it. Just need to change where the radio wire goes.....easy.
And for a cowl, you might try vacu-forming a new cowl and figure a way to put a false radial engine in there...kinda like the Avenger and Corsair are. Probably alot easier than the "banana split" you're talking about trying.
And for a cowl, you might try vacu-forming a new cowl and figure a way to put a false radial engine in there...kinda like the Avenger and Corsair are. Probably alot easier than the "banana split" you're talking about trying.
US Army MP Corps combat veteran Operation Desert Shield/Desert Storm
-
pickelhaube
- Officer - Brigadier General
- Posts: 9646
- Joined: Mon Jan 22, 2007 5:52 am
- Location: New Orleans
Hello Fulkwolfe,
Thanks for the input. I have yet to address the radio wire as of yet. But you are right the wires made a v ( for victory) from the top of the rudder to just inboard of the wing tips. This wil be addressed
Yes we will do a simplafide radial. If you guys do look at the 21st Corsair and P-47 they made a real plain radial with almost no detail. We will be doing this as well but the Mohawks engine was even plainer . The P-36's engine did not have the magnetos and what not in front of the engine like the other 2 birds . This will make that job a tad easier to do.
The cowling as I have said before will be the hardest challenge on this project I will go about this the same way as I did my Fw-190a's project with great results. With a little care and patience we can work this through. The vacuforming is a good idea. But with that you need to do a plug for the master. I think some of these guys will have a problem doing that. ( me anyway) Also in order do do a vacuform project you need a vacuformer. I do not have one , so I make do the best I can without one. What I will do on the cowling will be a step by step format and in that way it will be real hard to mess it up . I hope.
Thanks,
Matthew
Kirk Douglas : Mine hit the ground first
John Wayne : Mine was taller
John Wayne : Mine was taller
-
pickelhaube
- Officer - Brigadier General
- Posts: 9646
- Joined: Mon Jan 22, 2007 5:52 am
- Location: New Orleans
I am back and ready to get started.
My Vac. was fun we went to N. Cali. They have 2 Redwoods up there about 80 or so miles apart that you can drive through. I drove through one of them 8 times and once backwards! I drove through the other one 4 times 2 of those in the wrong direction !
What does this have to do with XD I am not sure but it sure was fun going against the norm
Kirk Douglas : Mine hit the ground first
John Wayne : Mine was taller
John Wayne : Mine was taller
-
pickelhaube
- Officer - Brigadier General
- Posts: 9646
- Joined: Mon Jan 22, 2007 5:52 am
- Location: New Orleans
Ok Guys,
I have taken a step in the right direction. I broke down and got a 1/32 scale kit off of E-bay . It was more expensive than the P-40 model. it should be here in a few days so I can nail down the front cowling. I will try to start cutting plastic this weekend but don't hold your breath.
I have taken a step in the right direction. I broke down and got a 1/32 scale kit off of E-bay . It was more expensive than the P-40 model. it should be here in a few days so I can nail down the front cowling. I will try to start cutting plastic this weekend but don't hold your breath.
Kirk Douglas : Mine hit the ground first
John Wayne : Mine was taller
John Wayne : Mine was taller
-
pickelhaube
- Officer - Brigadier General
- Posts: 9646
- Joined: Mon Jan 22, 2007 5:52 am
- Location: New Orleans

-
C-7A Caribou
- Corporal

- Posts: 48
- Joined: Mon Jan 22, 2007 7:40 pm
- Location: South Central Michigan
- Contact:
I don't know if your still on the fence about the rear windows or not, but I think you should rework them in my opinion. When I see a P-36, it's one of the more major differences that I notice between the P-40 B's and C's. The long sharper windows look good. Not to mention that the original models windows are WAY to thick. And the window on the left side has the opening for the fuel tank which could be easily recreated. : 
-
pickelhaube
- Officer - Brigadier General
- Posts: 9646
- Joined: Mon Jan 22, 2007 5:52 am
- Location: New Orleans
Hello C-7a Caribou,
I think your right the rear window needs to be done closer to scale. The carving and shaping of the nitch shouldn't be too difficult. The glass would be the toughfest. But I think that a plastic Coke bottle or the like should be the ticket.
Matthew
I have started cutting plastic. I have cut off the rudder, the nose and have laid out the splitting of the fuse. There was much thought that went into this. The rear tail wheel on the 36 has a streamlined bump on it that the P-40 does not. It looks like the 40 tail swung out and the 36 wheel telascoped so the doors on the 40 are a lot longer than the 36 but the wheel placement after it is down is in the same spot. I will try to use the same door layout to make things simple and put the bump on the door. This may or may not work. Plan B will be to get some a/c hinges from the hobby shop make my own door with bump but the tail wheel will not swing out. The way to fix this is to glue a tube up into the fuse pull out the tail wheel( don't lose it) and close the door.
This is all long winded but sometimes customizing can be tricky.
Don't forget to get a Prop from Aviator Nut this will save much time and effort . For $5 you can't beat the price because it will be very difficult to use the prop from the P-40 you will have to make the hub and glue the blades on just right. Not eay to do.
Kirk Douglas : Mine hit the ground first
John Wayne : Mine was taller
John Wayne : Mine was taller
-
pickelhaube
- Officer - Brigadier General
- Posts: 9646
- Joined: Mon Jan 22, 2007 5:52 am
- Location: New Orleans
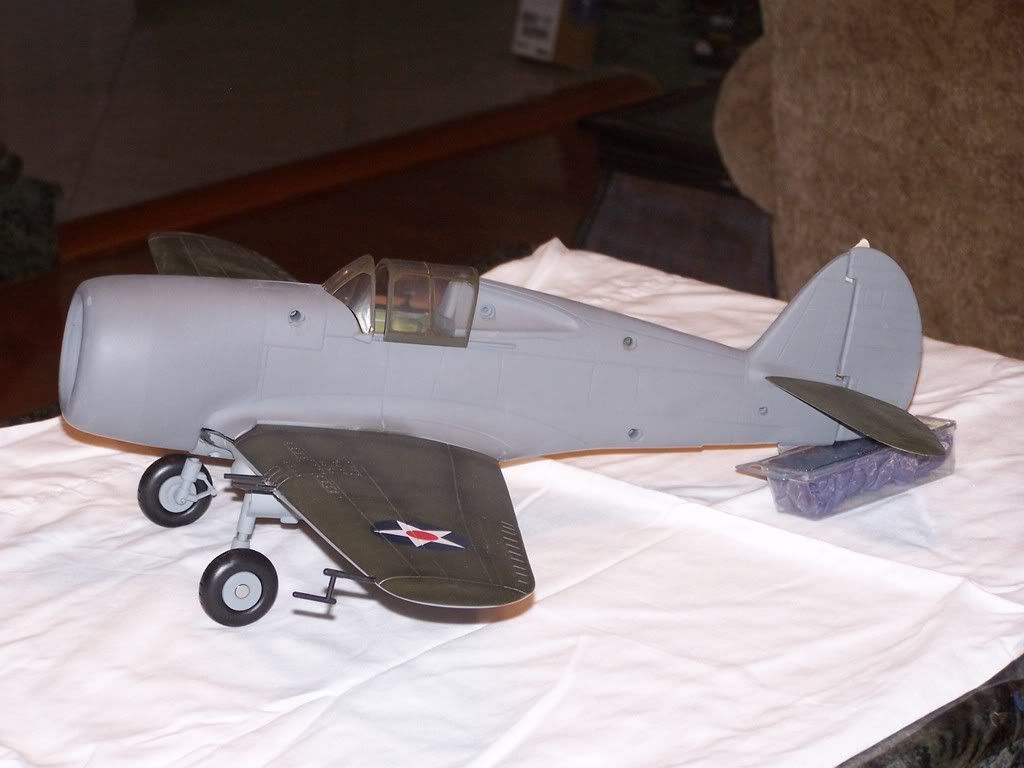
I am going to reserect this post. I have started back on the P-36 and the Ki-61 Tony is ready to post pics. But it has been so long since I posted them that I have forgotten how to. The call has been made to my nephew he will probably be over this weekend.
I will be working on the P-36 as I work on the Tony. Work has been done on the 36 . I have split the fuse and rudder and am ready to splice them back. Finally a move in the right direction.
I will be working on the P-36 as I work on the Tony. Work has been done on the 36 . I have split the fuse and rudder and am ready to splice them back. Finally a move in the right direction.
Kirk Douglas : Mine hit the ground first
John Wayne : Mine was taller
John Wayne : Mine was taller


-
pickelhaube
- Officer - Brigadier General
- Posts: 9646
- Joined: Mon Jan 22, 2007 5:52 am
- Location: New Orleans
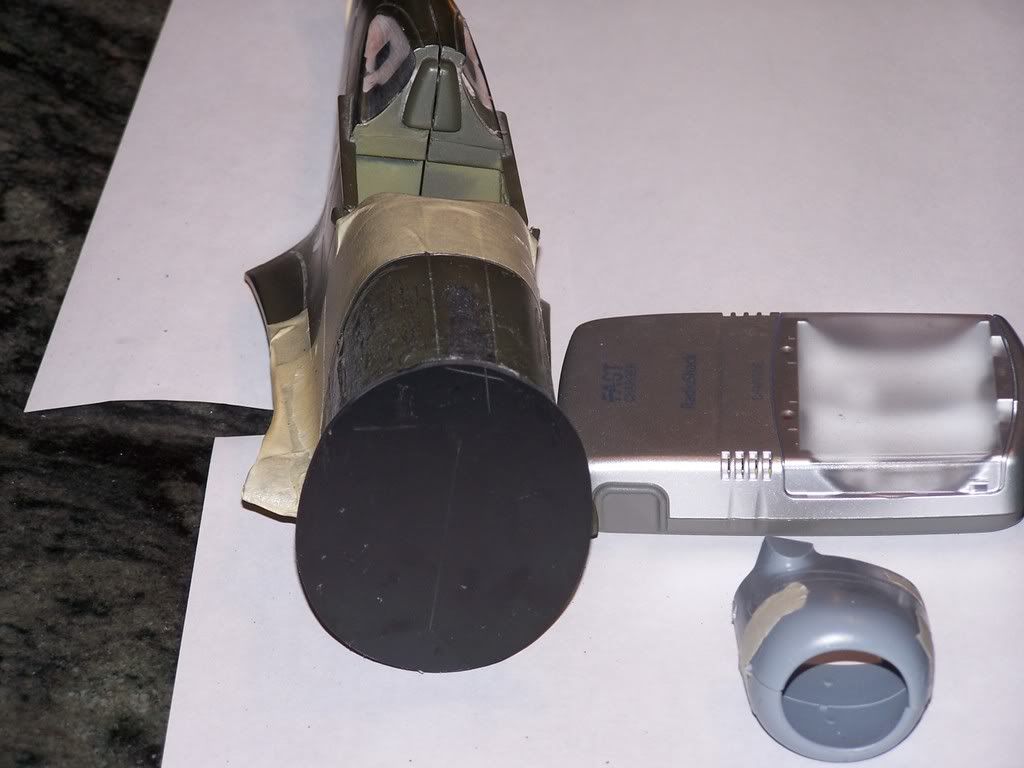
Plastic cutting begins.
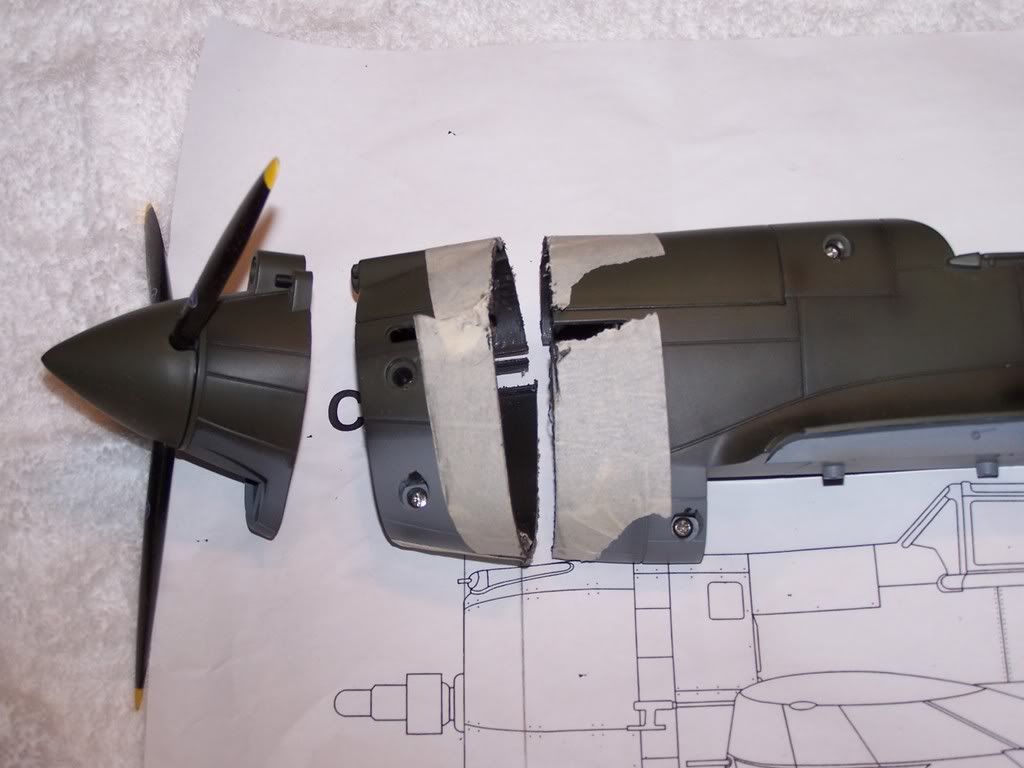
more works
Tail is split joint is done with bondo. Mask off the surrounding area so bondo does not stick. It is real tuff to get off.
more works
Tail is split joint is done with bondo. Mask off the surrounding area so bondo does not stick. It is real tuff to get off.
Last edited by pickelhaube on Sat Feb 09, 2008 9:53 am, edited 1 time in total.
Kirk Douglas : Mine hit the ground first
John Wayne : Mine was taller
John Wayne : Mine was taller
-
pickelhaube
- Officer - Brigadier General
- Posts: 9646
- Joined: Mon Jan 22, 2007 5:52 am
- Location: New Orleans
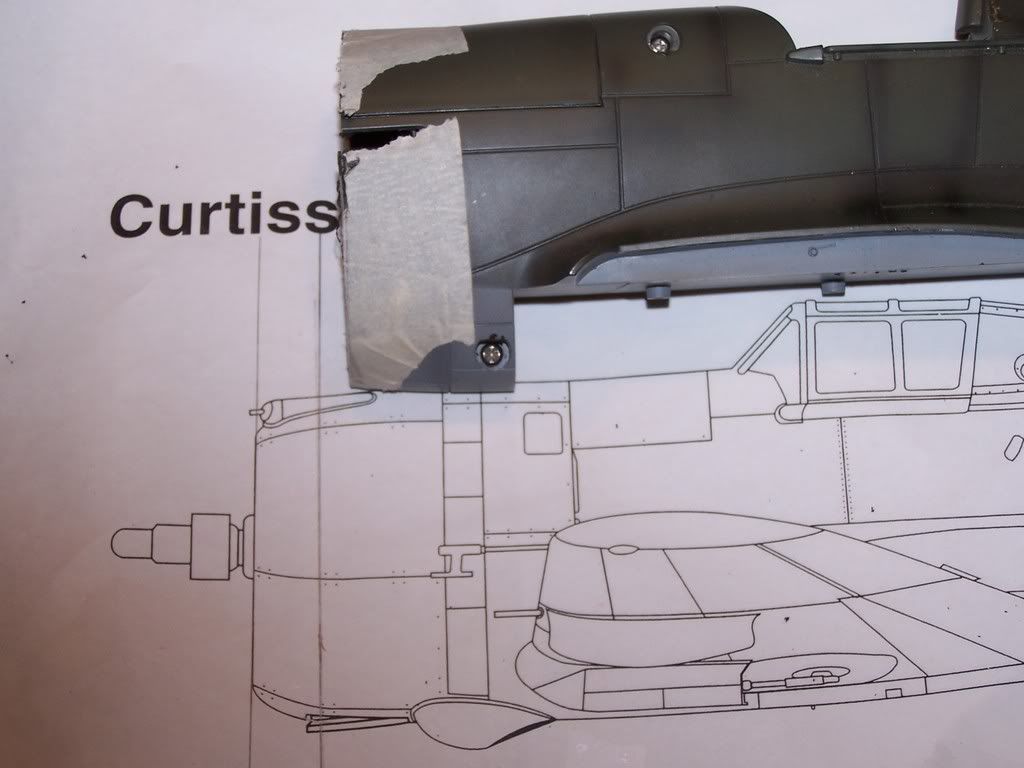
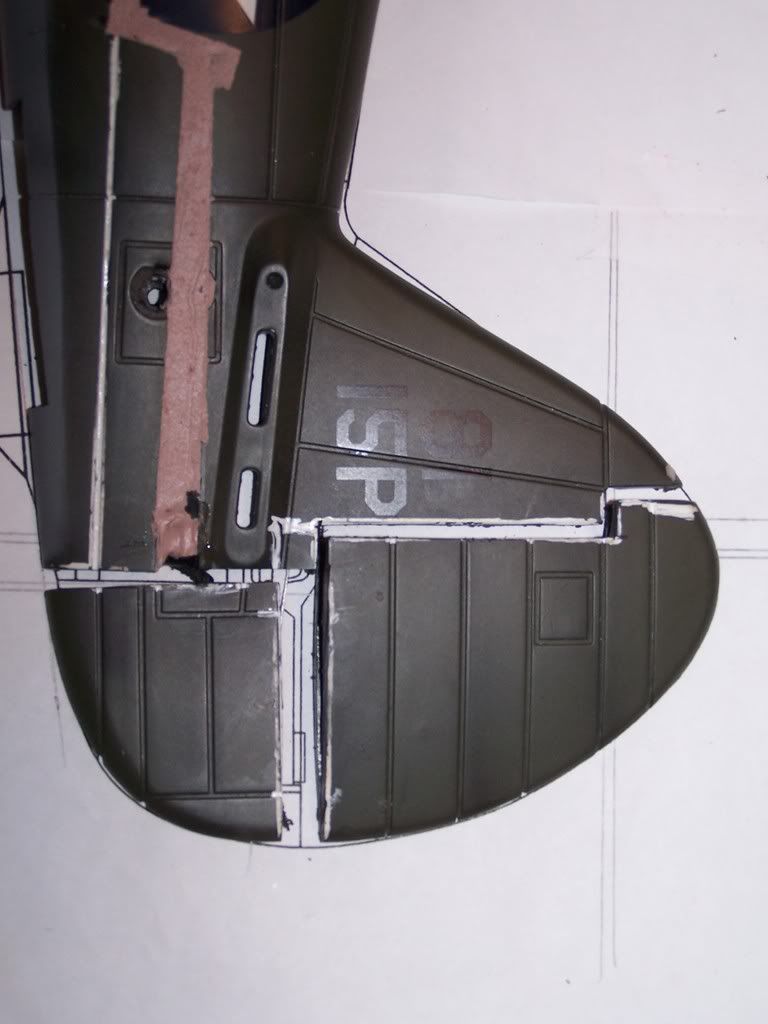
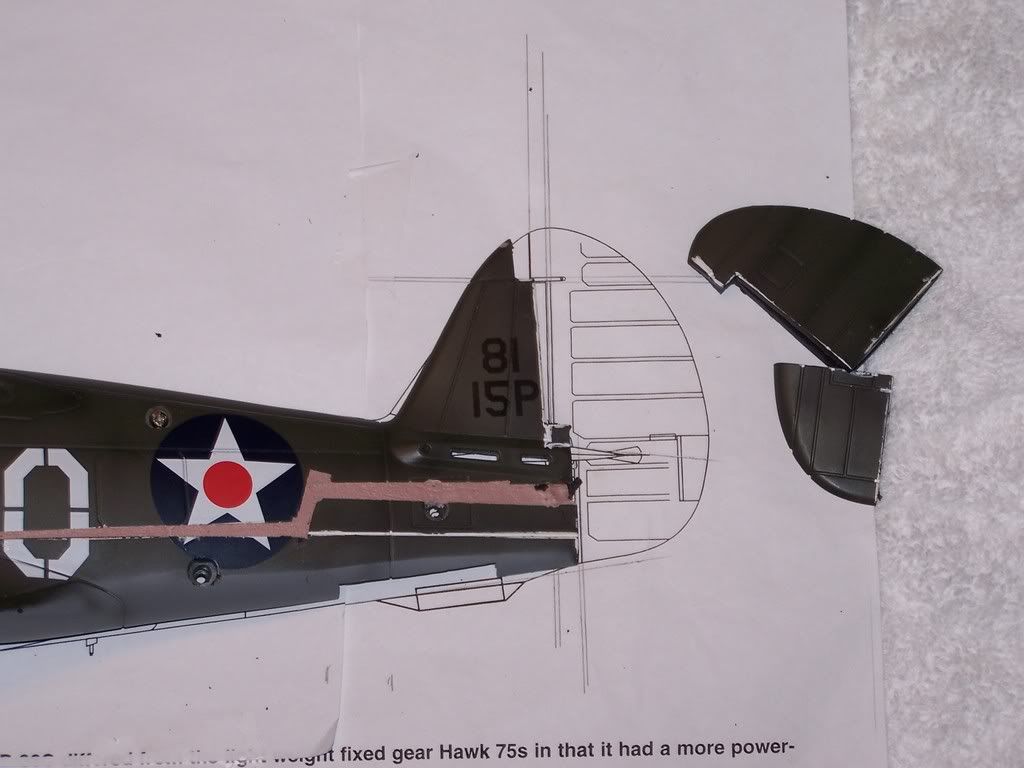
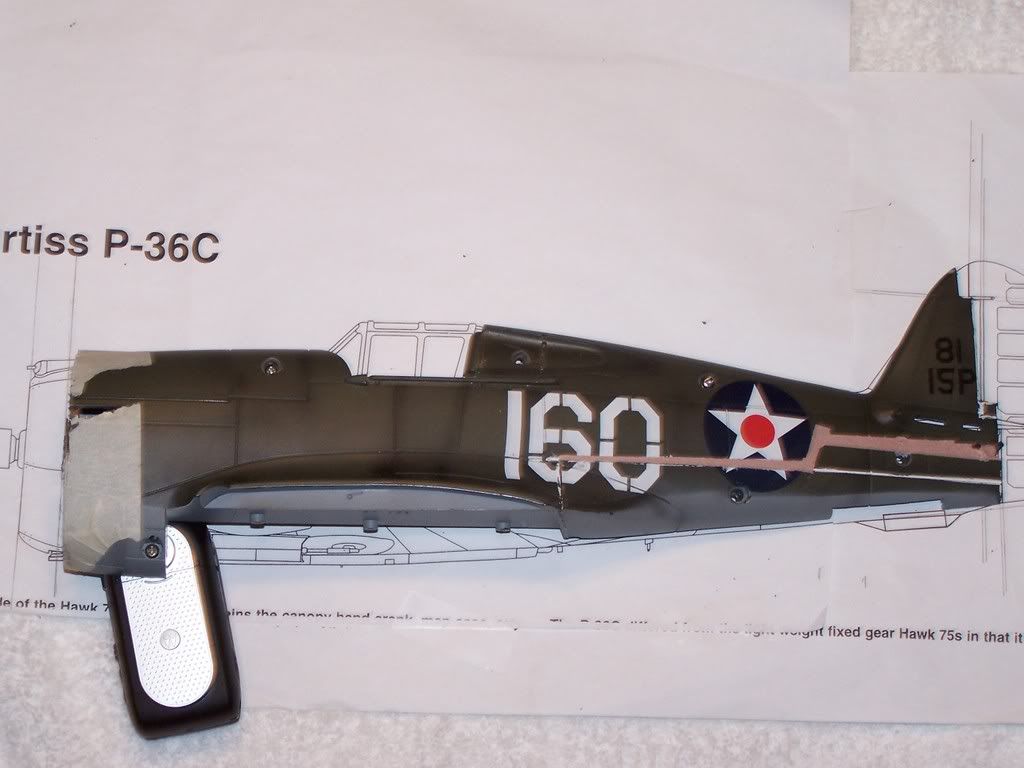
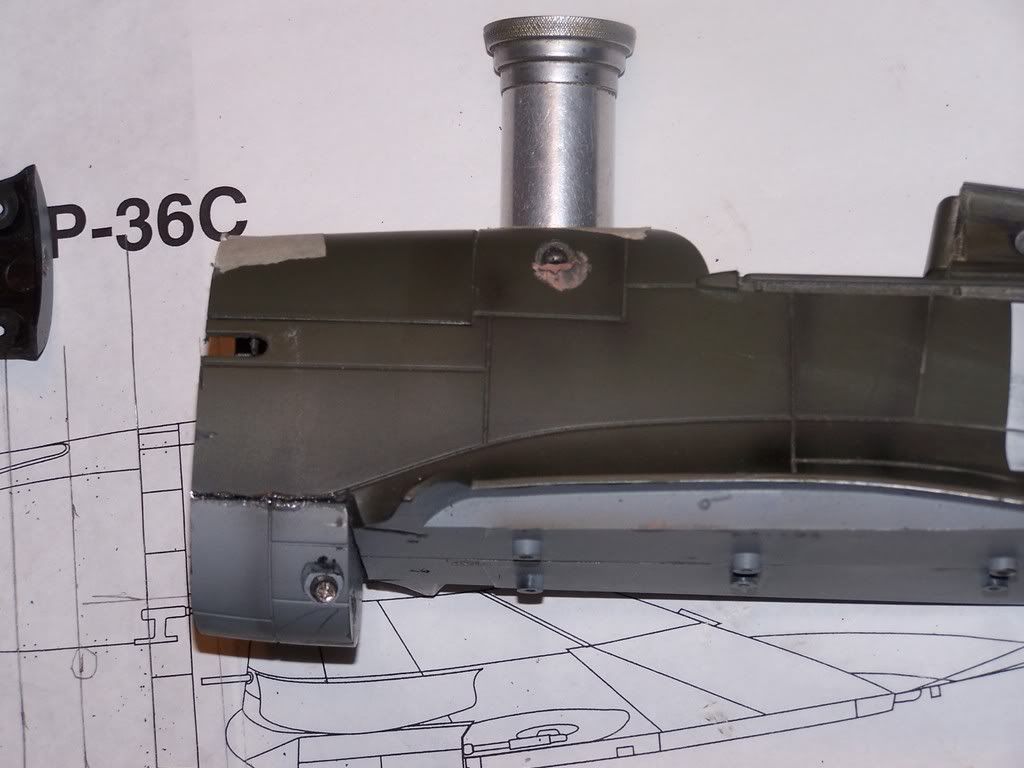
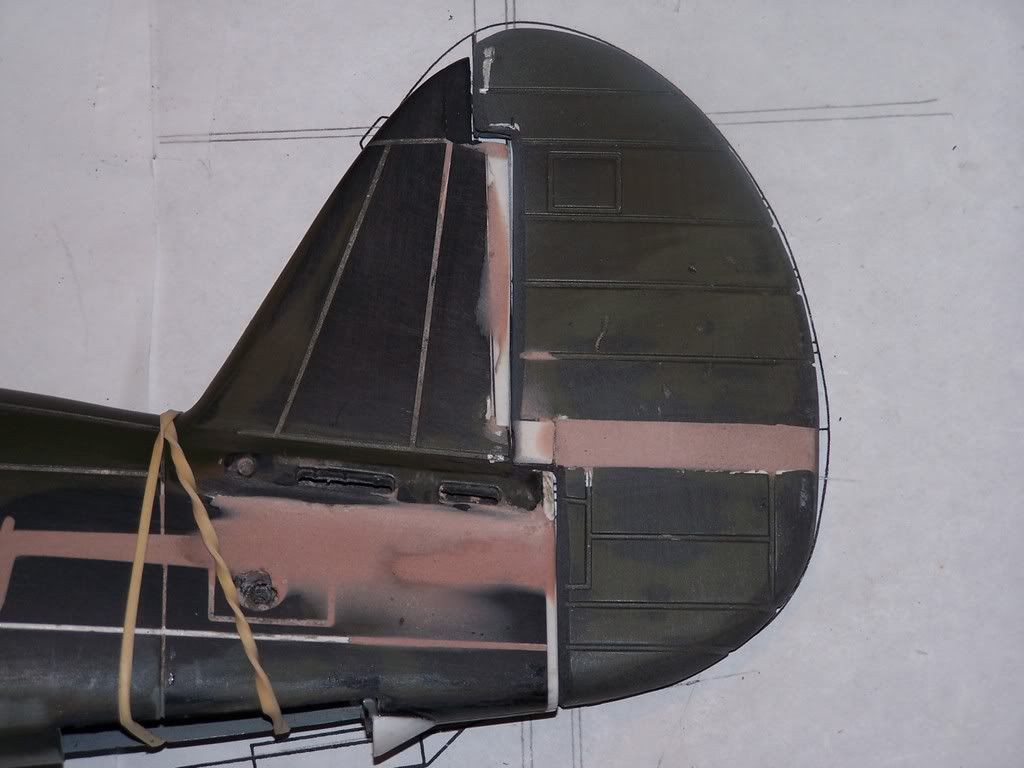
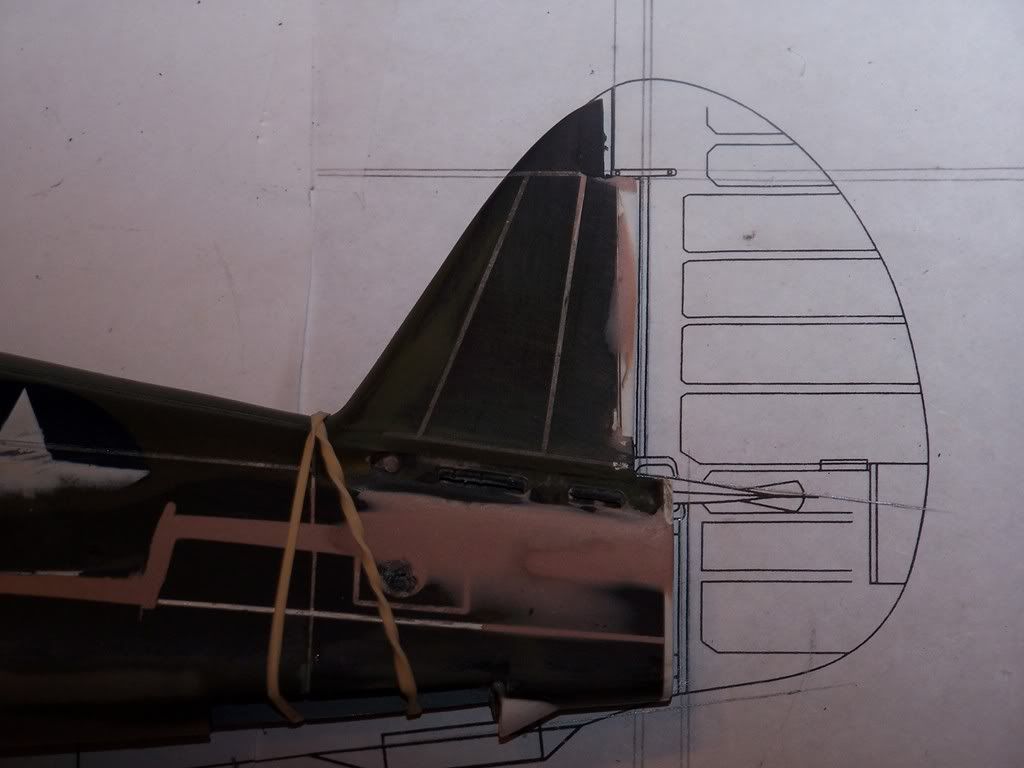
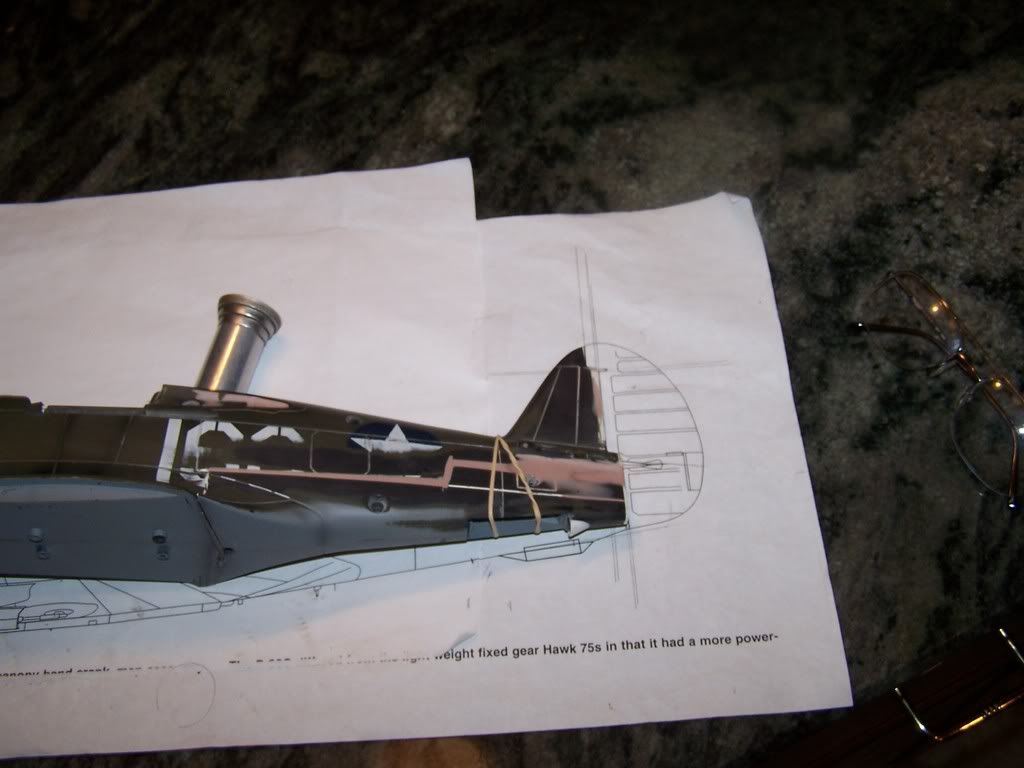
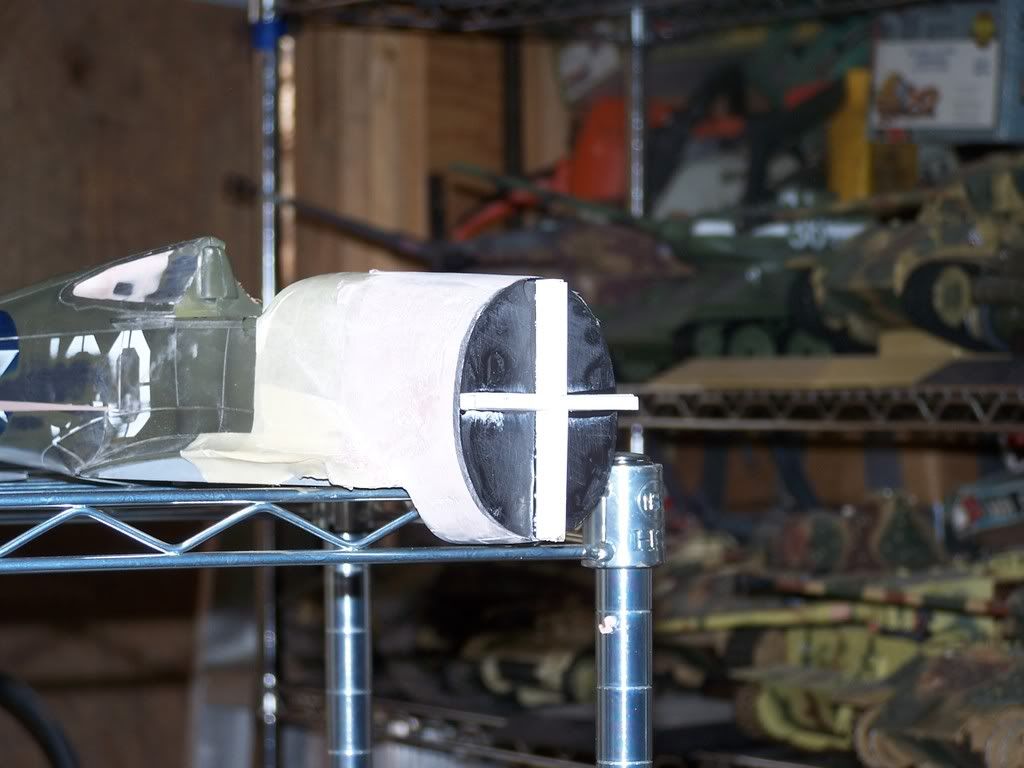
Progress is coming along. The rear fuse has been split 1/4 reglued and bondoed. The rudder the same, split and reassembled. The bottom wing faring has been thined down 3/16. The front leading wing fairing has been cut 3/16 and reglued.
Here is the bottom fairing after thinning out 3/16 of an inch
Here is the leading edge fairing reworked. Cut 3/16 and reglued.
A little fuzzy but here is the rear glass socket lengthend

Here is the tail completed after being reworked. Spacers had to be added to fin .
The rear fairing for the tail wheel this completely done but I will post it later.
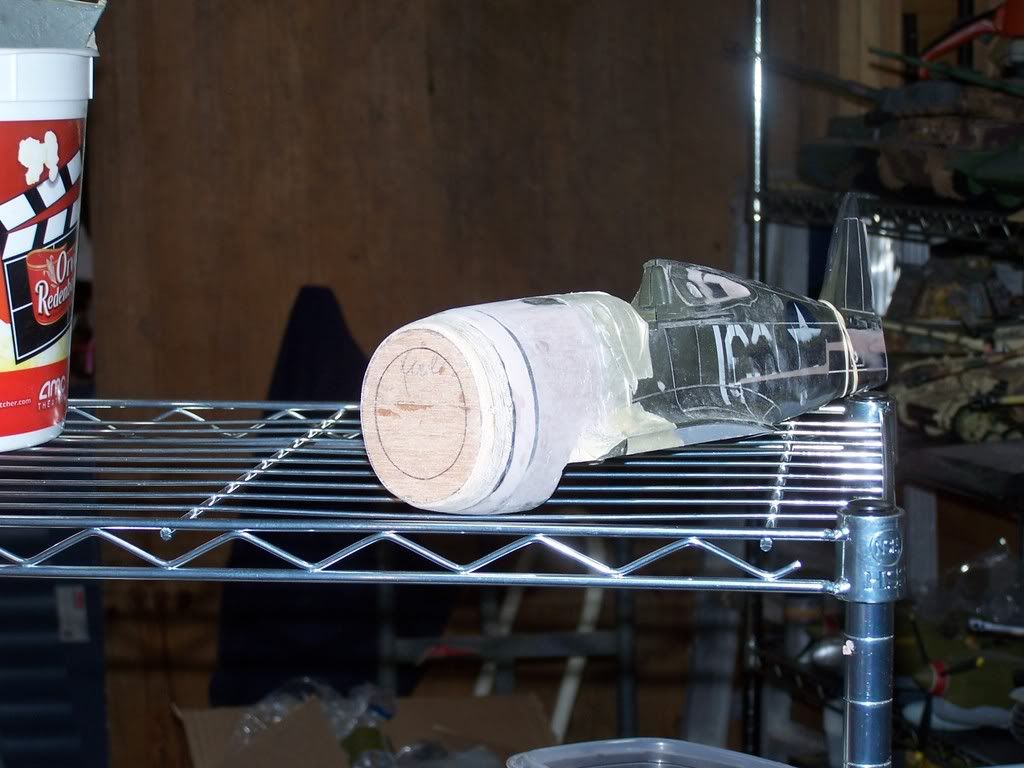
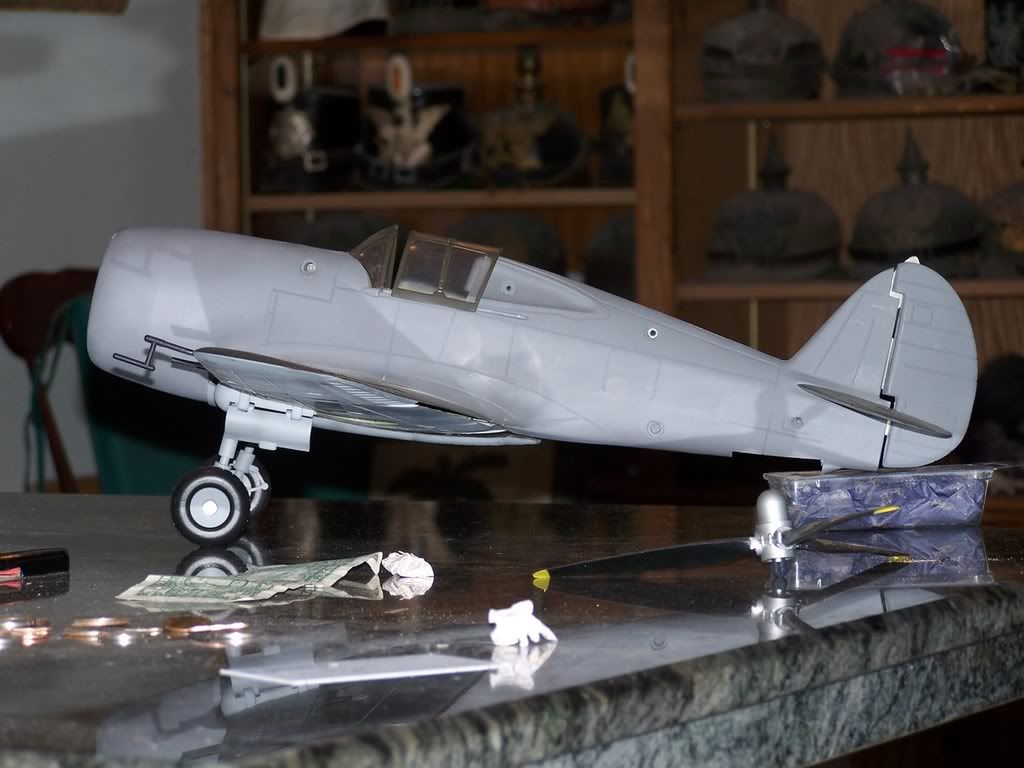
The rear modification is done. Not as bad as I thought it would be. I did a final cut on the nose and am ready to start forming it.
Things left to do.
1. Change the wheel covers
2. The rear stab needs a little trim.
3. Of course finish the cowling (start ?)
4. Vacumeform rear glass. This is something I have never done but I do have a Mattel vacumformer.
5. Paint job.
Anybody still with me ?
Here is the bottom fairing after thinning out 3/16 of an inch
Here is the leading edge fairing reworked. Cut 3/16 and reglued.
A little fuzzy but here is the rear glass socket lengthend
Here is the tail completed after being reworked. Spacers had to be added to fin .
The rear fairing for the tail wheel this completely done but I will post it later.
The rear modification is done. Not as bad as I thought it would be. I did a final cut on the nose and am ready to start forming it.
Things left to do.
1. Change the wheel covers
2. The rear stab needs a little trim.
3. Of course finish the cowling (start ?)
4. Vacumeform rear glass. This is something I have never done but I do have a Mattel vacumformer.
5. Paint job.
Anybody still with me ?
Kirk Douglas : Mine hit the ground first
John Wayne : Mine was taller
John Wayne : Mine was taller
-
tmanthegreat
- Officer - Brigadier General
- Posts: 11238
- Joined: Tue Oct 05, 2004 7:38 pm
- Location: Central California
-
pickelhaube
- Officer - Brigadier General
- Posts: 9646
- Joined: Mon Jan 22, 2007 5:52 am
- Location: New Orleans
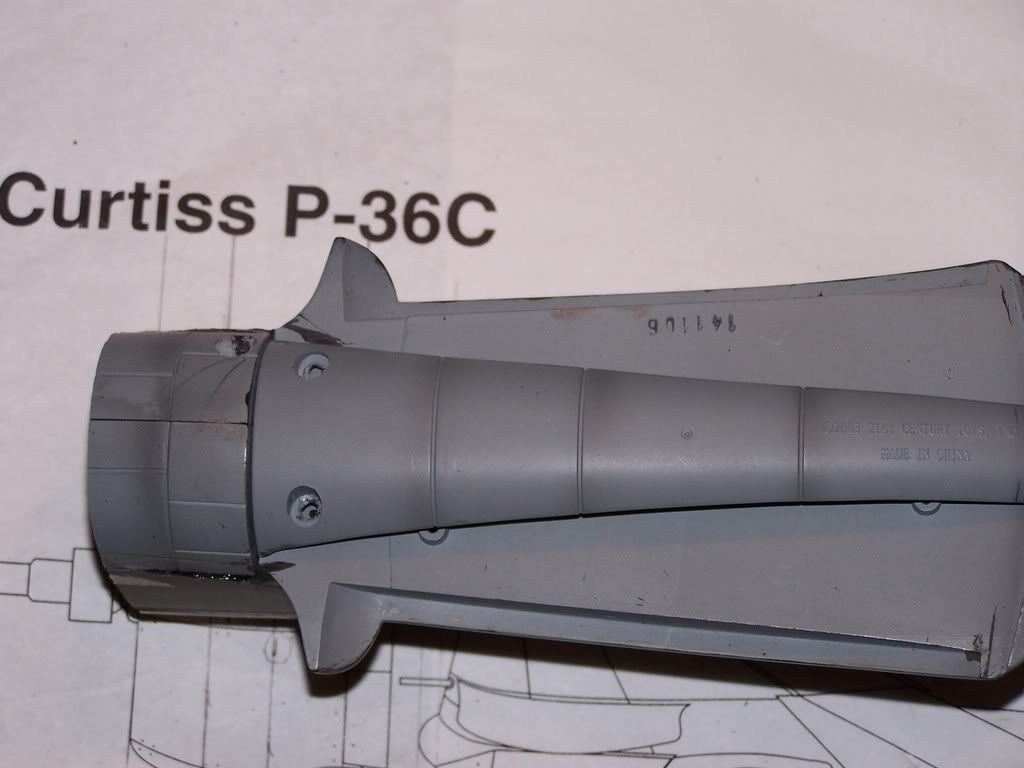
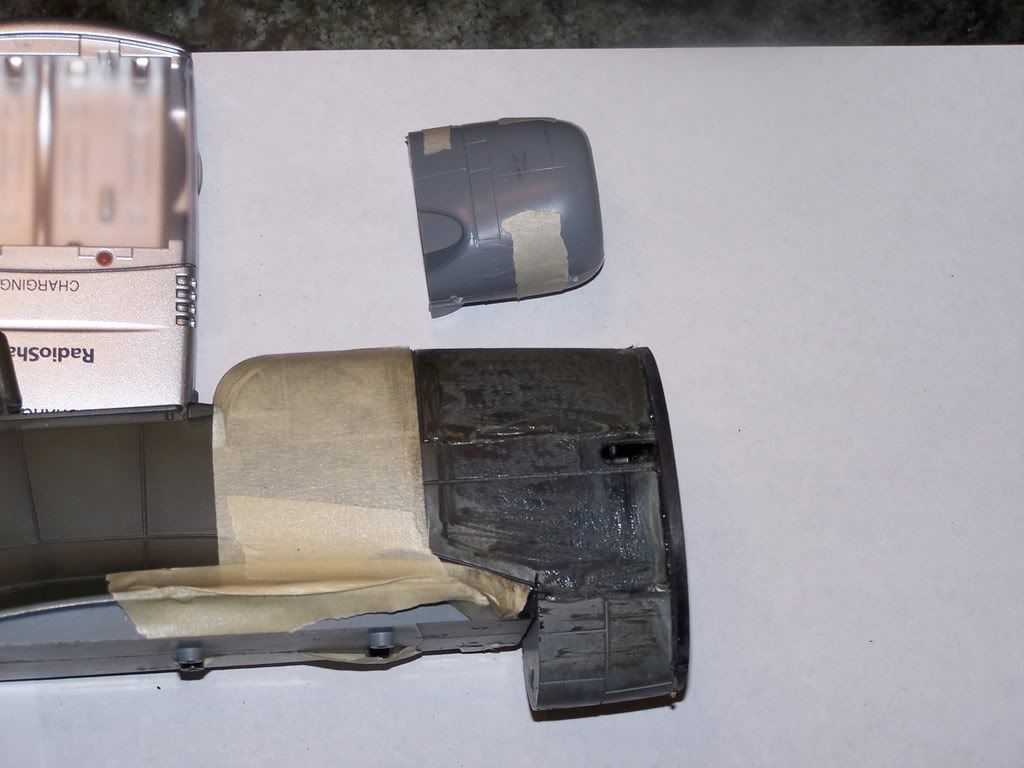
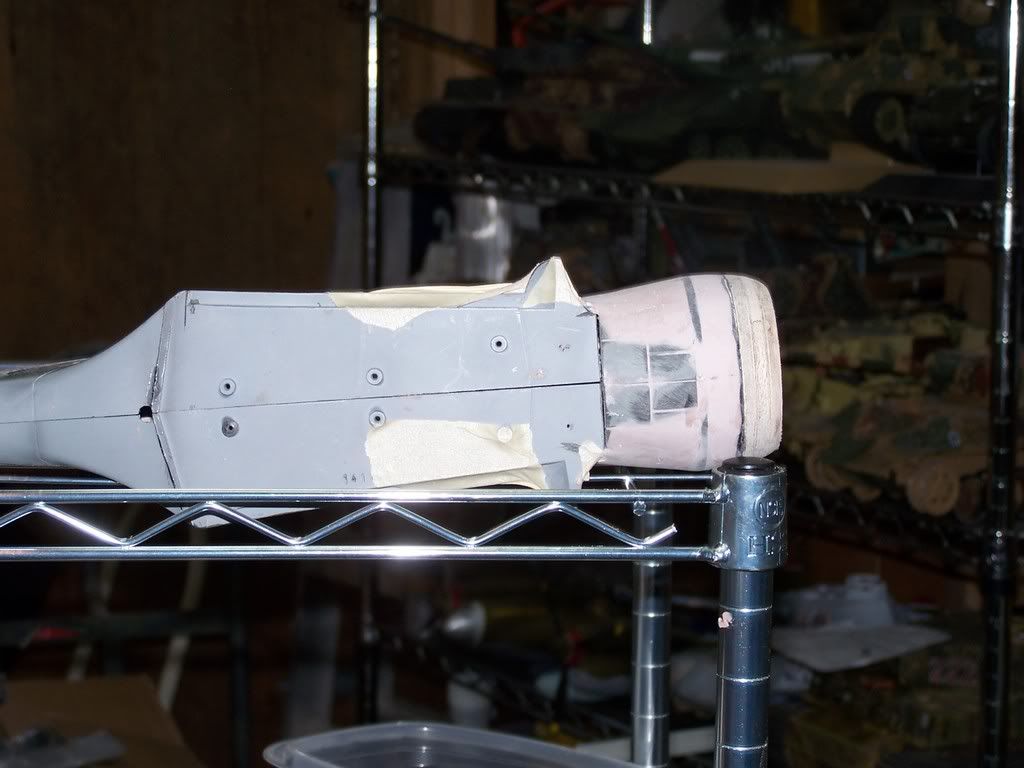
Cowling is started. After looking at the Russian prints and the 1/32 model cowling I had to scale from the model . The black plastic waffer is the start of the funnel shape. This probably should have been been made out of 1/8 ply because the plastic is so hard that when you sand the bodo around it is so much softer that it digs in and the plastic is still there. To prevent this sanding should me done slowy with rough paper so as to work the plastic down at the same time.
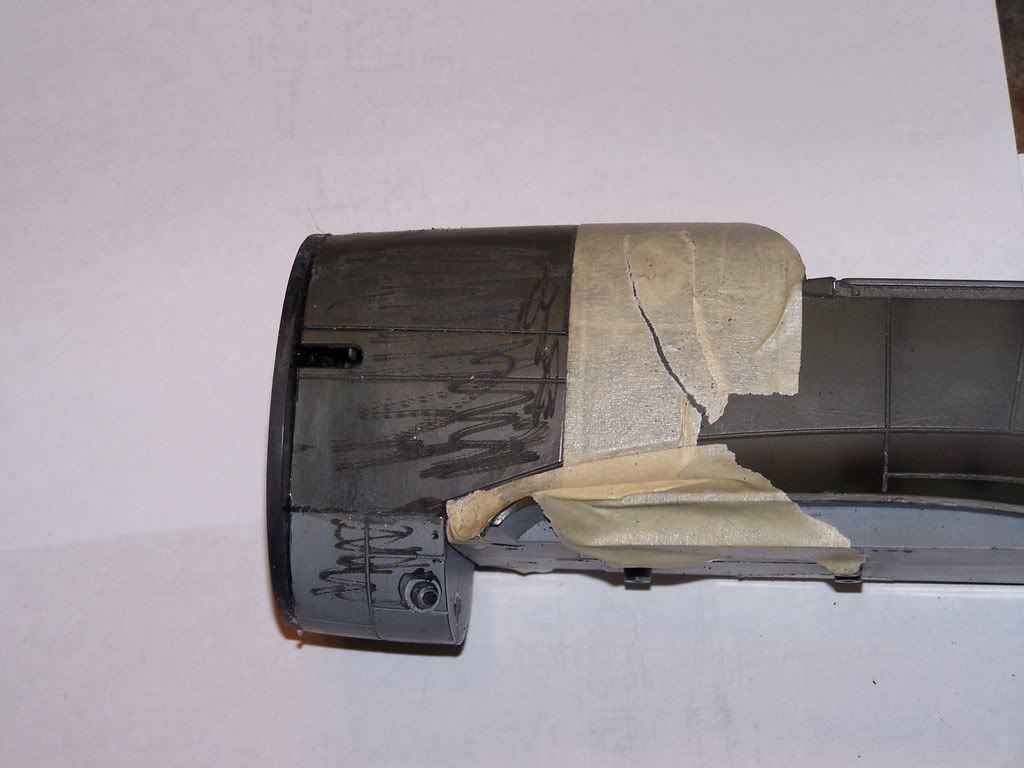
Prep work to accept the Bondo.
Acetotone used to clean area . This will melt the paint and plastic.
7/16 spacer used. This is the area of the cowling that kind of flatens out.

Both areas Bondoed and ply used to shape front ring. Final lip will be plastic. but I want to get the shape a little closer and smother before I glue it on. Plus I need to hollow the engine area and this could be done easier if I saw all of this in half.
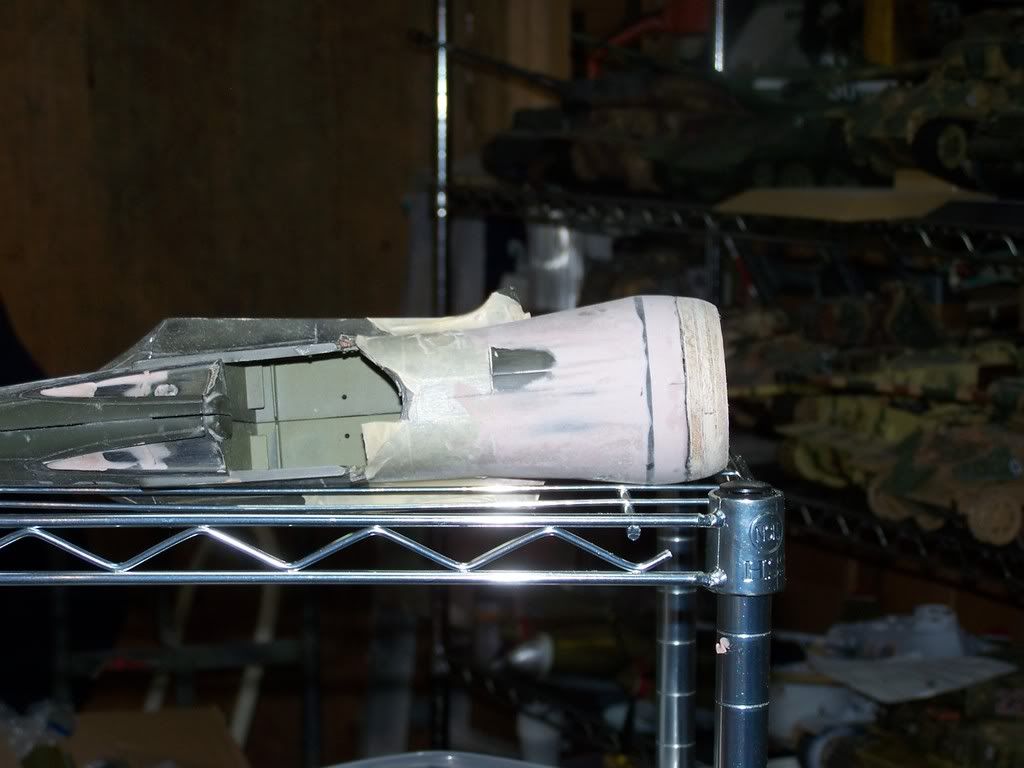
I tried to make the front roll of the cowling out of plastic. This was way to hard to shape so I made it out of plywood. With a coat of bondo this should work fine. Time for hollowing , final shaping and sanding.
Prep work to accept the Bondo.
Acetotone used to clean area . This will melt the paint and plastic.
7/16 spacer used. This is the area of the cowling that kind of flatens out.
Both areas Bondoed and ply used to shape front ring. Final lip will be plastic. but I want to get the shape a little closer and smother before I glue it on. Plus I need to hollow the engine area and this could be done easier if I saw all of this in half.
I tried to make the front roll of the cowling out of plastic. This was way to hard to shape so I made it out of plywood. With a coat of bondo this should work fine. Time for hollowing , final shaping and sanding.
Kirk Douglas : Mine hit the ground first
John Wayne : Mine was taller
John Wayne : Mine was taller
-
pickelhaube
- Officer - Brigadier General
- Posts: 9646
- Joined: Mon Jan 22, 2007 5:52 am
- Location: New Orleans
I was thinking of casting a Corsair or Thunderbolt front engine. There is just enough detail to look good. When I cast it I will do a little detailing to make it look a little more like a Wright Cyclone.aae83 wrote:Very impressive, ph! You're making great progress.
When you get there, what do you plan to use for an engine? (Sorry if you've posted this before...)
John
Kirk Douglas : Mine hit the ground first
John Wayne : Mine was taller
John Wayne : Mine was taller
-
pickelhaube
- Officer - Brigadier General
- Posts: 9646
- Joined: Mon Jan 22, 2007 5:52 am
- Location: New Orleans
The cowling is basicly done. I shot the first coat of primer on and it does not look too bad. One of the black plastic waffers may come back to haunt me. It showed up under the paimt, Hopefully a little sanding will take care of that.
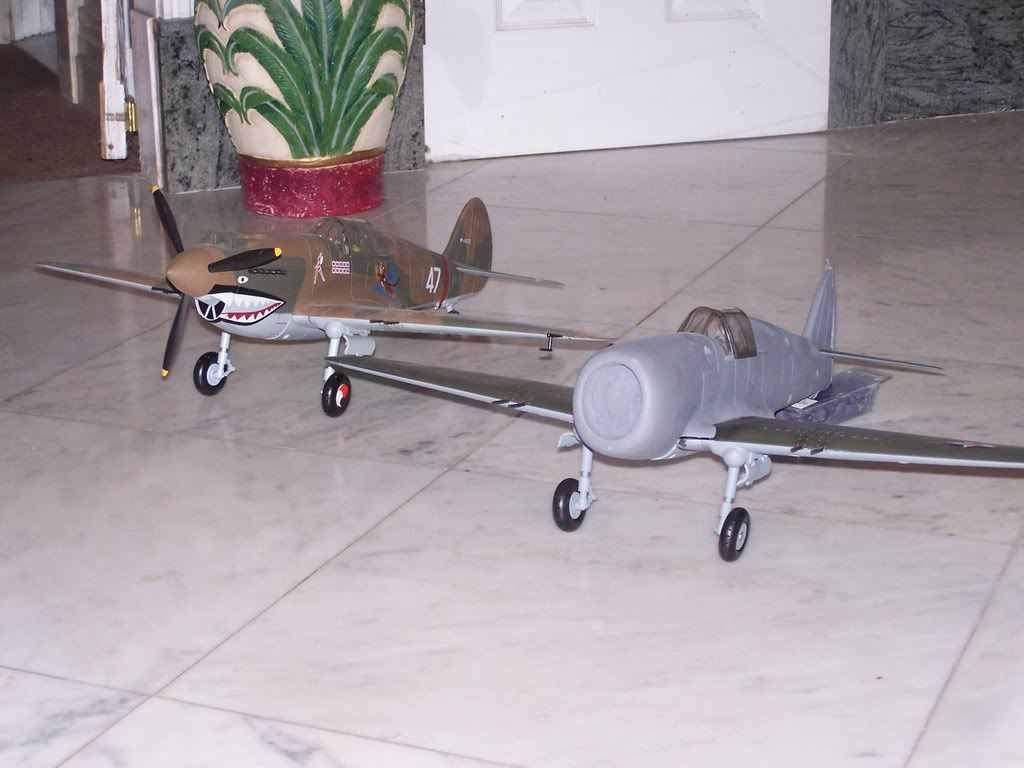
The lines look right.
That canopy does look a little silly but you have to work with what you have.
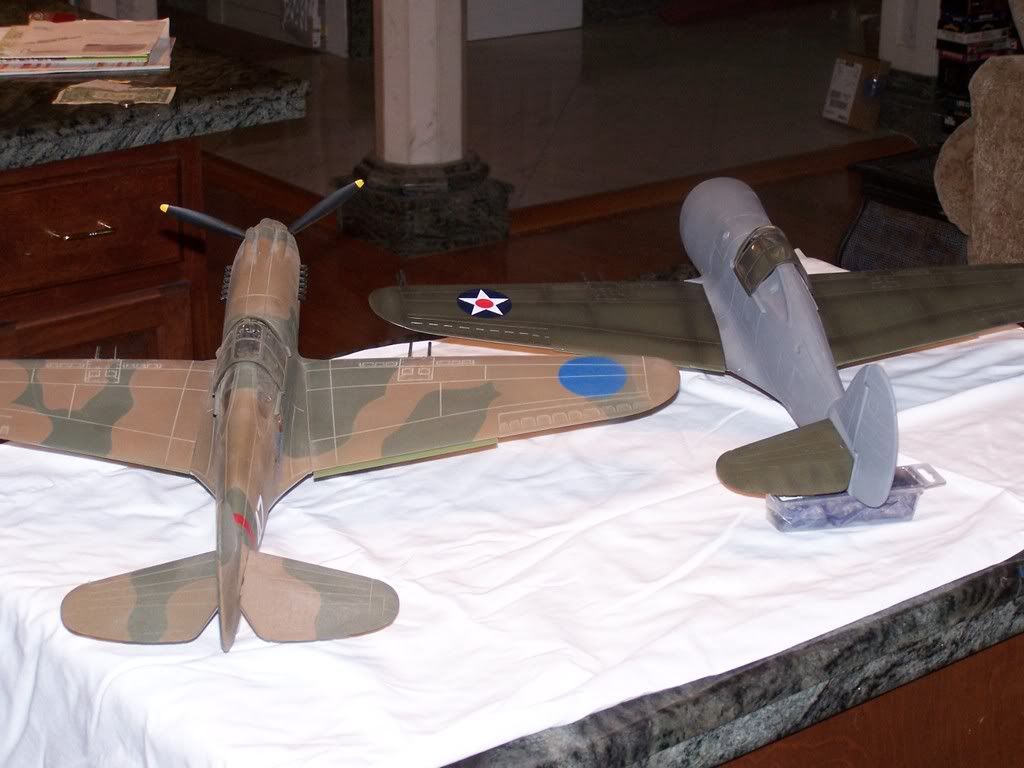
A shot of the rear shows you the lines of P-36.

Head to head the P-40 was a lot bigger.
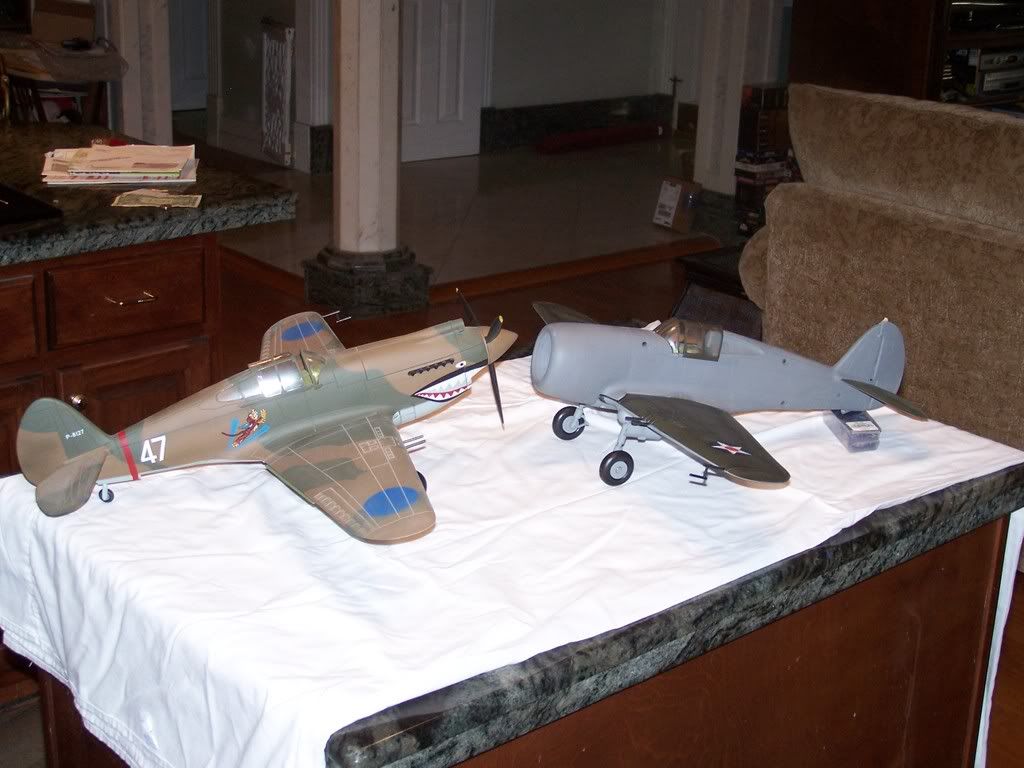
Isaih at Millitary Toys says that he will kick in a engine for the cause. That with the prop I got from Aviator Nut this thing may get done.
Anybody still with me?
The lines look right.
That canopy does look a little silly but you have to work with what you have.
A shot of the rear shows you the lines of P-36.
Head to head the P-40 was a lot bigger.
Isaih at Millitary Toys says that he will kick in a engine for the cause. That with the prop I got from Aviator Nut this thing may get done.
Anybody still with me?
Kirk Douglas : Mine hit the ground first
John Wayne : Mine was taller
John Wayne : Mine was taller