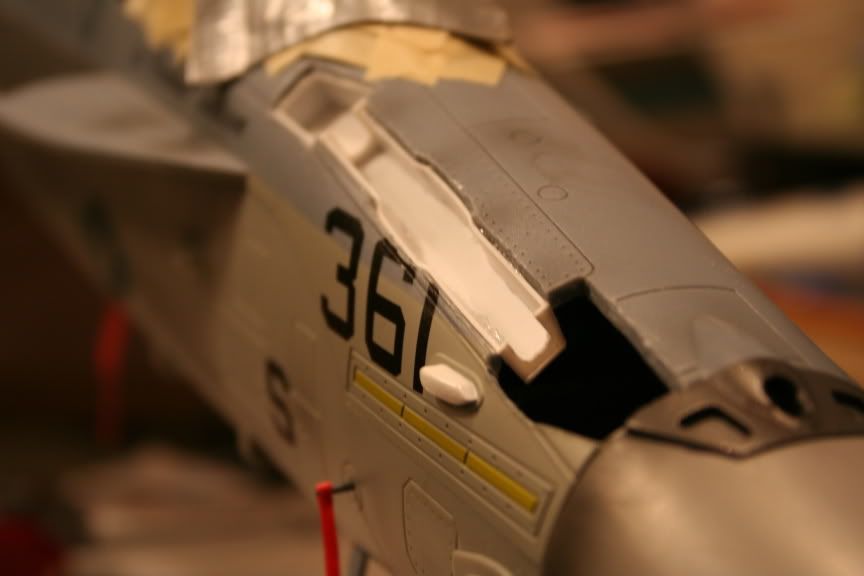
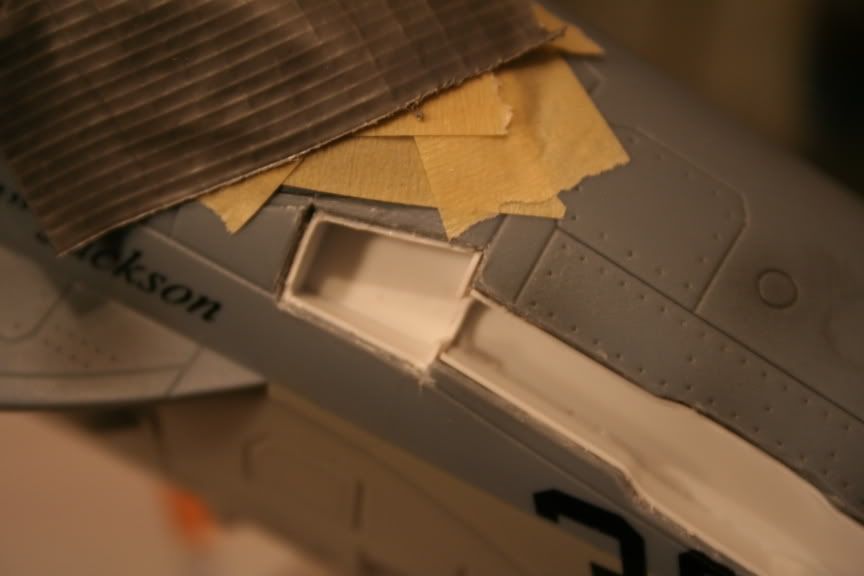
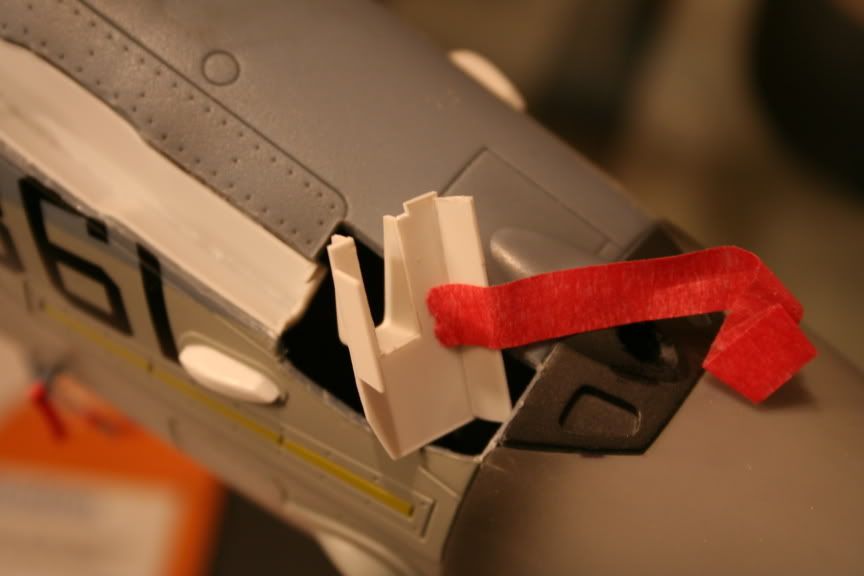
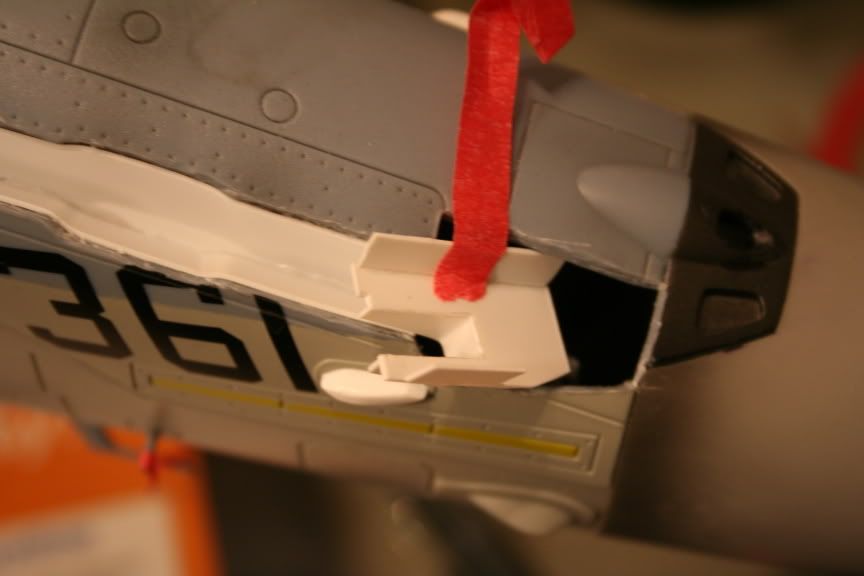
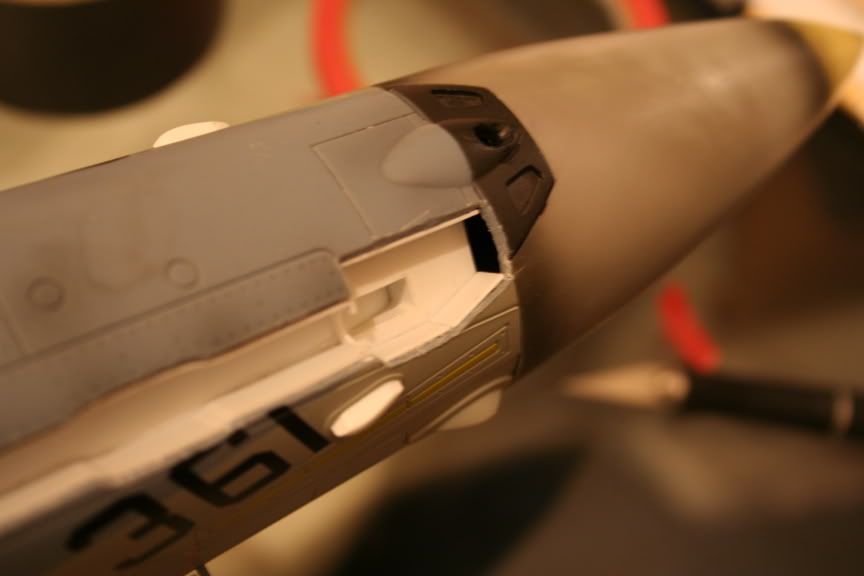
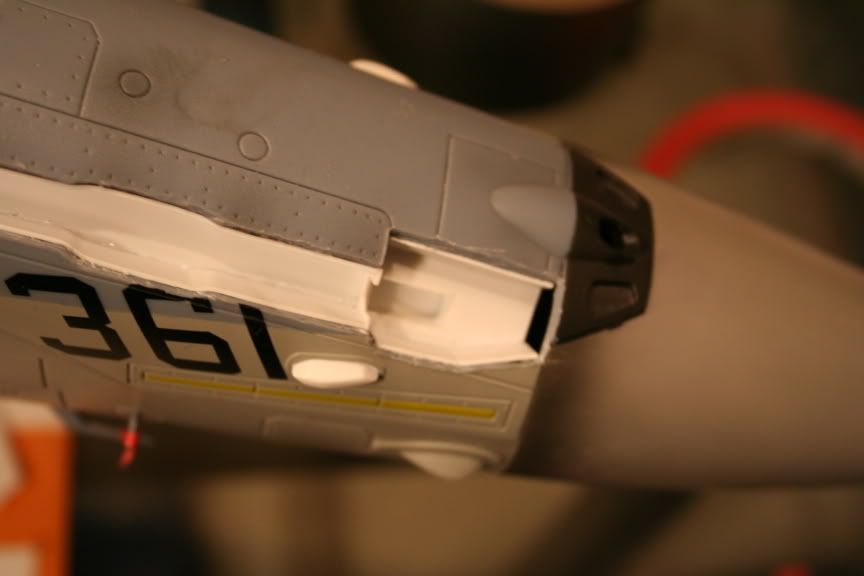
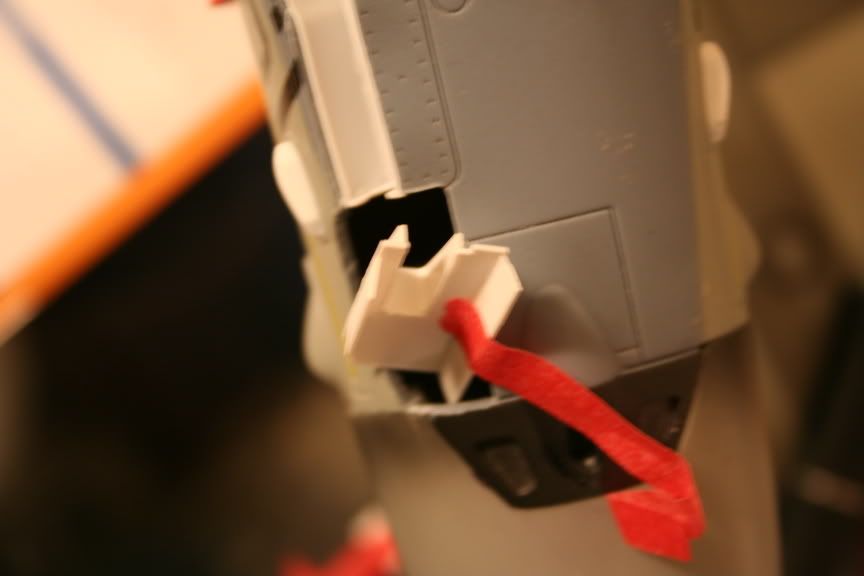
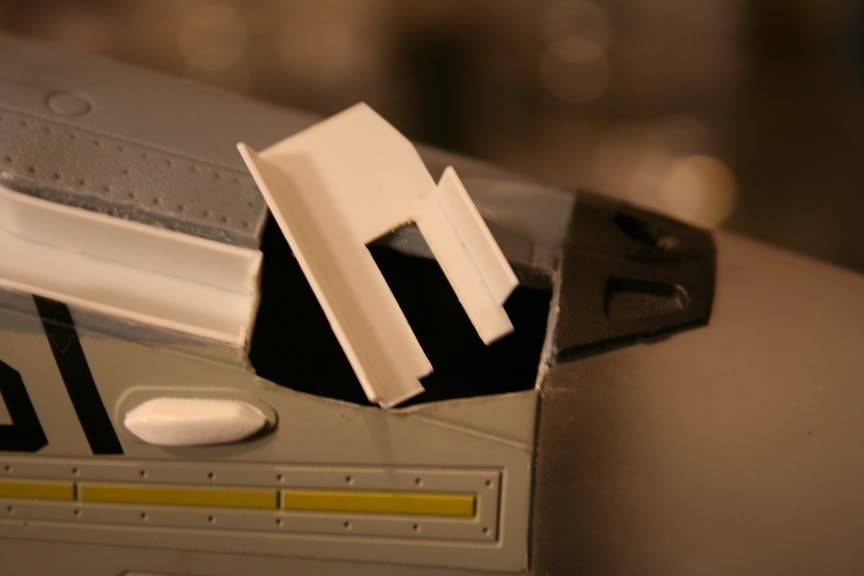
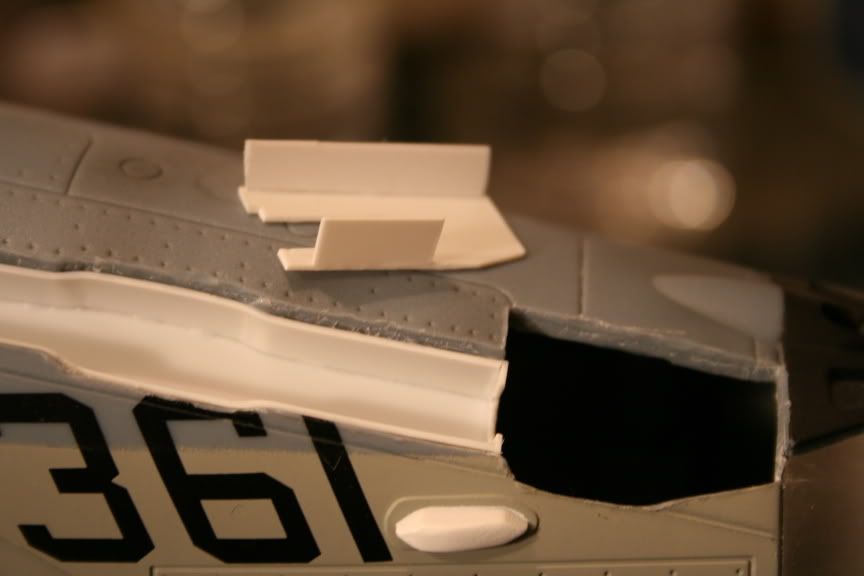
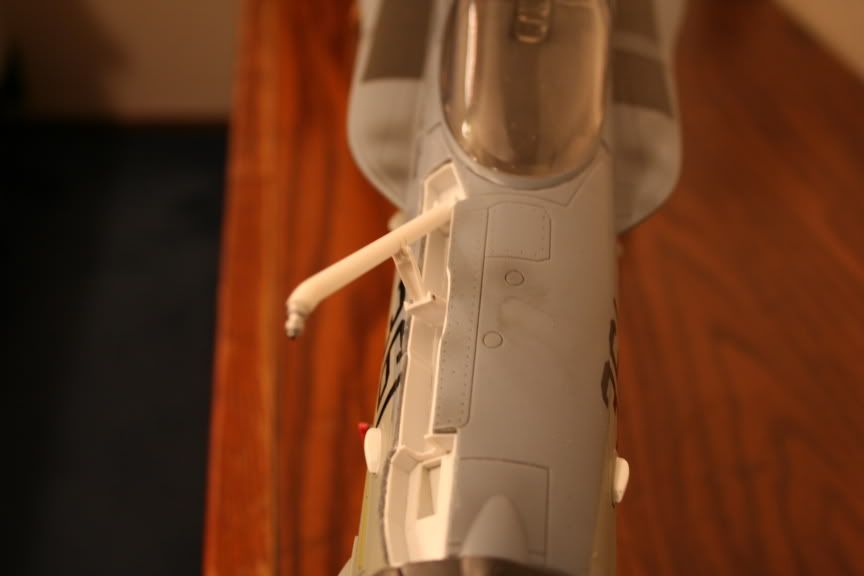
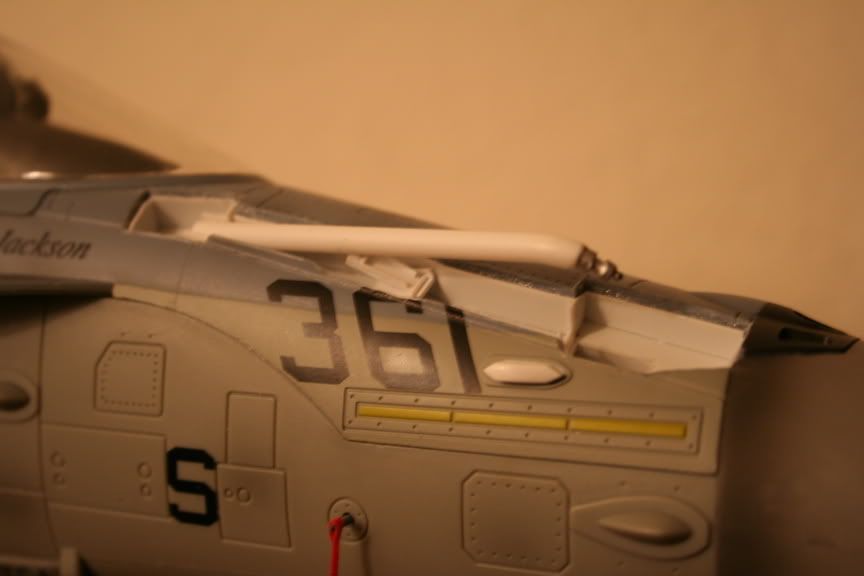
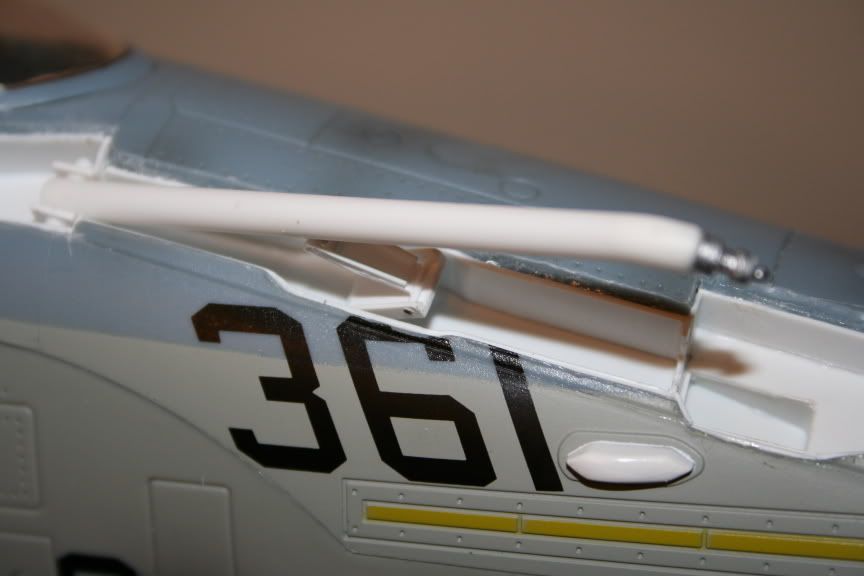
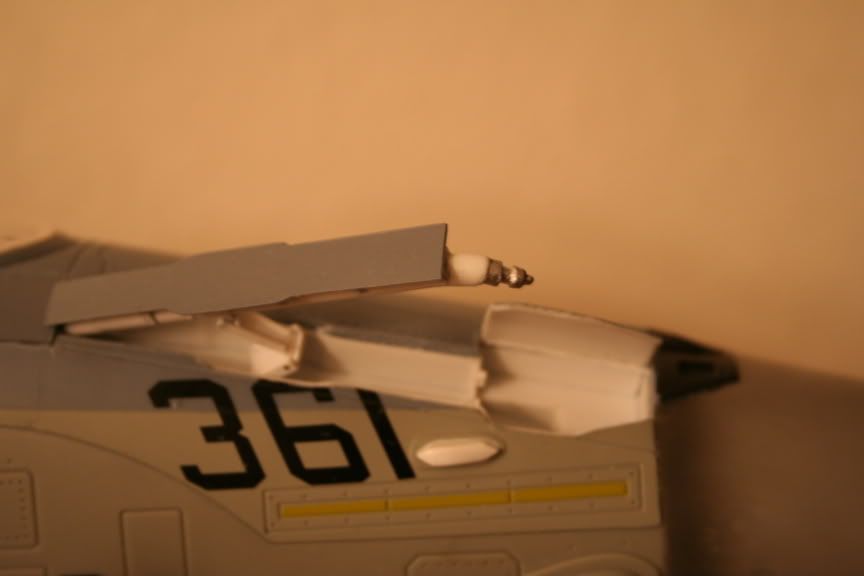
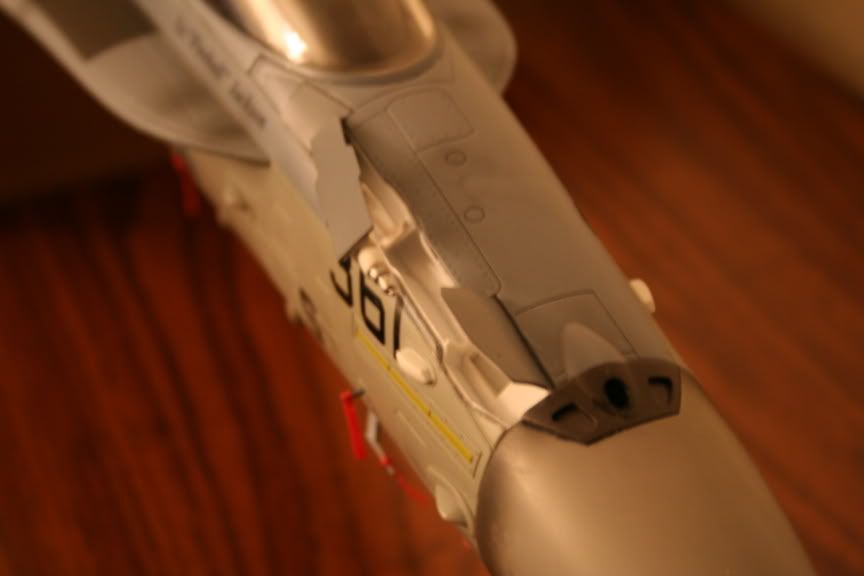
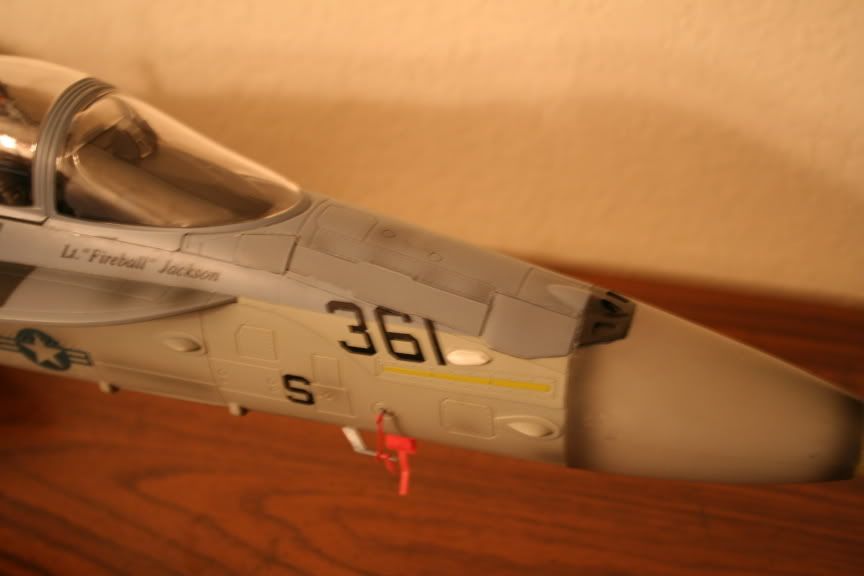
While cutting the doors and panels to add the refueling probe, I came across some surprises. I had already cut loose the Front and Back ends and realized that they still would come out. I suspected that it may have something to do with how the body was molded. I could have hit a spar or some ribbing that would reinforce the structure. Close. I hit two screw points that joined the top and bottom fuselage halves. This forced me to ditch the panels and settle for building new ones. The Speed brake as it turns out was a lot easier to do. I had a good idea of how I was going to approach this and I have half of it completed.
Tray Assembly
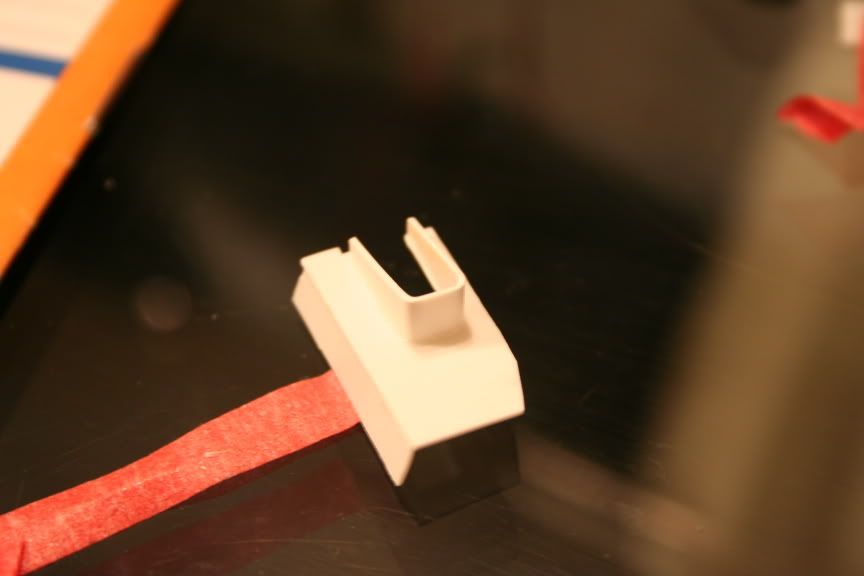
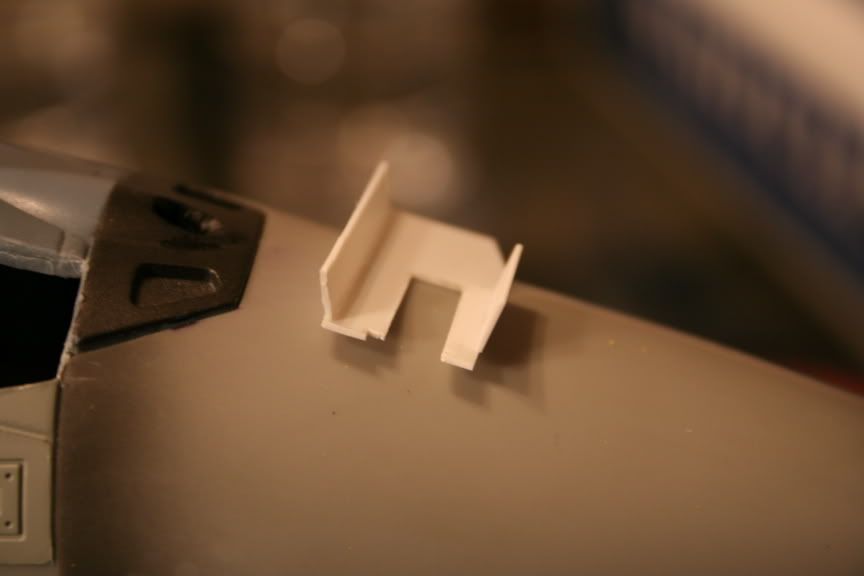
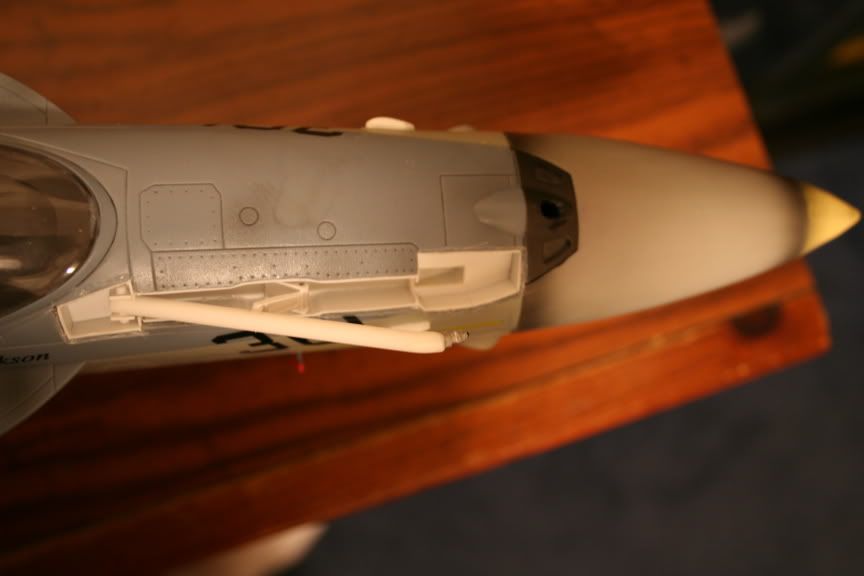
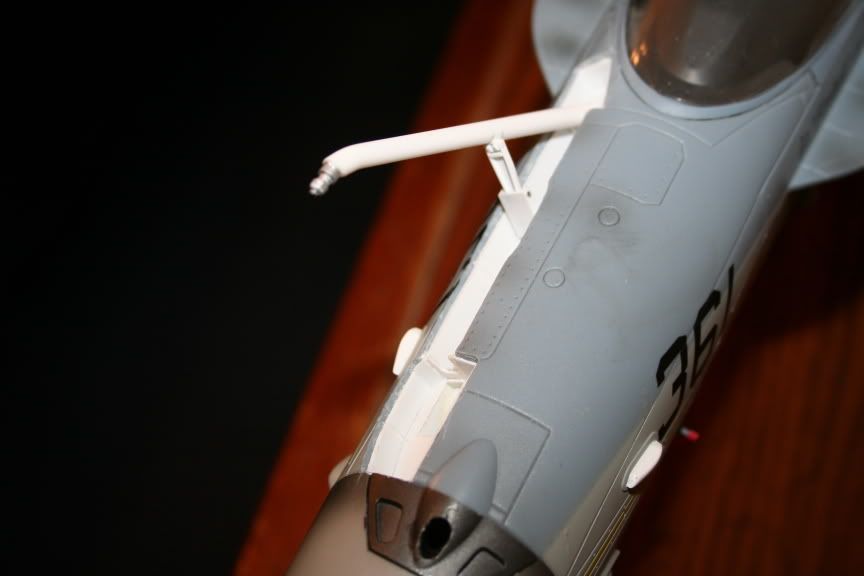
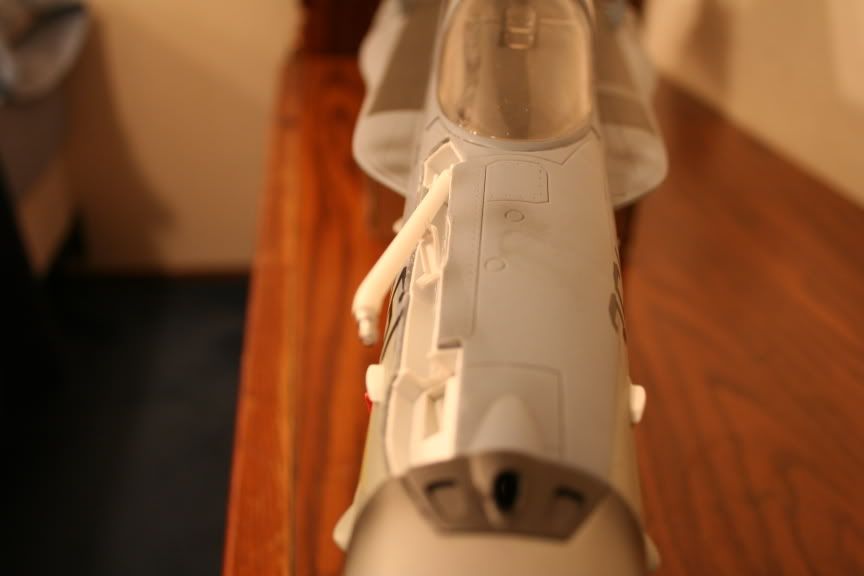
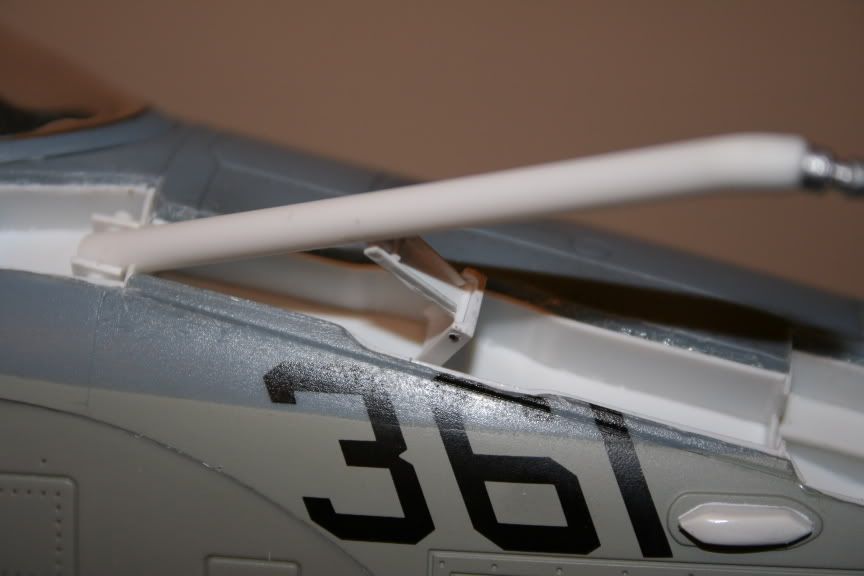
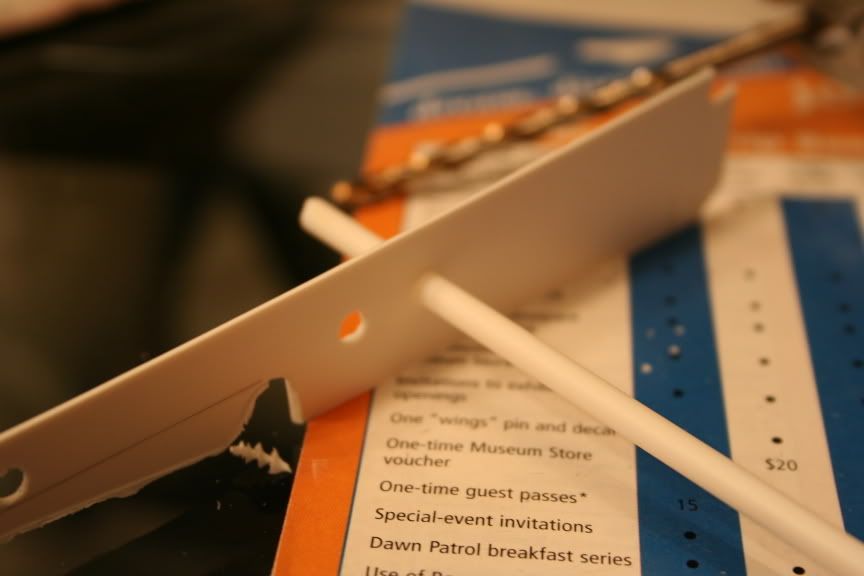
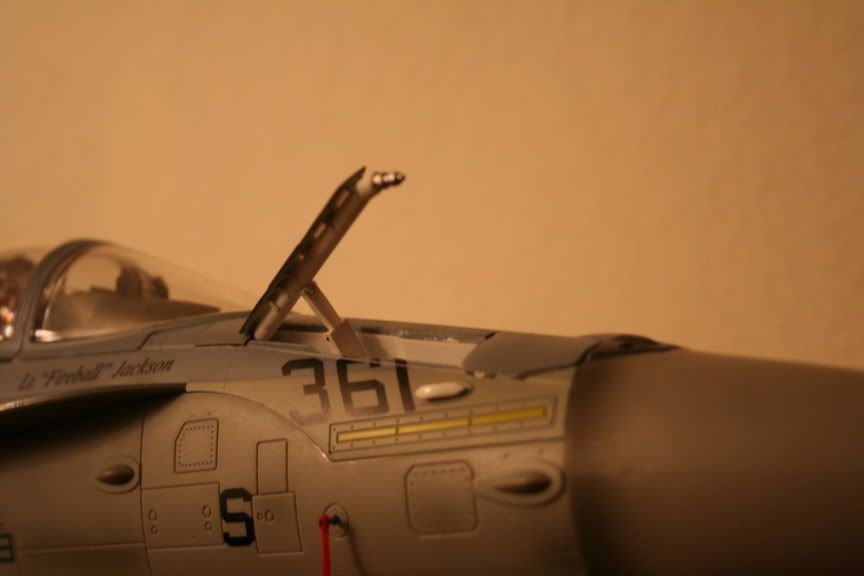
Proof of Concept - Dummy Refueling Bar :
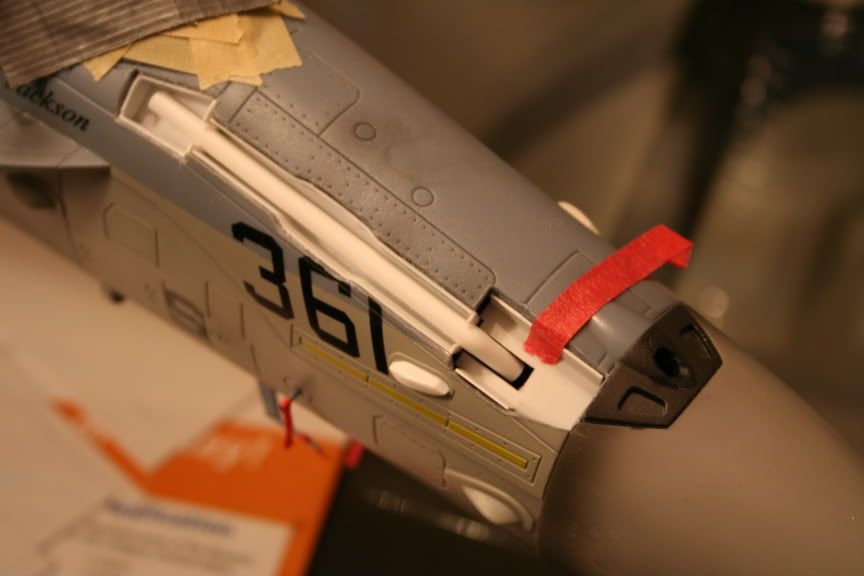
The lower hinge system and the door plates are next on the board.
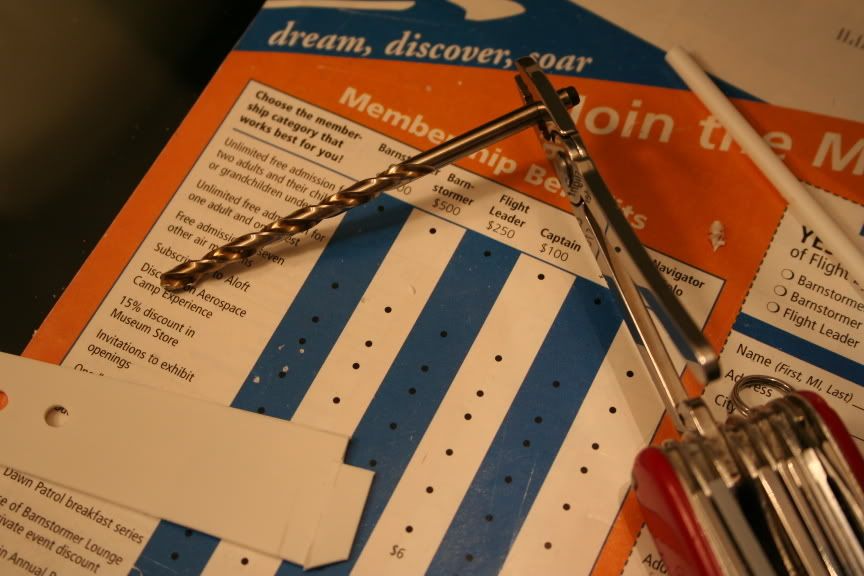
The insane asylum? I escaped, but dont tell anyone!!! haha... well I figure if bbi won't contract a sicko like me I'll go to 21st century toys -UST KIDDING!! nah all that aside, everytime I look at my work, its as if someone else has done it. I don't believe it myself. My thought process is really strange, its like I predict in my head how I want it and it somehow comes out. Turbofans. oh man... it would be nice but due to the internal structure (based on being able to observe it after cutting that huge gap for the airbrake) it wouldn't seem feasible from a logistics standpoint, HOWEVER, I considered changing the turkey feathers at one point to the "full open" position. While on the subject of the refueling boom... cutting the channel has allowed me to peer inside and the radar is not impossible but would be a royal pain in the you know where. the nose cone was NOT glued on to it as I had assumed but rather formed by the top and bottom "sandwich" of the fueselage. The plastic is about 1/8" thick!! And to address the cutting question. I used a number 11 Xacto to do the cuts BUT, when I realized that I tapped into "screw points" (look at the bottom of the plane and you'll know what im talkin about) The panels had to be destroyed and there is where the Dremel came in. I used it to cut off the "joining points" where the screws attached themselves. I'll take a pic of the bit and post it sometime so you'll get a better idea. Also, when I installed anything like antennaes and pitot tubes, they were "pegged" and glued for strength --> i.e, I cut a slot and tapped the piece in, and reinforced it with glue - sort of like snap together or legos. And to my friend Aferguson (Mike I believe it is) you would trust your plane to crazy person???? I think you'd have separation anxiety!! haha!! By the way, I'll have to find the site but some guy actually bought 8 of the Blue Angels jets and has them hanging in his house! I kept thinking if I had to do all these changes to all EIGHT jets, ooooh man...I don't want to go there. Anyway in the works are LASER GUIDED BOMBS.. I'm hoping to have them done before Friday. I will post pics of materials used! If you guys have ANY questions, don't hesitate to ask!
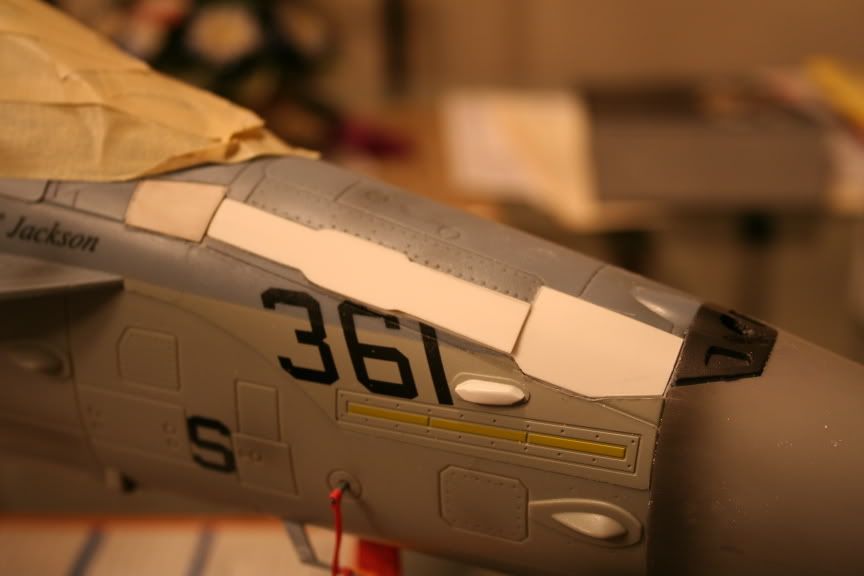
Between Damned Allergies (or the flu), an intermitent runny nose, groginess, and maybe two cuss words hehe... I have to admit, EVEN I do not believe it. I guess crazy hobbies bring out that "10 percent" we do not realize we have...ESPECIALLY when I feel uber-crappy haha!!! (I'll go in a few hours late to work) So I had posted the preliminary pics this morning and now I have some progress... The only thing left are the door panels....AND I cannot wait to start the Laser Guided Bombs. I will post pictures of the materials and where I bought them - Again, any questions on what drugs I was on (just kidding) when I was crafting something...or how I did a certain task or why I hate celery are all welcome. Without further delay here they are: (PS Thanks to all of you for the kind comments and input and suggestions of my insanity)
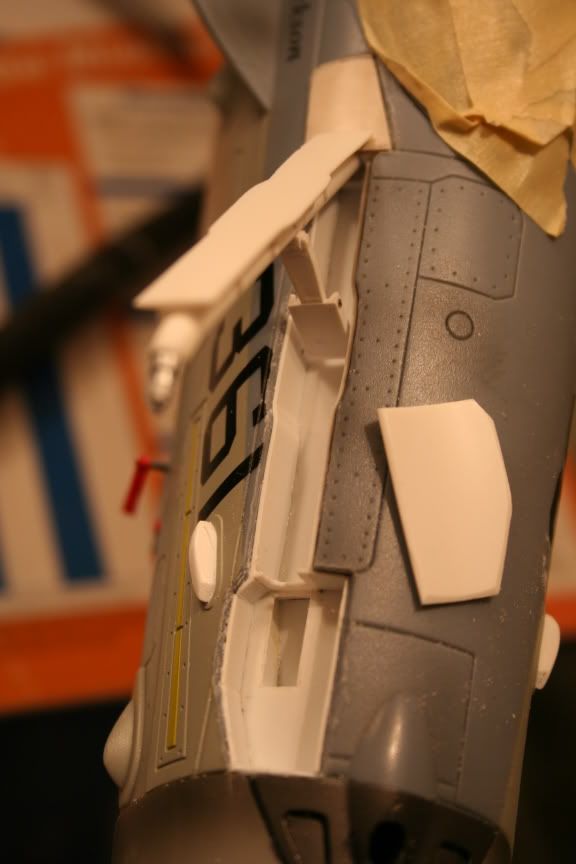
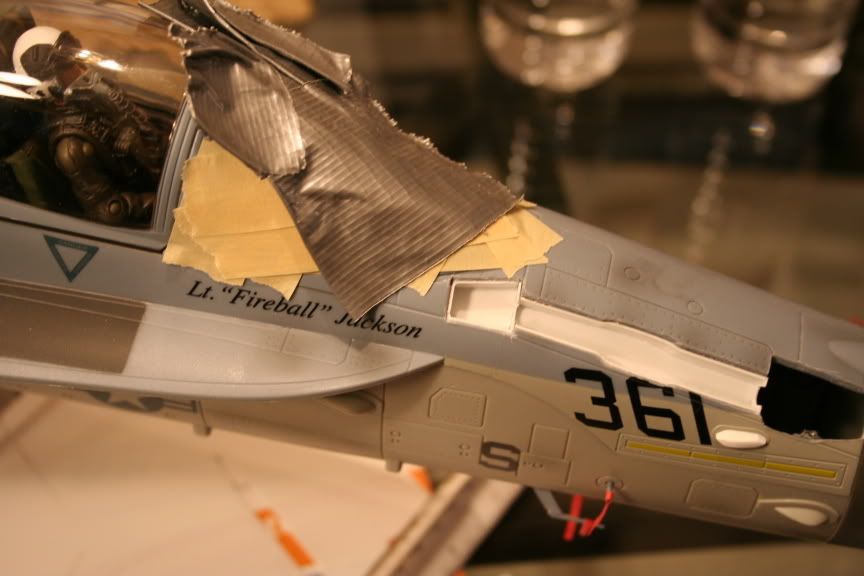
I know what some of you may be asking... "Was this a B*&%CH to do?" In a matter of speaking...kind of. The super tiny hinges were a bugger (love that word...we Yanks don't have that in our vocab) to do because somehow, I kept getting the alignment off. Since there is no drill bit the size of 1MM that I know of...I had to use the #11 Xacto Knife. I don't know why I'm scared, but I have this (probably unfounded) feeling that the door panels might be really difficult. What I plan to do is Boil some sheet plastic so I can bend the plastic into a "rounder" surface. After boiling, I will place the sheet on say a coffe can or something with a similar curvature gradation as the nose of the plane. When I'm happy with it, I will immerse it under very cold water to set. Hopefully tomorrow I'll get to the doors....THEN to the LGBs! P.S. if any of you have pics, know sites or have knowledge of the GBU-12 Paveway II LGB, hit me up. I want to know more about the 'deployable wings' because I want to make those function. There will be local model show this week... In fairness to others, I'm going to enter it for display and not a prize. Since it is not a bonafide model, I wouldn't feel right entering it in as one. Alright dudes... I'll catch up with all of you soon!
Wow Mig. I have never seen anyone do so much extensive detailing on a 1/18 plane . Your work looks great. I can't wait to see this whole F-18 finished.
"It is foolish and wrong to mourn the men who died. Rather we should thank God that such men lived."
General George S. Patton
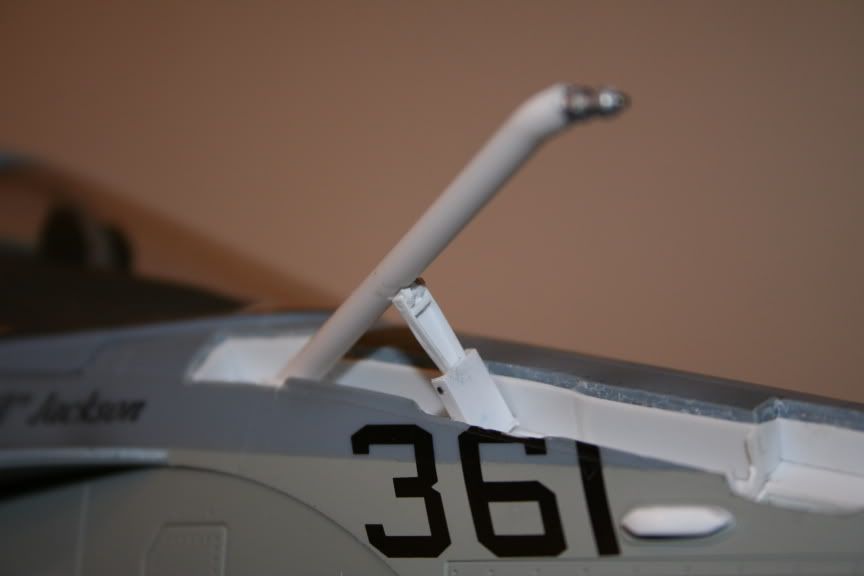
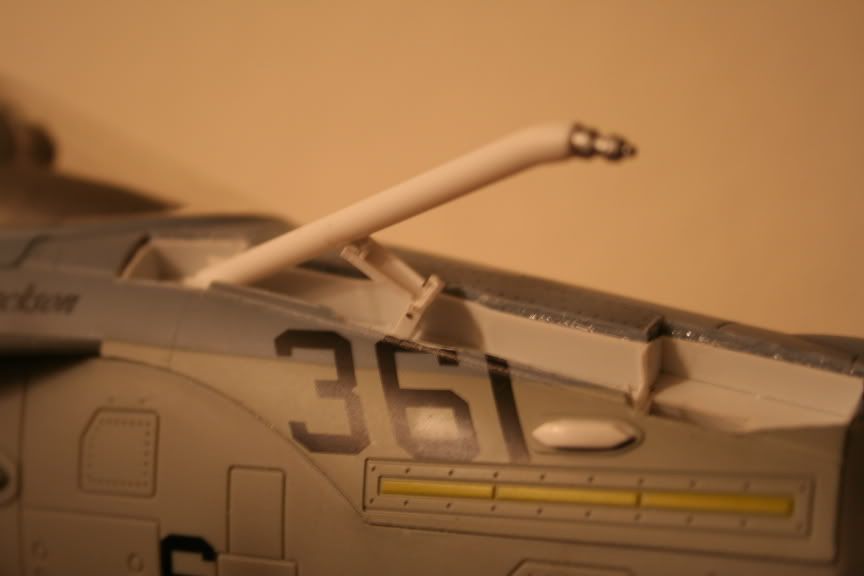
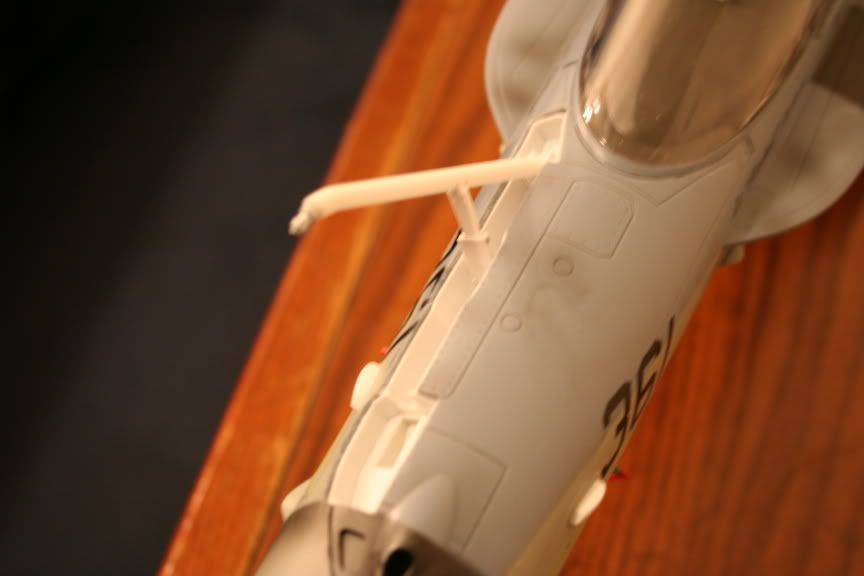
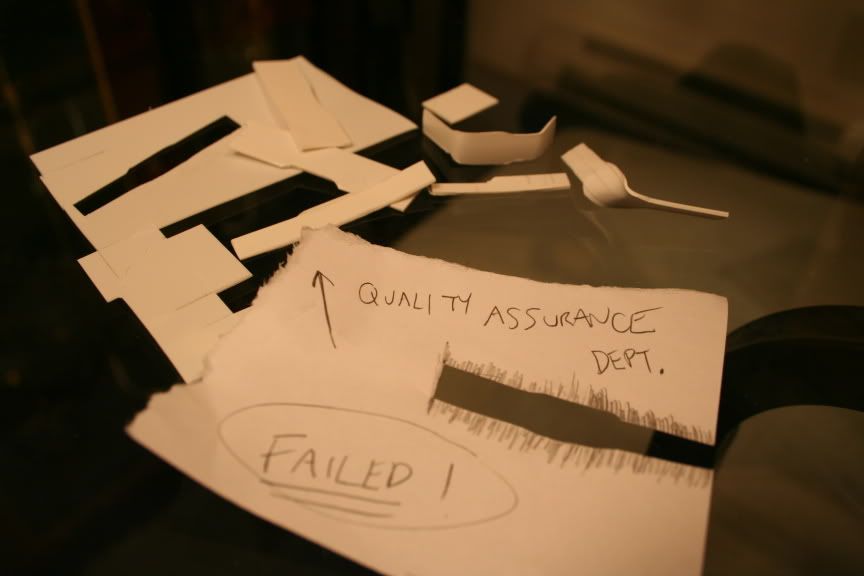
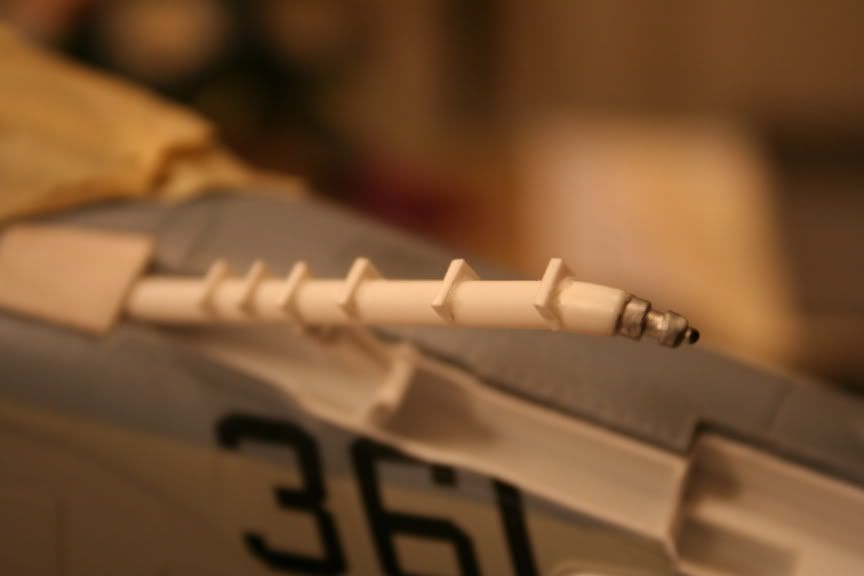
LESSONS LEARNED: 1. Polystyrene will behave a LOT different than Vinyl when subjected to boiling water. It's good I learned this when building the LAST panel (the one the covers the nose of the probe) otherwise it may have been quite a rude awakening. 2. PATIENCE and TENACITY: Well you will notice one of the pics where I built about four different central panel doors and then "failed" all of them on 'Quality Assurance" grounds muahhahaha because they didn't mesh properly during door alignment! So that was about 1-2 hours of trial and error. 3. PAINT MIXING. That one should stay in Michaelangelo's Department. "Thou shall not attempt to mix Ghost Gray, Testor's Gray Paint Pen, Blue Paint Pen, and Bottle white in the foolish attempt to mimic bbi's body color." However, I did happen to find a flat grey Testor's Spray paint layin around - How idiotic of me to forget I had this. This came a decent close. 4. The # 11 X ACTO I never thought I would do so much fine tuning and carving of minute plastic details. 5. INSTINCTS - I've learned that throughout this freakin' process, my instinct have served me well 99.9% of the time. It is a big confidence builder. Lastly, when I get home, I can look forward to the much easier and STRESS FREE task of the Laser Guided Bombs...here are pics of the completed boom:
Now for the less nerve-wracking tasks: Wheel Chocks made from Chopstick ends and 2mm Jute Colored string... and yes, I keep talking about it again and again....bing ba da boom....GBU-12As...
A friend walked into my office the other day (does this sound like the start of a joke) after I showed him your progress pics on this Hornet project. I had told him I might be looking for the "combat" version of the Hornet because the only one I have presently is the Blue Angel version. He walked in and gave me his (for $50) because he knew I was salivating over these mods you've been doing. GREAT!!! As if my workbench isn't hidden enough as it is I now have a very large scale Hornet dominating the desktop screaming "Change me...Change me!!!" I have already invested in a new box of #11 blades and BandAdes (I always seem to cut myself as much as plastic), a stack of reference material (Half Price Books loves to see me coming) and a new sketchpad for mod "think-throughs". Thanks Mig-29......you've created a monster!
US Army MP Corps combat veteran Operation Desert Shield/Desert Storm
WOW Truely WOW. Knew you`d a Bang Up job on it & you`ve ceetainly NOT disappointed
This with ALL the other mods you have done make this F/A 18 the UBER 1/18th aircraft
WOW & I`ve just been showing my wife your mods to the plane & was told NO Boooooo Hoooooo Even before I said anything HAHAHA
Wife`s it`s like they can read our minds .....LOL
BTW my wife thought the mods were Outstanding too
So you have a fan family over here in Blighty LOL
Nice work rob, How did you get the panels With the proper curve to fit flush ?
Colonel "Madman" Maddox: Let me hear your guns!
Captain Wild Bill Kelso: My what?
Colonel "Madman" Maddox: Your guns! Ack, ack, ack, ack, ack!
Captain Wild Bill Kelso: [fires his airplane's guns] AHHHH!
Now if you can just scale down the fuel..... Really outrageous work, nice!! Out of curiousity, that panel opening up at ungodly speed, what keeps it from getting completely blown away?
 Tray Assembly