Page 1 of 2
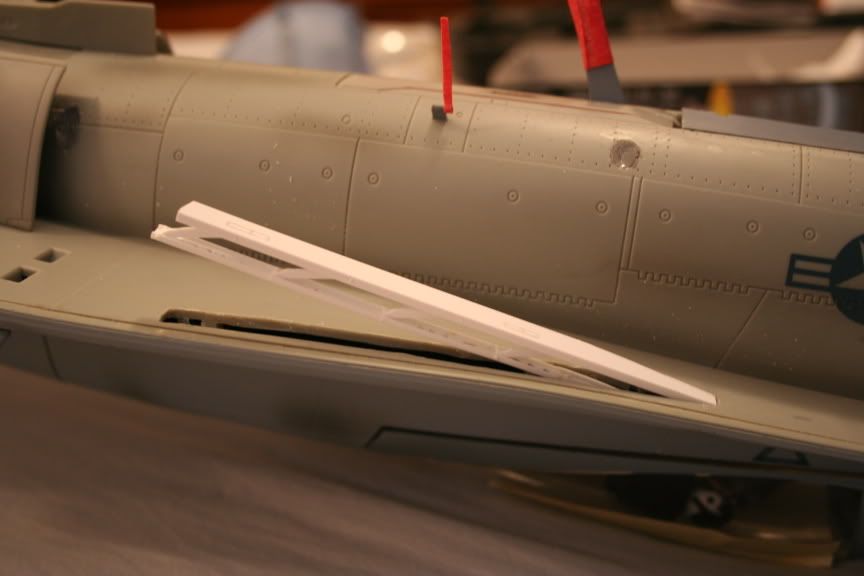
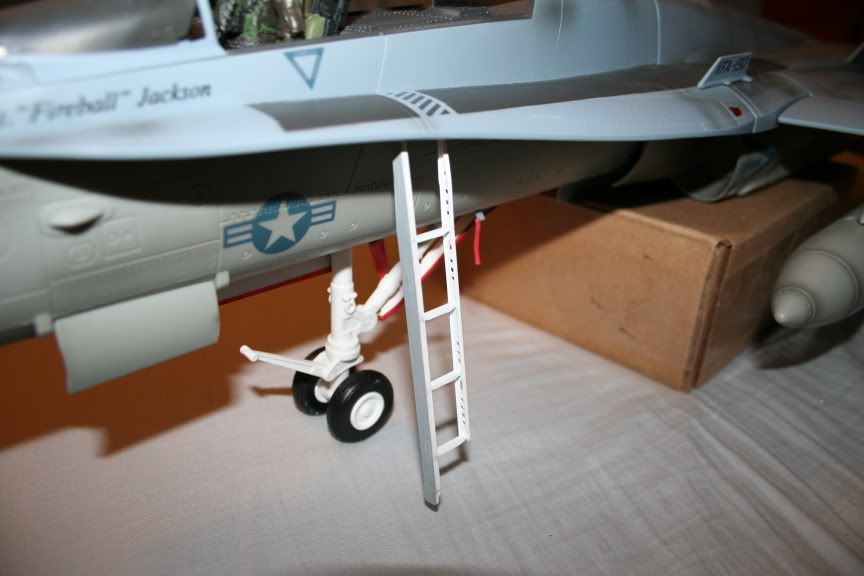
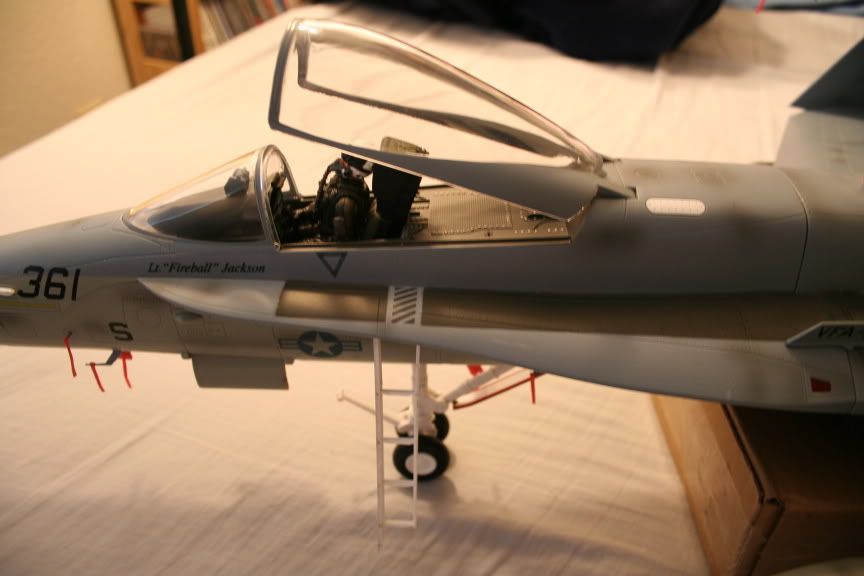
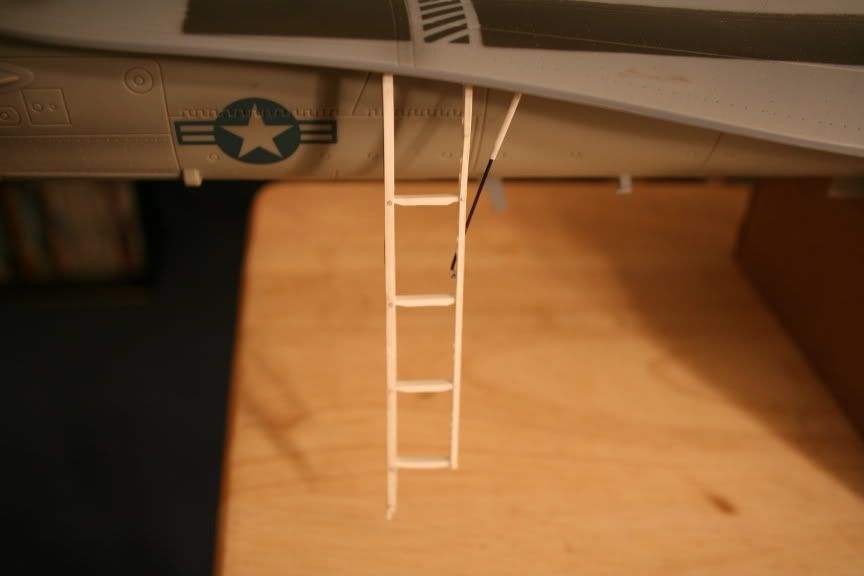
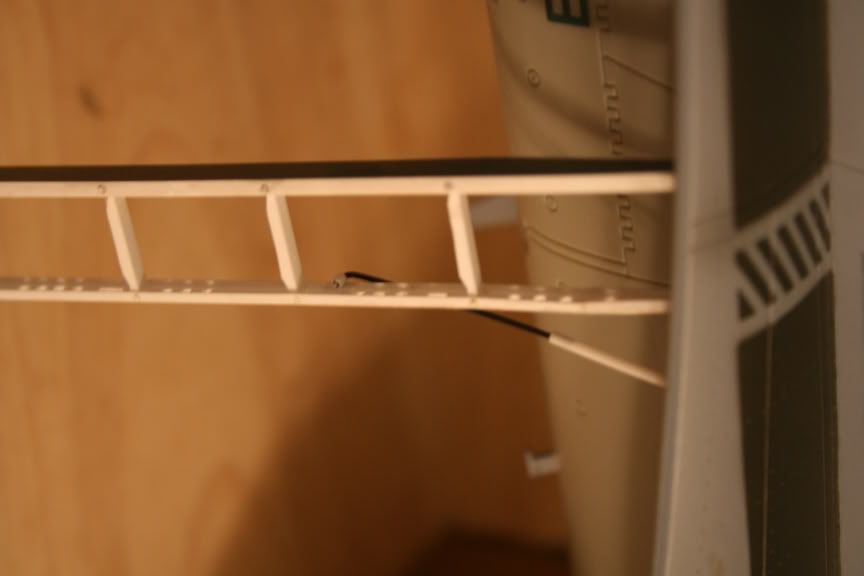
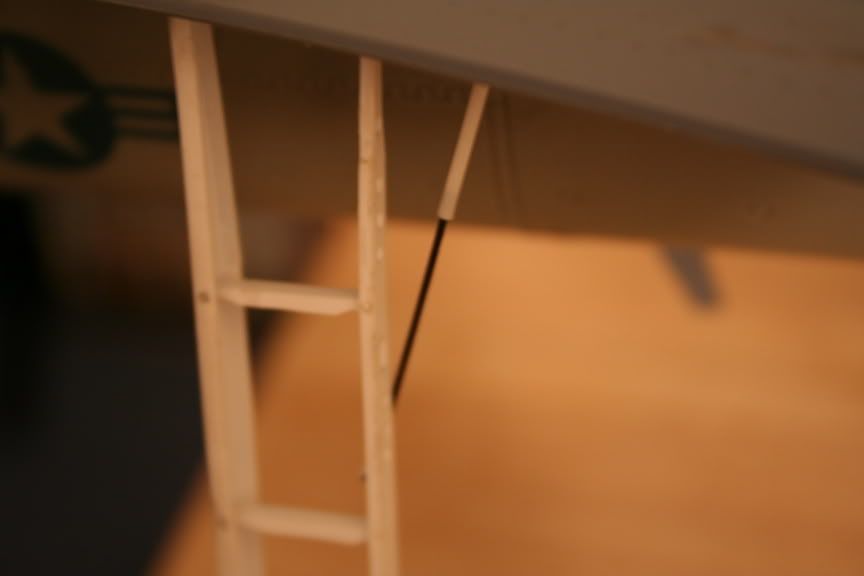
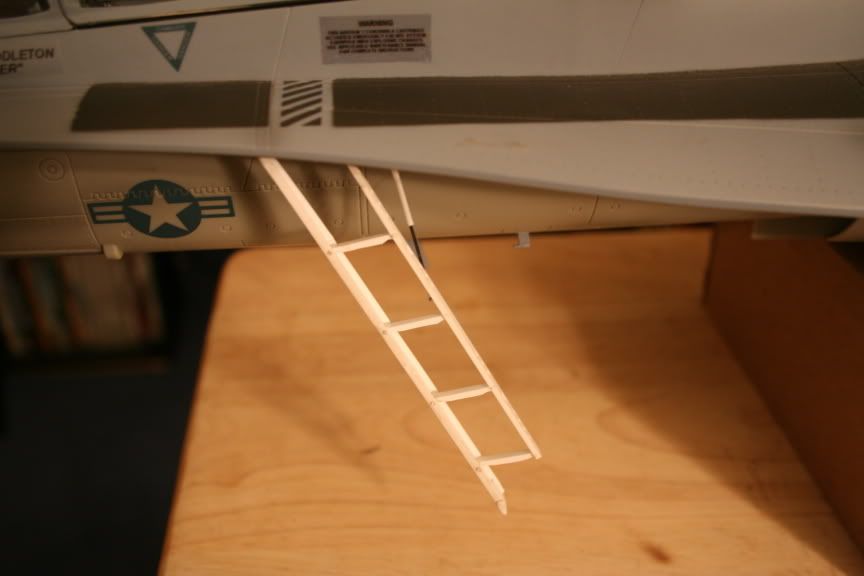
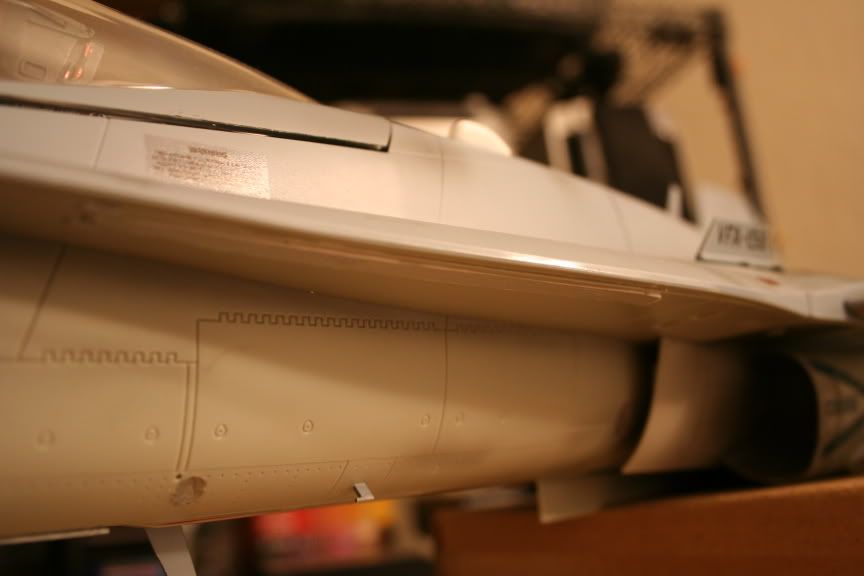
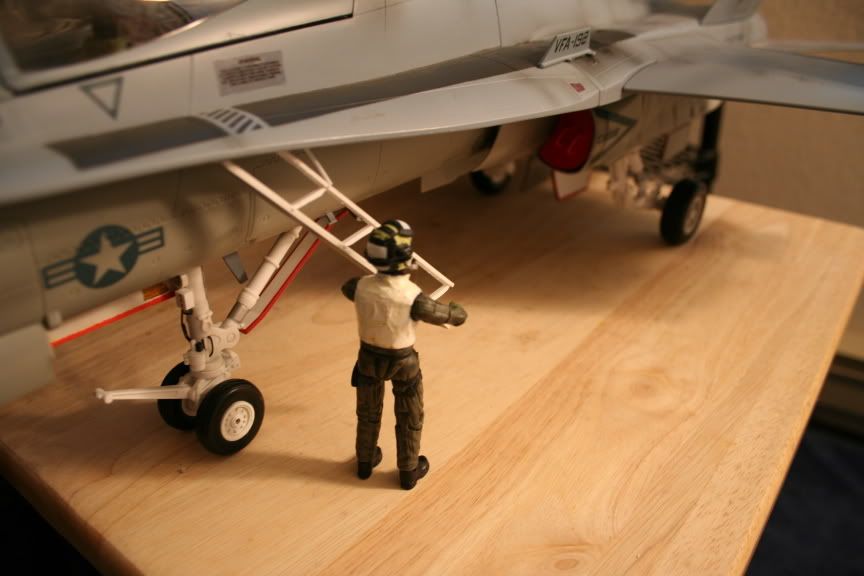
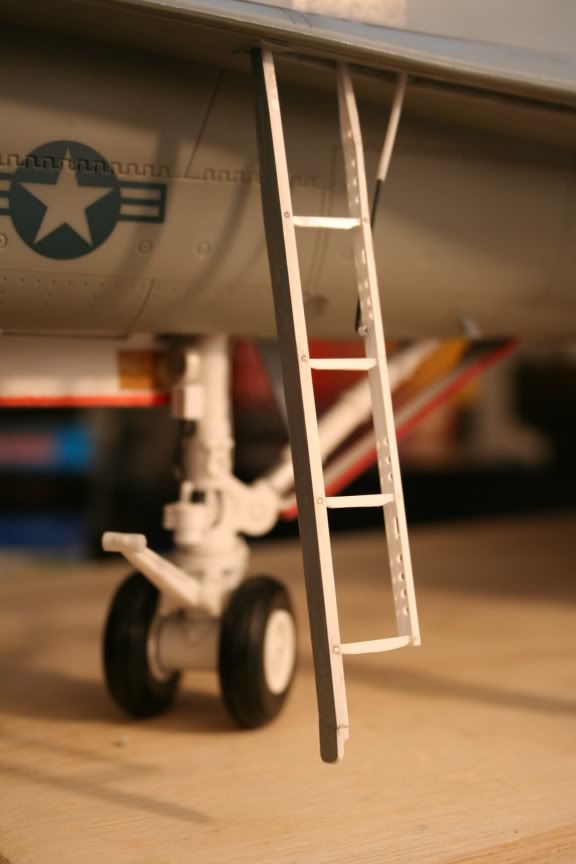
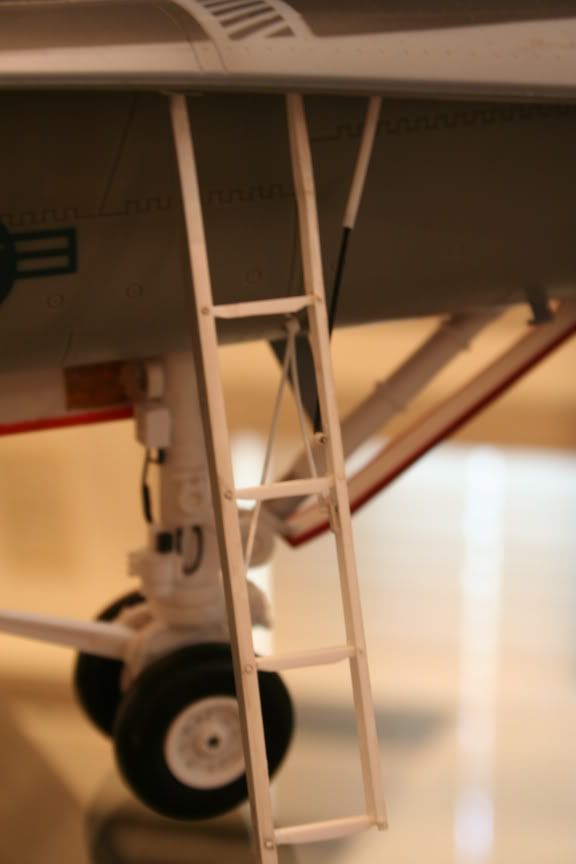
Getting into the drivers seat...
Posted: Mon Mar 20, 2006 12:08 am
by MiG29K
Posted: Mon Mar 20, 2006 12:27 am
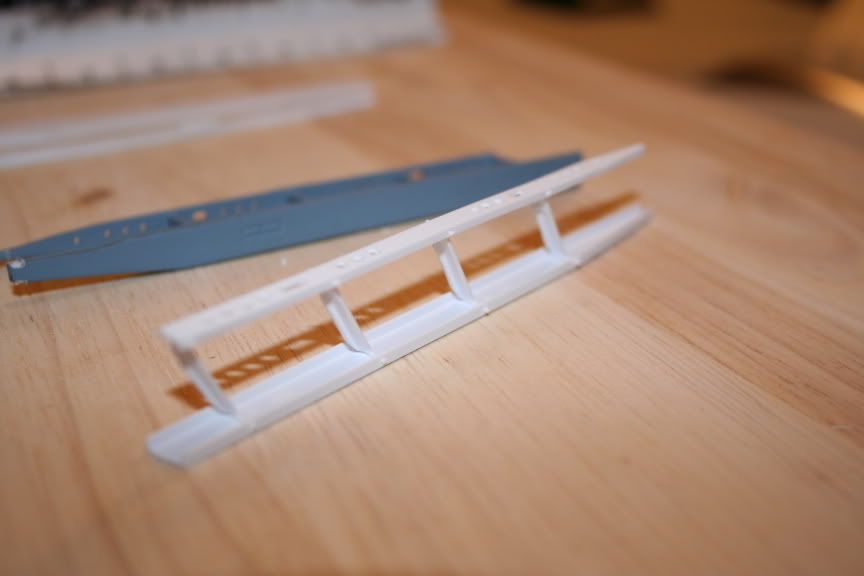
by tmanthegreat
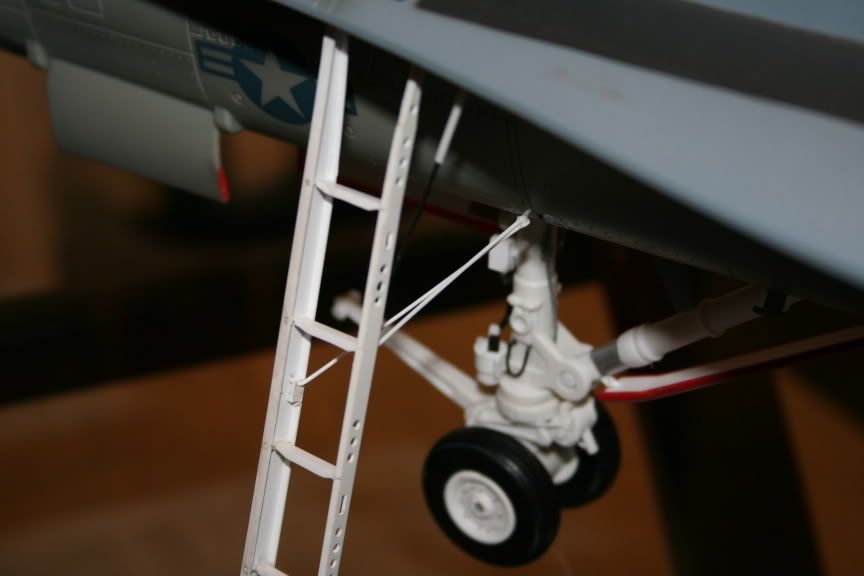
That is some VERY fine workmanship. You really got the small detail and function down. What material is the ladder made from?
Posted: Mon Mar 20, 2006 3:15 am
by steelbonnet
WOW that must have been a challange.
Now that is Customizing at it`s BEST

Morso that it works too
Excellent work mate
Ja
Steel Bonnet
Posted: Mon Mar 20, 2006 5:44 am
by airforcecop67
You are sick man, sick I tell ya.
You need help.
Quick, box that Hornet up and send it to me. Its the only way you're going to get any better.
Trust me, I am here to help!

Awesome work. You are a craftsman!
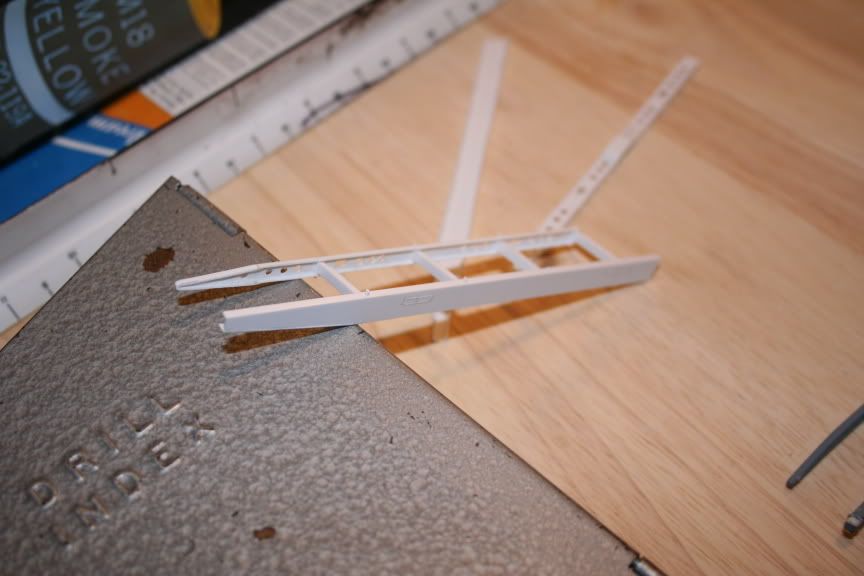
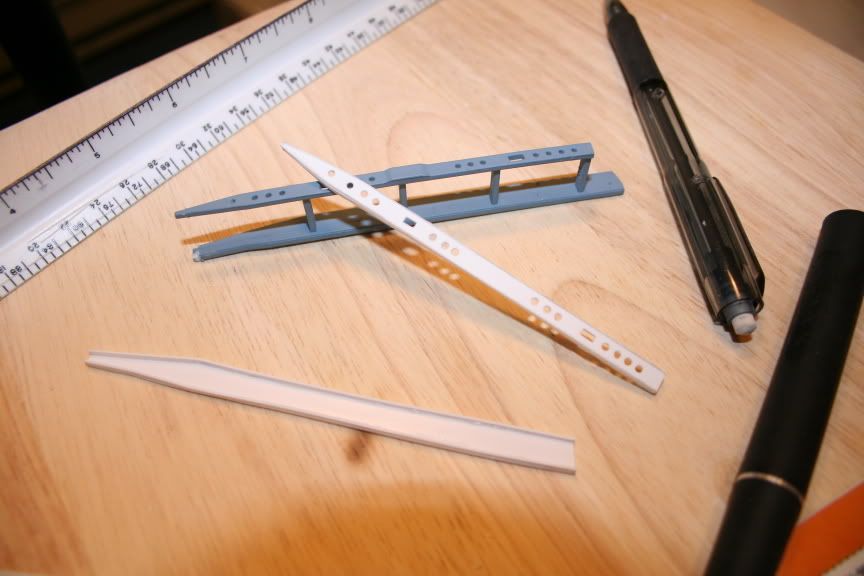
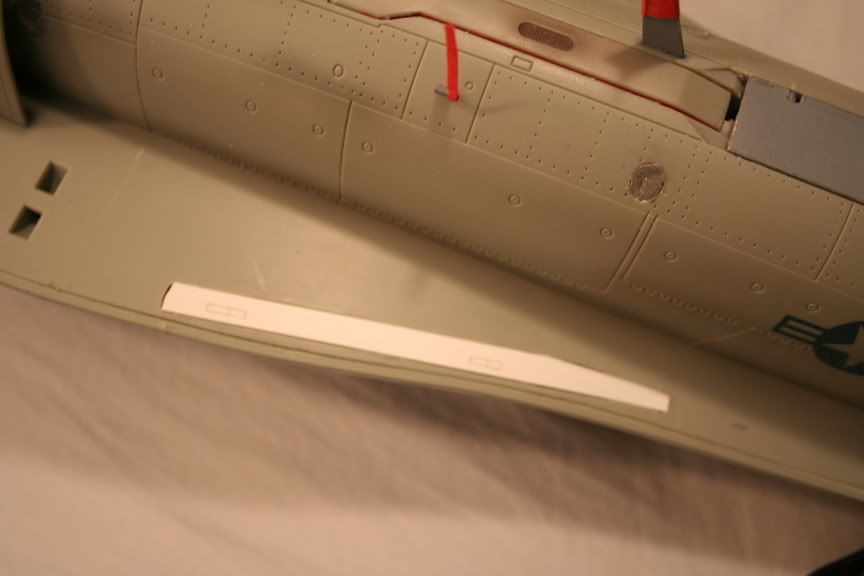
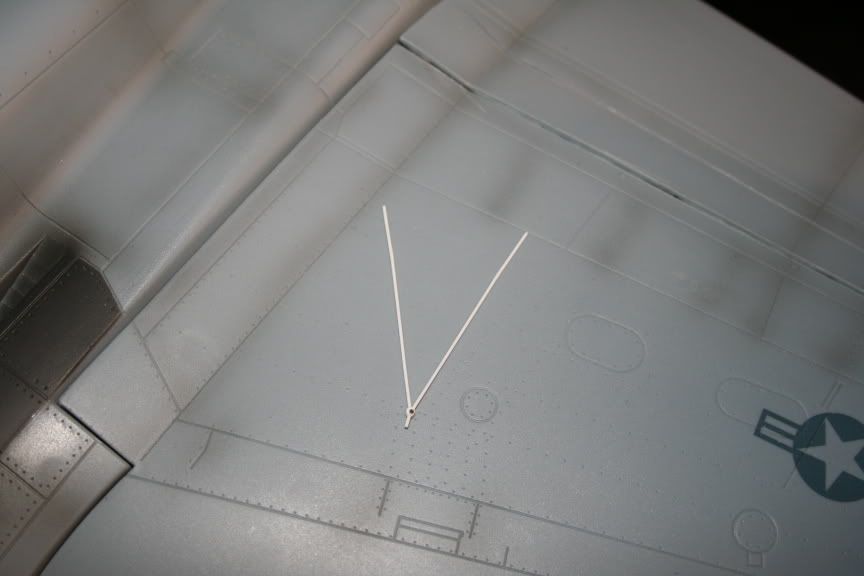
Materials...
Posted: Mon Mar 20, 2006 7:45 am
by MiG29K
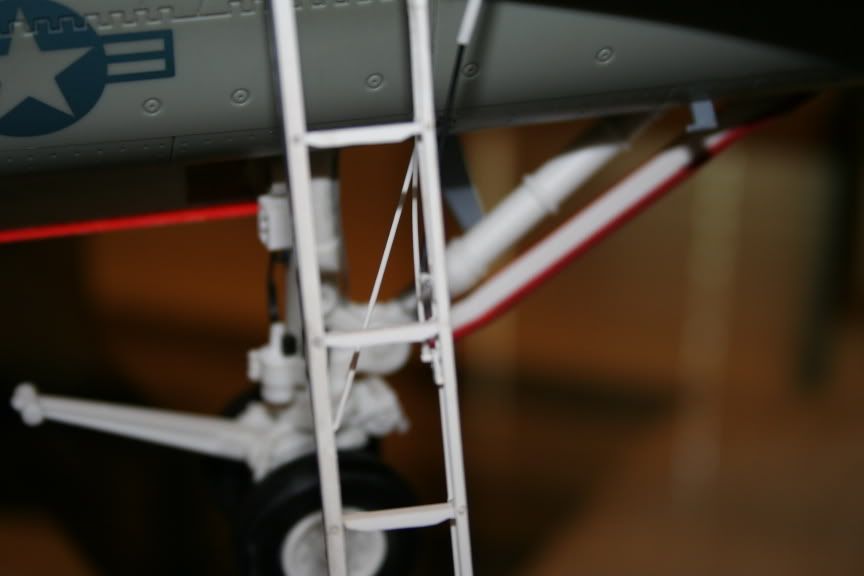
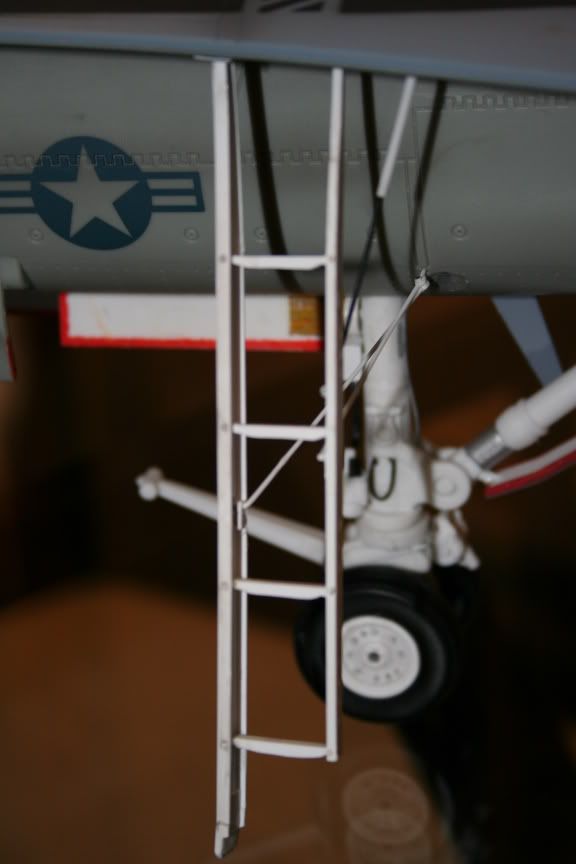
It is both scrap plastic and sheet plastic that you can get at the local model shop. This, like the Speed Brake took about 2.5 days. Over half of it was simply planning and at times questioning whether it was feasible but never once discouraged. Reason? As our friendly AirForcecop67 has diagnosed and concluded: Rob is sick - NOT well and needs commitment for treatment!

Oh yeah, I'm boxing it up as we speak with packing peanuts and foam and having Fed Ex take care of it. The Tracking Number is 450840.... ohhh man... I'm NOT that sick!!!!! Muahhahaha...but you never know. I keep telling myself that I'm gonna stop but the devil is in the details isn't he? I keep eyeing a refueling probe or something. We shall see....
thank yas...
Posted: Mon Mar 20, 2006 7:47 am
by MiG29K
thanks steel bonnet - the sickness continues... R
Posted: Mon Mar 20, 2006 7:55 am
by steelbonnet
WOW your thinking a working (well Up/down,though seeing what your doing who know`s maybe take on fuel too) refuelling probe....Awww man that is a Sickness
Gentlemen I think we have found the first man to make a BBI 1/18th F18 break the sound barrier. As the plastic engine just won`t do for him
HAHAHAHA
Again Outstanding with the ladders & If you do make the probe,looking forward to that too
Ja
Steel Bonnet
Hilarious...
Posted: Mon Mar 20, 2006 9:30 am
by MiG29K
Steelbonnet, I joking thought about a removable engine...but again I would need a LOT of reference material and planning for that one!!! The morning commute can make you think bizarre things!
R
Posted: Mon Mar 20, 2006 9:42 am
by steelbonnet
HAHAHAHA Now that would be something if somewhat scary.
As for crazy idea`s when commuting,yes i recall my days in London & commuting to work.Your creative thoughts do tend to go to the next level/Out of the Box ideas
Though that`s sometimes the best place for certain ideas too
Not owning the BBi F18,does the nose open for the radar? Not that i`m giving you ideas,you are ahead on that all on your lonesome
HAHAHA
As for engine specs,bound to be somewhere or maybe actually send an email to the manufactures? or DoD?
I`ve done that for a few of my old projects & you`ll be surprised how much assistance they will give sometimes.
One was getting info on the L85A2-UGL. Got in touch with the MoD & they gave me specs & got intouch with HK & Enfield armoury & they sent me some stuff through the post.
Also the Alvis SHADOW. Got in touch with ALVIS & they sent me a Load of paperwork in the mail.
So asking DOES sometimes work
Ja
Steel Bonnet
Now I definitely have to watch out for you...
Posted: Mon Mar 20, 2006 10:04 am
by MiG29K
Steel Bonnet... You and I must be on the same FM or is that UHF radio frequency!!! I discussed radar to someone else and yesterday rummaged through some pictures of it. The F/A-18's nose cone is fixed and would have to be cut as well. The actual radar slide forward on a rail system. Behind the radar is the M61 20MM Gatling gun which I would like to see on my plane. (...I wish I lived in Lemoore in California...Virginia Beach... or the Naval Base at Sigonella Sicily) I think if I had the reference material in front of me, I would likely be up at night tryin' to make it happen! When I lived in Naples, I saw two F/A-18s sitting on the tarmac in for maintenance at Capodichino (outside of Naples) when I was at my summer job. Good times! (I'll definitely try searching other sources for info....I think General Electric makes the Gatling Gun and Westinghouse-the radar)
R
Posted: Mon Mar 20, 2006 10:56 am
by steelbonnet
HAHAHA It does look that way mate.Though bet there`s a few here who may have thought of that too
Now your thinking rader & also gatling,my god you are going to have a TOTALLY accurate F18 when done with all these mods & there`s us all thinking the BBI F18 was spot on as it was
Nothing like taking the aircraft to the next level
Ja
Steel Bonnet
Yeah Man
Posted: Mon Mar 20, 2006 4:15 pm
by eddie372
Rob, once again man, hats off! You're the man for mods, so should we call you ModRob, RobMod, RobtheModMan, or just good ole MiG29???

Have you contamplated adding lights and sound?
Eddie
Drool
Posted: Mon Mar 20, 2006 6:57 pm
by Folkwulfe
I can't believe how much better your F/A-18 looks than my nasty ole Blue Angels version! I can't stand "straight from the box" either, but you've raised the bar quite a few notches dude! Oh, and I have a few pics of the Gatling and engine bays for the Hornet...if you dare! (and I bet you do from the work you've done so far). All I can add is AWESOME!!!!
Folkwulfe...
Posted: Tue Mar 21, 2006 4:58 am
by MiG29K
Thanks! Hmmm the pics of the Gatling gun? Might have to take you up on that one. As far as the engine bays. I think the engine project might be a tad difficult because of the way the plane is designed inside. It looks like there are obstructions inside but if you have the pics, its worth a look. The Blue Angels version of yours is pretty rad and kicks ass! Now you need 6 more. Of course one being a TWO seater. (Hey BLUE BOX, we NEED a TWO seater so Folkwulfe can have a full demo team and I can make myself the USMC's F/A-18 "D" Night Attack Model! ) But yes, I'd like to see the pics you have. I have a few of the Gatling gun but not enough to for a decent 360 degree top to bottom and side views so I can properly scale them. Anyhow, take care and I'll catch you later....its now 4am and I've been up since 1...
-R
Gatling Bay
Posted: Fri Mar 24, 2006 12:04 pm
by Folkwulfe
OK....I know I have that walk-around book here somewhere? May take me a few to find it, but there are some good pics of the bay and gun on a maintenance cradle. You probably already know this...but the gun is raised and lowered from the large panel immediately in front of the gear bay. A hatch on the left side immediately at the front edge and below the chine is the ammo service door. The gun itself has the barrels above the electronics bay for the radar...meaning the radar dome is opened (and hinged to the right), the electronics shelf is slide forward, and this allows for the gun and feeder to be lowered out the bottom of the nose. The gun is hydralically actuated and requires two high pressure connections, besides electrical connections. A good crew can swap the gun in under 30 minutes if everything goes well. Now if I can find that book....I think I hide it with my Alzheimer's medication....?!?!?!
you rock!
Posted: Fri Mar 24, 2006 12:26 pm
by MiG29K
Thanks Folkwulfe... This should be real cool! I inquired to a unit of Boeing in St. Louis about the refueling probe. I wonder if they'll have answers to my questions? I'll let you know what they tell me.
R
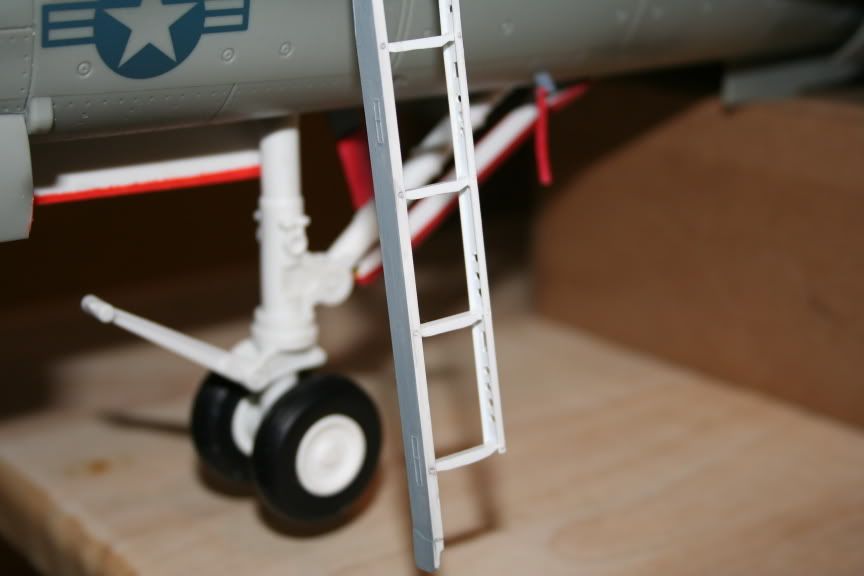
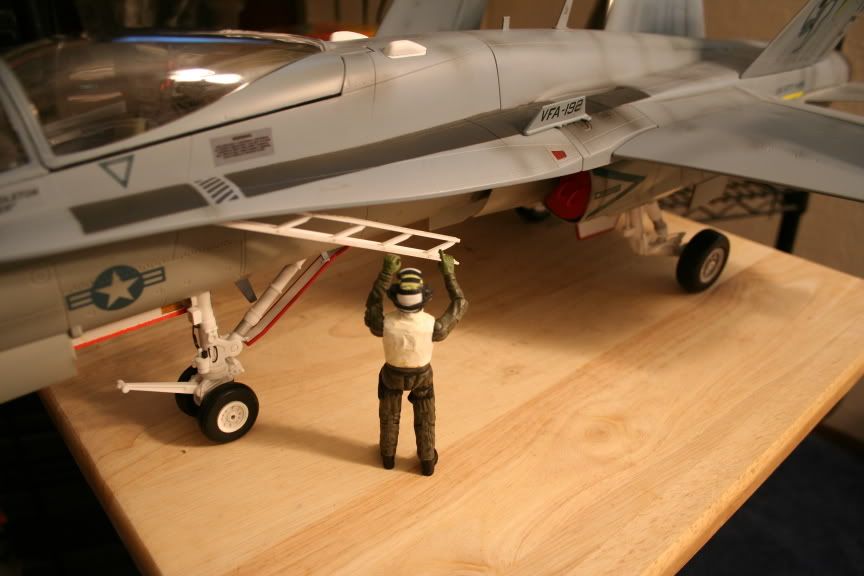
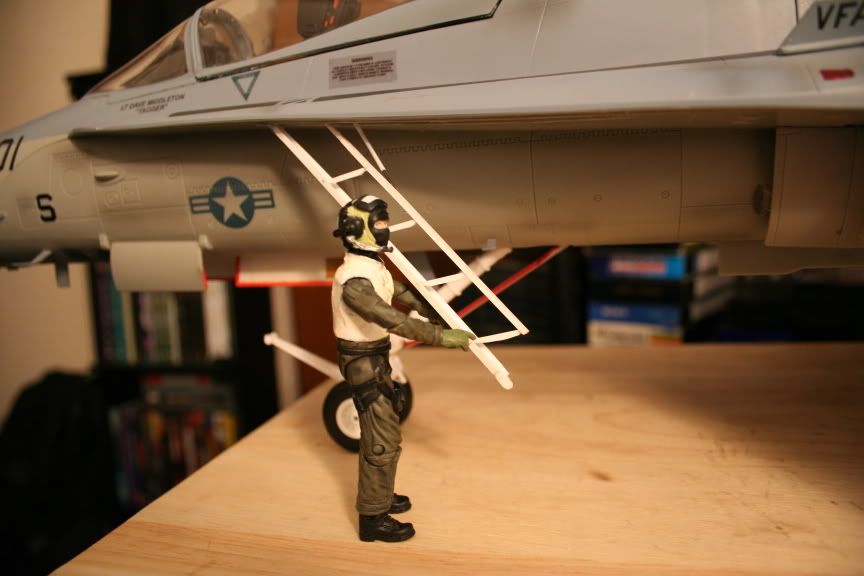
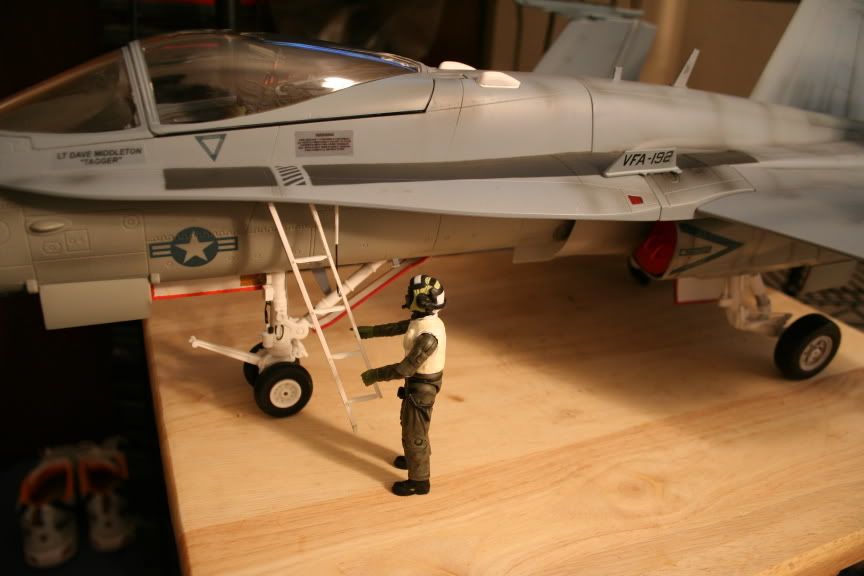
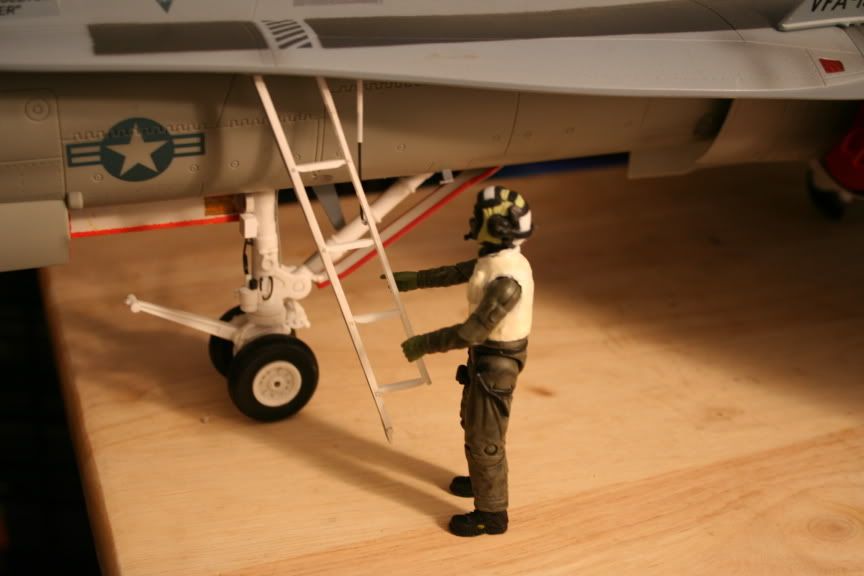
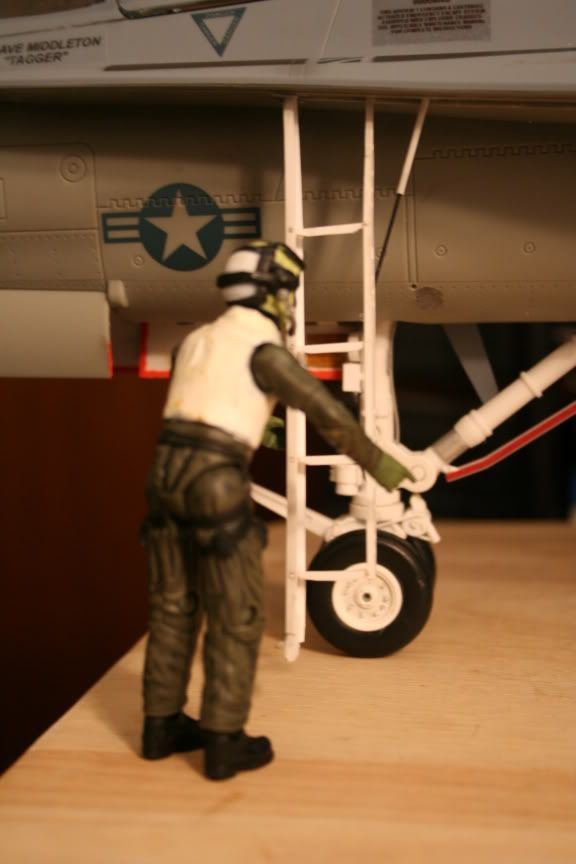
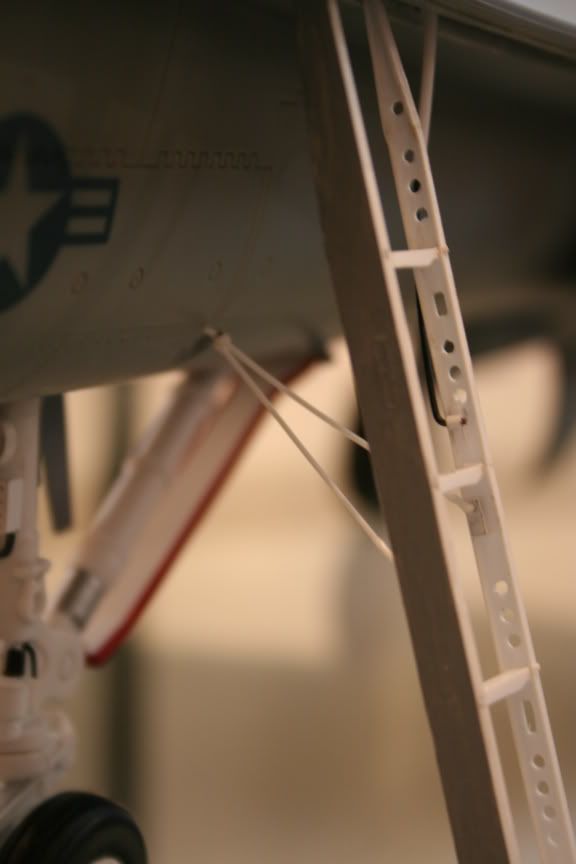
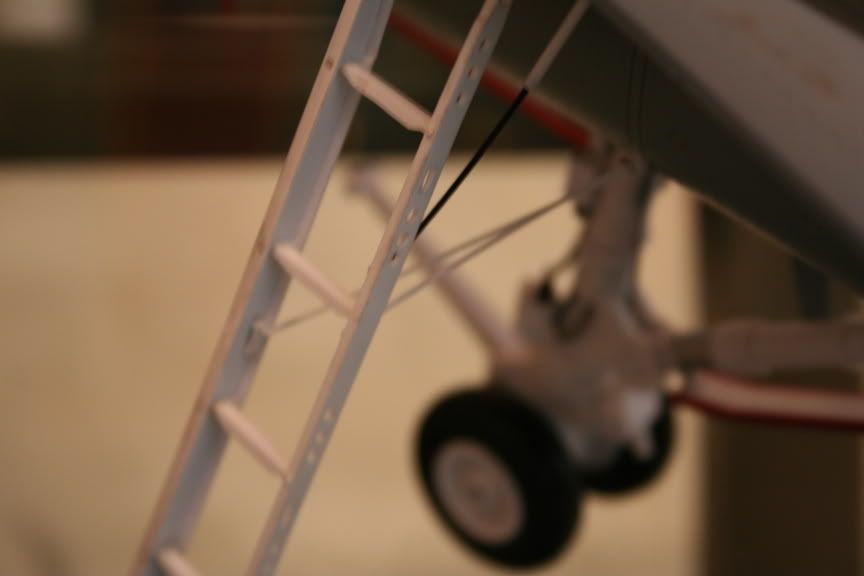
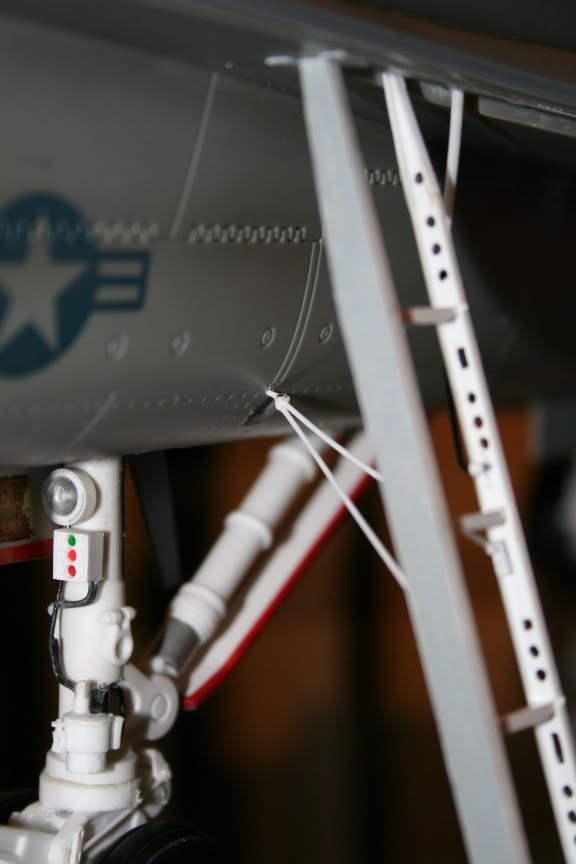
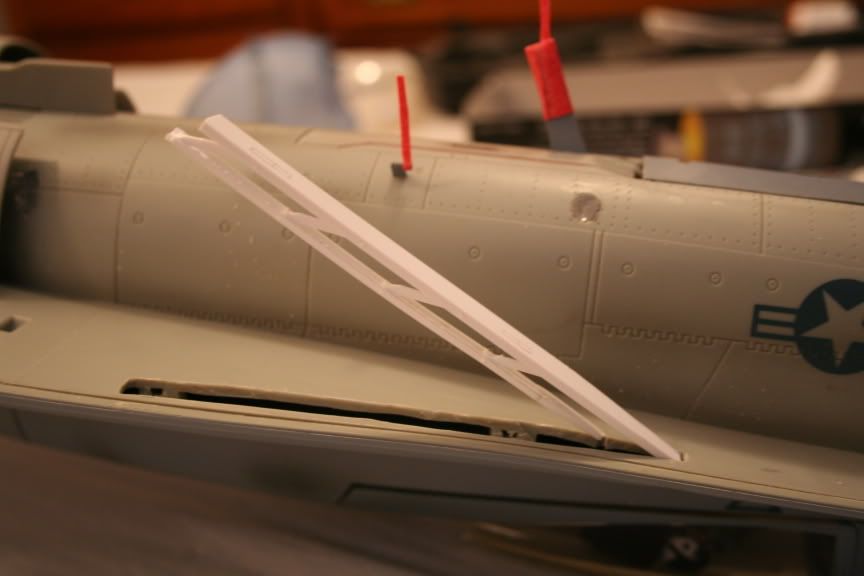
Stability Strut for Retacting Ladder
Posted: Wed Aug 02, 2006 7:48 am
by MiG29K
Posted: Wed Aug 02, 2006 8:45 am
by steelbonnet
WOW Rob now talk about detailing.
I thought just doing the ladders & having them collapse was sweet now you have done a working support arm too.Good God man you are the Man of Precision
Excellent
Ja
Steel Bonnet
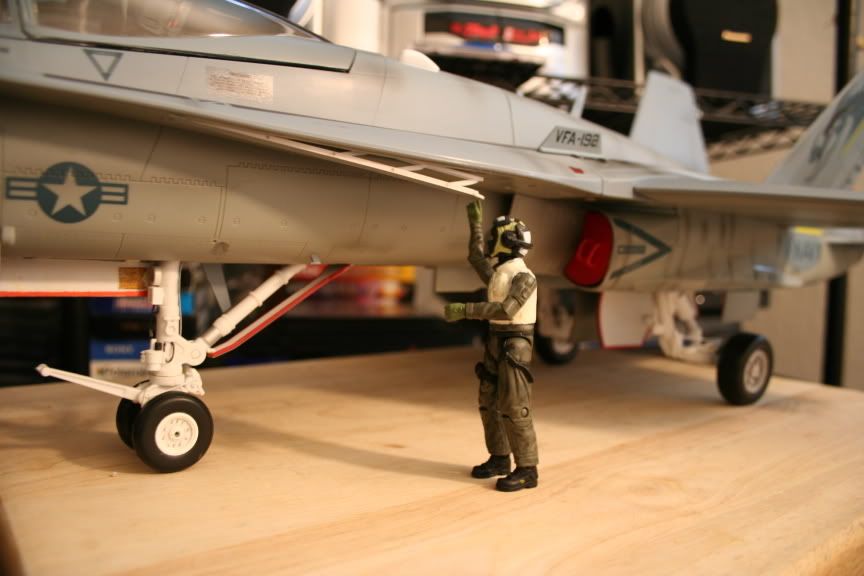
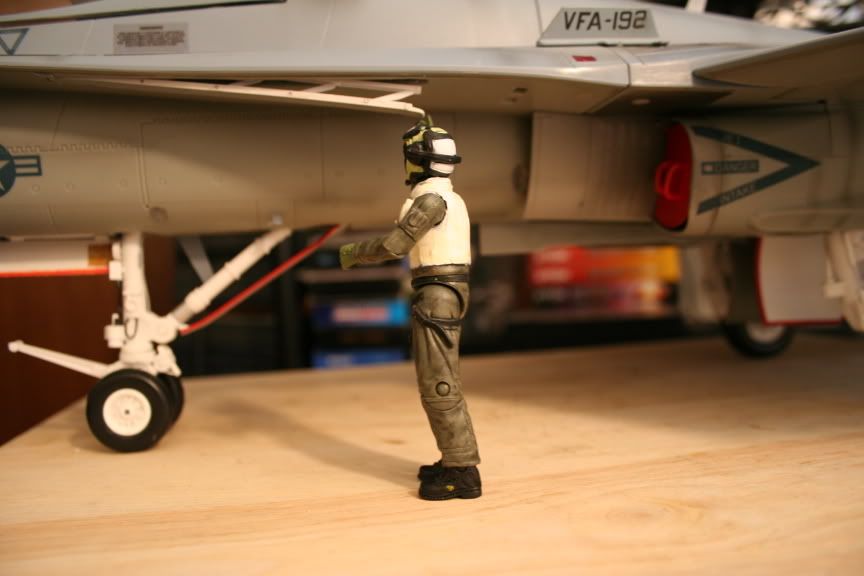
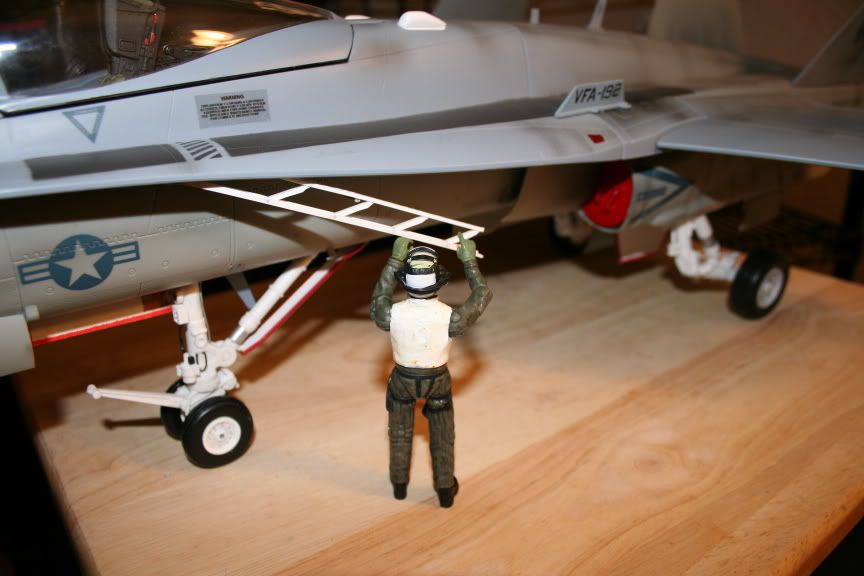
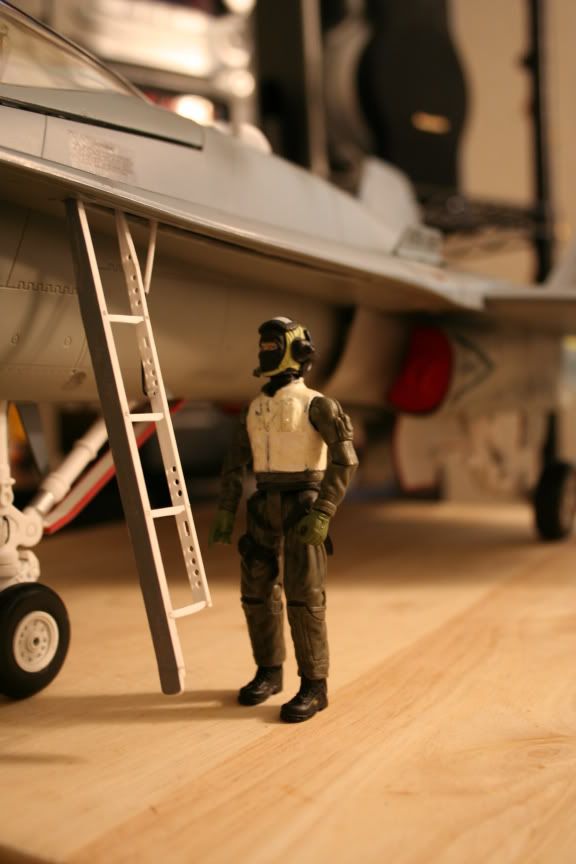
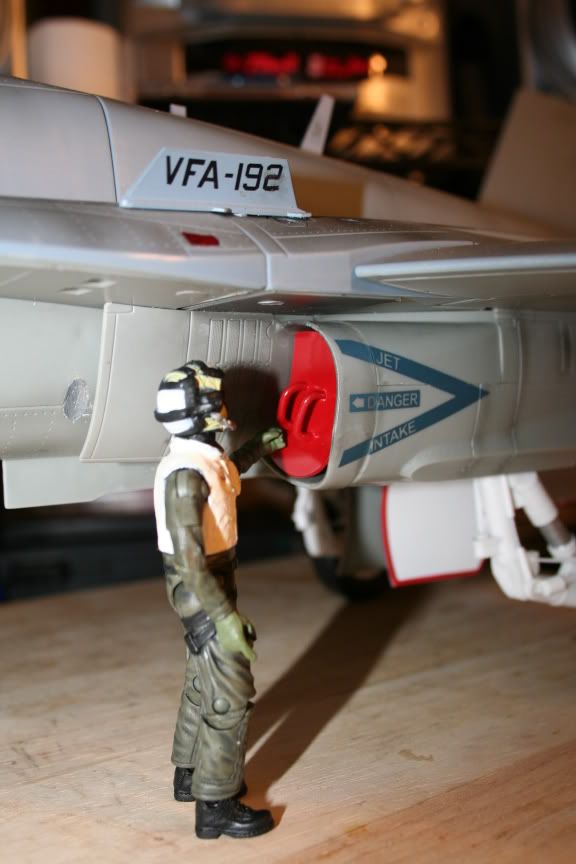
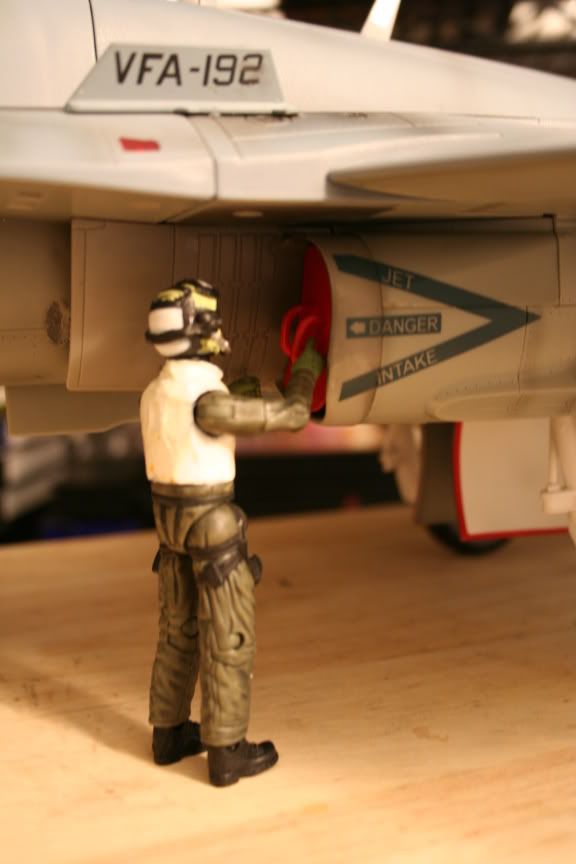
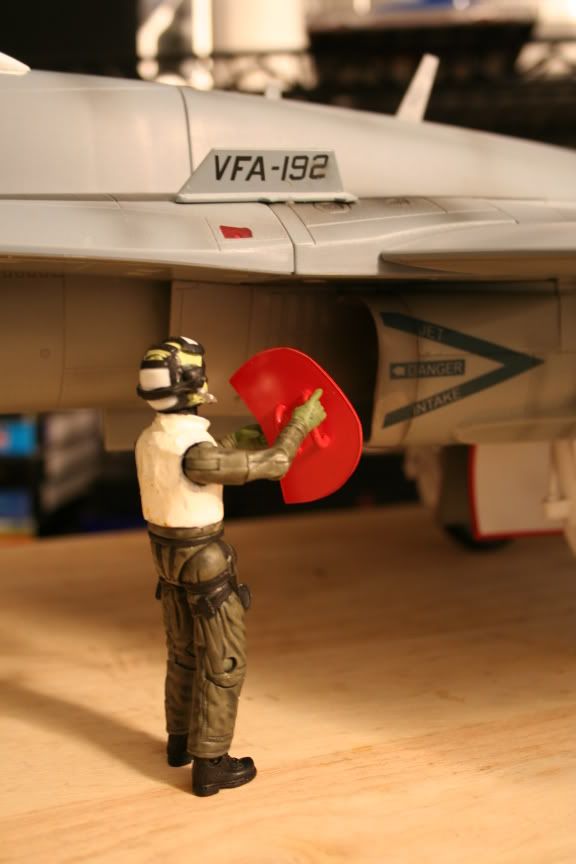
Ground Crew Demo and...
Posted: Thu Aug 03, 2006 12:49 am
by MiG29K
Posted: Thu Aug 03, 2006 1:09 am
by steelbonnet
Very nice to see the groundcrewman prepping the bird
Sweet Intake cover BTW. One for each side no doubt? Silly question I know.......LOL
Excellent,now where`s the Fighter Jock checking his bird?
Ja
Steel Bonnet
ahhh meester pilota
Posted: Thu Aug 03, 2006 1:13 am
by MiG29K
JA...
He's at the Officers Club Drinking Vodka with a couple of Female Russian Exchange Pilots! Yeah yeah...in flagrant violation of the 18 hour rule... ( I think that's what it is but something tells me its a wider time frame???)
Yep, intake covers for port and starboard! FOD (Foreign Object Damage) is a messy business you know!!!
Posted: Thu Aug 03, 2006 5:19 am
by steelbonnet
Ahhhhhhh Sounds like your Jock is a Jock
HAHAHA
As for the messy Buisness Ohhhh yea i know that I`ve seen the intakes of a Tornado after bird flythrough.
Also had a friend who worked at a testing facility where they fired Frozen Turkeys at objects (Glass,etc) to test impact for aircraft & other purposes.
Then again there was that vid clip of the Aircraft carrier ground crewman who got sucked through too.What a Lucky bugger he was.
So you making a 1/18th scaled "mess" for the ground crew to clean out? LOL
Ja
Steel Bonnet
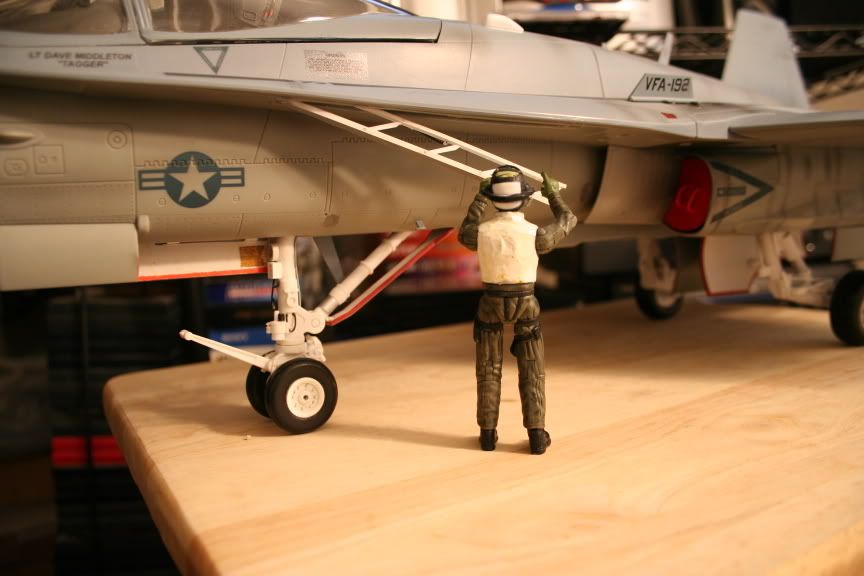
V-Bar Installed
Posted: Fri Aug 04, 2006 1:11 pm
by MiG29K
Posted: Sat Aug 12, 2006 6:13 pm
by Spudkopf
G'day Mi29K
Love your work it has been very inspiring indeed.
I have recently obtained the limited release 75sqn RAAF version of this beast and plan to correct some of the gear door inaccuracies and add the various omitted antennae and tubes as well.
As such I was wondering what paint colour and brand you have found to be the closest match to that used on the upper surfaces of the Hornet?
My preference is to use non-enamels as it is easier to clean my airbrush when using acrylic paint. I also prefer to use Gunze or Tamiya paints
as these are easier to obtain down here.
On the Australian version there is one major marking error (along with many minor errors that is) in that the roundels have been painted on the upper wing surfaces and not the lower surfaces where in fact on the real deal the reverse is true.
As I see it I have three options.
1. Simply overspray the offending roundels, however this would require that the area first be rubbed back and then the appliaction of an accurate paint match.
2. Seeing that the grey upper surface colour of the aircraft is actually raw plastic I could consider using a very fine grade wet and dry paper to remove the roundels much in the same manner that I used to remove the markings from my Stuka, however this would not remove the traces of the paint from inside the panel and rivet details so a soft airbrushing of an appropriate colour would still be required to finish the job.
3. Try to find a mild solvent that will only remove the roundel paint and not attack the plastic. But as with the above option I may still need to do some soft airbrushing for the same reasons.
In regards to option 3 has anybody else found a suitable solvent?
Thanks
Posted: Sun Aug 13, 2006 3:22 pm
by mack perry
dam thats nice one hell of a jet whooo!


