1/18 scale Flettner Fl-282 V21 Kolibri scratchbuild model

Love to tweak toys and models? Add features and small details? This forum is for you!
Nick_Karatzides
Officer - 2nd Lieutenant
Posts: 286
Joined: Fri May 01, 2009 4:53 pm
Location: Valley of Death

Re: 1/18 scale Flettner Fl-282 V21 Kolibri scratchbuild mode

Post by Nick_Karatzides » Sun Apr 17, 2016 7:46 pm

After studing the available reference (few hundreds of pics, blueprints, slides & negatives, videos, technical data and original Luftwaffe's text documents) kindly offered from a variety of sources such as Deutsches museum flugwerft schleißheim, Hubschraubermuseum Bückeburg, Midland air museum, a fellow modeler from Germany whose grandfather was a worker in the Anton Flettner Flugzeugbau GmbH factory at the time when the helicopters manufactured, Mr. Steve Coates author of the "Helicopters of the Third Reich" book and ofcourse Mr. Google (modeler's best friend), the already existing CAD digital file converted to Kolibri cutaway. Now, the model is ready to be forwarded to the 3D replicator and become an actual physical object under 1/18 scale, within short time.

Image

Image

Image

Image

Image

Image
Image

Nick_Karatzides
Officer - 2nd Lieutenant
Posts: 286
Joined: Fri May 01, 2009 4:53 pm
Location: Valley of Death

Re: 1/18 scale Flettner Fl-282 V21 Kolibri scratchbuild mode

Post by Nick_Karatzides » Sun Apr 17, 2016 7:48 pm

Approx 50% of the components are copied & pasted from the already existing full fuselage version and (lucky me) I did not had to design everything from the start. For example, the complex of intermeshing rotor gearbox, the 7-cylinders radial engine, the 24° angled rotor heads etc. On the other hand, all the “wooden frame” parts such as the vertical stabilizer, the rudder fin, the horizontial elevator fins and rear fuselage frame details, were CAD designed from the start. Ofcourse, the cutaway version was also built with all included truss-type welded tubes and drive shaft rods with universal joints attached on frame. IMHO, that was mostly preferred because all basic parts should be accurately pre-installed in place without any glue, putty, sanding etc.

Image

Image

Image

Image

Image

Image
Image

Nick_Karatzides
Officer - 2nd Lieutenant
Posts: 286
Joined: Fri May 01, 2009 4:53 pm
Location: Valley of Death

Re: 1/18 scale Flettner Fl-282 V21 Kolibri scratchbuild mode

Post by Nick_Karatzides » Sun Apr 17, 2016 7:54 pm

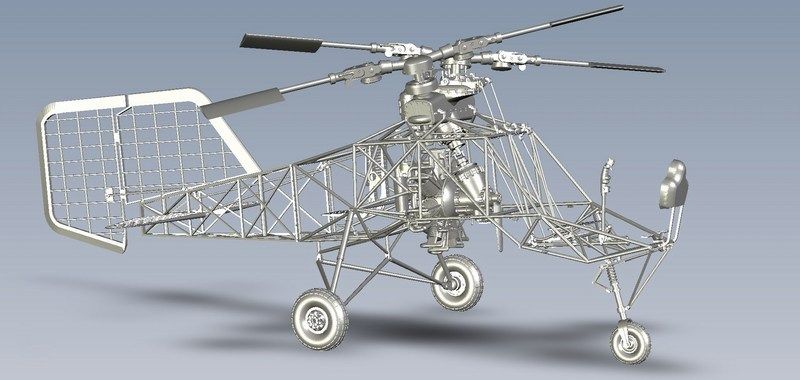
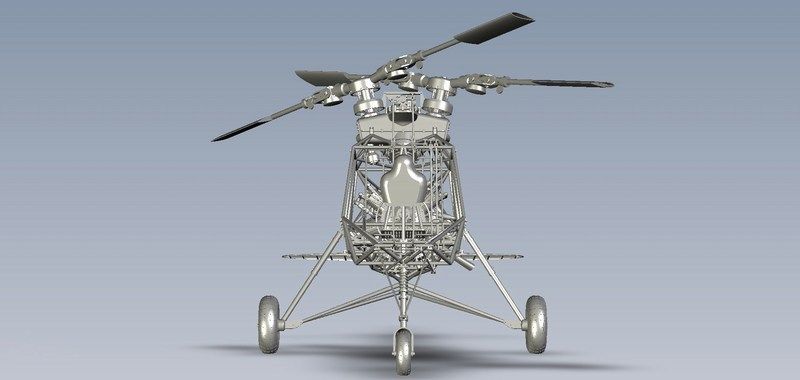
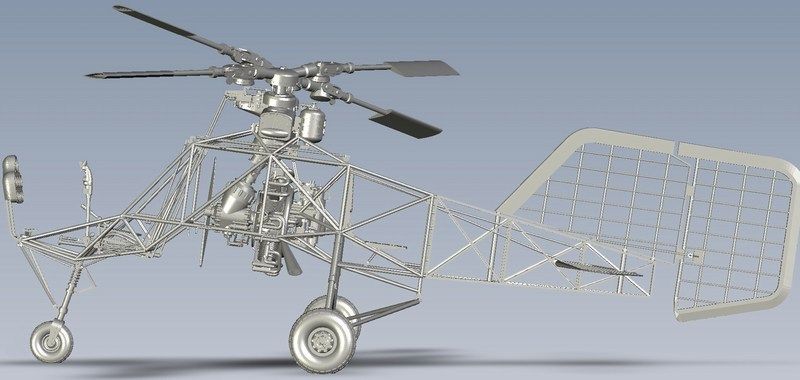
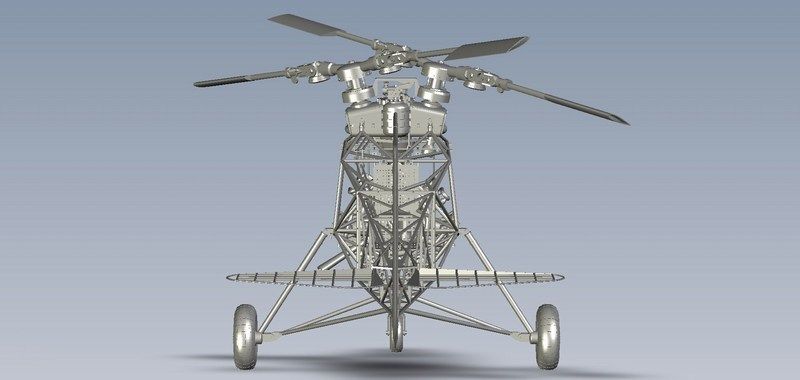
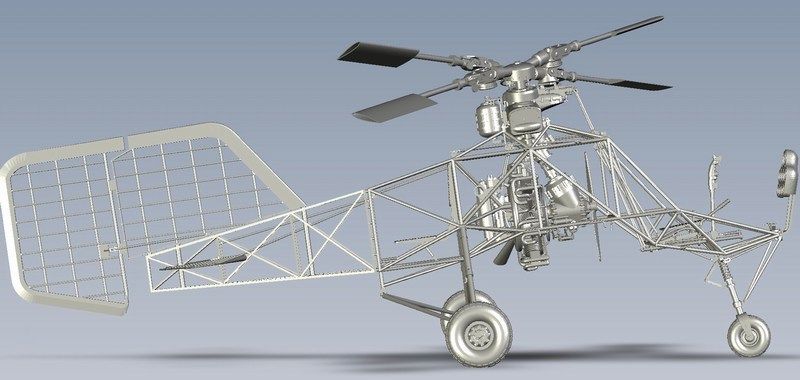
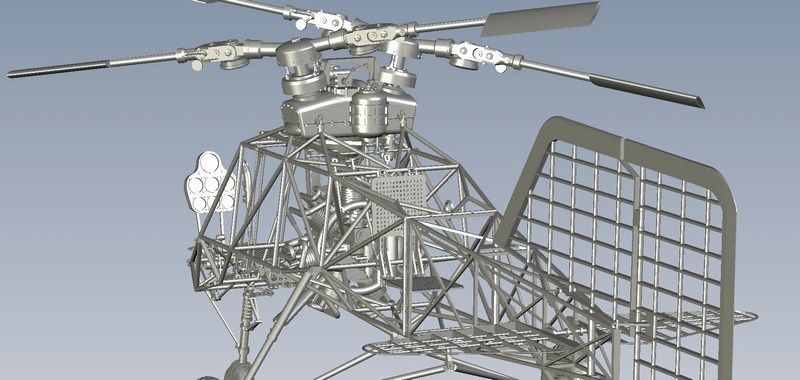
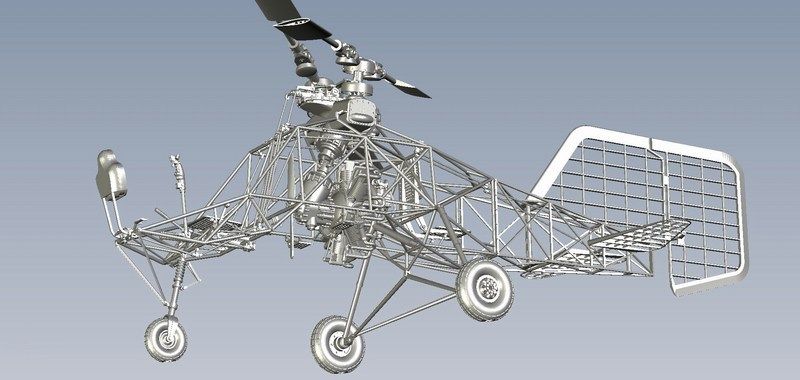
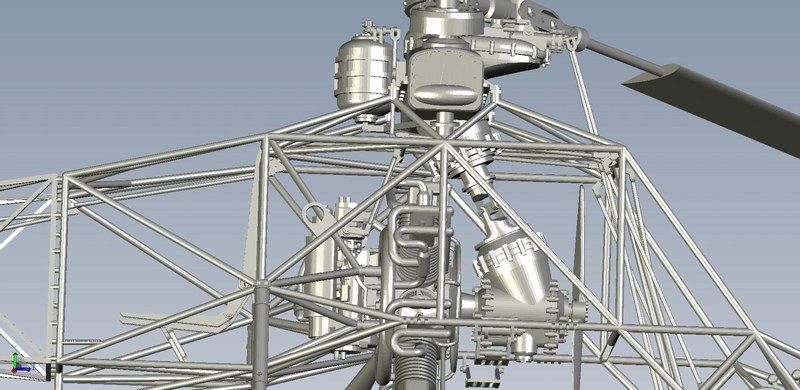
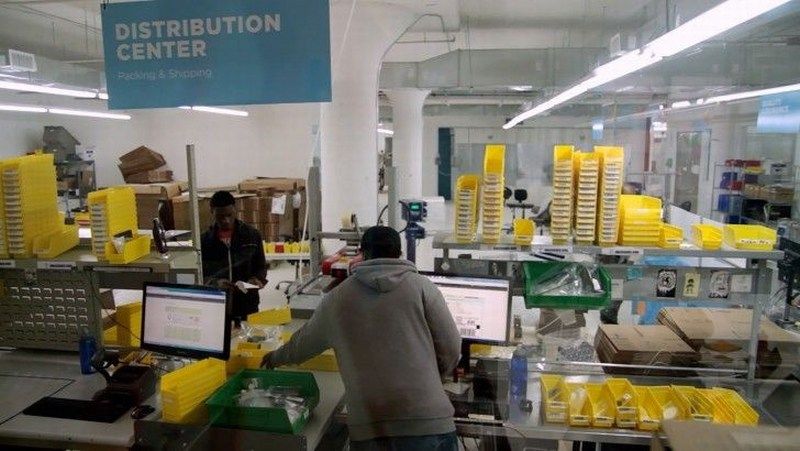
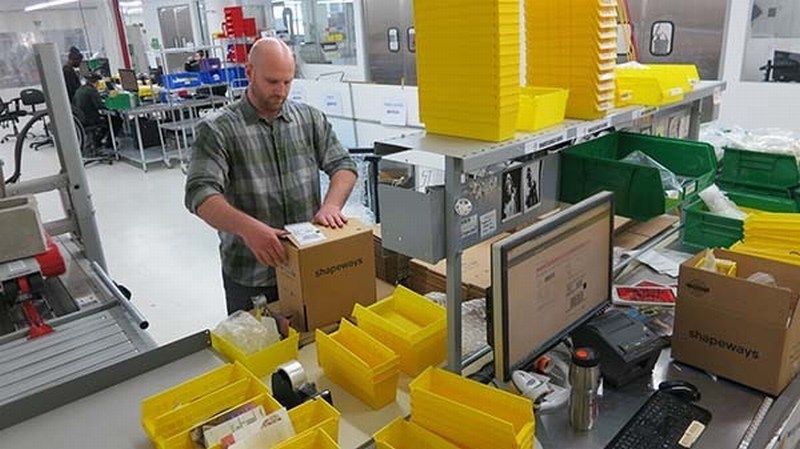
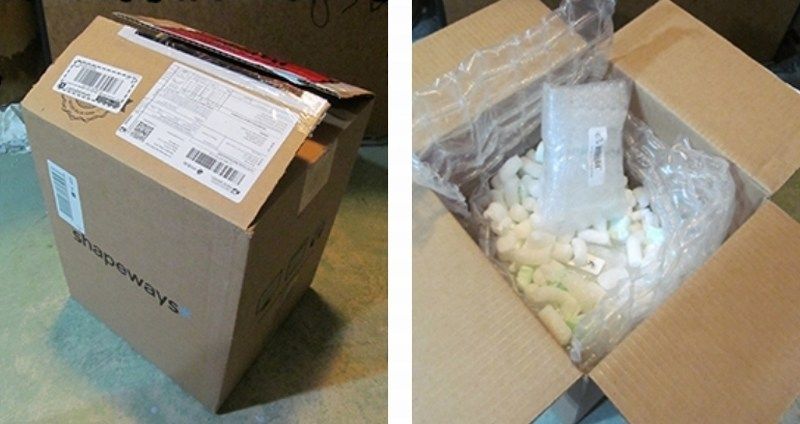
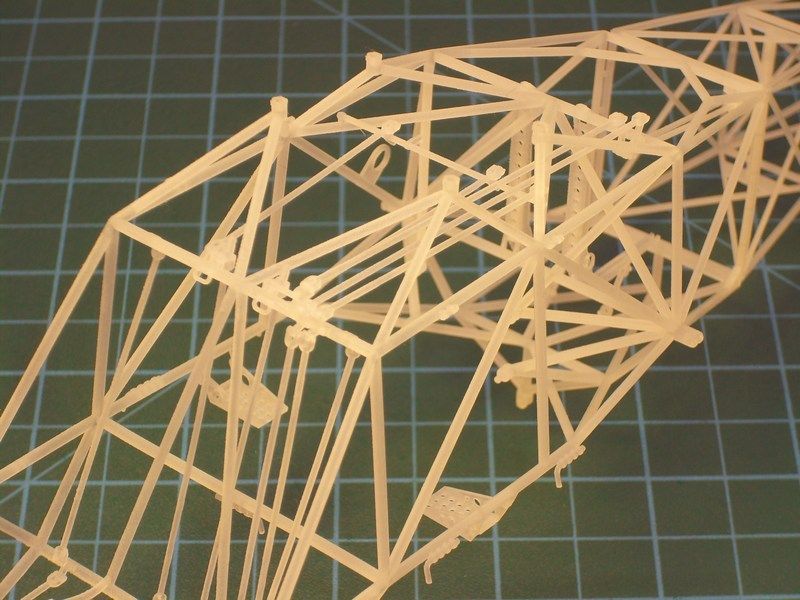
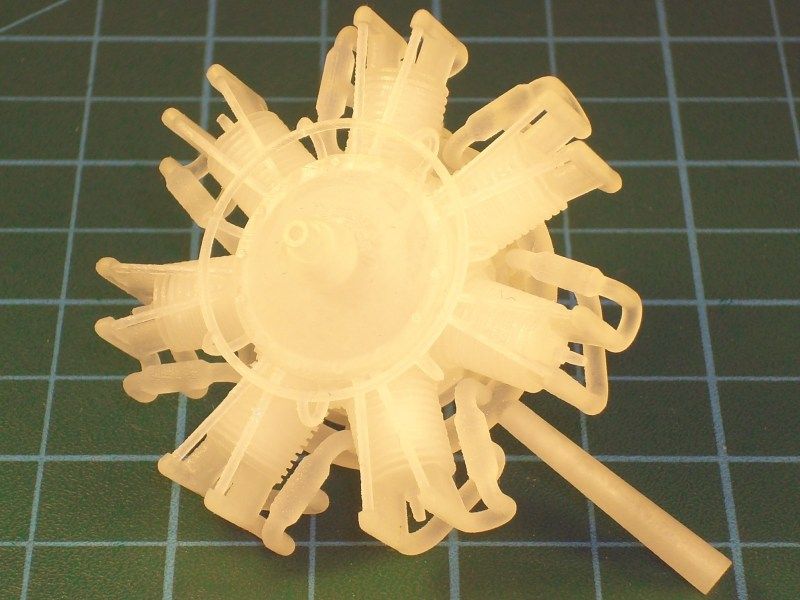
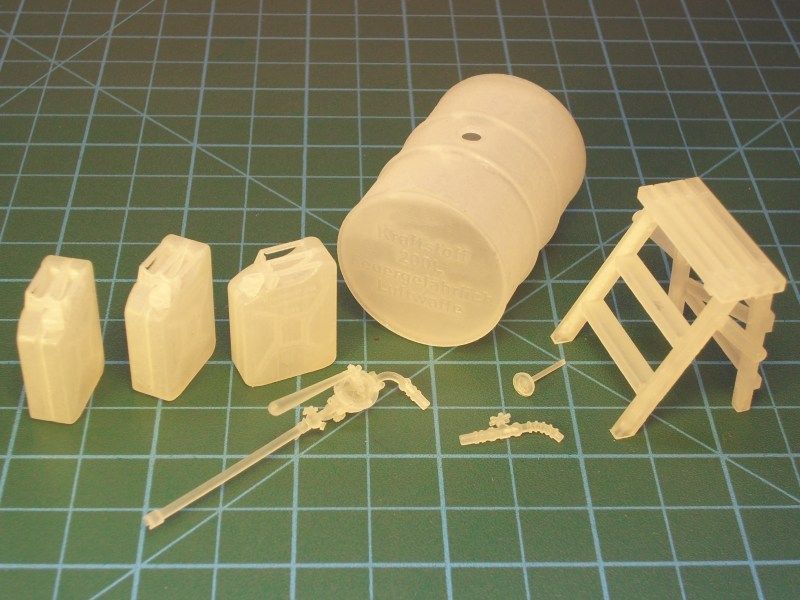
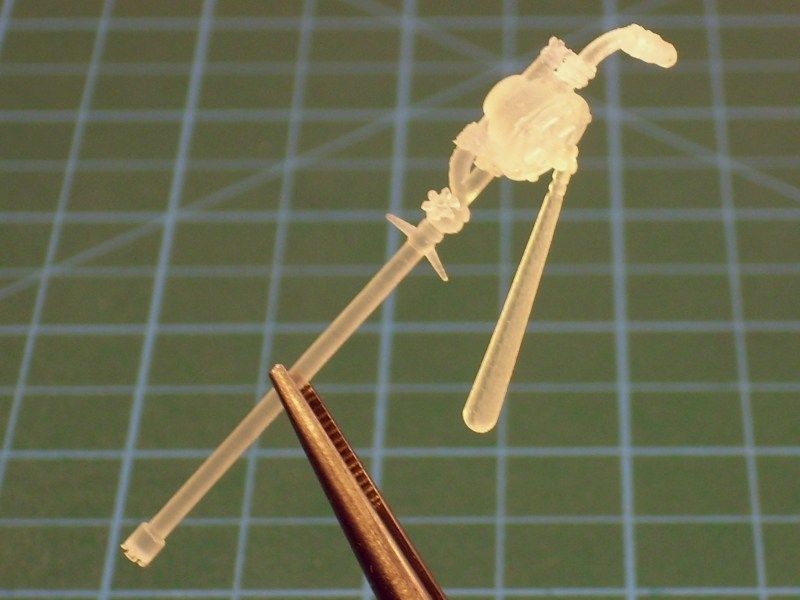
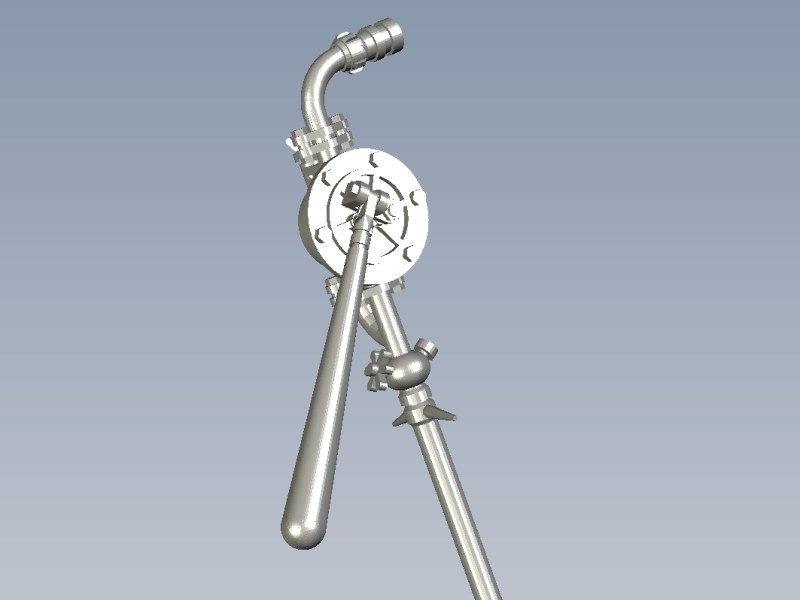
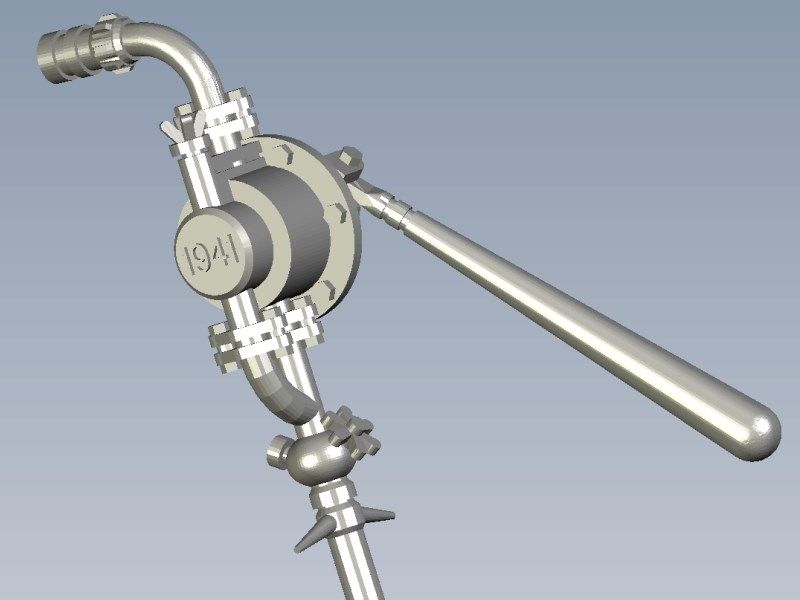
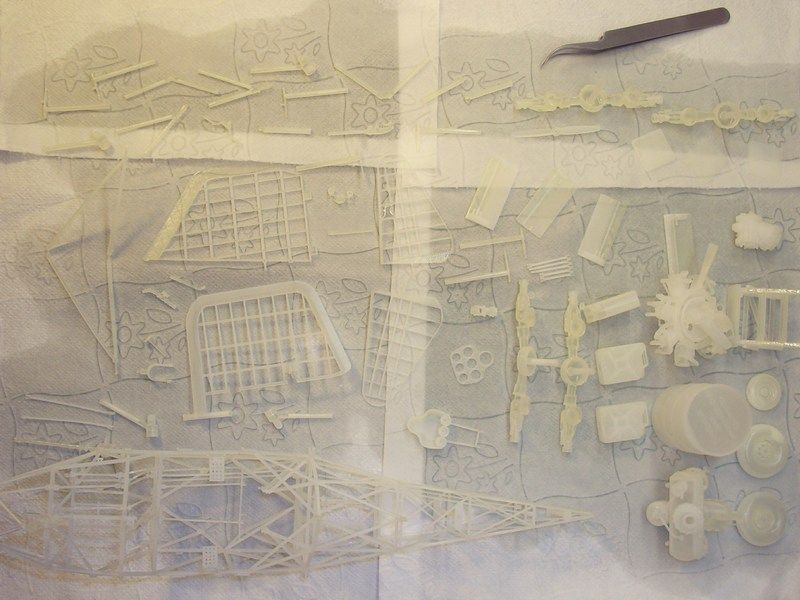
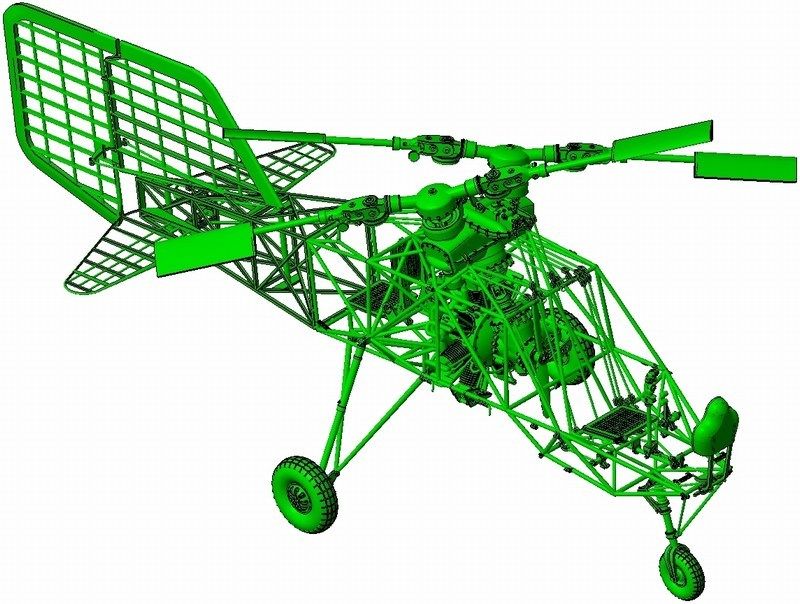
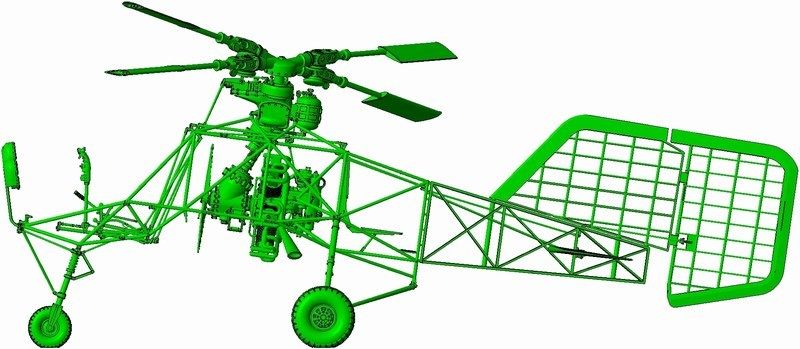
After digitally building the Fl-282 Kolibri cutaway 3D model using only mouse clicks, I saved it as an STL - STereoLithography format binary file and forward it on the 3D replicator to start generating the individual parts of the actual scale model. Once again, I used best available tools & plastic material and asked from Shapeways digital fabrication lab (equipped with a high-precision & high-cost “ProJet HD 3000” machine for creating custom made-to-order products), to 3D print it. The 1/18 scale Fl-282 V21 Kolibri “cutaway” model kit consists of more than 40 different 3D printed parts made of matte translucent plastic material - in fact, the kit parts are quite more, but smaller in size are interconnected on same sprue frame which is counted as one part. Kit was CAD designed and 3D produced in such way to simplify assembling process while maintaining necessary details required by the scale size. Following the instructions described into the 67-page ultra-detailed “1/18 Fl-282 V21 cutaway kit building instructions” manual (which can be found HERE as a PDF format downloadable file), the assembling process becomes easy.

Image

Image

Image

Image

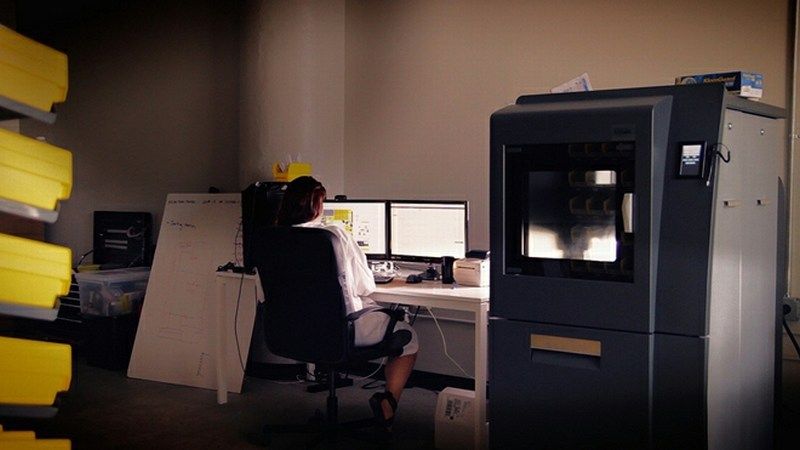
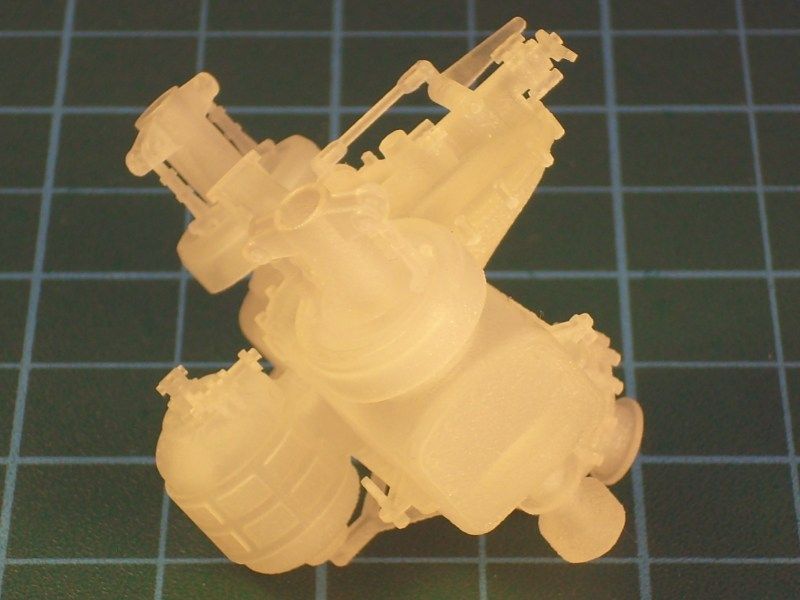
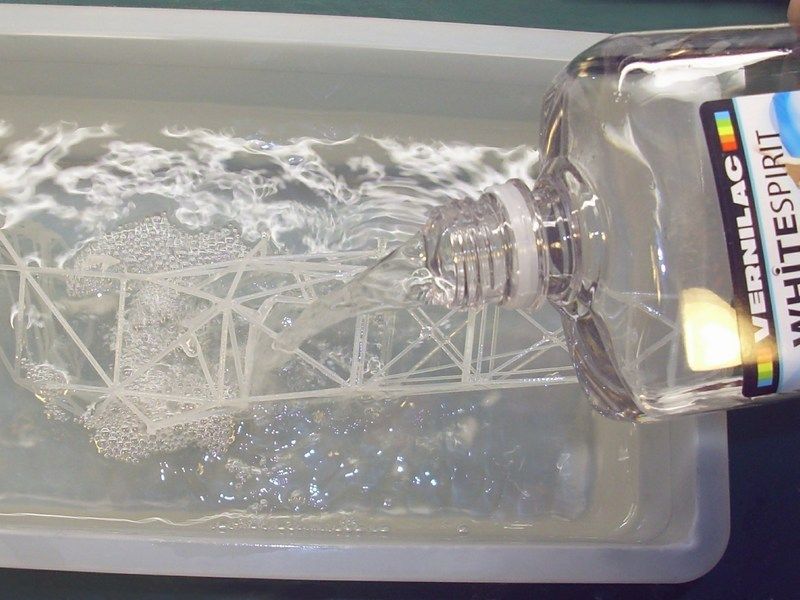
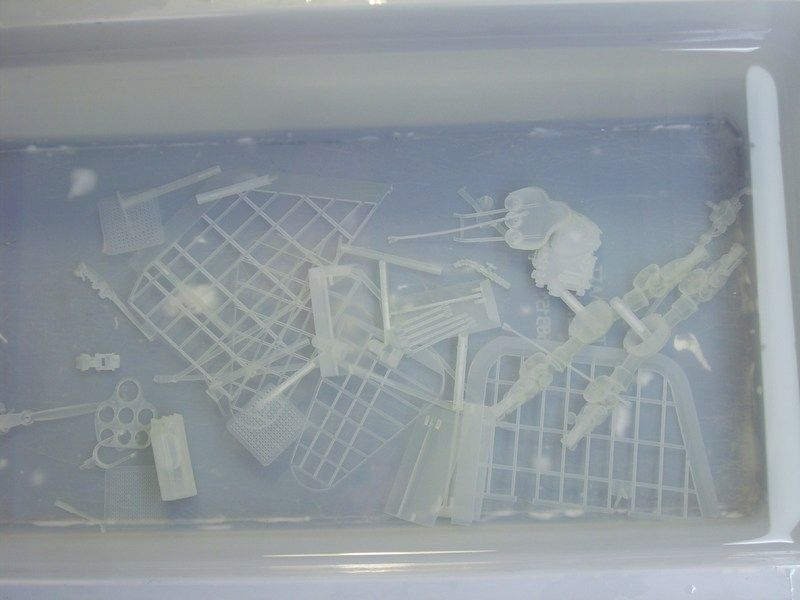
When printing is finished, the model parts are removed from the tray and placed into an oven that melts away the wax support material. Next, the models are placed into an a ultrasonic oil bath to remove any remaining wax residues, and then a ultrasonic water bath to remove any oil on the model. Final inspection and dry by hand follows for every single model part. Although the ProJet HD 3000 prints in high resolution (16 microns per layer) and can easily produce high detailed parts as small as 0.1 mm, it is better to avoid printing such small parts because they could easily get lost while washed into ultrasonic bath later, for wax residues removing. Each complete model kit takes about 5 to 7 days to get produced after order due to increased workload for 3D printed manufacturing demand in Shapeways factory.

Image
Image

Nick_Karatzides
Officer - 2nd Lieutenant
Posts: 286
Joined: Fri May 01, 2009 4:53 pm
Location: Valley of Death

Re: 1/18 scale Flettner Fl-282 V21 Kolibri scratchbuild mode

Post by Nick_Karatzides » Sun Apr 17, 2016 8:00 pm

As soon as 3D printing process completed, the produced parts were cleaned & checked for broken parts or imperfections by Shapeways 3D printing lab specialized personnel. Later, everything carefully packed and shipped to my home address using UPS 24hrs delivery service. Once again, I was happy to hold my own custom 3D printed model kit, CAD designed with my laptop and later converted to an actual physical object, under my preferable 1/18 scale.

Image

Image

Image

Image

Image

Image

Image

Image

Image

Image
Image

Nick_Karatzides
Officer - 2nd Lieutenant
Posts: 286
Joined: Fri May 01, 2009 4:53 pm
Location: Valley of Death

Re: 1/18 scale Flettner Fl-282 V21 Kolibri scratchbuild mode

Post by Nick_Karatzides » Sun Apr 17, 2016 8:09 pm

Some additional parts unrelated to the helicopter structure, also 3D printed to be used later as part of a diorama scene. For example few 1/18 scale 20 litres fuel canisters, a couple of 1/18 scale 200 litres fuel drums as used by Wehrmacht, Luftwaffe & Kriegsmarine during WWII with “Kraftstoff 200L Feuergefährlich Luftwaffe” and “Kraftstoff 20 L Feuergefährlich 1941” inscriptions engraved or embossed on side, a 1/18 scale fuel hand pump and one 1/18 scale wooden 3-steps ladder as used by Luftwaffe WWII ground crews and technician personnel for ground vehicle & aircraft maintenance procedures.

Image

Image

Image

Image

Image
Image

Nick_Karatzides
Officer - 2nd Lieutenant
Posts: 286
Joined: Fri May 01, 2009 4:53 pm
Location: Valley of Death

Re: 1/18 scale Flettner Fl-282 V21 Kolibri scratchbuild mode

Post by Nick_Karatzides » Sun Apr 17, 2016 8:12 pm

Rotary hand pump used by techical crews & maintenance personnel to transfer fuel from the 55 gallons drums to aircraft & armoured vehicles fuel tanks or into the 20 lt fuel canisters (both drums & canisters are available for sale at Anyuta 3D products catalogue). This type of manual fuel pump used by Luftwaffe & Wehrmacht during WWII. The rotary hand pump kit contains all necessary parts for assembling one fuel hand pump under 1/18 scale. Any extra diorama accessories (hose, 55 gallons fuel drum etc) are not included and should be purchased separately.

Image

Image

Image

Image

Image

Image
Image

Nick_Karatzides
Officer - 2nd Lieutenant
Posts: 286
Joined: Fri May 01, 2009 4:53 pm
Location: Valley of Death

Re: 1/18 scale Flettner Fl-282 V21 Kolibri scratchbuild mode

Post by Nick_Karatzides » Sun Apr 17, 2016 8:16 pm

Although 3D printed models do not differ so much from ordinary kits, the plastic material may cause surprises. Some of the kit parts may feel a little greasy and appeat slight traces of oil on their surface. As I've already described into previous pages, it is absolutely normal. After the 3D printing process was finished and the kit parts been removed from the printer tray to be washed into an ultrasonic oil bath and later an ultrasonic water bath, some oil traces escaped the clean inspection and dry by hand procedure. Parts can be easily cleaned by following one of the following methods:
  • By washing parts with water (NEVER apply water hotter than 50º C / 125º F or you'll be really sorry) & dishwasher soap and brush gently with an old soft toothbrush. Keep in mind that items are only 0.3mm to 0.5mm thin and they are very fragile. Therefore, being very carefull while washing the parts is a necessary.
  • By sinking everything into a plastic bowl filled with White Spirit and leave it there for few seconds or a couple of minutes (max) to wash oil traces. In the end the the kit won’t feel greasy anymore and show an almost complete white colour. Never use anything more "aggresive" than White Spirit. Also, AVOID stove cleaning spray and acetone nail polish remover products - both clean oil & wax but also dissolve the plastic leading to breakage and failure.
  • By using hydrosonic cleaning machine (IMHO, is the best alternative), filled with water & dishwasher soap and repeat procedure if needed. Meanwhile the water will turn cloudy - that’s the wax.
It is of utmost importance that the model parts are properly degreased - otherwise the paint will not stick. Small remainders can be removed with a swab or toothpick. For my own 1/18 scale Kolibri cutaway model kit, I decided (since I do not have a hydrosonic cleaning machine) to wash slight oil traces on parts by sinking everything into a 2 litres plastic bowl filled with White Spirit and leave it there for a couple of minutes. Shortly after all kit parts enjoyed their bath into a White Spirit filled bowl, they were washed with liquid soap & warm water, placed on soft paper towels and allowed to dry.

Image

Image

Image
Image

Nick_Karatzides
Officer - 2nd Lieutenant
Posts: 286
Joined: Fri May 01, 2009 4:53 pm
Location: Valley of Death

Re: 1/18 scale Flettner Fl-282 V21 Kolibri scratchbuild mode

Post by Nick_Karatzides » Sun Apr 17, 2016 8:20 pm

After all kit parts washed in White Spirit & water to clean the oil traces, every section of the model has been repeatedly dry fit tested to ensure that all individual parts could be later combined together as an overall built model. When looked OK to me, each part sprayed over with an undercoat mixture of 80% Life Color LC02 Matt Black and 20% Life Color LC37 Matt Burnt Umber acrylic, to prepare the surfaces for the basic paint which about to follow. Later, a very thin coat of Life Color UA503 Light Blue acrylic paint layer applied, very diluted with Life Color’s acrylic thinner in a 30% paint to 70% thinner ratio. The darkest recesses sprayed first, gradually working my way up the frame, keeping to the lighter areas on central parts of each tubular part. Same pattern maintained throughout the entire painting process to preserve continuity with the light source and subsequent spraying sessions continued to utilize very thin Life Color UA503 Light Blue acrylic paint layers as a base to varying degrees because it is the source of the light colour.

Image

Image

The tubular frame got gradually lighten with each successive layer as the painting process continued, so the second layer of paint as the medium layer of the base coat, is based upon a less diluted 50% paint to 50% thinner ratio. Then, I added just a few drops of Life Color LC01 Matt White FS37925 acrylic paint into the mixture to lighten up this stage of paint application, being very careful to always follow the established gradation pattern, untill contrast between light and dark started to become apparent.
Image

Post Reply