Page 1 of 1

Pickelhaube Indy Bike Sidecar

Posted: Mon May 31, 2010 1:23 pm
by tmanthegreat
I finished my Pickelhaube sidecar kit for the Hasbro Indy Bike today. Another neat little custom vehicle to add to the fleet 8)

Image

Image

Image

Image

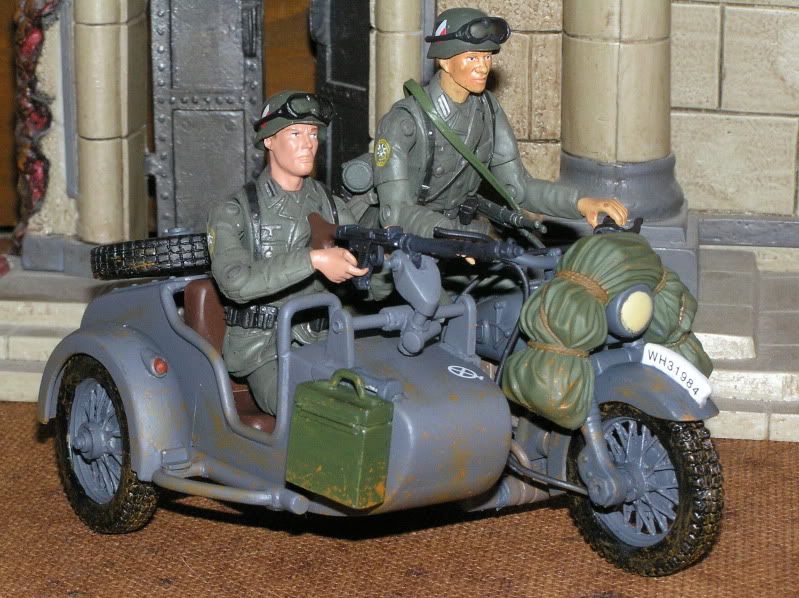
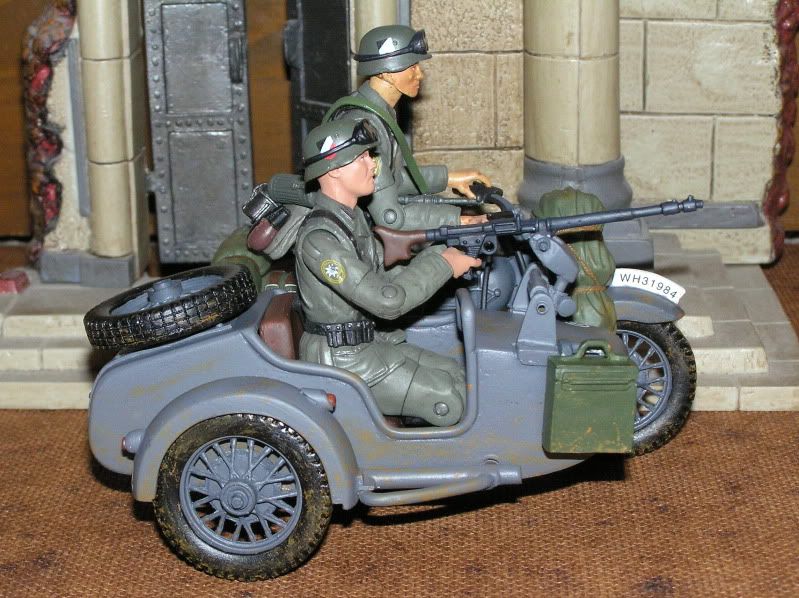
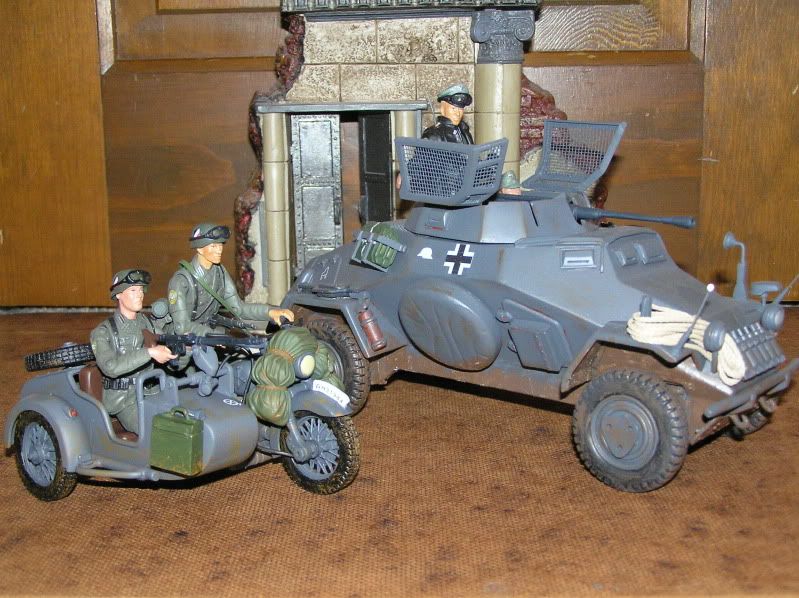
The kit was easy to build, but took longer than I originally thought it would. The most difficult part for me was actually getting the Indy bike apart to remove the original wheels - the pins did not come out easily. In the end, Pickelhaube's spoked tires really make the bike look a lot better. Originally, I was going to paint the sidecar OD green to match the Indy bike, but then decided to go with the more accurate German gray on everything.

I decided to leave on all they stowage on the bike and so did not put on the jumpseat or all the ammo boxes. This makes the model a little less accurate, but I think it looks the part and I'm happy with the way the bike/sidecar combo came out.

I'm anxious to see the work of some of the real customizing experts! Feel free to post your photos on this thread as well :D

Posted: Mon May 31, 2010 1:37 pm
by pickelhaube
Sweet !!!!!! :D :D :D

Posted: Mon May 31, 2010 2:26 pm
by YT
Wow that looks great!

Posted: Wed Jun 09, 2010 10:28 pm
by paulpratt
Can i ask where the goggles on the figures came from? I've been hunting for a pair for a custom.

Posted: Thu Jun 10, 2010 1:38 am
by Jesse James
The goggles look very "Dressellian Commando" from Star Wars to me, but I could be wrong on that.

Very sharp T-Man... I like it. I've thought about doing a camo deco, or just plain grey. I'm likely going with plain grey. What paint did you use, may I ask?

I'm thinking about just modding the Indy Biker to look different/cooler... The Indy Biker's not a bad figure, but his belt sucks horrifically, as do the gear on said belt. I'd like to alter the head totally too with a new one and things. I'm going to keep him, and for the sidecar rider I think I'll use a 21st or FOV figure.

Great bike though, and inspiration for doing my own one. Mine didn't come with the ammo cans, so I'll have to figure out how to do those or just leave it off. I'm leaving some of the stowage on mine as well, but I'll be adding the rear seat I believe. I like the tarp tied to the front though.

On mine I'm thinking of adding some of the foliage/camo wired to vehicles like was seen a lot during the Normandy invasion... I like the idea of these guys tearing around watching the skies a LOT. :)

EDIT: Did you also add a nut to the end of the brass axels? I'm curious how to go about making my axels still functional but hold the wheels on ok.

Posted: Thu Jun 10, 2010 11:25 am
by pickelhaube
The car wheel should be a tight fit.

Once you paint the axel shaft (with the wheel on) it should not come off unless you pull on it.

Posted: Thu Jun 10, 2010 7:58 pm
by tmanthegreat
Thanks Jesse :D I used Tamiya German Gray paint for the gray, as well as Tamiya flat black, tamiya olive green, testors gunmetal, and testors flat brown. I left the bike's engine parts in their original colors. The goggles are actually those that came with the S1 BBI figures.

As for the axels, I pulled the bike apart (quite difficult, actually) and removed the pins that held the original wheels. Once the little plastic "sleeve" was removed from the pins, I was simply able to reinsert them through Pickelhaube's wheels - which were designed so as one fit specifically in the front, rear, and sidecar.

Since these pictures were taken, I've modified the bike further, adding a working shovel rack to the sidecar and removing the rear stowage to add the 3rd seat and ammo cans. I left the tarp on the front, though, as I like that :wink: