Love to tweak toys and models? Add features and small details? This forum is for you!
-
rschaap
- Officer - Major

- Posts: 851
- Joined: Mon Feb 02, 2009 10:20 am
Post
by rschaap » Sun Feb 15, 2015 7:20 pm
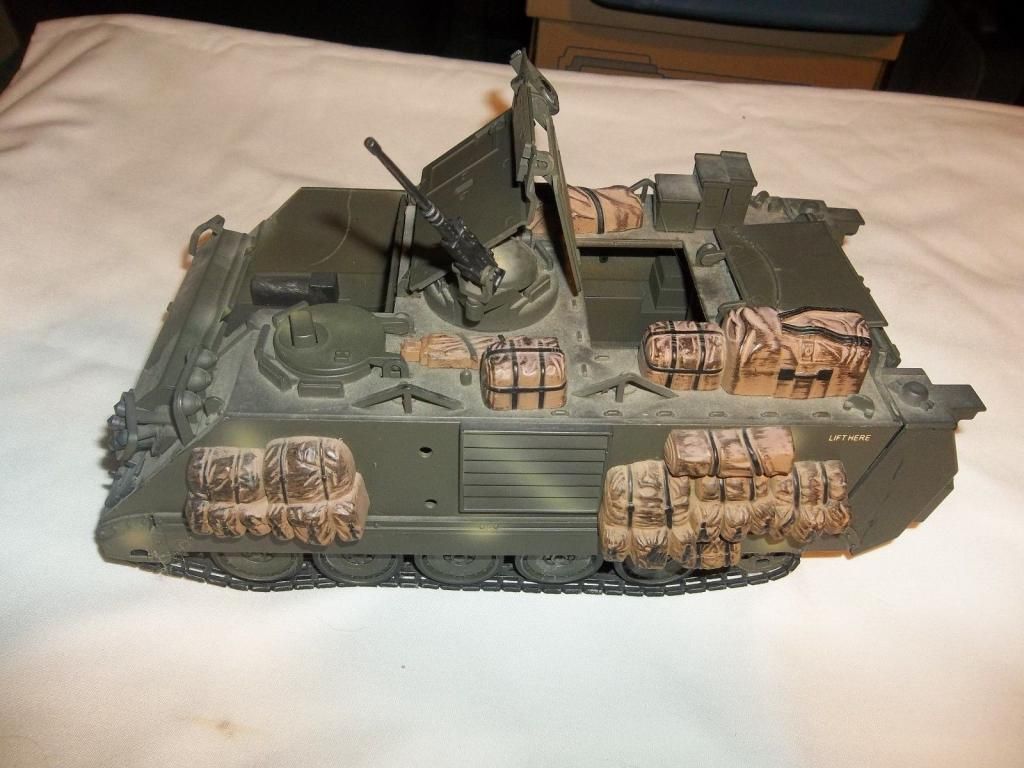
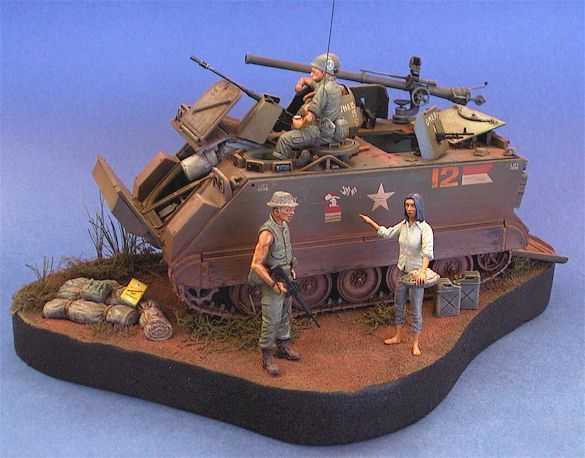
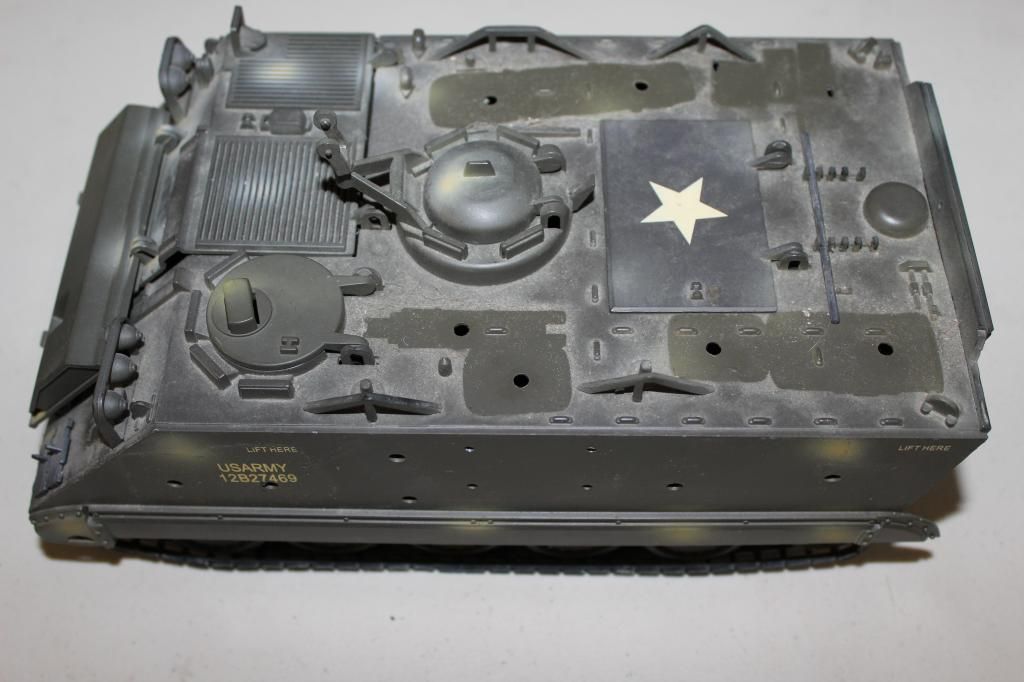
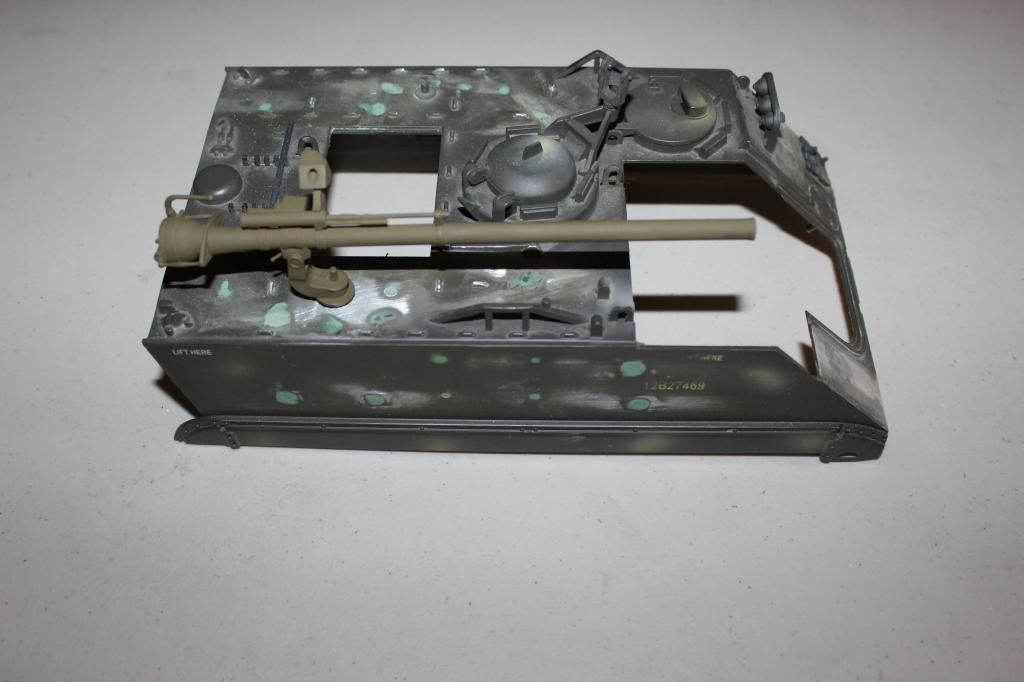
Thanks to the heads-up from "skorzeny" I was able to acquire a Millennium Models 1/18 M113A2 for a conversion to a Vietnam era M113 with 106mm recoilless rifle. Here is the model I started with and what my future conversion shall look like.
 Wish me luck....
Last edited by
rschaap on Sat Aug 29, 2015 6:18 pm, edited 5 times in total.
-
rschaap
- Officer - Major
- Posts: 851
- Joined: Mon Feb 02, 2009 10:20 am
Post
by rschaap » Sun Feb 15, 2015 7:29 pm
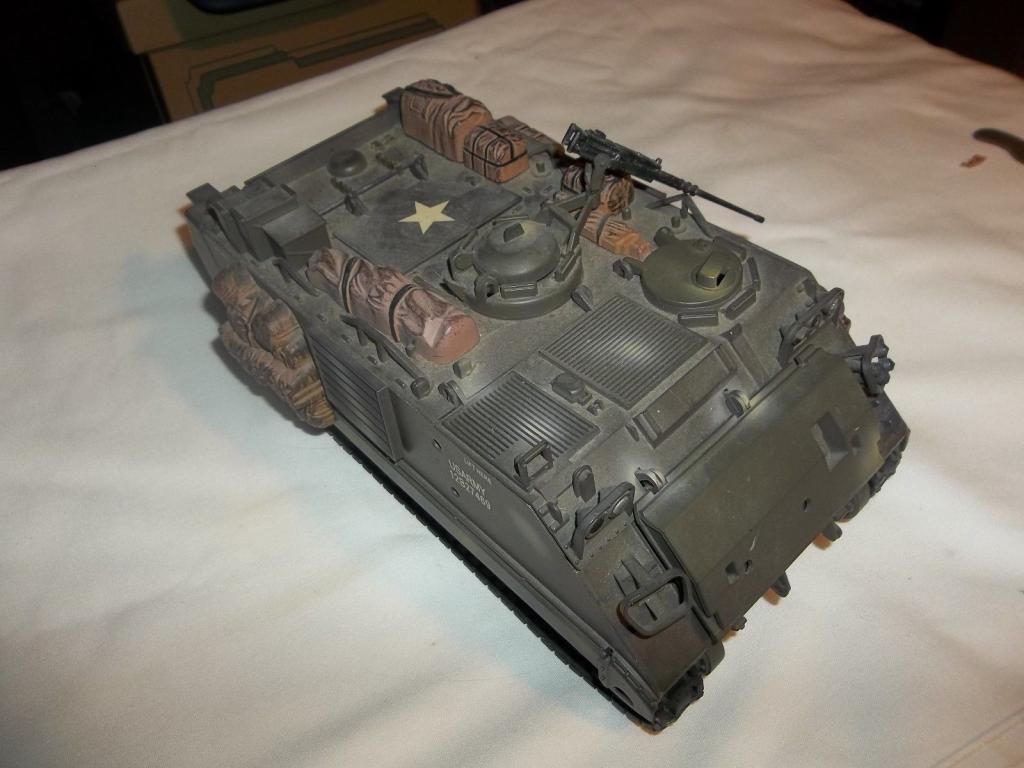
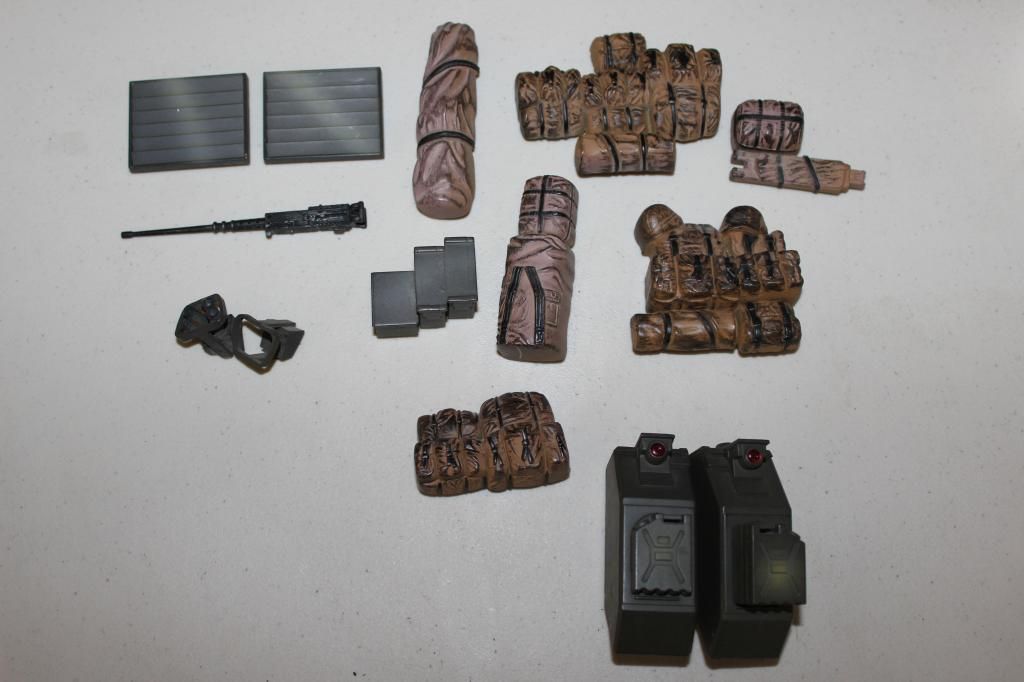
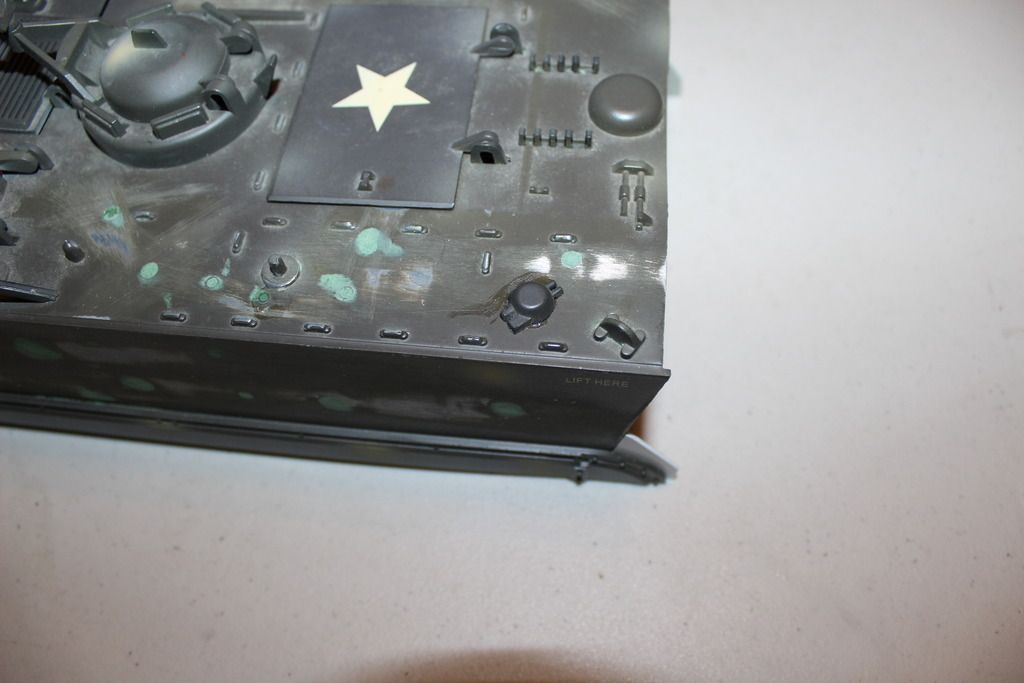
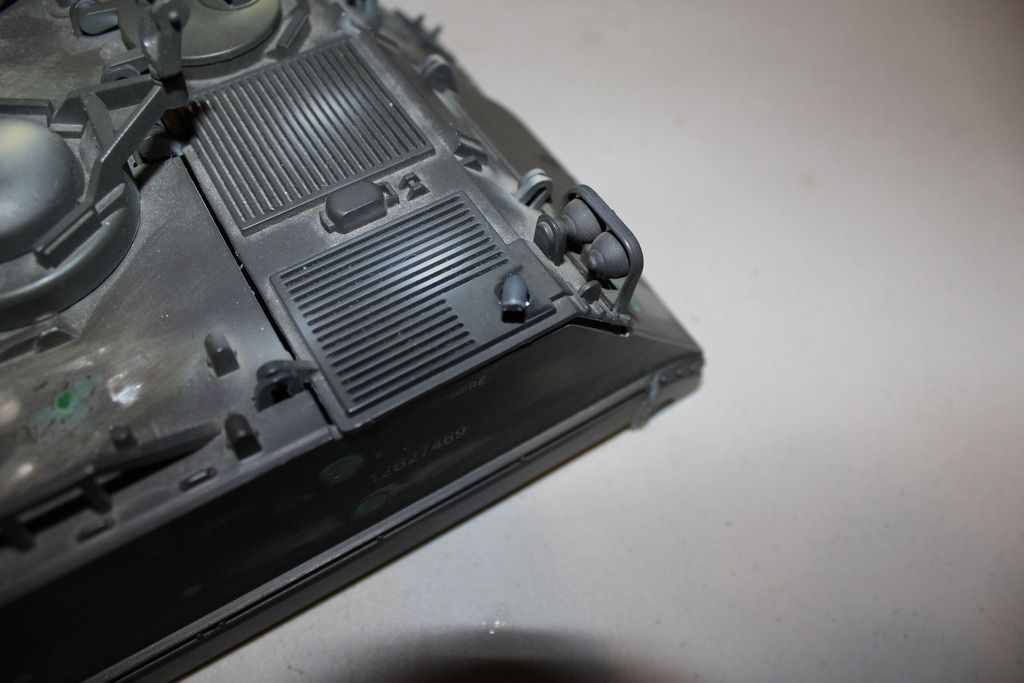
**UPDATE #1** First I stripped all the gear off.
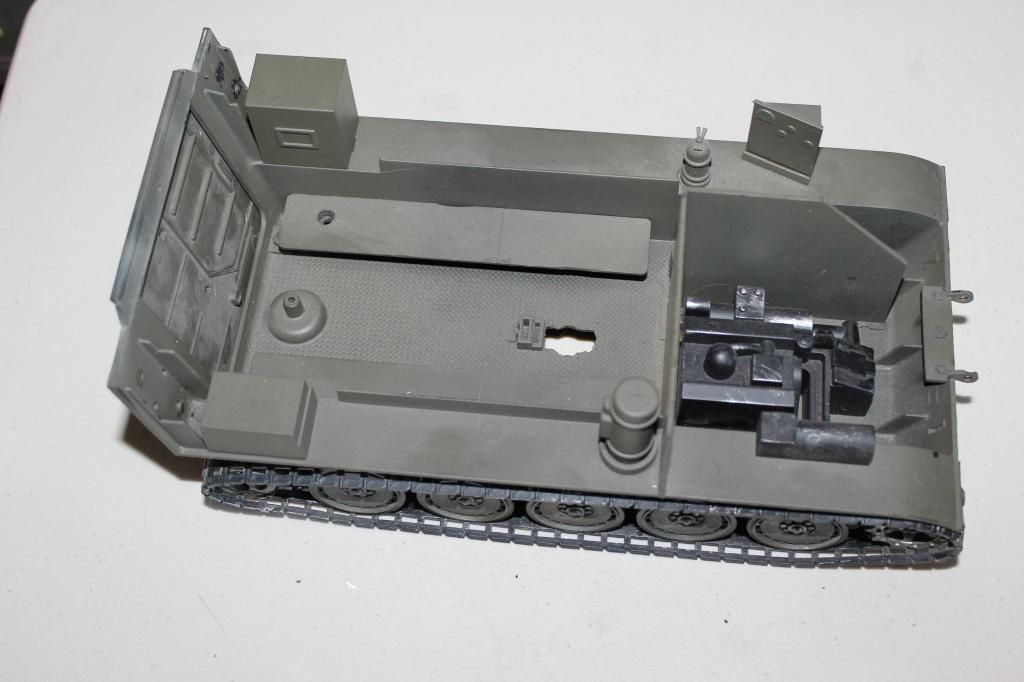
 And then I removed the hull to work on the interior first.
 Now the fun starts......
Last edited by
rschaap on Tue Mar 24, 2015 9:22 am, edited 1 time in total.
-
rschaap
- Officer - Major
- Posts: 851
- Joined: Mon Feb 02, 2009 10:20 am
Post
by rschaap » Sun Feb 15, 2015 7:46 pm
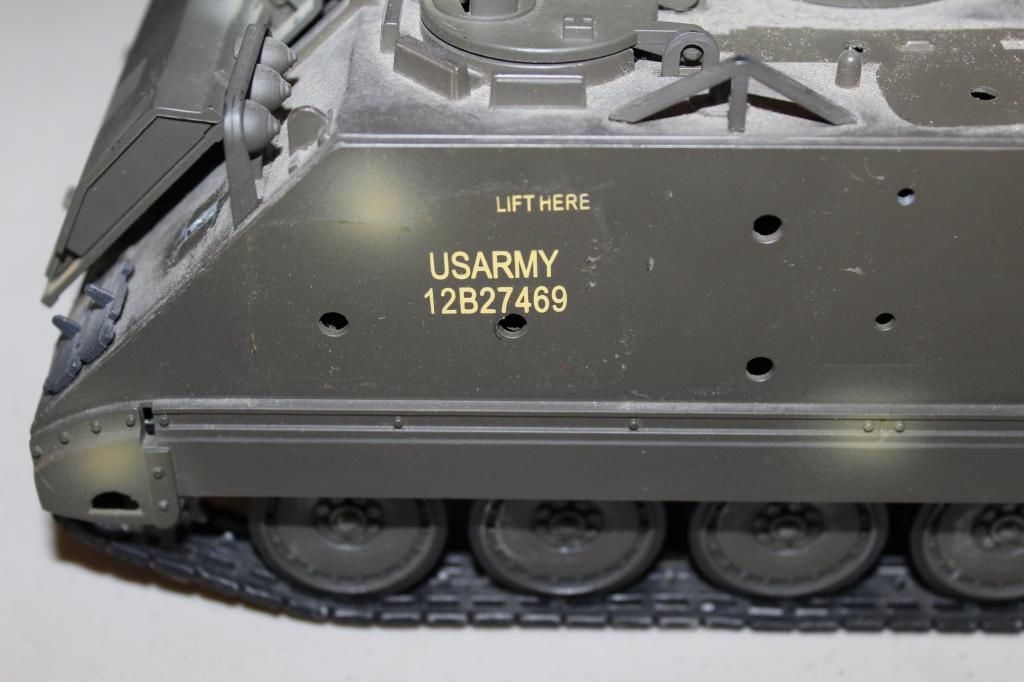
I did notice something when I started. The hull number on the 1/18 scale model matched Tamiya's M113 model from the 1980's. My guess is the plan was to build the model as a Vietnam M113 at the start and they decided to upgrade it. The storage packs cover the numbers, so unless you remove them you would never see the numbers. Curious...
-
normandy
- Officer - Brigadier General

- Posts: 6028
- Joined: Mon Oct 04, 2004 6:30 pm
- Location: Atlantic Coast
Post
by normandy » Mon Feb 16, 2015 5:39 am
Interesting find regarding the Nam era numbers. Looks like this will be a nice project.
-
rschaap
- Officer - Major
- Posts: 851
- Joined: Mon Feb 02, 2009 10:20 am
Post
by rschaap » Mon Feb 16, 2015 5:17 pm
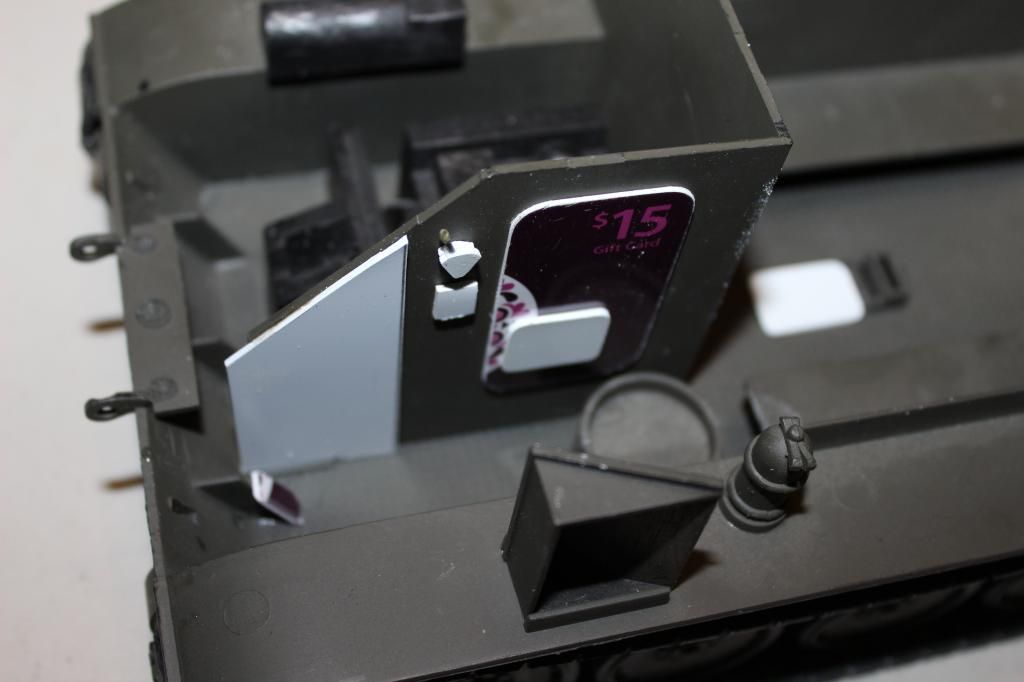
**UPDATE #2** I used old "I-Tunes" cards (An idea I got from the guy who did the WWII Dragon Wagon) and plastic stock for some of the interior access hatches along with the driver and gunner's seats (not pictured). I wasn't going for 100% accuracy, just to the point where it satisfied me visually. Matt (Pickelhaube) once commented on detail work, essentially saying that it's nice if you can see it. That thought has stuck with me while doing this conversion.
I had the idea of doing this a while back and was prompted to make it happen when I was searching old forum post and saw another conversion back in 2010 by "pcoughran."
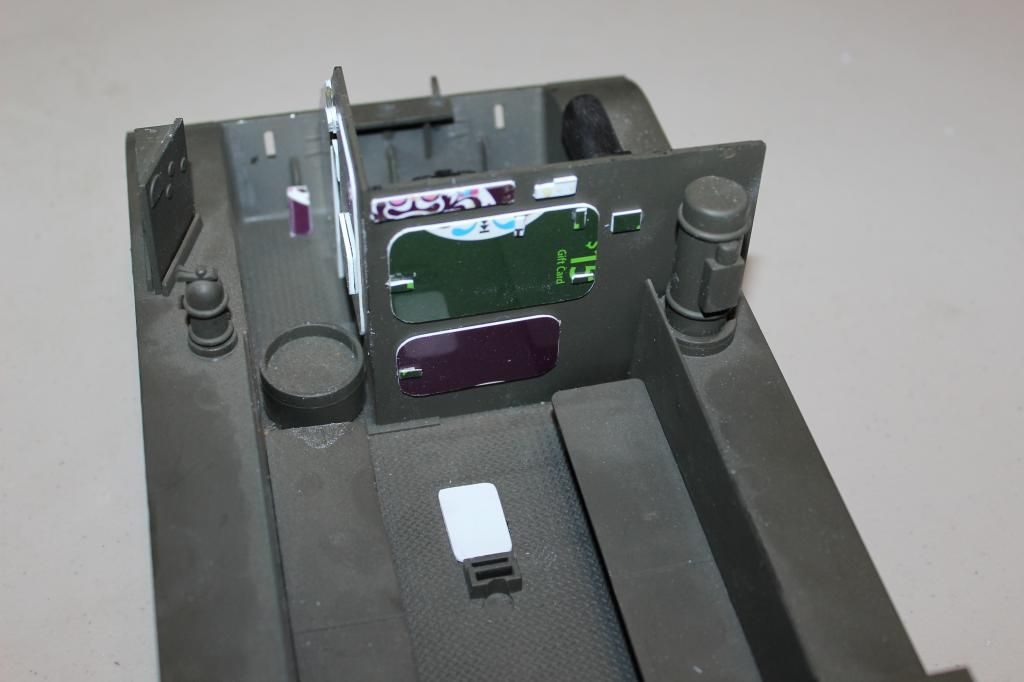
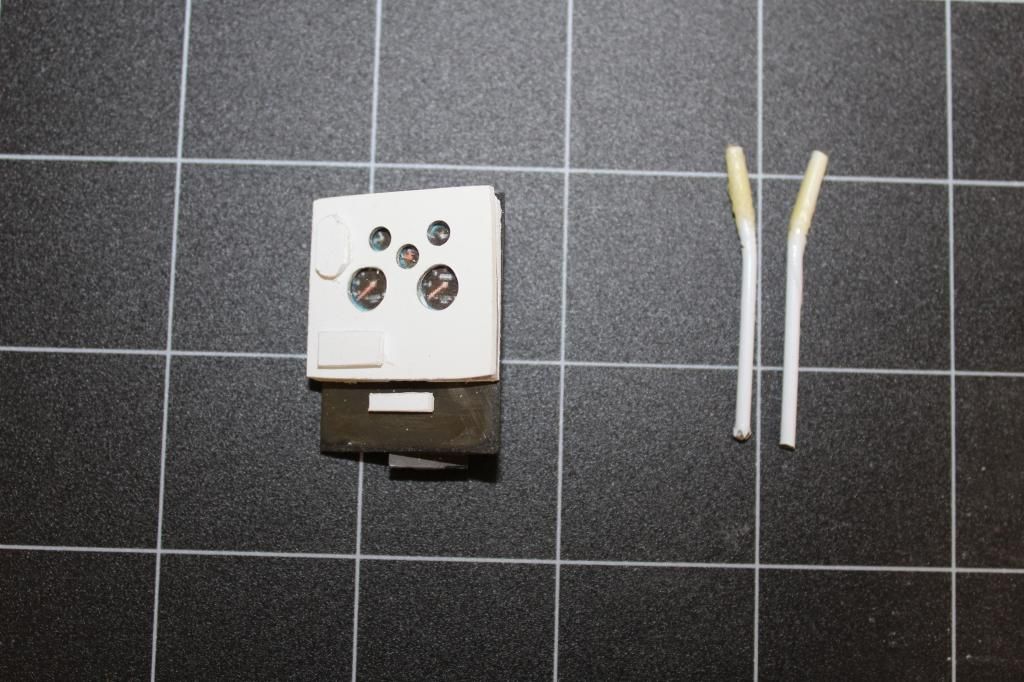
 I also did a little update to the instrument panel and drive handles.
 Until next time...
Last edited by
rschaap on Tue Mar 24, 2015 9:23 am, edited 1 time in total.
-
tmanthegreat
- Officer - Brigadier General
- Posts: 11240
- Joined: Tue Oct 05, 2004 7:38 pm
- Location: Central California
Post
by tmanthegreat » Tue Feb 17, 2015 11:35 am
Talk about going all-out on the 21c M113

It seems the 21c M113 was just made to be customized from the ease of getting the stowage off to the ease of disassembling the model. There's been a number of excellent custom examples over the years. My very first custom XD vehicle was the "Desert" M113 where I replaced the crappy 21c stowage with better Build-a-Rama items. Did that 10 years ago. Last year, I re-did my Vietnam M113, removing the stowage and external fuel tanks while attempting to make the sides smooth. My Vietnam came out pretty decent, though it still needs the MG shield, cupola armor, and proper ID markings.
However, yours is going to look fantastic, I think

"If you fail to plan, you plan to fail."
-
rschaap
- Officer - Major
- Posts: 851
- Joined: Mon Feb 02, 2009 10:20 am
Post
by rschaap » Tue Feb 17, 2015 1:20 pm
I am planning on buying 1/16 scale decals for a M113 and reducing it to 1/18. I will let you know how that works out. Thanks for looking. I will be posting more pictures soon.
-
rschaap
- Officer - Major
- Posts: 851
- Joined: Mon Feb 02, 2009 10:20 am
Post
by rschaap » Sun Feb 22, 2015 12:02 pm
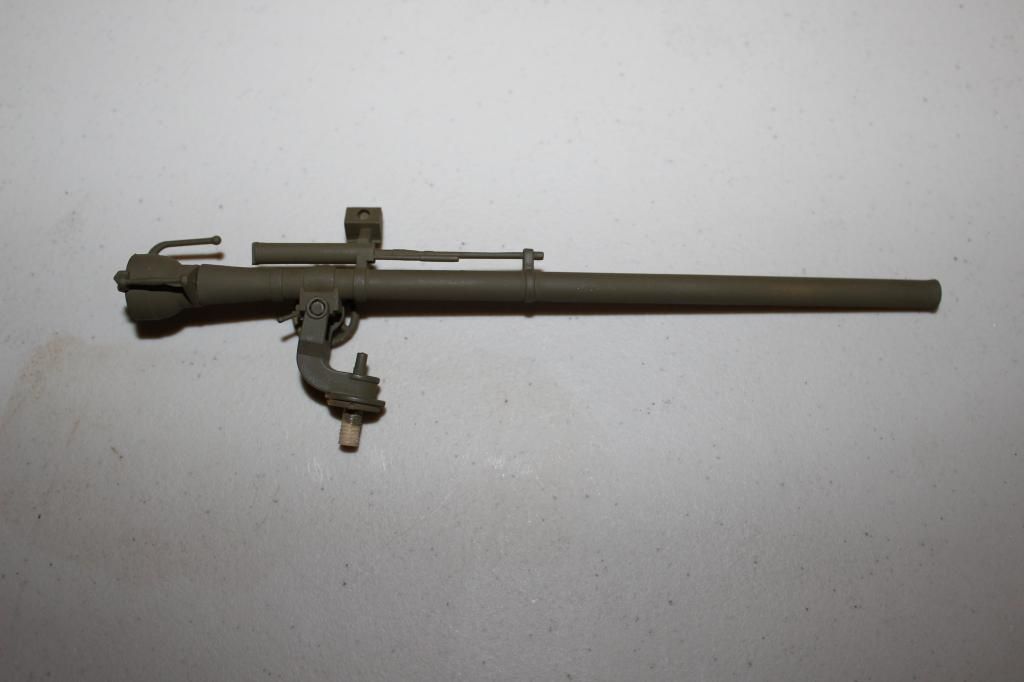
**UPDATE #3** I used the 106mm recoilless rifle from a Humvee I had. I painted the 106mm rifle with Testors Olive Drab #1911.
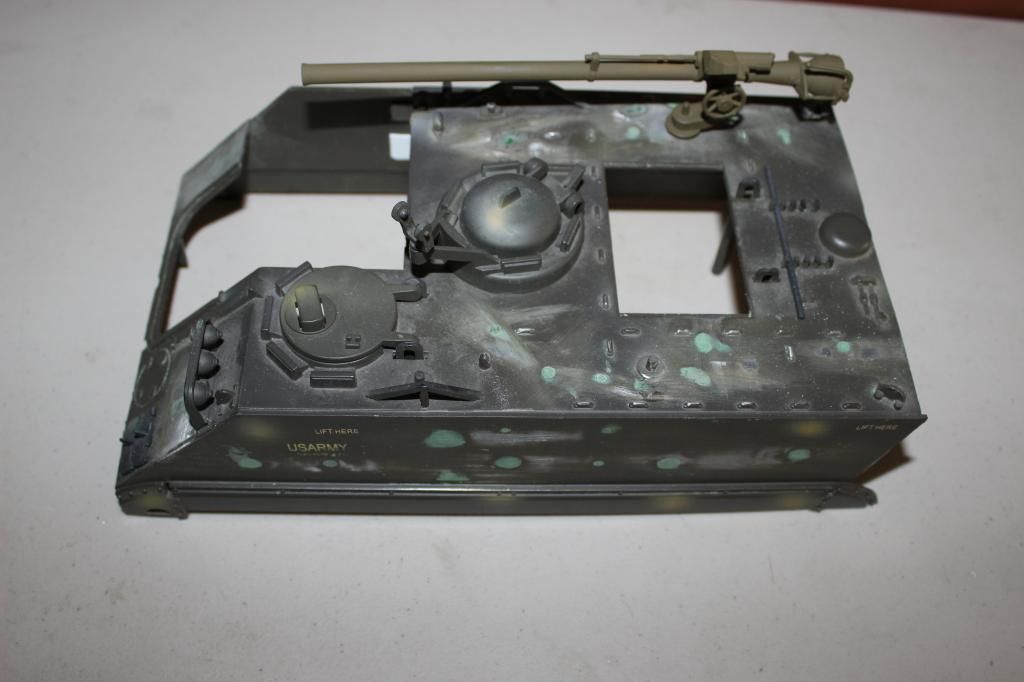
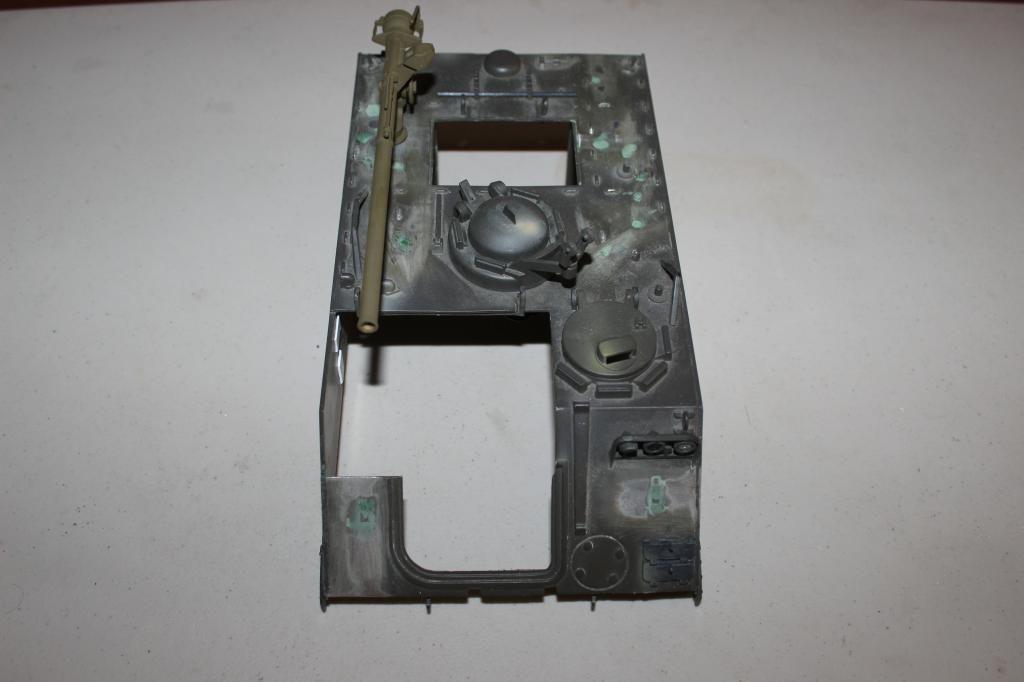
I had to patch 36 holes in the diecast body before proceeding. This took three days of filling and sanding due to the shrinkage of the filler. I wanted the body to be smooth before painting. I also removed some of the body detail that was not present in the M113 in my reference photos.
 Next update soon...
Last edited by
rschaap on Tue Mar 24, 2015 9:24 am, edited 1 time in total.
-
Rylau
- Officer - 2nd Lieutenant

- Posts: 275
- Joined: Mon Oct 04, 2004 2:08 pm
- Location: 1,Bergen County,Northern N.J.
Post
by Rylau » Sun Feb 22, 2015 12:19 pm
Looking good. Keep the updates coming.
Sgt. John Ray 12/8/67 Hill 172
99% of Americans try to avoid getting caught in traffic.
1% of Americans try to avoid getting caught in an ambush.
God Bless Our Troops.
-
rschaap
- Officer - Major
- Posts: 851
- Joined: Mon Feb 02, 2009 10:20 am
Post
by rschaap » Sun Feb 22, 2015 12:55 pm
Looking at the photo of the 106mm recoilless rifle after painting it olive drab I realized it is too light. I read Humbol #66 is a closer match to the color of Vietnam armor. Any suggestions?
-
skorzeny
- Officer - 1st Lieutenant

- Posts: 615
- Joined: Thu Feb 12, 2009 12:01 pm
- Location: WIND CITY
Post
by skorzeny » Sat Feb 28, 2015 6:30 pm
You are very Welcome rschaap ! any time !
Happy to know the the it worked for you !
I like your Custom Idea , I wish the best for this custom !
-
rschaap
- Officer - Major
- Posts: 851
- Joined: Mon Feb 02, 2009 10:20 am
-
Light.Inf.Scout
- Officer - Brigadier General
- Posts: 2053
- Joined: Wed Jan 24, 2007 11:51 am
- Location: Central Illinois
Post
by Light.Inf.Scout » Mon Mar 02, 2015 9:38 am
Thats very cool
Trade References: JOC, IMMEWW2, Razor17019, KAMIKAZE, caesarbc, momaw nadon, supersonicfifi, Tambo, USMA07, bigsarge, American Grenadier, YT, Crazy Kraut, C00per, AV-8B Driver, cjg476, Buckyroo, aae83
-
rschaap
- Officer - Major
- Posts: 851
- Joined: Mon Feb 02, 2009 10:20 am
Post
by rschaap » Tue Mar 03, 2015 11:09 pm
Thanks, I just finished the wiring on the motor and primered the interior. Once I take care of some small issues, I will paint the interior and engine before putting on the decals. I will post my progress soon.
-
rschaap
- Officer - Major
- Posts: 851
- Joined: Mon Feb 02, 2009 10:20 am
-
rschaap
- Officer - Major
- Posts: 851
- Joined: Mon Feb 02, 2009 10:20 am
Post
by rschaap » Mon Mar 09, 2015 10:34 am
It has been slow go this weekend due to a family emergency. I did have an opportunity to add two shelves to the interior hull for radio equipment, along with moving the fuel cap and backdating the exhaust. I also had a chance to work on the rear fenders and fix a couple of small details. I will post photos in the next day or two.
-
rschaap
- Officer - Major
- Posts: 851
- Joined: Mon Feb 02, 2009 10:20 am
Post
by rschaap » Wed Mar 11, 2015 6:54 am
**UPDATE #6** Here is the photos of the relocated fuel cap and the backdated exhaust.
The fuel cap is located on the upper left rear portion of the hull.
 The exhaust (silver piece) is located on the upper right front portion of the hull on the engine access.
Last edited by
rschaap on Tue Mar 24, 2015 9:25 am, edited 1 time in total.
-
rschaap
- Officer - Major
- Posts: 851
- Joined: Mon Feb 02, 2009 10:20 am
-
Rylau
- Officer - 2nd Lieutenant
- Posts: 275
- Joined: Mon Oct 04, 2004 2:08 pm
- Location: 1,Bergen County,Northern N.J.
Post
by Rylau » Wed Mar 11, 2015 9:46 am
Real nice. You have the skills.
Sgt. John Ray 12/8/67 Hill 172
99% of Americans try to avoid getting caught in traffic.
1% of Americans try to avoid getting caught in an ambush.
God Bless Our Troops.
-
rschaap
- Officer - Major
- Posts: 851
- Joined: Mon Feb 02, 2009 10:20 am
-
rschaap
- Officer - Major
- Posts: 851
- Joined: Mon Feb 02, 2009 10:20 am
Post
by rschaap » Wed Mar 18, 2015 6:56 am
**UPDATE #9** I put the cushions on both sides of the cargo bay along with three 106mm crates, seven more ammo cans and a ration box on the storage shelves.
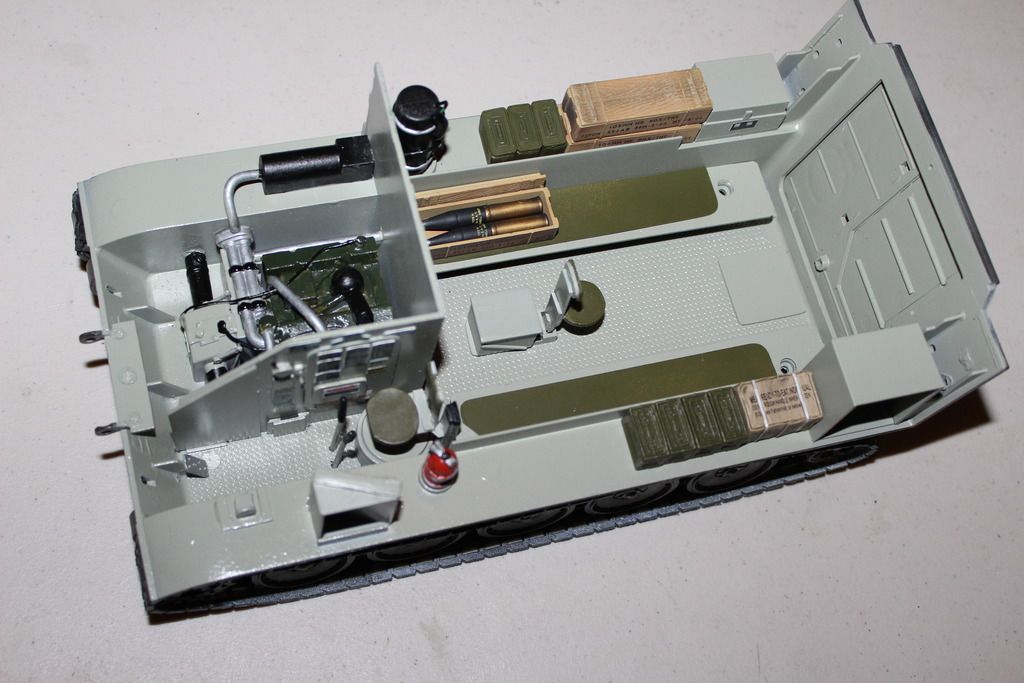
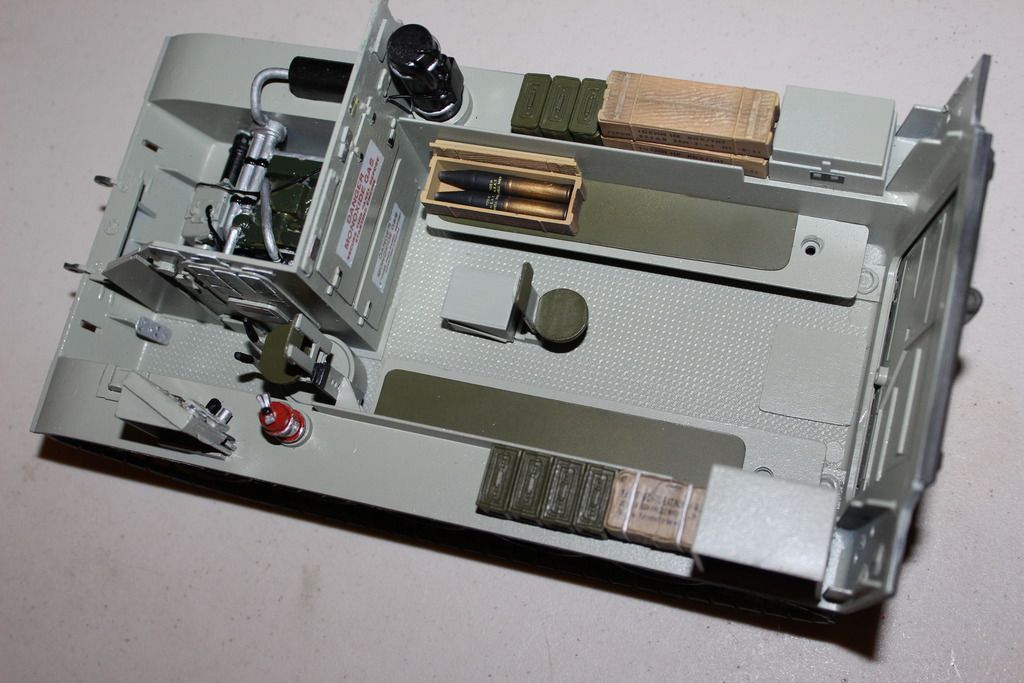 I took a photo through the back of the M113 to give an idea of what it will look like when it's all buttoned up.
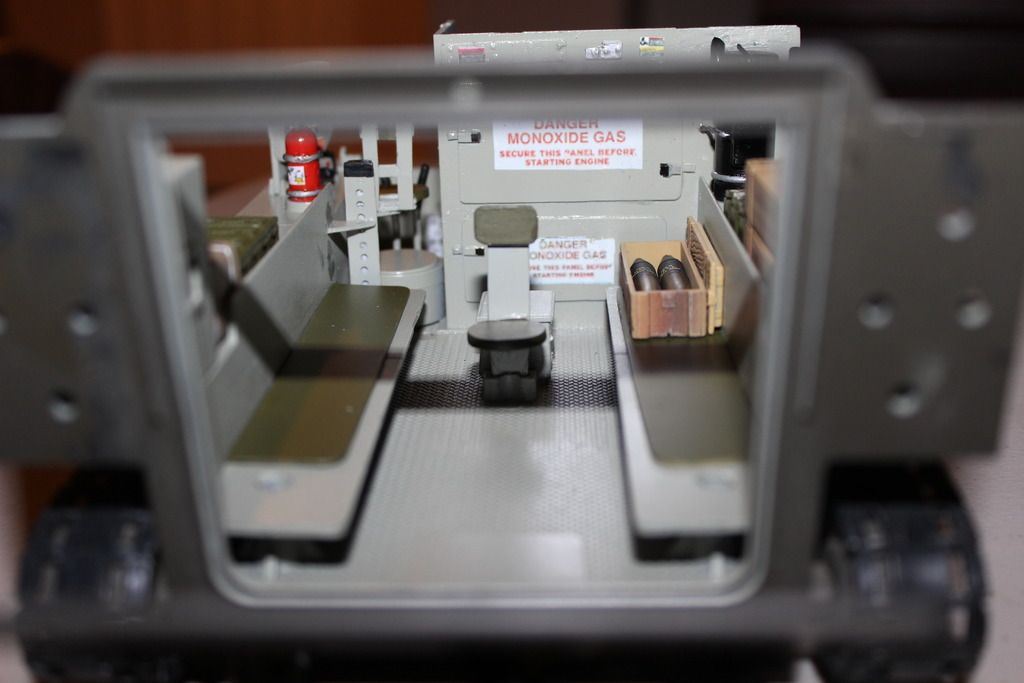 The next update should show the painting of the hull prior to assembly.
Last edited by
rschaap on Tue Mar 24, 2015 9:28 am, edited 1 time in total.
-
[CAT]CplSlade
- Officer - Brigadier General
- Posts: 3544
- Joined: Tue Sep 18, 2007 6:59 pm
- Location: Villa Rica, GA
Post
by [CAT]CplSlade » Wed Mar 18, 2015 8:01 am
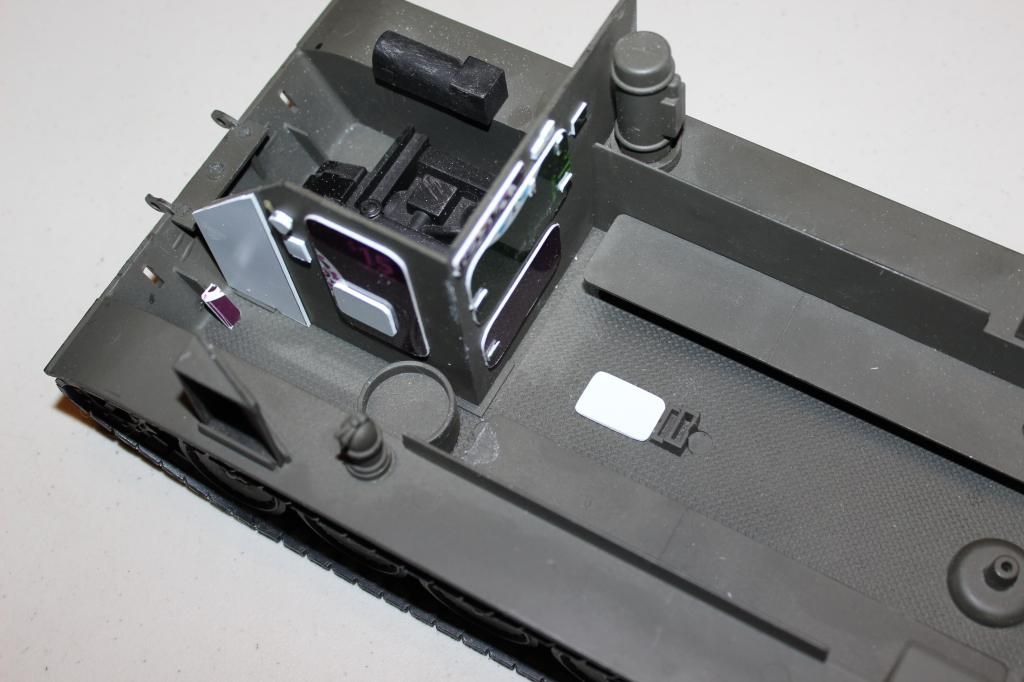
Isn't the gas pedal a bit far from the driver's seat?
Assuming that little silver rectangle glued to the reinforcement ridge is the pedal.
-
rschaap
- Officer - Major
- Posts: 851
- Joined: Mon Feb 02, 2009 10:20 am
Post
by rschaap » Wed Mar 18, 2015 8:48 am
Yes it is. The area where I put the gas pedal should be where the drive shaft for the transmission is. There is a lot of problems with the interior of this model that would require a lot of work to fix. The engine compartment is all wrong, the interior walls are in the wrong place making the cockpit too narrow. It has the wrong gas tank for the later model M113. There were some odd things found in the cargo bay which makes me believe they had other ideas for the interior. This is why I choose to make something for myself and not shoot for 100% accuracy, since I realized a lot of the detail would not be seen once it's all assembled.
Last edited by
rschaap on Tue Nov 03, 2015 8:27 am, edited 3 times in total.
-
[CAT]CplSlade
- Officer - Brigadier General
- Posts: 3544
- Joined: Tue Sep 18, 2007 6:59 pm
- Location: Villa Rica, GA
Post
by [CAT]CplSlade » Wed Mar 18, 2015 9:06 am
Understood.
-
Puke
- Private First Class

- Posts: 19
- Joined: Sun Feb 22, 2015 12:08 am
Post
by Puke » Sat Mar 21, 2015 7:35 pm
My goodness this is nice work. For what it is worth NAPA stores carry a spray paint ( I forget what brand) but it is called Detroit Diesel Alpine Green that is a very close match for the interior of modern U.S. Armor vehicles.