UPDATED 21st C. 1:32 Brummbar re-paint

Love to tweak toys and models? Add features and small details? This forum is for you!
Post Reply
Cabe
Officer - Captain
Officer - Captain
Posts: 817
Joined: Fri Aug 03, 2007 4:03 am
Location: Dallas TX USA
Contact:

UPDATED 21st C. 1:32 Brummbar re-paint

Post by Cabe » Wed Sep 10, 2008 7:54 pm

as you may be aware of, the original paint jobs on the Ultimate Soldier 1:32 brummbars were h-o-r-r-i-b-l-e
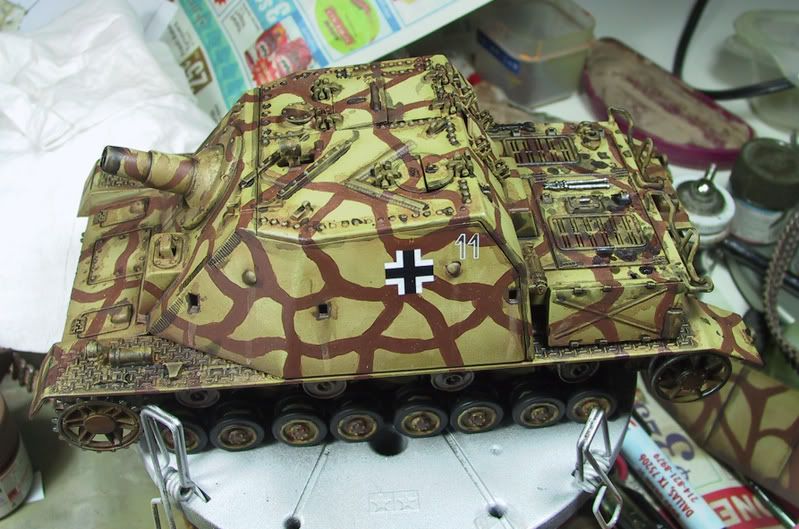
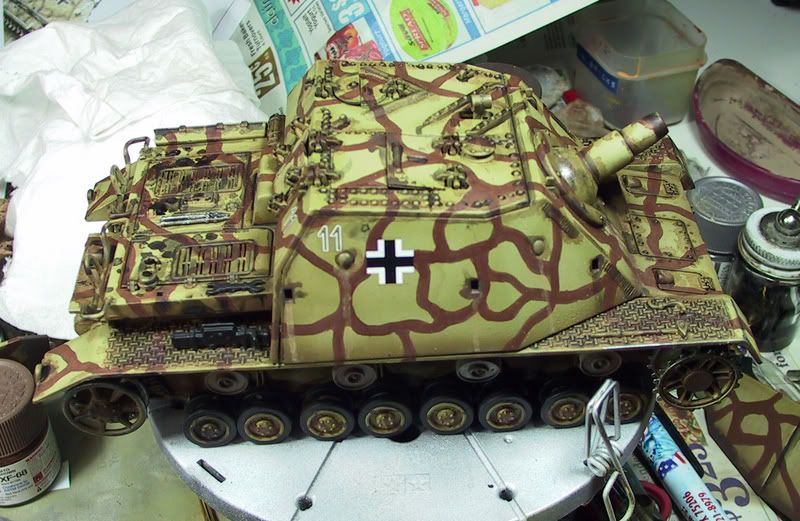
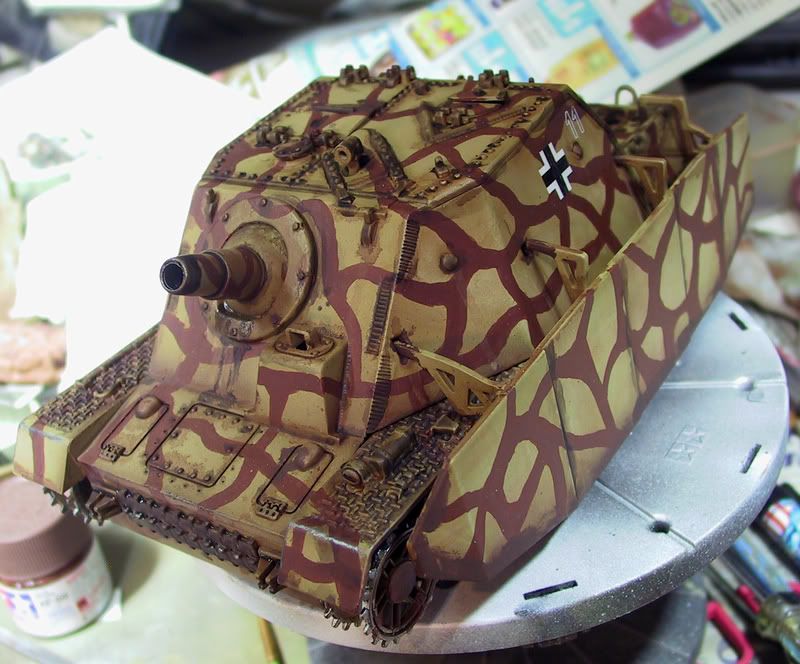
so I decided to do a repaint from ground up. This paint scheme may look similar to one of the ones offered by 21st C, but the original colors were very bright and well ugh, even though it was a good selection.
SO i hit this one with a total coat of grey primer and started over.
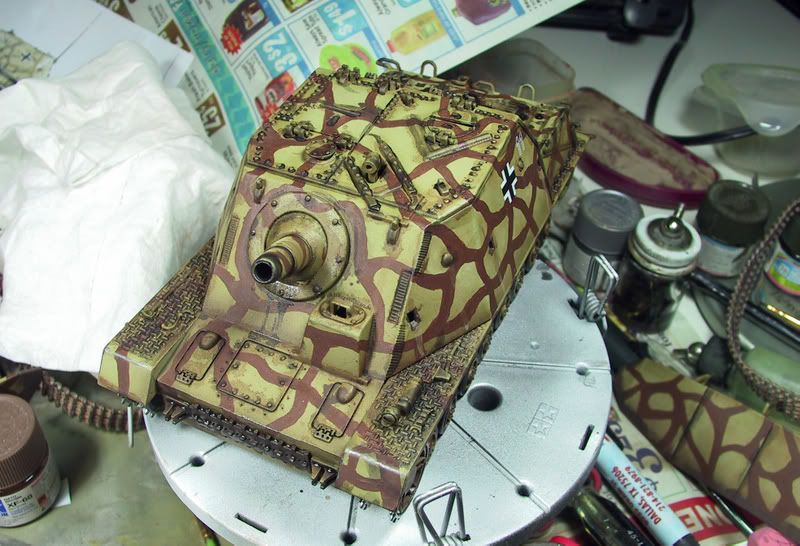
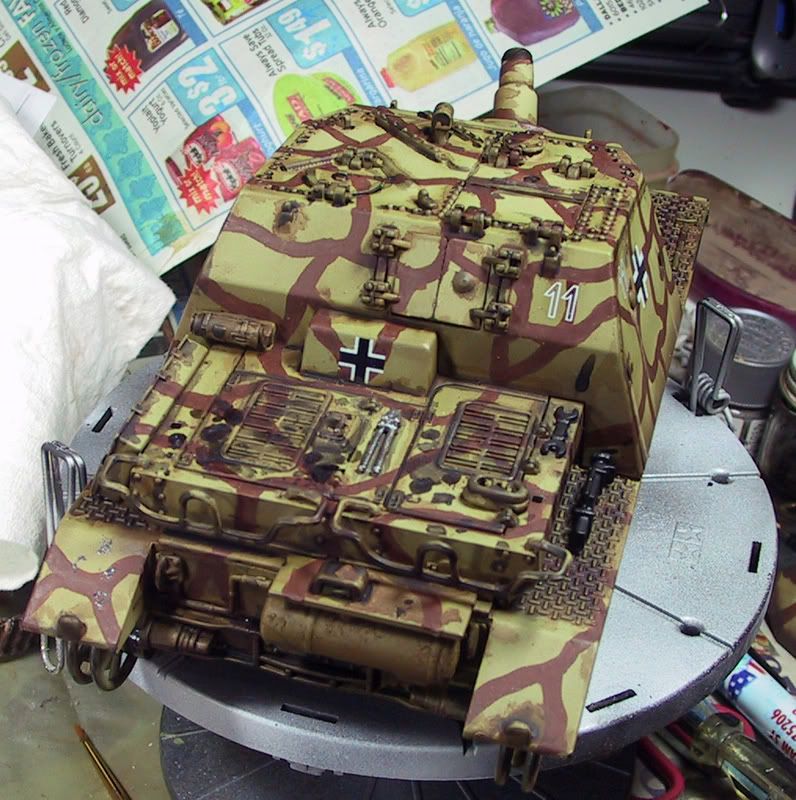
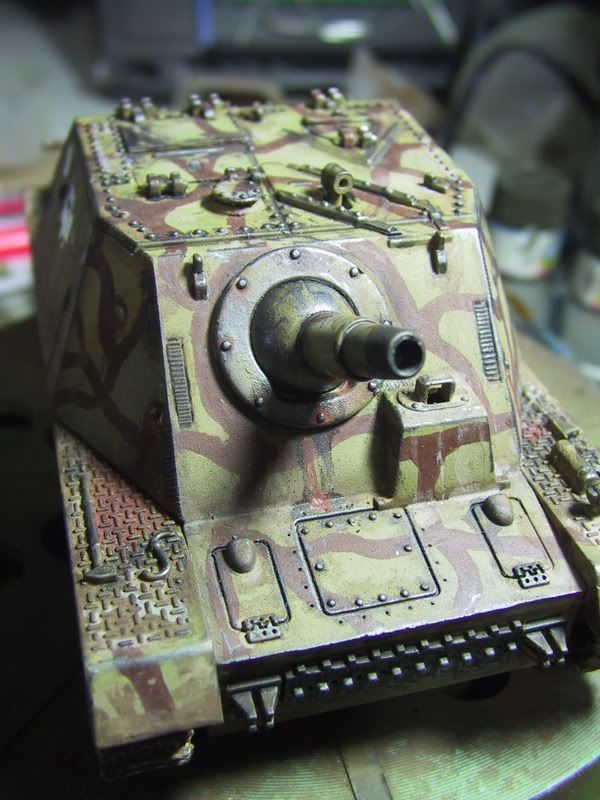
There is still some weathering to be done, but not much. Just some chipping exposed steel and rust, especially the shurzten which are not pictured much. The treads are re-done as well.
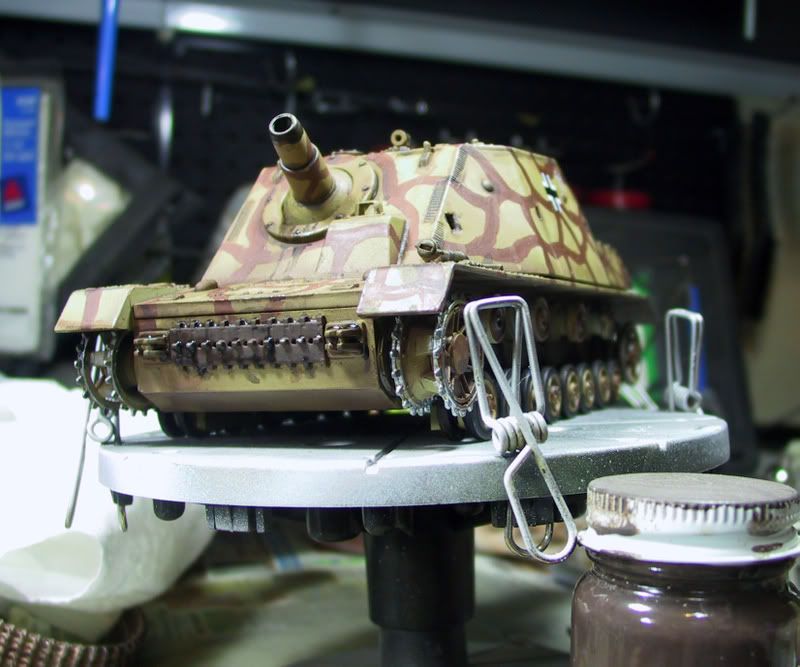
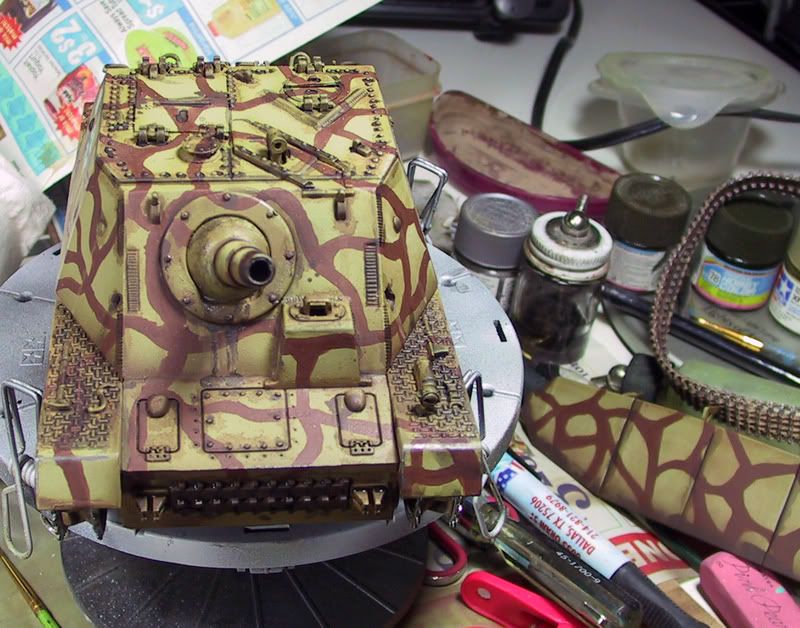
I will be hitting i with either a light or dark dusting on the lower hull and some soot around the gun and engine areas.

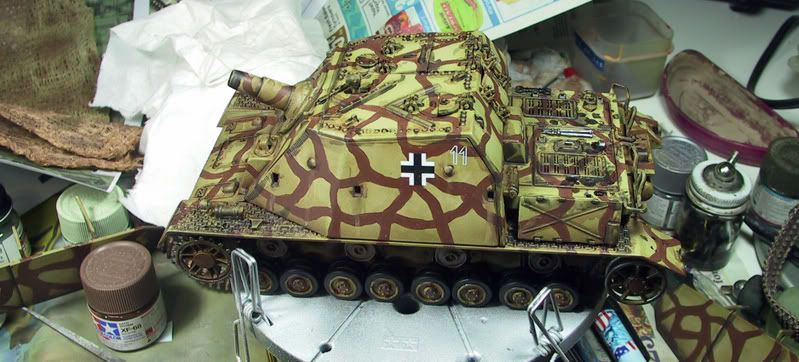
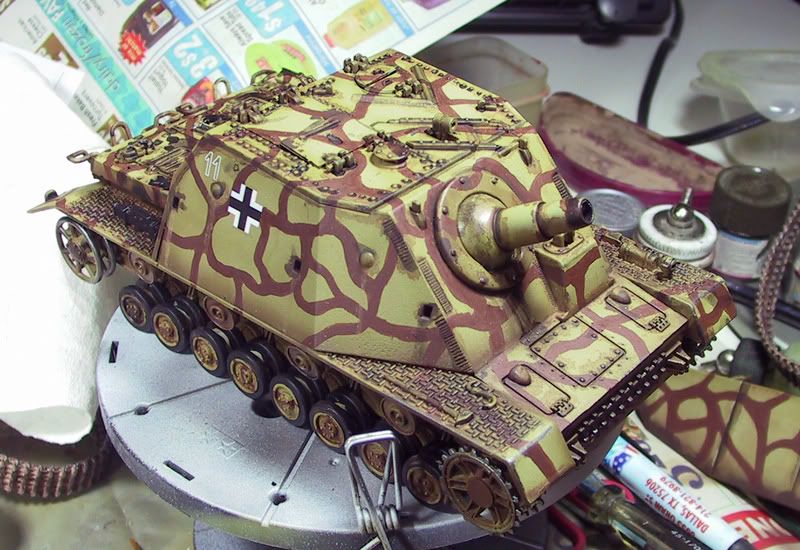
as many may know by now we are moving and have 1st child due next month so this brummbar will be for sale the instant i finish it.
Any one interested can get with me. I will be looking for about $150 for it
so pm me now if you want to snag it

Image

Image
Image
Image
Image
Image
Image
Image
Image
Last edited by Cabe on Wed Sep 17, 2008 6:07 pm, edited 1 time in total.
see my art and model gallery at http://www.cabebooth.com

PanzerArm
Officer - Brigadier General
Posts: 1576
Joined: Thu Jun 16, 2005 3:38 pm
Location: Rapid City, SD

WOW!

Post by PanzerArm » Wed Sep 10, 2008 8:41 pm

Great job! It looks fantastic!!!!!

Cabe
Officer - Captain
Officer - Captain
Posts: 817
Joined: Fri Aug 03, 2007 4:03 am
Location: Dallas TX USA
Contact:

Post by Cabe » Wed Sep 10, 2008 10:22 pm

Thanks!
given how bad the paint schemes have been on these from the company, I cannot understand why I have not seen more re-paints.
admittedly the brummbar is one of my favorite vehicles, but that is also biased due to my use of it in game when playing combat mission Afrika Korps or Barbarossa to Berlin
Last edited by Cabe on Thu Sep 11, 2008 4:36 am, edited 1 time in total.
see my art and model gallery at http://www.cabebooth.com

Jagdpanther
Officer - Lt. Colonel
Posts: 1083
Joined: Sat May 05, 2007 3:57 am
Location: Warren County,NJ

Post by Jagdpanther » Thu Sep 11, 2008 3:27 am

Very nice! 8)
[img88]http://i155.photobucket.com/albums/s281/army5551/160392_1114600356-1.jpg[/img88]

Stug45
Officer - Brigadier General
Posts: 6374
Joined: Fri Mar 21, 2008 3:16 pm
Location: Orlando FL

Post by Stug45 » Thu Sep 11, 2008 4:13 am

Awesome job Cabe.
The mind is the limit. As long as the mind can envision the fact that you can do something, you can do it, as long as you really believe 100 percent.

ostketten
Officer - Brigadier General
Posts: 3240
Joined: Wed Apr 05, 2006 6:23 am
Location: Washington DC area
Contact:

Post by ostketten » Thu Sep 11, 2008 5:21 am

Nice work. 8)
Gen. George S. Patton Jr., 28th Regimental Colonel, 3rd Armored Cavalry Regiment, U.S. Army, "Blood and Steel"

Cabe
Officer - Captain
Officer - Captain
Posts: 817
Joined: Fri Aug 03, 2007 4:03 am
Location: Dallas TX USA
Contact:

Post by Cabe » Thu Sep 11, 2008 6:24 am

Tanks!
see my art and model gallery at http://www.cabebooth.com

1958Zelda
Officer - Captain
Officer - Captain
Posts: 804
Joined: Fri May 18, 2007 1:01 pm
Location: SPOKANE, WA

Post by 1958Zelda » Thu Sep 11, 2008 9:12 am

Great paint job.

Cabe
Officer - Captain
Officer - Captain
Posts: 817
Joined: Fri Aug 03, 2007 4:03 am
Location: Dallas TX USA
Contact:

Post by Cabe » Wed Sep 17, 2008 6:07 pm

posting it for sale now in the bst forum
Image
see my art and model gallery at http://www.cabebooth.com

NHoggard12
Officer - 2nd Lieutenant
Posts: 420
Joined: Thu Jan 17, 2008 6:52 pm
Location: Greensboro, NC

Post by NHoggard12 » Sat Sep 20, 2008 5:13 am

Have you created any skins for cmak or cmbb?

Cabe
Officer - Captain
Officer - Captain
Posts: 817
Joined: Fri Aug 03, 2007 4:03 am
Location: Dallas TX USA
Contact:

Post by Cabe » Sat Sep 20, 2008 6:02 pm

yes i did, i made a stummel, i also made patches for some mods like AR flag patches or markings

Image
Image
Image
Image
Image
see my art and model gallery at http://www.cabebooth.com

NHoggard12
Officer - 2nd Lieutenant
Posts: 420
Joined: Thu Jan 17, 2008 6:52 pm
Location: Greensboro, NC

Post by NHoggard12 » Sat Sep 27, 2008 12:04 pm

LOOKS cool. Now, how did you create the camo netting on your brummbar?

Cabe
Officer - Captain
Officer - Captain
Posts: 817
Joined: Fri Aug 03, 2007 4:03 am
Location: Dallas TX USA
Contact:

Post by Cabe » Sat Sep 27, 2008 2:17 pm

its gauze bandage
there are 2 types both may looks good but i prefer the dense sock like material gauze (in fact, shredded sock might do the trick now that I think about it). But gauze is best because it weaves are so loose it already looks like a netting.
you can either keep it double layered or unravel it.
make a thick wash of acrylic paint and water and dip the who thing in it (well the amount you want to dye anyway)
afterwards would can stain or airbrush a pattern on it then let it dry.
You want to paint it before you put it on tank

then using woodland scenics "Scenic Cement" (which i basically watered down Elmer's or white craft glue except it dries extremely clear and extremely matte in finish)you can either dip the netting in it and apply or as I do mostly apply the netting and use a cheap condiment bottle (like the yellow or red mustard bottle with the small tip dribble it on the netting, you want to soak it or you netting will not look like it has weight and be and hairy and such. The use a q-tip, or more accurately a ton of q-tips, to soak up the extra glue puddles or sogginess out of the netting. Pose the netting how you want it, but aim to make sure gravity is in effect, then let it dry. Then you can hit it with chalk or pigment dust to give it a rusty used look or just leave it as is
see my art and model gallery at http://www.cabebooth.com

Post Reply