How to Finish and Paint Resin Kits Using Home Depot Paint

Love to tweak toys and models? Add features and small details? This forum is for you!
Post Reply
pickelhaube
Officer - Brigadier General
Posts: 9649
Joined: Mon Jan 22, 2007 5:52 am
Location: New Orleans

How to Finish and Paint Resin Kits Using Home Depot Paint

Post by pickelhaube » Sun Apr 25, 2010 2:46 pm

Most resin kits come with flash and pin holes. This is just the deal. From expensive kits to cheapos. You will get flash and pin holes.

I will try and give a tuturial on how to prep and paint a resin kit using standard house paint.You can get this paint at either Lowes or Home Depot.

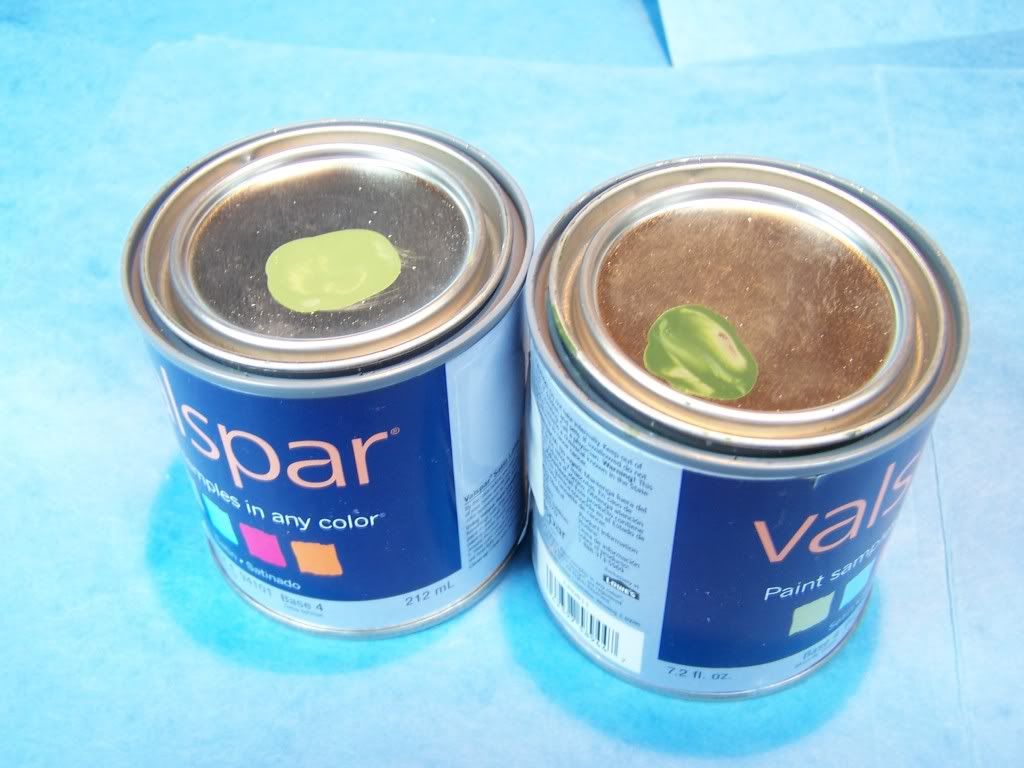
Why use house paint ? Believe me it is not the paint of choice. But if you need to match an existing paint color this is the cheapest way to go. You can spend hrs trying to match paint and may never get an exact match. To match it at Lowes or HD you simply take the part ( it has to be at least 2" X 2" to put under the censor) and say I need a sample of this paint in flat finish. They do the rest. It will cost about $3-$5 . THIS IS CHEAP compaired to a bottle of Tamiya or Model Master .

Ok here we go.
Step 1.
You need to wash your parts to get the oily resadue off from the moulding process.You can either use mild dish soap and water or denatured alcohol. The soap is easier on the hands but you need to let it dry off. The D A dries quick but it is hard on the skin and is a solvent. So be careful.
Step 2.
Fill holes and sand off or cut flash. This is what you need.

Image

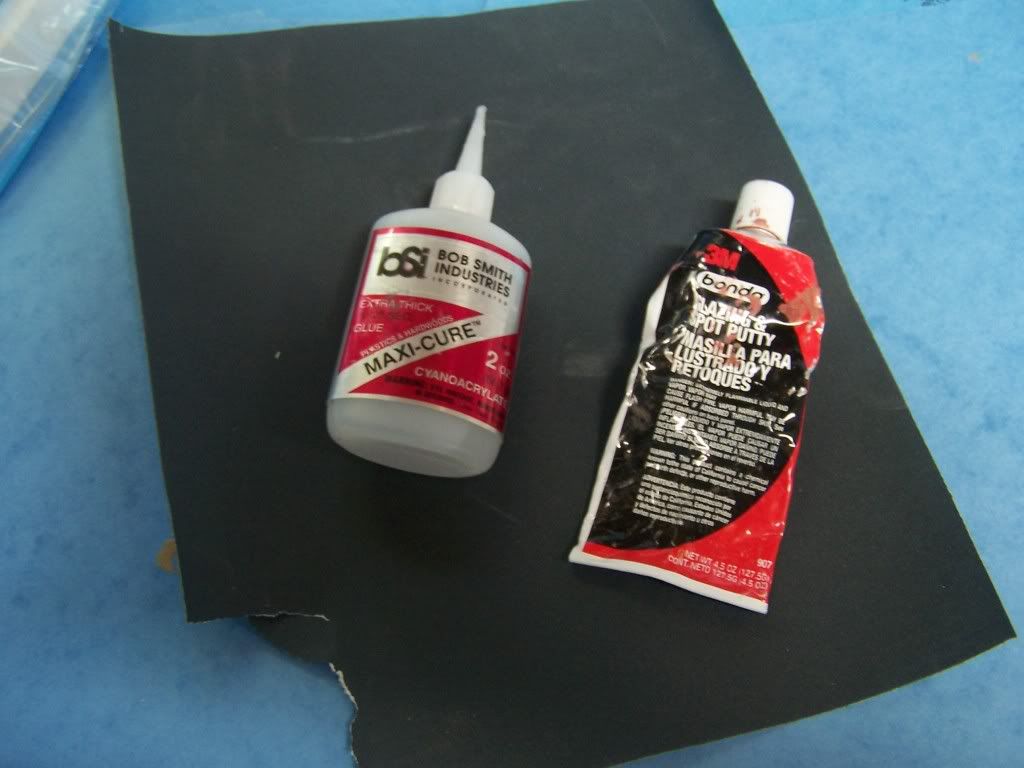
The CA glue is for small holes and the bondo glazing for big holes. You can use Squadron putty but it is a bit more expensive and I like the red color. It is easier to see to sand. Fill all holes and sand smooth. I like using 220 grit to rough in and 320 grit for final sanding.
Step 3.
Wash again. Repeat step 1.
Step 4.
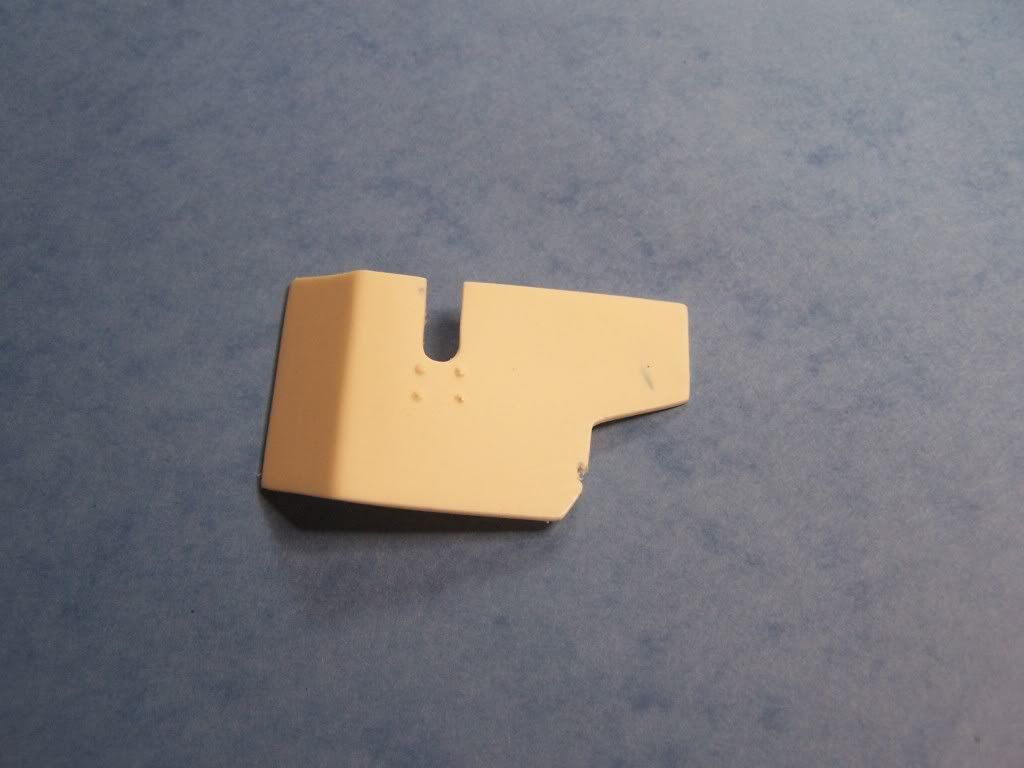
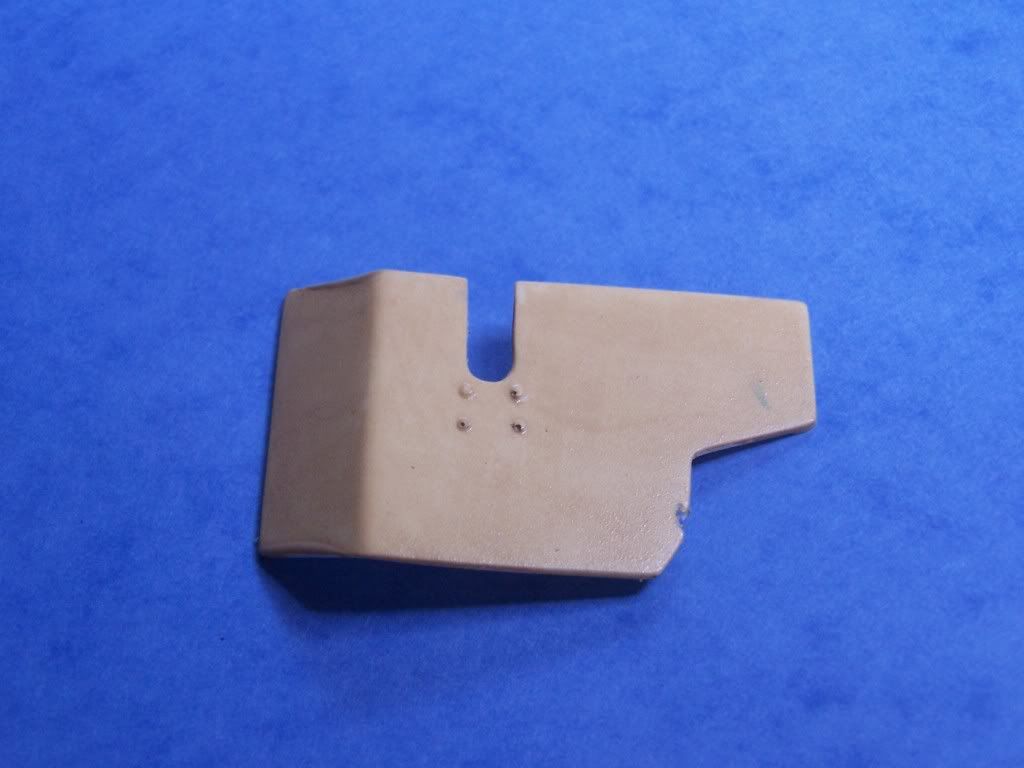
Prime the object. I use automotive primer. It works easy and sands easy.Using a primer does 2 things It seals the resin and shows off holes and roughness were you missed.The good thing about using the bondo glazing is that it sticks to paint. If you missed a spot apply the glazing let it dry sand again. Then reprime the area. Repeat until you get it smooth .

This piece has been primed . Look at the hindge area to the left. You can see a pin hole that needs to be filled. The only way it showed up was after priming.
Image
Step 5.
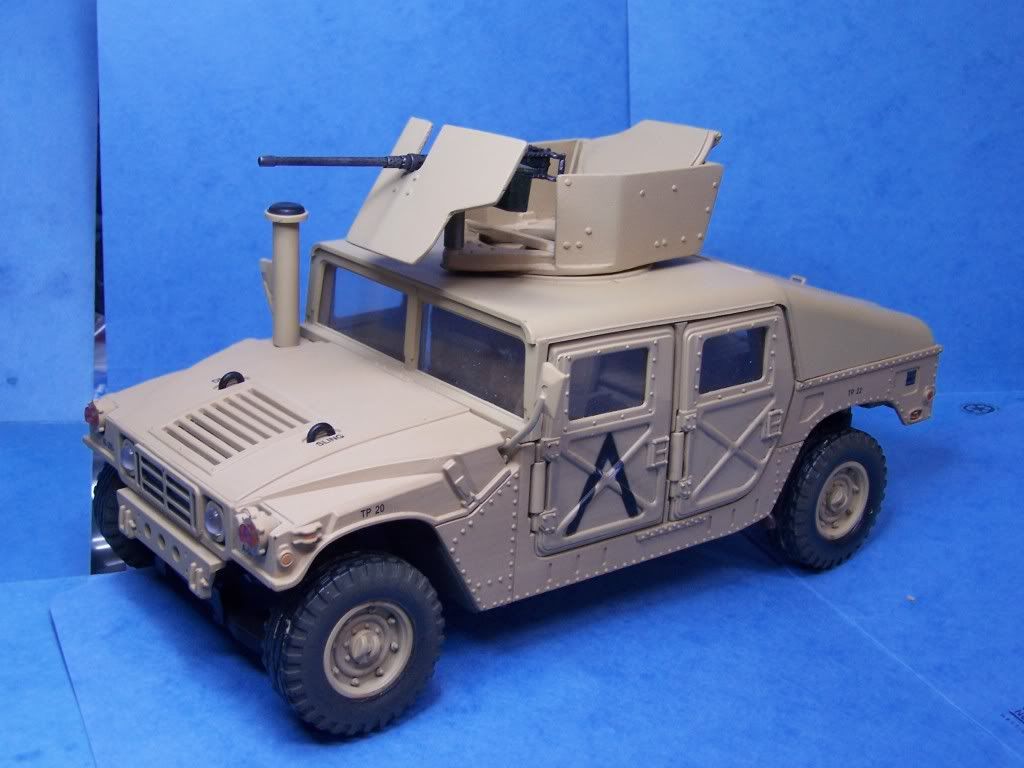
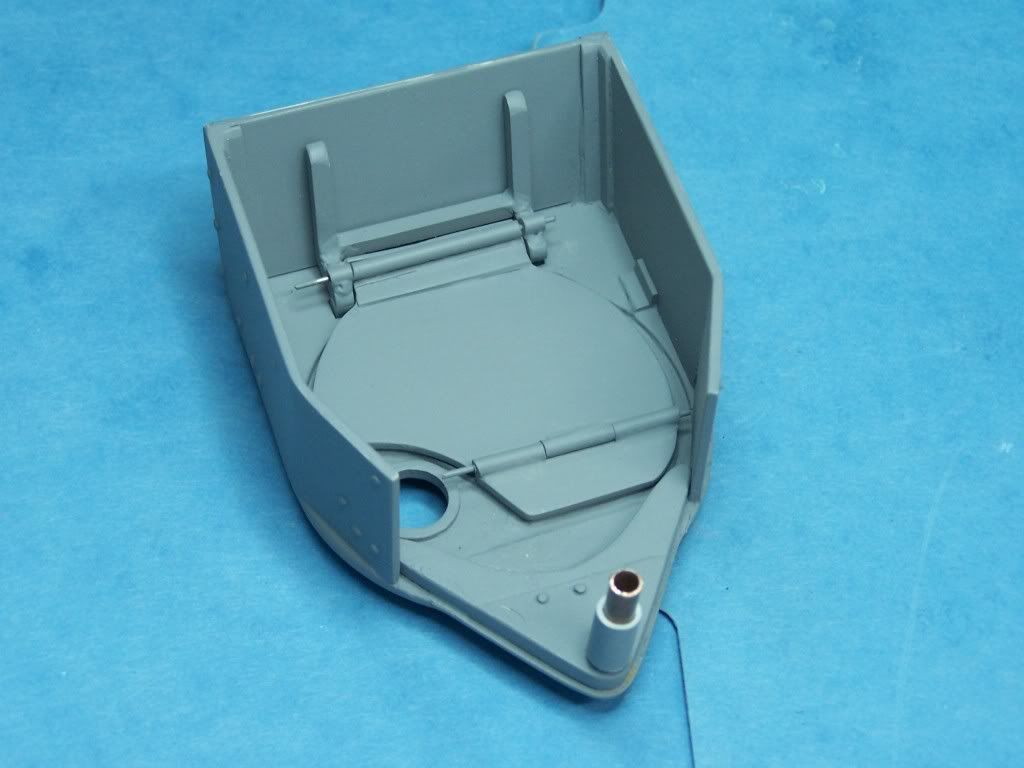
Ready to paint ? Let's begin , first it is wise to practise on something other than your model. I started with the inside of my Humvee turret. I figured if it is rough you really will not see it. So start with something out of the way and leave the parts that you can see for last to get your skills up.
Step 6.
Here is what you need to start . Paint brush 2 water dishes or containers and make up sponges.
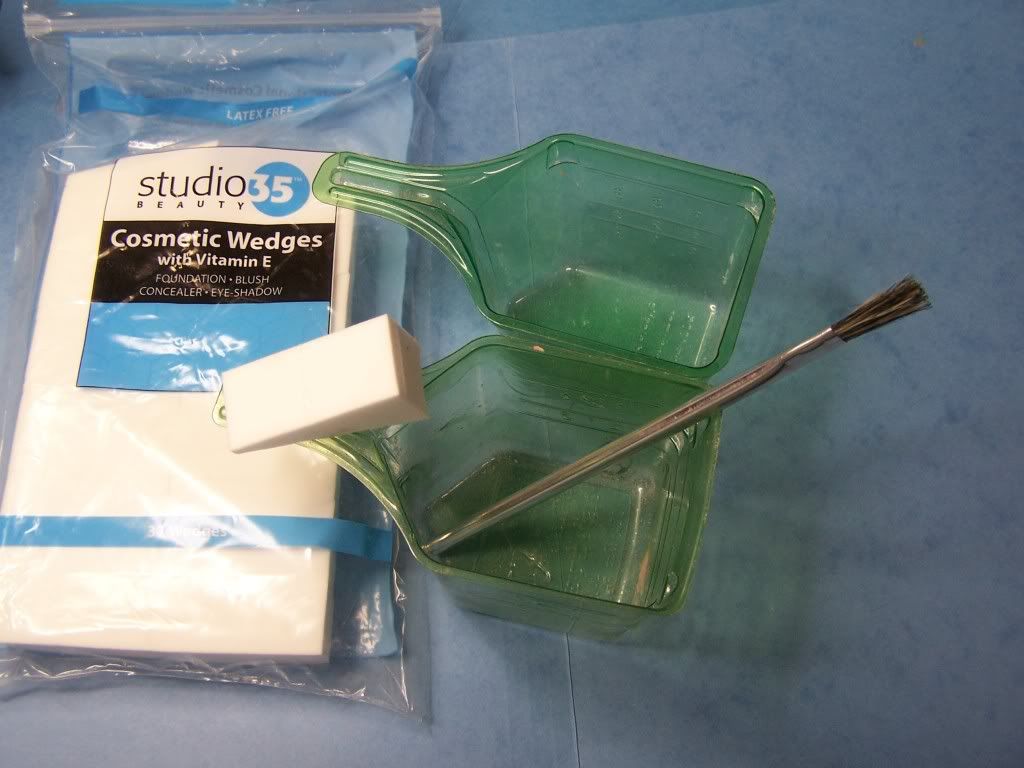
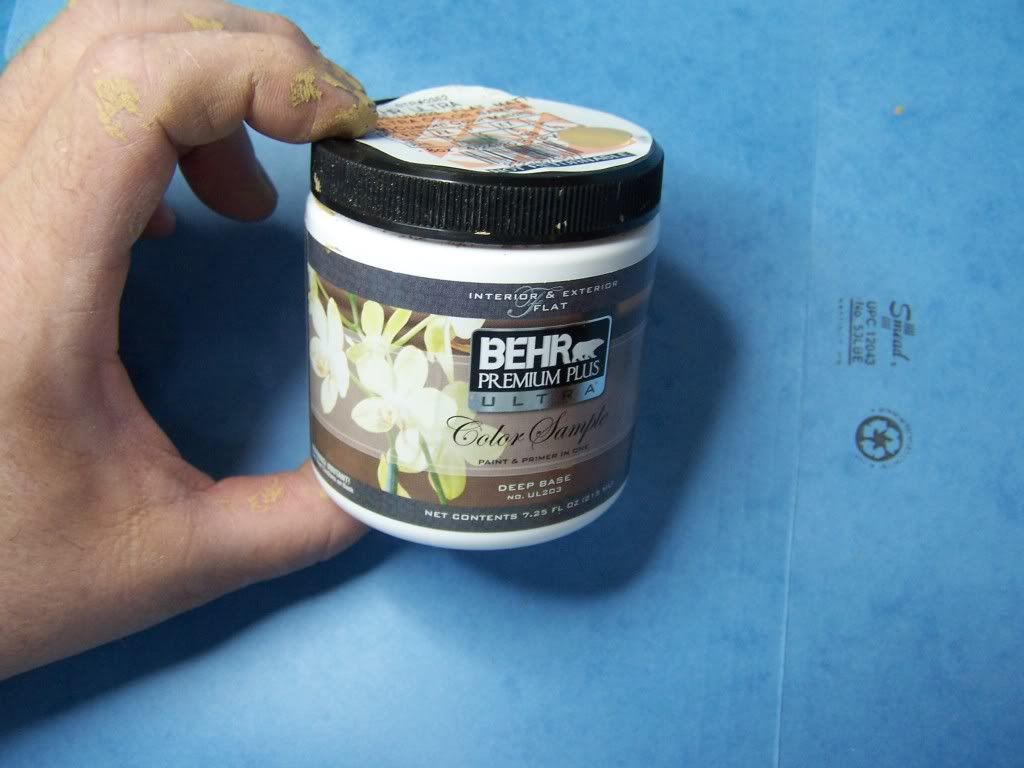
Image
Home Depot paint

Image
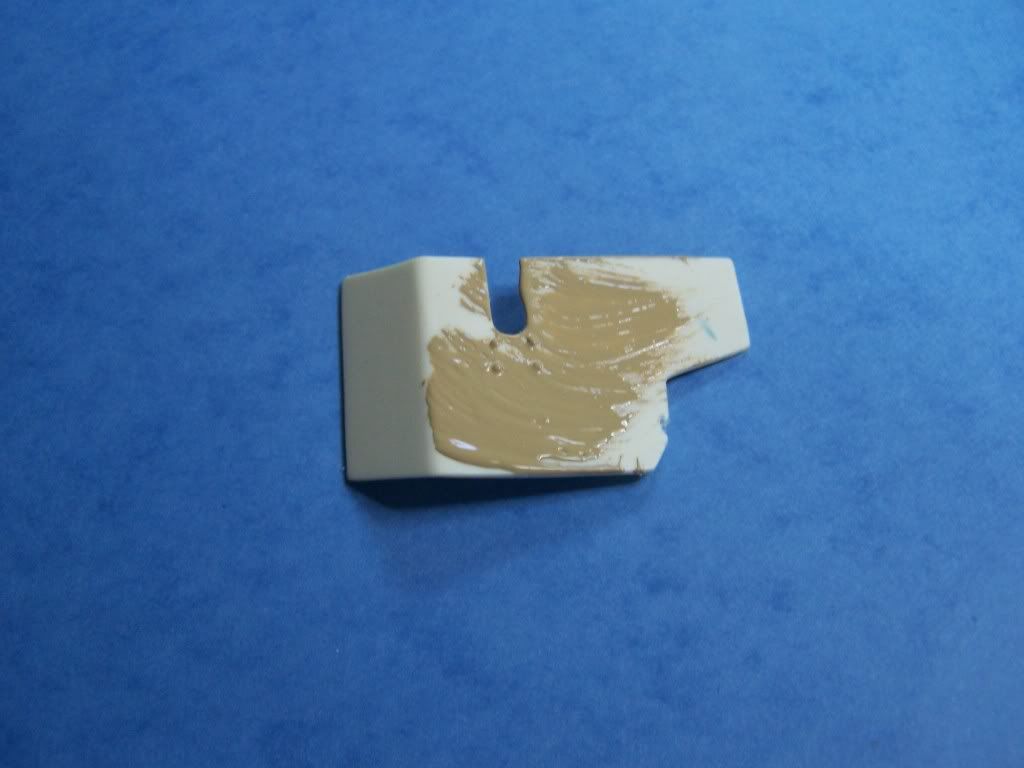
Here is the front shield I would advise doing this part the very last because it is up front and the first thing you see.
Image
Remember you need to work fast here. YOU CAN NOT LEAVE THE UNFINISHED PAINT ON THE OBJECT. IT YOU PAINT IT AND GO DO SOEMTHING ESLE AND COME BACK YOU HAVE RUINED YOUR PROJECT.
First dip the paint brush in the water squeeze out the extra water you just want it moist. Do the same with the sponge. You want it damp.
Dip the moistened paint brush in the paint and as quick as you can paint the area you want to work on first. Spread the paint as thin and even as you can.
Image


DO NOT TRY TO DO THE THING ALL AT ONE TIME. WORK IN SECTIONS.
Now. Using your moisted sponge dab and smooth out your paint. Make sure it is even. The idea is to go as thin and even as you can.
Image

The paint will not cover at one time. You will probably need to put at least 3 coats on.

You can sand between coats if you get too rough or gloppy with the paint.I also found that if you get an old white T-shirt you can smooth the area between coats. It takes about 10 mins. for the paint to dry. More or less depending on your situation.

http://www.mtv.com/shows/jersey_shore/c ... tyId=13195

Sorry just had to do that :shock: Don't hate !!!

Also , I used a dark gray primer. If you use a lighter primer you may not have to go as many coats.
I painted over the cheveron on the side of the Humvee and it took about 6 coats to finally cover it up .
Image

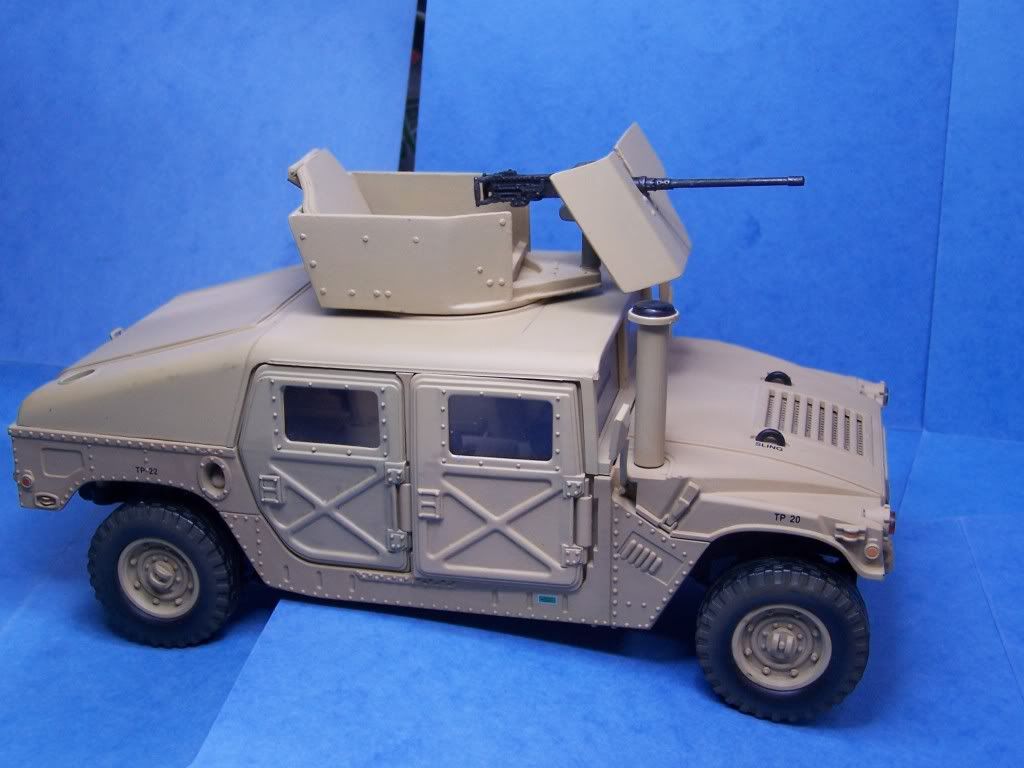
This was not hard to do at all.Just a little practice and you will get good at it. I started with the inside of my turret. It could have been smoother. The wet sponge is the trick. If you use a dry sponge the texture will be rougher.

This can be a good thing if you are trying for a rough casted effect.

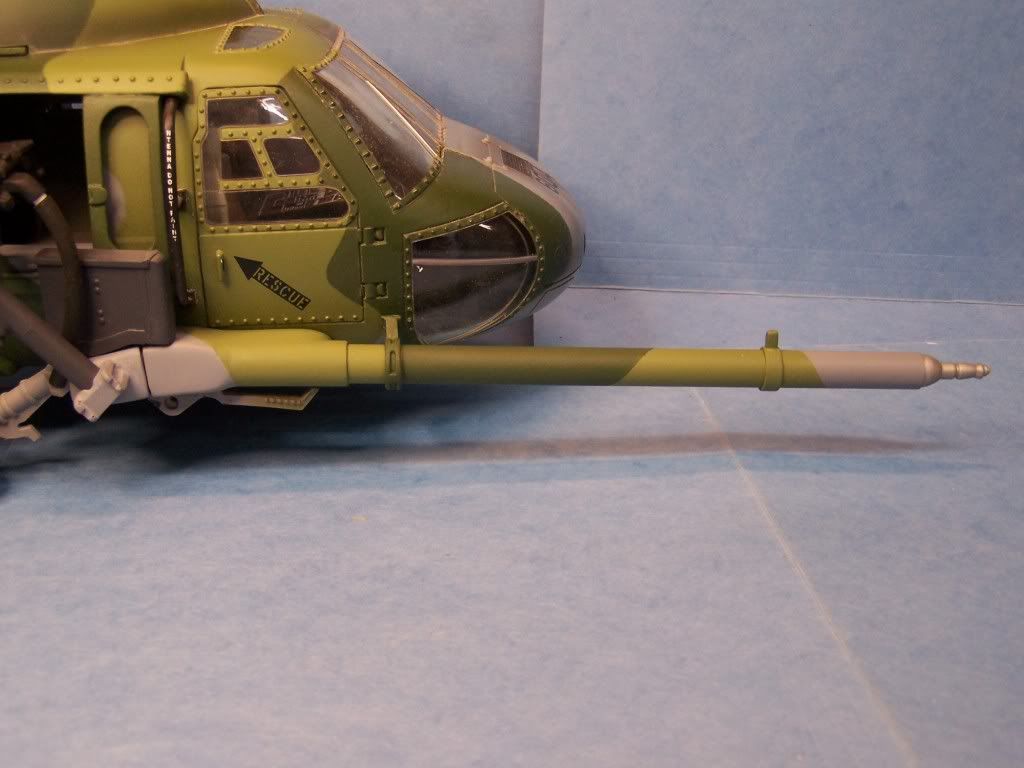
The paint matching has so many uses . If you dropped your aicraft and broke off your rear stabalizer. You can can patch it up match the paint and with a little effort you could hide the repair.

Here is another look at the Humvee with painted turret.

It took about 1 1/2 hrs to get it to look like this.

YOU CAN DO IT TOO :D :D :D :D
Image
Last edited by pickelhaube on Sun Apr 25, 2010 9:44 pm, edited 3 times in total.
Kirk Douglas : Mine hit the ground first
John Wayne : Mine was taller


Image

User avatar
grunt1
Officer - Brigadier General
Posts: 2978
Joined: Tue Jul 25, 2006 8:41 pm
Location: Indiana
Contact:

Post by grunt1 » Sun Apr 25, 2010 3:26 pm

Awesome... 8)

User avatar
YT
Officer - Brigadier General
Posts: 2128
Joined: Sun Mar 29, 2009 2:40 pm
Location: Central IL

Post by YT » Sun Apr 25, 2010 4:26 pm

Thanks for the tutorial. I wonder if we could run this paint through an airbrush?

pickelhaube
Officer - Brigadier General
Posts: 9649
Joined: Mon Jan 22, 2007 5:52 am
Location: New Orleans

Post by pickelhaube » Sun Apr 25, 2010 5:02 pm

YT wrote:Thanks for the tutorial. I wonder if we could run this paint through an airbrush?
Yes you can. Years ago I did just that cutting it with distilled water but it was a pain. It kept clogging up but I was able to do it. I have heard of people cutting acrylic paint with Windex. That could work with this paint. It is acrylic as well.
Kirk Douglas : Mine hit the ground first
John Wayne : Mine was taller


Image

kduck
Officer - 1st Lieutenant
Posts: 508
Joined: Mon Feb 11, 2008 9:08 pm
Location: Locust Grove, GA

Post by kduck » Sun Apr 25, 2010 6:04 pm

Interesting thread. I don't have any experience using house paints for custom projects but I've seen several threads in 1:6 forums that I thought some of you might find interesting. From what I've read Sherman Williams Woodscapes paint comes highly recommended for these types of projects. There are similar topics in a number of forums but here are just a few from a couple:

http://www.sixtharmygroup.com/portal/vi ... hp?t=22022
http://www.sixtharmygroup.com/portal/vi ... hp?t=20290
http://www.sixtharmygroup.com/portal/vi ... hp?t=16054
http://onesixthnet.yuku.com/topic/16981 ... Paint.html

pickelhaube
Officer - Brigadier General
Posts: 9649
Joined: Mon Jan 22, 2007 5:52 am
Location: New Orleans

Post by pickelhaube » Sun Apr 25, 2010 8:17 pm

kduck wrote:Interesting thread. I don't have any experience using house paints for custom projects but I've seen several threads in 1:6 forums that I thought some of you might find interesting. From what I've read Sherman Williams Woodscapes paint comes highly recommended for these types of projects. There are similar topics in a number of forums but here are just a few from a couple:

http://www.sixtharmygroup.com/portal/vi ... hp?t=22022
http://www.sixtharmygroup.com/portal/vi ... hp?t=20290
http://www.sixtharmygroup.com/portal/vi ... hp?t=16054
http://onesixthnet.yuku.com/topic/16981 ... Paint.html
Thanks for those links K Duck.

The primer I use is dupli coat. I need to check out that adhiesian primer. I have not had a problem with the paint lifting but that could give it some extra bite.That Shermwin Willims stain, I may have to check into.

This tuturial is for guys who do not have access to an air brush.Finishing customs is always an issue if you do not have all the tools. This method is very primative . BUT IT WORKS !!!! :D :D :D
Kirk Douglas : Mine hit the ground first
John Wayne : Mine was taller


Image

hustler
Private First Class
Private First Class
Posts: 5
Joined: Fri Oct 30, 2009 6:25 pm
Location: Central Indiana

Post by hustler » Sun Apr 25, 2010 9:12 pm

I find your use of house paints /stains interesting.

Considerations to make are that house paints/stains are desigend to cover at mil thicknesses greater than your model paints. This is one of the reasons model/hobby paints are so much more expensive. They use higher grade material and are ground finer so as to give you a "scale" thickness of paint. They give you better hide and don't cover up finer details in the surface.

This is not an issue in the project presented here because a textured surface is desired as well as hiding the chevron. Not such a good thing if you want panel lines or engraved details to show and provide that "scale" appearence. Much like the difference in how much make up a woman wears.

If you want to use acrylic house paints and stains consider getting a product to extend the "open time" of the paint such as Floetrol (made by Flood) or Latex Extender (made by X-I-M). Both available at Sherwin-Williams and Home Depot. These will reduce the viscosity of the paint without sacrificing the hide characteristics allowing you to use the airbrush. These products will also extend the "open time" of the paint being applied to allow it to flow and level to prevent brushmarks or other surface imperfections caused by the applicator. Read the label for reduction recommendations. Not a lot is needed to work effectively.

Now, having said all of this, if you're looking to do this as a means to save money- consider the time for a learning curve, the volume of leftover product you'll have and in the end will it give you the aesthitics you're looking for? Certainly it works for this project- because the build of material on the surface provides the desired look. I wouldn't want to use it to paint a camo scheme on a Tiger tank or on an airplane.

If you want to experiment- I've given you my 2 cents.

pickelhaube
Officer - Brigadier General
Posts: 9649
Joined: Mon Jan 22, 2007 5:52 am
Location: New Orleans

Re: How to Finish and Paint Resin Kits Using Home Depot Pain

Post by pickelhaube » Sun Jan 23, 2011 5:44 pm

I started working on one of my pavehawk full builds and pulled out my Lowes custom mixed paint for the Pavehawk.

I used it and it laid down nice and smoothe. The paint is a semi gloss and it is a bit shiney. When it sets up for a day or so I will hit it with some dull coat.

I used HomeDepot flat on my Humvee and the paint match was perfect. But is went down a little grainy. but look cool on the Humvee because it gave it a casted look.

So i would say use a semigloss for aircraft and the flat for armor.

Lowes paint

Image

Image
Kirk Douglas : Mine hit the ground first
John Wayne : Mine was taller


Image

Jesse James
Officer - Brigadier General
Posts: 3484
Joined: Wed Oct 06, 2004 11:37 am
Location: Pittsburgh, PA
Contact:

Re: How to Finish and Paint Resin Kits Using Home Depot Pain

Post by Jesse James » Mon Jan 24, 2011 2:33 pm

The real trick to painting I've found is tracking down paints that don't chip, or can adhere to plastics like production paints. That's been a real bear.
http://www.JediDefender.com Bringing Balance to the Force
http://www.FFURG.com The Ultimate Customizing Resource.
Now Hasbro, make us some Head Sculpt & Endor Uniform variations! The new Rebel Fleet Trooper gets the JJ Seal of Approval Though!

pickelhaube
Officer - Brigadier General
Posts: 9649
Joined: Mon Jan 22, 2007 5:52 am
Location: New Orleans

Re: How to Finish and Paint Resin Kits Using Home Depot Pain

Post by pickelhaube » Fri Feb 04, 2011 4:44 pm

Well I got finished with one of my builds using the Lowes paint and dab method.

IT WAS A COMPLETE SUCCESS. IT CAME OUT GREAT.

I used the sponge and came back after it set for 3 days to dry and sprayed TAMIYA DULL COAT TO NOCK OFF THE SHINEYNESS..

It matched the Pavehawk PEFECTLY :D :D :D

Image

Before dull coat .

Image[/quote]


After dull coat.

Image
Kirk Douglas : Mine hit the ground first
John Wayne : Mine was taller


Image

snake
Officer - Brigadier General
Posts: 3657
Joined: Mon Mar 23, 2009 12:28 am
Location: Victoria,B.C. Canada

Re: How to Finish and Paint Resin Kits Using Home Depot Pain

Post by snake » Sat Feb 05, 2011 8:45 pm

Very interesting PH.

I was worried we would see a roller. :lol:

Jnewboy
Officer - Brigadier General
Posts: 2124
Joined: Mon Dec 13, 2010 1:46 am
Location: California
Contact:

Re: How to Finish and Paint Resin Kits Using Home Depot Pain

Post by Jnewboy » Thu Feb 24, 2011 4:02 pm

ljj
Last edited by Jnewboy on Mon Mar 23, 2015 3:03 pm, edited 1 time in total.

Jnewboy
Officer - Brigadier General
Posts: 2124
Joined: Mon Dec 13, 2010 1:46 am
Location: California
Contact:

Re: How to Finish and Paint Resin Kits Using Home Depot Pain

Post by Jnewboy » Fri Feb 25, 2011 4:39 pm

ill
Last edited by Jnewboy on Mon Mar 23, 2015 3:06 pm, edited 2 times in total.

pickelhaube
Officer - Brigadier General
Posts: 9649
Joined: Mon Jan 22, 2007 5:52 am
Location: New Orleans

Re: How to Finish and Paint Resin Kits Using Home Depot Pain

Post by pickelhaube » Tue Aug 02, 2011 5:11 pm

Bumped for CW Army :D
Kirk Douglas : Mine hit the ground first
John Wayne : Mine was taller


Image

CW4USARMY
Officer - Brigadier General
Posts: 1859
Joined: Tue Oct 05, 2004 4:32 pm
Location: Huntsville, AL

Re: How to Finish and Paint Resin Kits Using Home Depot Pain

Post by CW4USARMY » Wed Aug 03, 2011 4:37 pm

Thanks! I dont know how I missed this thread. Greatly Appreciated!

Post Reply