Oh I'm not worried about showing people how I do it. I have only been painting them 5 weeks or so. Besides I had a good instructor named "every model in google, MIG productions washes, filters and pigments, FAQ on painting AFV book, Squadron publications and Armorama. mini lessons or "features" and info obtained from questions I asked in forums"
so it isn't a secret in the least. I have learned the one thing that keeps people from trying something new, especially if it is a creative task is fear of failure. People don't want to know if they suck, they don't want to ruin their tanks and planes, they don't want to learn that it doesn't just "flow out of them".
But I would encourage everyone to get out their least treasured and most common vehicle and do some toying around. Buy acrylics from taimya since they will wash off with denatured alcohol or even water. Sit down and do ONE thing you always wanted to try. Chip the paint or dust it up with some pigments. Maybe try a rudimentary wash using water and black or dark brown paint, let it fill the cracks of your vehicle, get around the rivets and into the lines, let it dry and consider the difference. Then using a paint that is several shades lighter than the color of your vehicle go along the edge of your surfaces , near hatches or areas where branches or rocks may rub or kick up against it. Areas where people put their hands and feet to get in and out or areas that just just plain wear down like fenders or weld points, rivets. Be very sparing at first. If you don't want to try that method of paint selection use the actual undercoat of gelb, grau, red oxide or a flat gray. use a very fine tip brush or (and this works very well) use a makeup sponge to apply maroon, brick red or just a dark brown paint to a jerry can or dab it along a fender or landing gear cover to make rusting through spots. Look at it and decide if you want to go further.
One great technique is to get a woodless pencil or heck just a pencil or graphite and run the side of the lead along some edges that are steps or foot holds or hinges. This simulates wear all the way down to polished steel. Take a pencil ad run it on a piece of paper until lead accumulates. Take a soft brush and work it in to a large surface area on your vehicle. Then use your finger to blend it into the whole area simulating an even fading or wearing off of the paint in a sun or weather exposed area.
just take one of these and try it, most are reversible, but don't count on it. So choose wisely and go in with an open mind and willingness to use common sense when applying. Each area will become a separate work and you will not feel so intimidated, that is.... if you are in the first place.
The first thing my college art 101 teacher told us after he announced that 95% on us would NOT being doing art 5 years from now is that the main key to being creative is knowing when a work is DONE and conversely when one isn't finished. Overdoing a painting makes it mess of colors or subjects, and not taking the time to accurately represent your idea or subject will obviously show as well.
You can fool some people, mainly yourself. But other people, their eyes are very critical, your eyes have to be like theirs on steroids.
I am having a blast painting tanks and doing dioramas, but it is cutting into my RL artwork. I find myself impatient with my day's work on my paying art, i usually find myself taking 3 hour breaks to go paint or build "just a a little bit" before getting back to work on my deadlines.
(and BTW I was informed my probationary period is OVER and I can now actively sell or trade here, so fire away if you want or like something/ need something done)
Thanks to all of you for the compliments, I enjoy this forum a lot
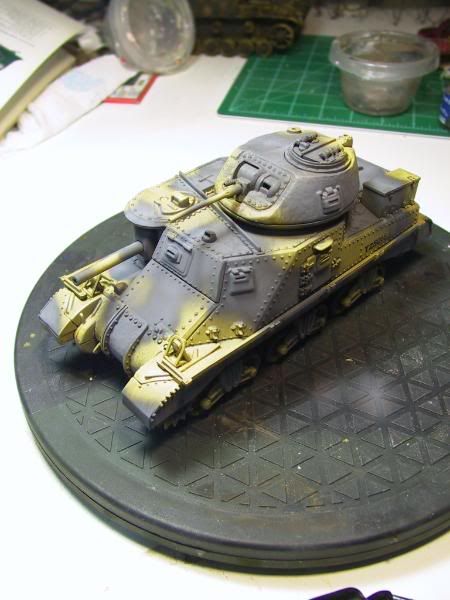
here is my current schedule wrecker, a repaint of the action series FoV 1:32 "action series" from target-grant tank, before and after, very heavy weathering.
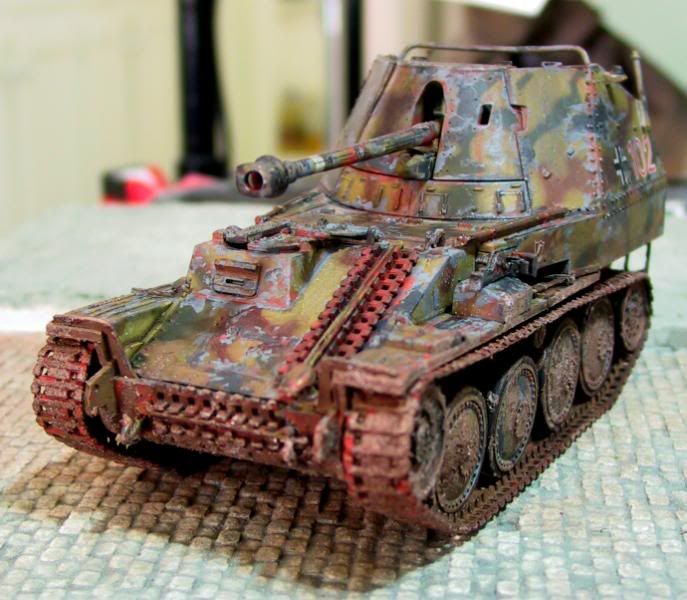
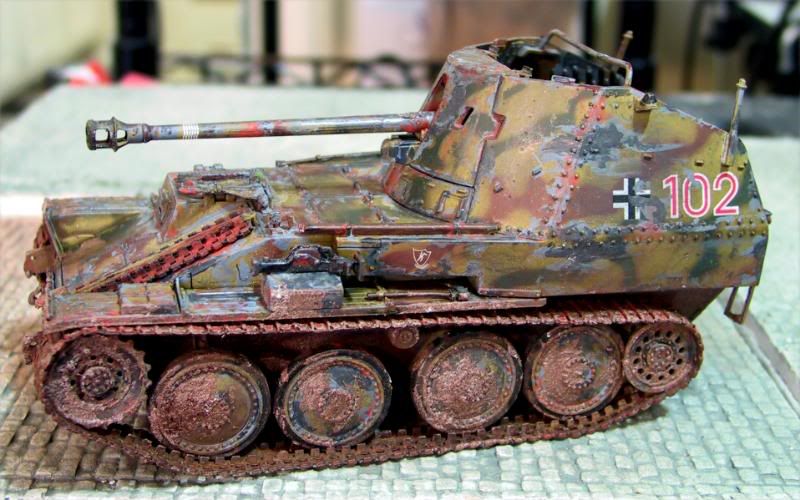
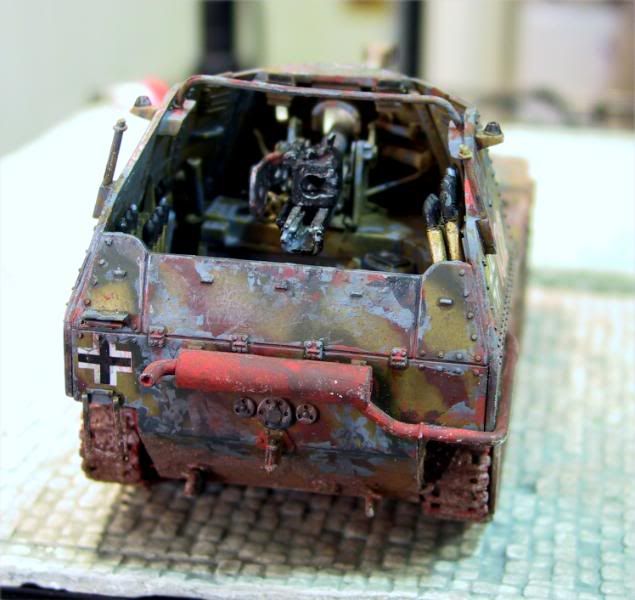
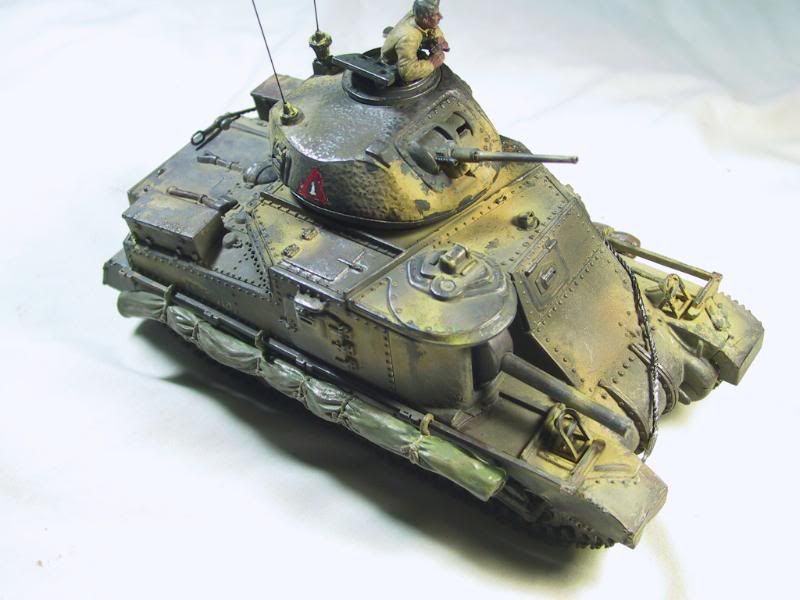
the shiny areas are lead or graphite and silver pencil rubbed against raised areas, The rust id applied with a makeup sponge to look like chipping, but since it is a desert vehicle, rust was a minimum, so I used a dark gray and a hull red to show chipping and wear, once again with a sponge and very fine tip brush. I also used MIG filters and then a MIG wash. Finished it off with a heavy application of MIG sand colored pigments rubbed heavily on the running gear and lower portions of the tank and sparingly at the top.
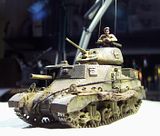
The flag is a piece of Kleenex that wax placed on wax paper and then soaked in water with latex rubber dissolved in it (woodland scenics brand), when it dried i flipped iy over and hit it again. The i folded over the large rubber/paper sheet with a piece of newspaper between so the 2 parts didn't touch (it sticks to itself really easy.) and cut the small flag out, painted it red on the antennae and now i have a flexible flag that I can shape to look like it is blowing in wind or whatever other shape, it stays put.
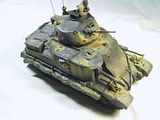
here it is after i hit it with my airbrush to hive it a grey and tan camo, i later added a black-green center to the gray patterns forming a grey outlined dark flat dull green camo
and here it is after a few hours of being roughed up


