Page 1 of 6
1/18 M-10 Custom Rebooted
Posted: Sat Feb 28, 2009 10:25 pm
by pickelhaube
Posted: Sat Feb 28, 2009 11:20 pm
by flyboy_fx
ahhh man i wish i had your talent
Posted: Sat Feb 28, 2009 11:42 pm
by immeww2
Looks

.
Posted: Sun Mar 01, 2009 5:55 am
by popeye357
Wow man, once again Im very impressed with your skills!
Posted: Sun Mar 01, 2009 8:34 am
by pickelhaube
Thanks Guys,
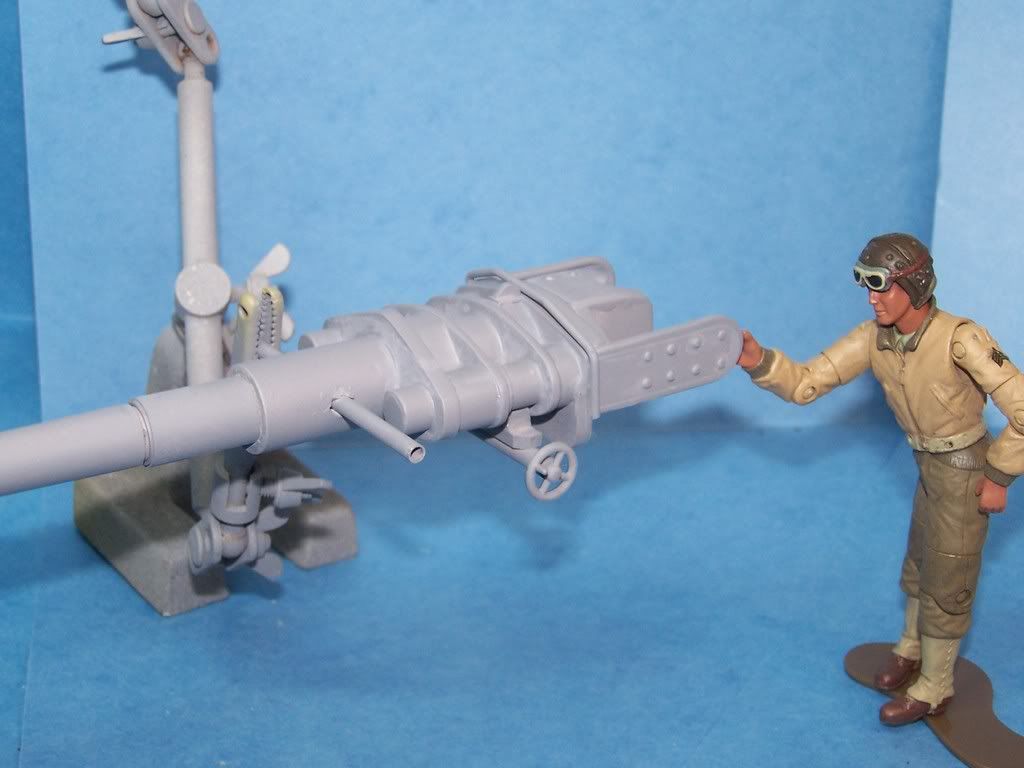
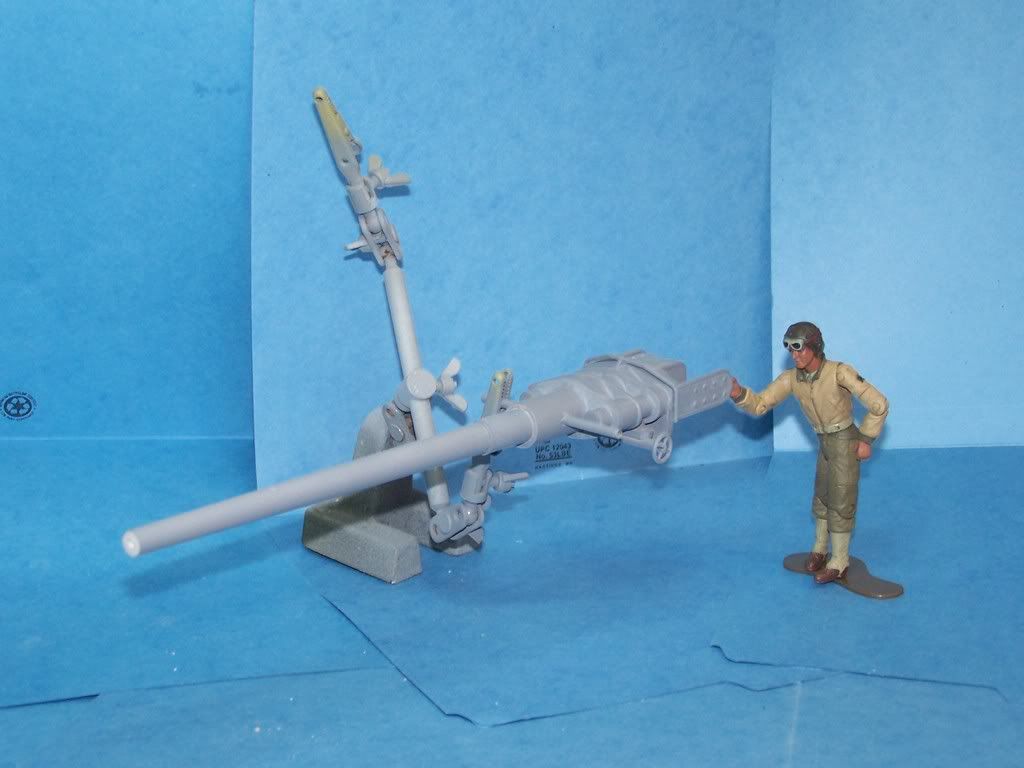
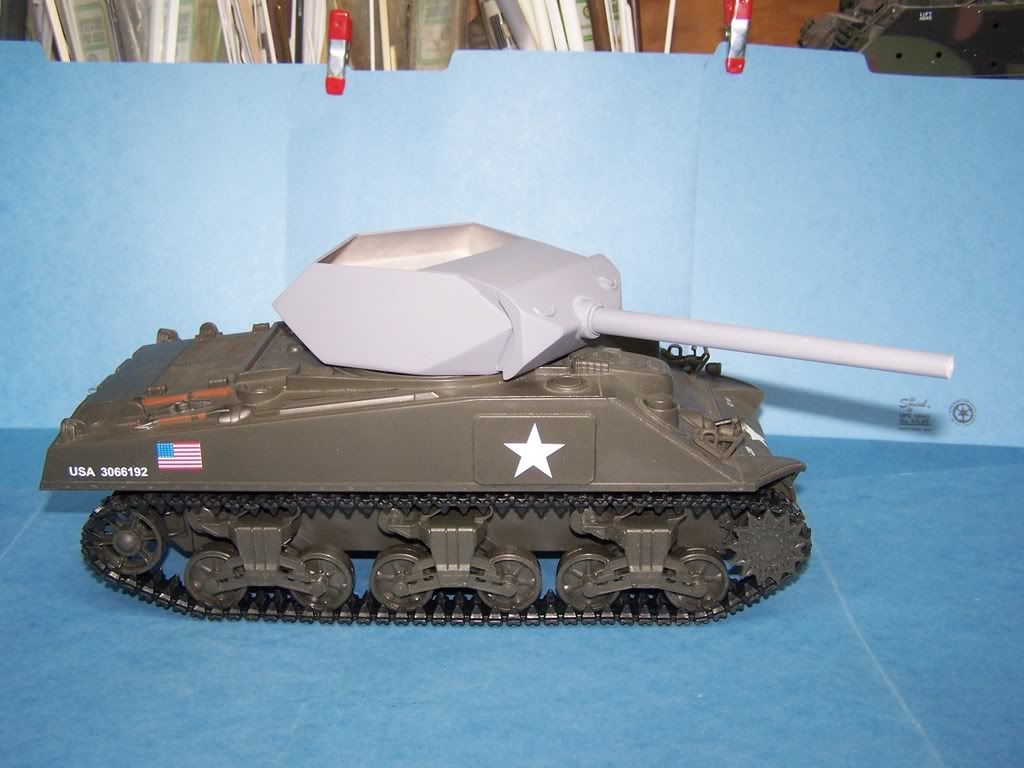
I thought that the M-10 and Firefly used the same gun. Aperantly the round was about the same size but the guns were different.
http://www.flickr.com/photos/barryslemm ... 476965425/
I will try to start the turret today. Because of the guns size it looks like I will have to make the M-10's turret in a couple of pieces because the length and size of the gun.
I am not sure if this will be easier or harder when it comes time to mold and cast this.
Posted: Sun Mar 01, 2009 9:08 am
by Panther F
Looks very nice!
The Achilles and Firefly had the same 17 pounder Mk IV gun and the M-10 used a 3 inch M7 gun.
Posted: Mon Mar 02, 2009 5:36 pm
by pickelhaube
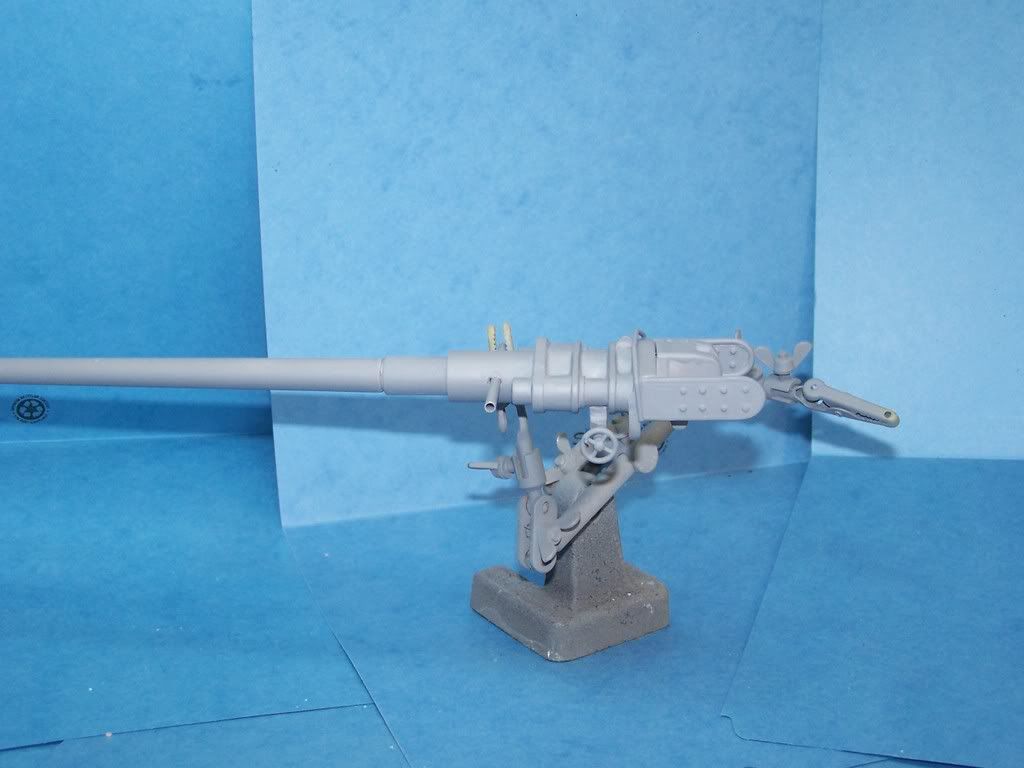
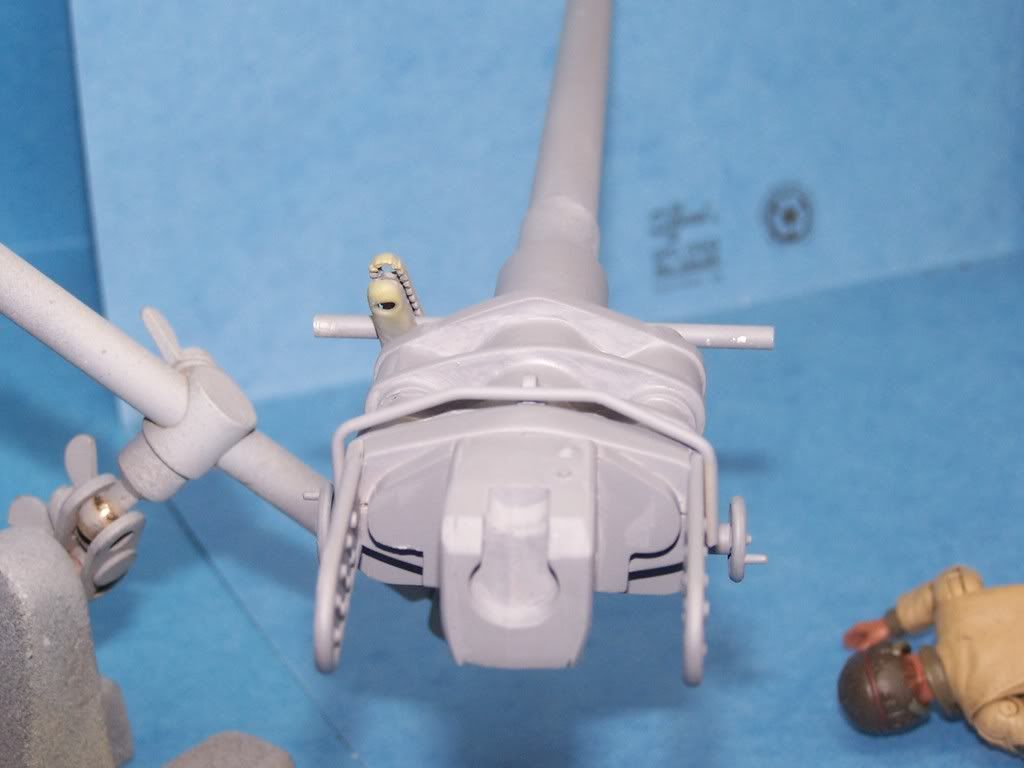
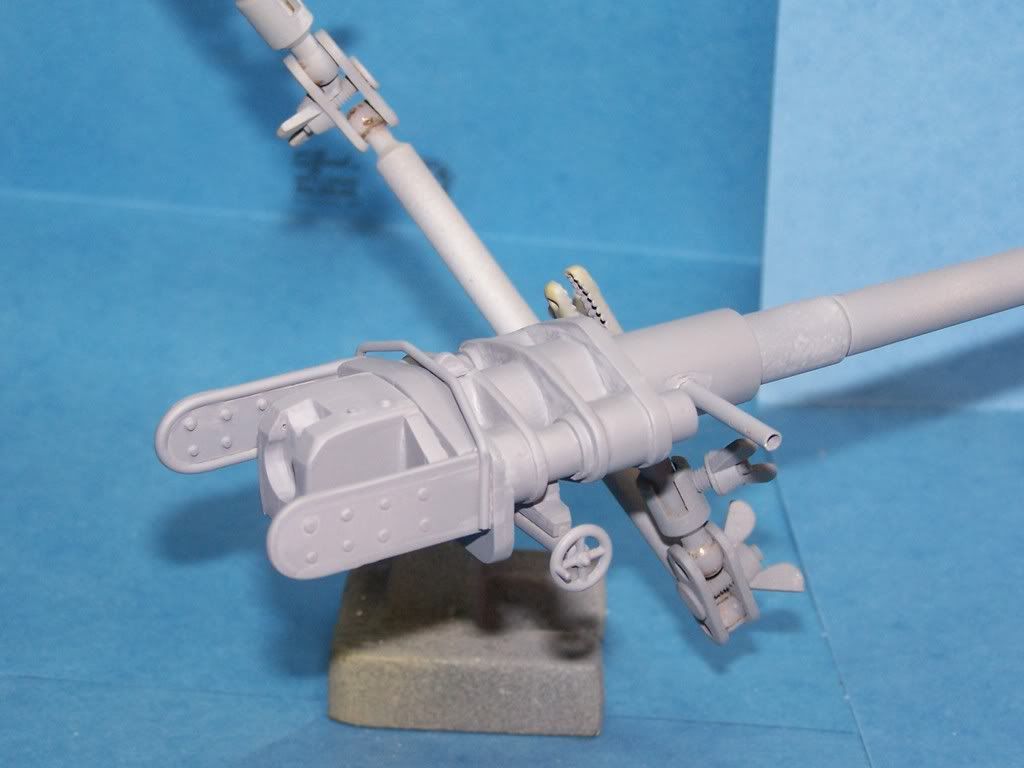
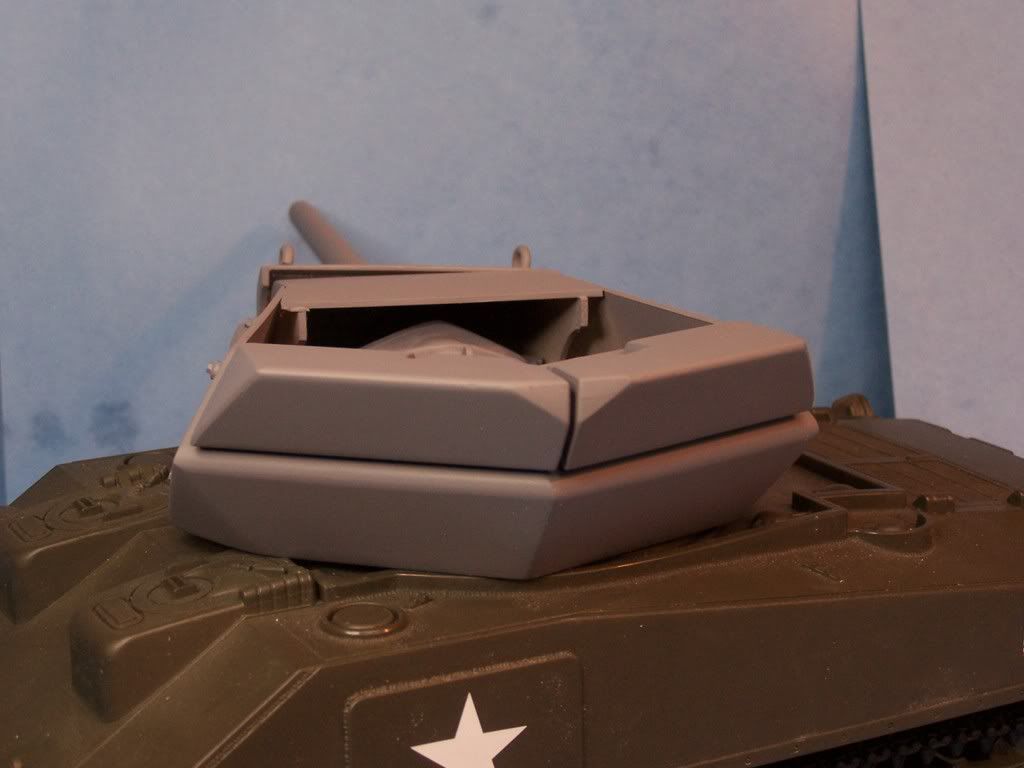
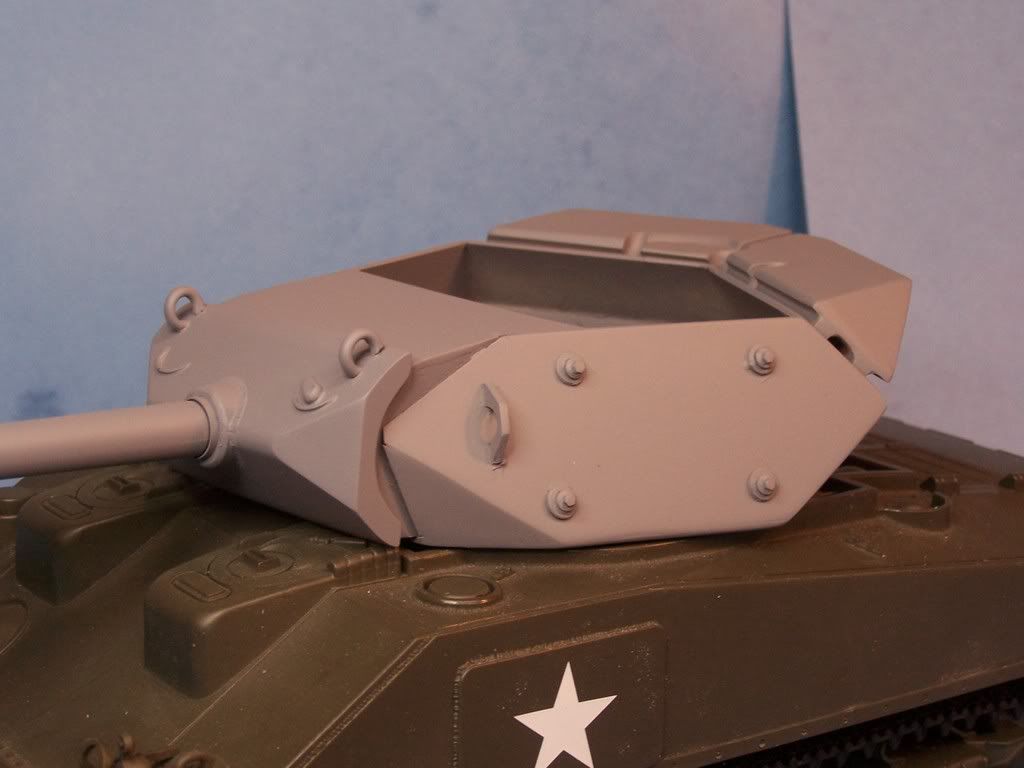
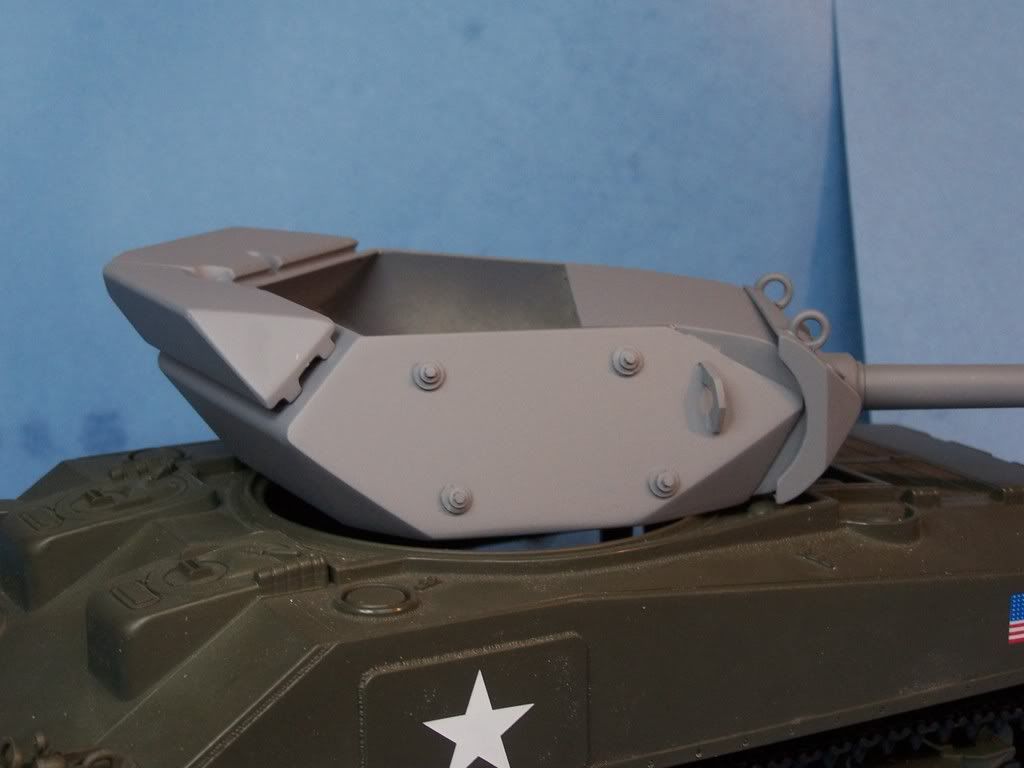
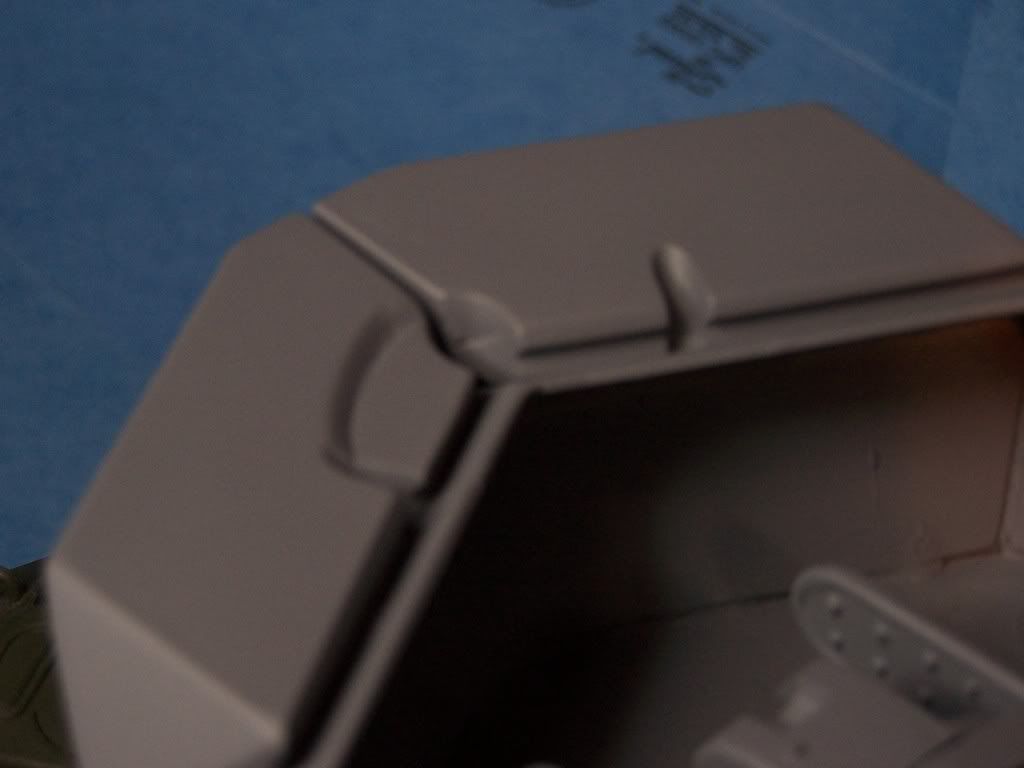
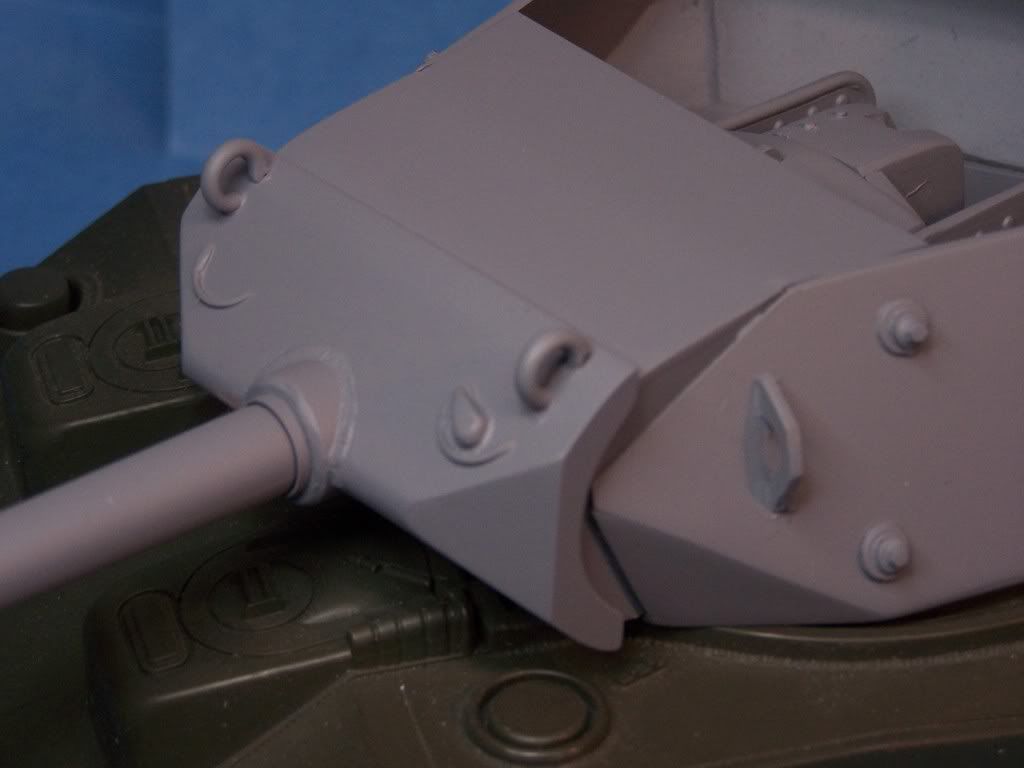
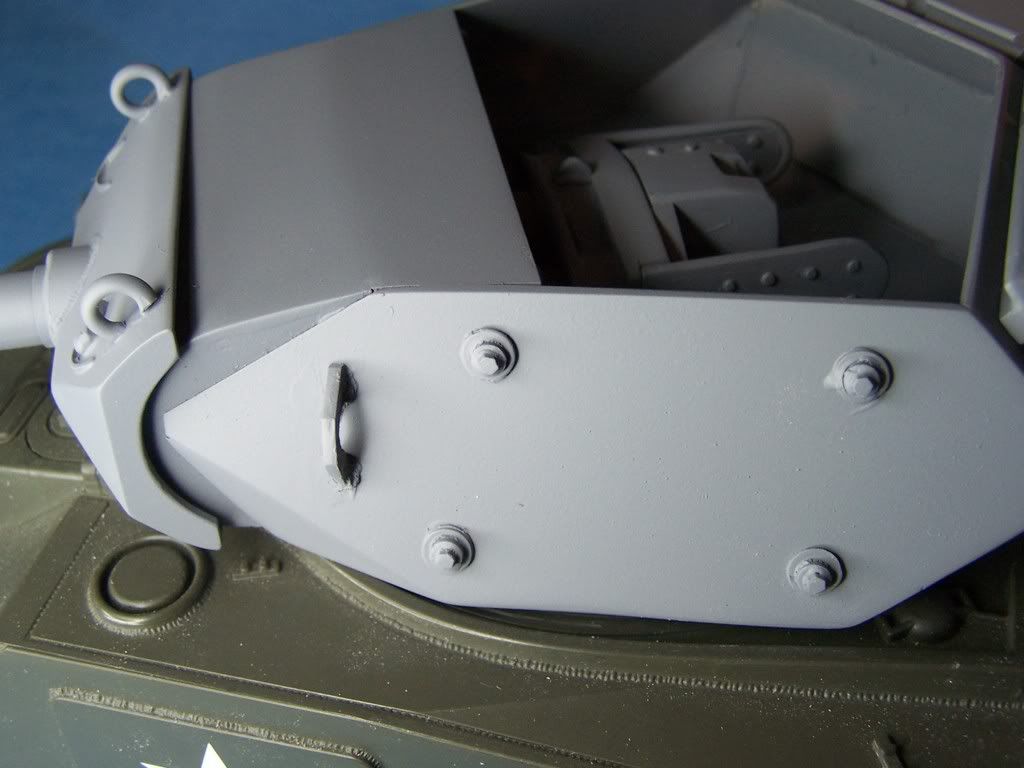
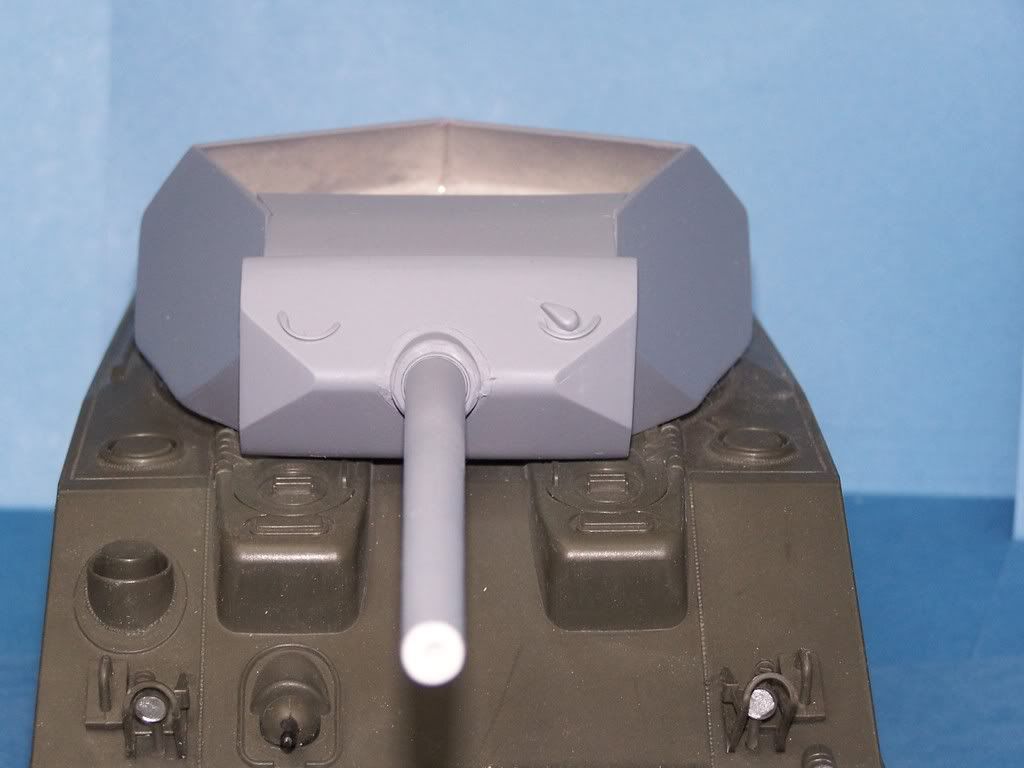
I was going to wait untill I got further along on this to post pics, but it looks like I may be working all this week. So here are a few pics of the roughed in turret and mantlet with gun semi mounted.
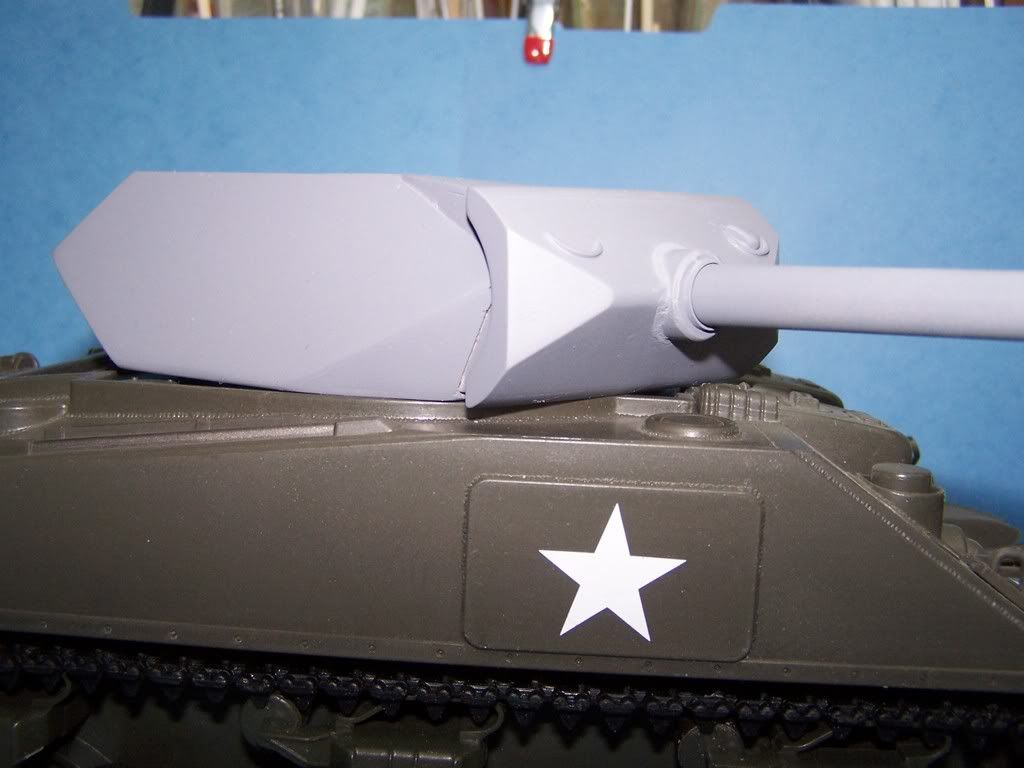
Those eye brows are supposed to be asymetrical. The hoist hooks need to be added to the mantlet. I just got a modeling book and it gave me a good idea on how to make the eyelets. Twist the styreen rods around a dowl and emerse it all in boiling water for a minet . I am going to try this for the hoist hooks.
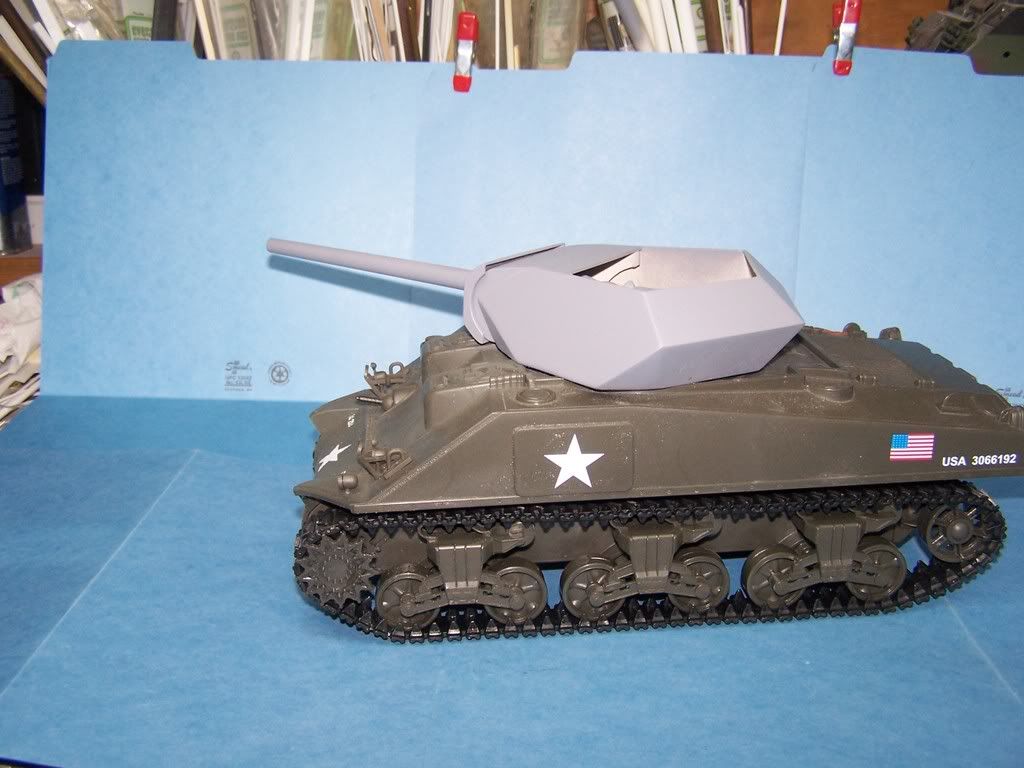
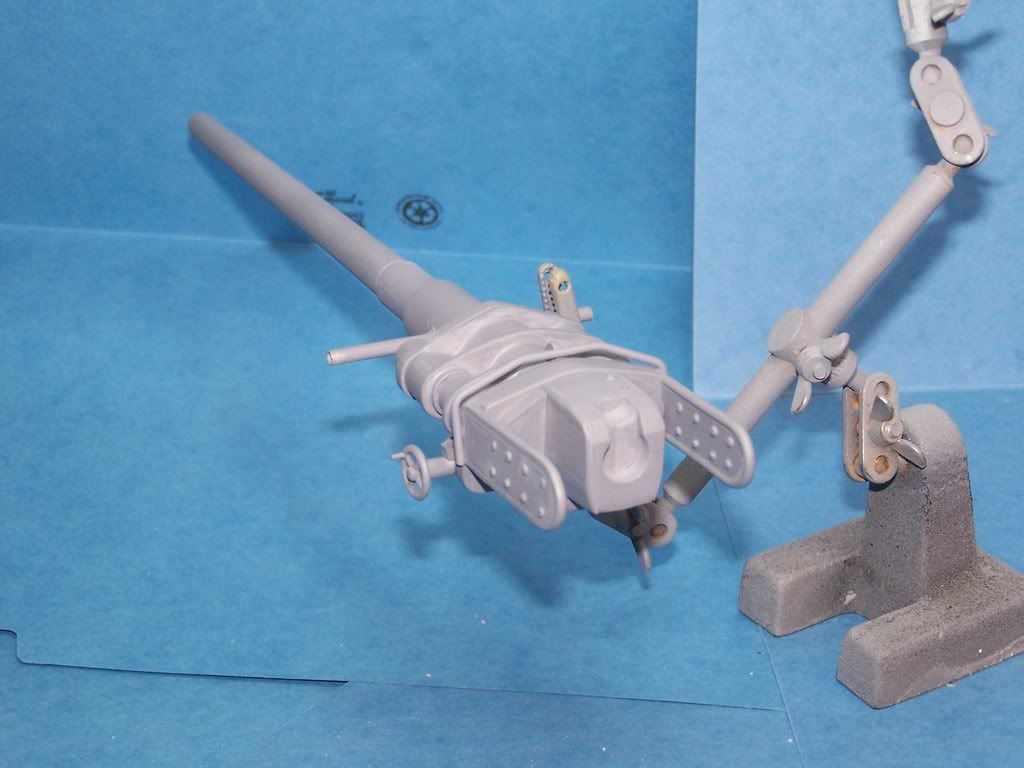
Here it is next to the Wirbelwind
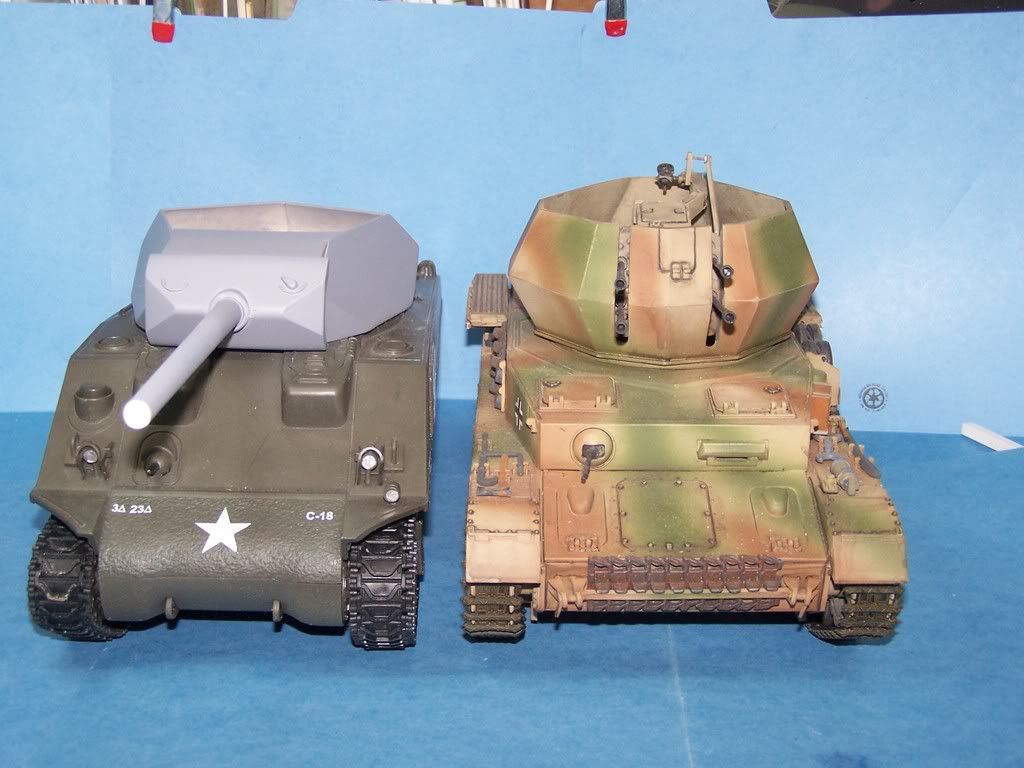
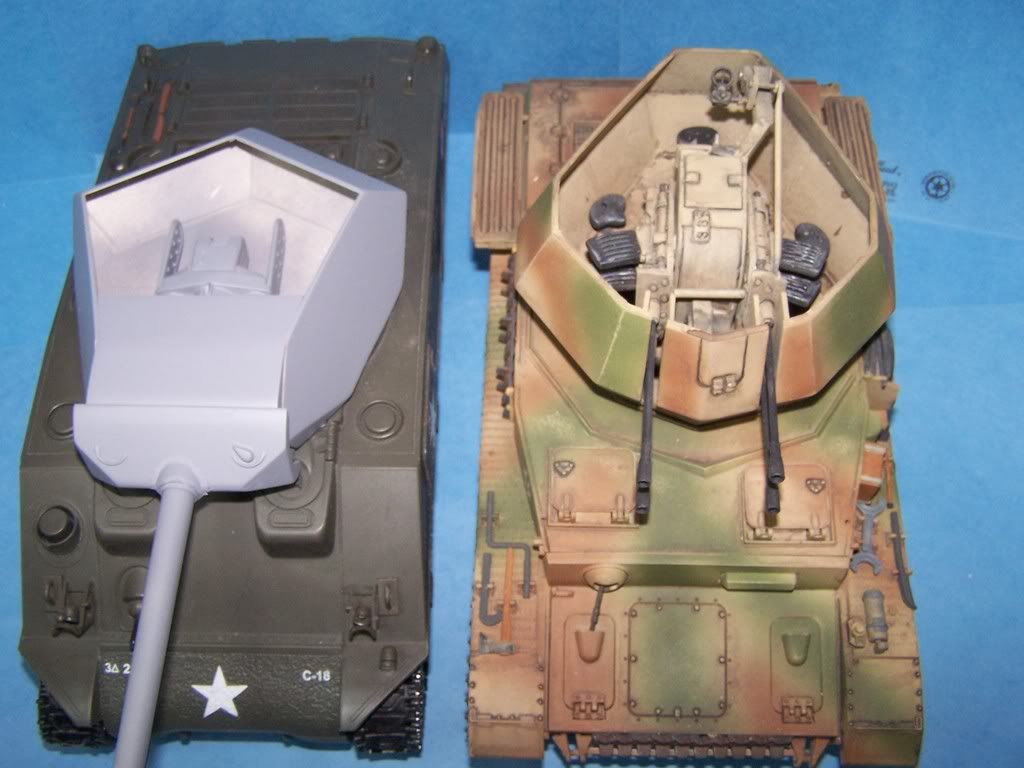
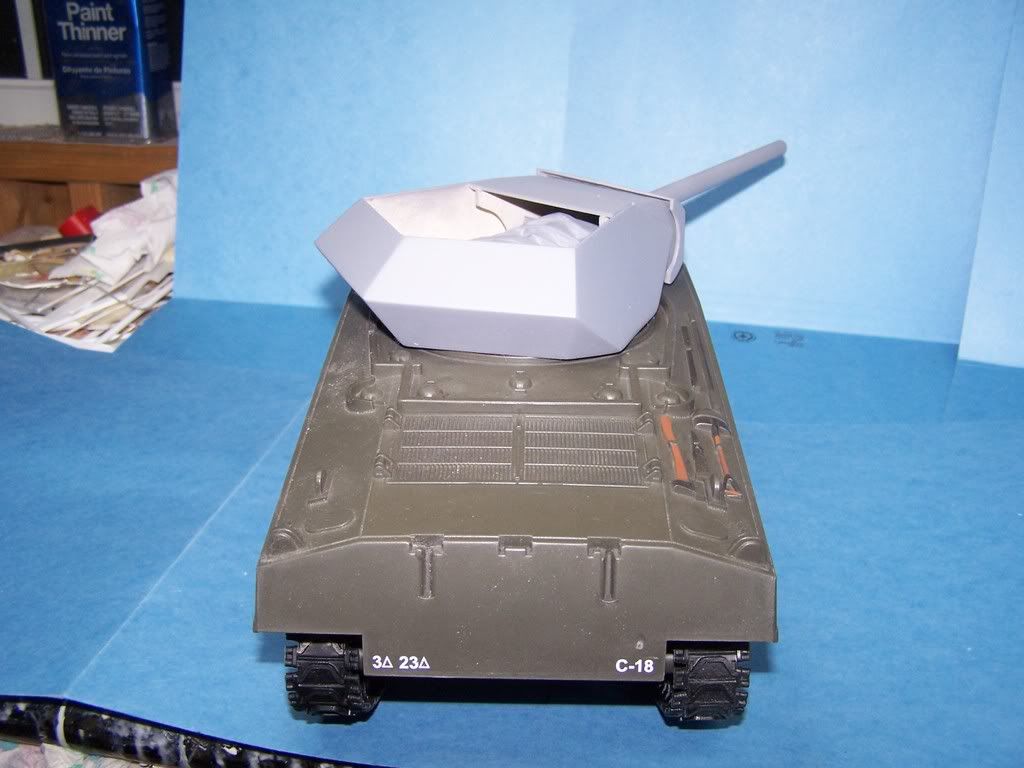
I think that I have all of the hard stuff done except the rear counter weights. Those are some CRAZY angles back there.
When I move onto the interior I will try to keep it as simple and plain as possible. Maybe just ready shells only and crew seats.
I am hoping that the upper hull will be an easy do.
Posted: Mon Mar 02, 2009 6:17 pm
by CW4USARMY
You are truly an artist!
Posted: Mon Mar 02, 2009 6:43 pm
by Panther F
Great stuff!
Posted: Wed Mar 04, 2009 11:54 pm
by grunt1
Awesome!
Posted: Thu Mar 05, 2009 9:40 pm
by 1958Zelda
Great!
Posted: Thu Mar 05, 2009 11:13 pm
by pickelhaube
Thanks for all of the kind remarks guys.
I will try to get back on this Fri and the weekend. I figure about 4 -5 more working days and I will have this wrapped up.
This is be a major custom. The top hull will be the biggest mold/pour that I will have done to date. The mold itself will be the size of a shoe box. Probably about $350 - $500 worth of RTV on the hull alone.
But it will be the second U. S. piece of armor in our 1/18 world to be made for production.
When I do the Firefly it will be the first British tank in 1/18 history. That is if you count it as a British tank.
It sure is easier wishing for these things than it is making them.
* M-10 turret custom
Posted: Fri Mar 06, 2009 9:30 am
by MG-42
* This is were the U.S. tank loader "
Brewster" comes into play.
* The guy that comes complete w/ a 75mm tank round.


..........
Nice work Matt ! *
*
Edit :
............... Oh , it's a 76mm gun

... "Sorry".

Mitch v MG
Re: * M-10 turret custom
Posted: Fri Mar 06, 2009 9:18 pm
by pickelhaube
MG-42 wrote:* This is were the U.S. tank loader "
Brewster" comes into play.
* The guy that comes complete w/ a 75mm tank round.
..........
Nice work Matt ! *
*
Edit :
............... Oh , it's a 76mm gun
... "Sorry".
Mitch v MG
Thanks Mitch,
Do you have a pic ? Isn't the 76 mm round the same as the 3 inch round ? If so I need one so I can cast a few for the interior ready shells.
Or maybe I should keep these out of the project to keep the price down ?
Posted: Fri Mar 06, 2009 9:42 pm
by PanzerArm
PH,
Have you ever posted a thorough step by step process on how you do your work here at SSHQ? You know, like a step by step how to on how you make molds etc etc. I customize a lot myself, but the old fashioned way, with alot of elbow grease and cut fingers

and they never get replicated without starting the process all over again.
Anyway, I'm getting to the point now where I would also like to start making things that can be shared with others instead of just one-of-a-kinds and I was looking for some guidance/help. And don't worry about me stealing some of your consumer base, I only do 1/32 stuff. I figured it's about time the 1/32 guys got some cool stuff too!
-Kevin
Posted: Fri Mar 06, 2009 10:18 pm
by pickelhaube
Comp glitch
Posted: Fri Mar 06, 2009 10:23 pm
by pickelhaube
PanzerArm wrote:PH,
Have you ever posted a thorough step by step process on how you do your work here at SSHQ? You know, like a step by step how to on how you make molds etc etc. I customize a lot myself, but the old fashioned way, with alot of elbow grease and cut fingers
and they never get replicated without starting the process all over again
Anyway, I'm getting to the point now where I would also like to start making things that can be shared with others instead of just one-of-a-kinds and I was looking for some guidance/help. And don't worry about me stealing some of your consumer base, I only do 1/32 stuff. I figured it's about time the 1/32 guys got some cool stuff too!
-Kevin
I have done step by steps with the P-36 I did. I did not think anybody would be interested in the casting part of the pojects. It is real messy.
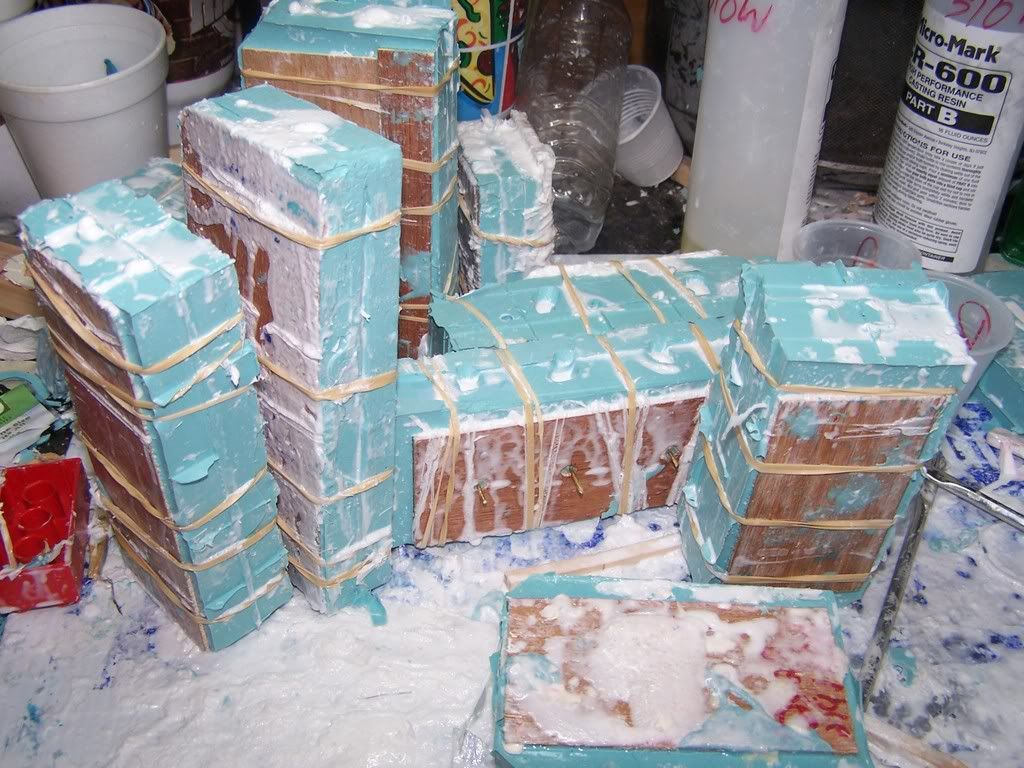
If anybody else would be interested in that I can post it in the customs post. I try to keep the progress pics short as possible in the 1/18 forum because as Aferuson has said my projects are considered NEW ITEMS IN THE 1/18 SCALE MARKET.
Posted: Fri Mar 06, 2009 11:36 pm
by flyboy_fx
Posted: Sun Mar 08, 2009 5:50 pm
by pickelhaube
Posted: Sun Mar 08, 2009 5:56 pm
by Fritzkrieg
Phenominal work!
I wish I had the skill, to do scratch builds like this. I can't wait to see the completed model.
Posted: Sun Mar 08, 2009 6:23 pm
by paulpratt
Are you building with styrene? It kind of looks like wax. I use styrene in my scratch builds. I only do them for myself, and only simple things, the easy stuff. I was just looking for a few tips. Some of those angles look really nice. I was wondering how you achieved those. If you don't want to share publicly, please PM me.
I want to ask about some of the techniques in all your work, but i don't want you to feel that I'm attempting to undermine you or steal your spotlight. Just another artist looking to improve.
Posted: Sun Mar 08, 2009 6:54 pm
by 1958Zelda
Thats just outstanding work! looks great!
Posted: Sun Mar 08, 2009 8:11 pm
by usmcchet9296
How did you taper the barrel
Im getting a BBi M4 and the barrel sucks
Id like to replace it with something better
 Well I guess you probably wont notice anyway because most of it will be hidden .