Page 9 of 19
Posted: Wed Dec 23, 2009 7:26 pm
by iflabs
lol, the power of make up. Super easy and turned out nicely.
Posted: Wed Dec 23, 2009 8:49 pm
by aferguson
i knew all that make up i keep hidden in my bathroom would come in handy some day.
I'm gonna try Dean's method..

Posted: Wed Dec 23, 2009 9:20 pm
by deankleines
aferguson wrote:i knew all that make up i keep hidden in my bathroom would come in handy some day.
I'm gonna try Dean's method..
I did not use make-up -- only the sponges!!!
LOL
Just finished the nose cone - Used Model Master Radome Tan
for the front section. Gull Grey on the back.
I'll try to post a progress pic tomorrow!!!
What an awesome Christmas present to myself!!!
So excited!! Have fun!!!!
Posted: Wed Dec 23, 2009 9:42 pm
by aferguson
exactly what do you mean by 'sponges'? Can you post a pic?
Posted: Thu Dec 24, 2009 6:56 am
by SkyWorksToys
Thank you for massages and emails sorry I should be more specific about our F14 paint service ,we charge $50.00 for paint and also we have painted planes in stock

Posted: Thu Dec 24, 2009 7:10 am
by pcoughran
aferguson wrote:exactly what do you mean by 'sponges'? Can you post a pic?
Aferg,
here's a pic of what he used from his flickr photo site: (I think you could just use those foam paint applicators that you see all over Michaels or Lowes - looks like they are the same foam just have a stick in them to hold - the texture might be different though I guess)

courtesy deankleines
Posted: Thu Dec 24, 2009 9:23 am
by thatf14guy
i've discovered that the battery panel also comes off on the regular version as well, this can aid getting apart the nose section for those who wish to send the plane off to be repainted. instead of prying or pulling it from the main fuseage. this way you just stick a butter knife between the opening below the two tabs and all i had to do was twist a little and it popped off pretty easily. this way you don't have to worry about damage to the paint job. i'll post pics if anyone needs me too.
Posted: Thu Dec 24, 2009 10:13 am
by Kroll777
Post the pic bro. Thanks
I've been wondering how to get it apart after it has shoved in there.
Kroll
Posted: Thu Dec 24, 2009 10:55 am
by thatf14guy
first you got to take the panel off, that pretty easy since its not glued on. then place the butter knife in the opening under the two tabs and twist. it should come right off.

Posted: Thu Dec 24, 2009 11:20 am
by tmanthegreat
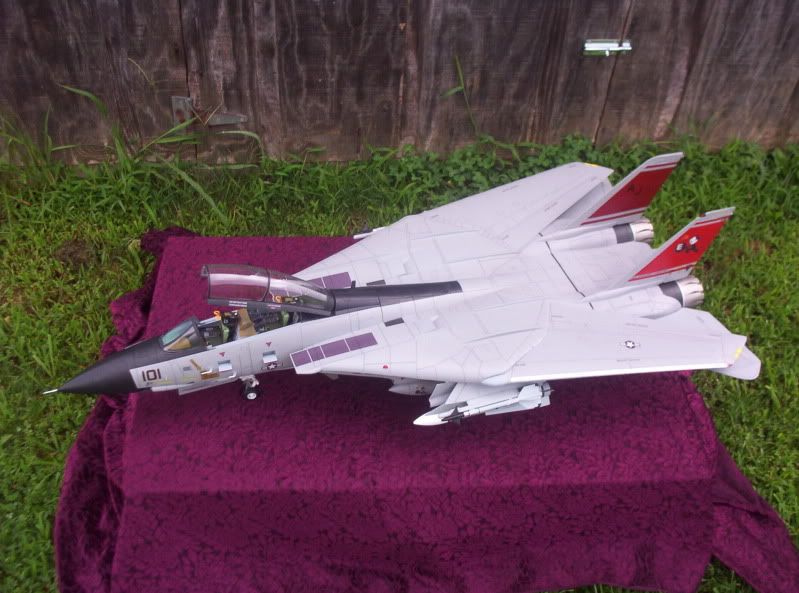
Here is my attempt at spot removal on the F-14:
Overall, I am impressed with how it turned out. There is only some minor touchup left to do. My goal was not to eliminate the spots completely, but to abate them. Thus, one can still make out the spots, but they are not nearly as glaring and add texture and character to the weathering. That may have been the effect JSI was going for, but they obviously didn't quite make it.
This was also my first major custom painting of a 1:18 aircraft. After research and a little experimentation, I used a combination of several methods discussed here, particularly the random airbrushing and index card techniques suggested by P47faninchicago, the Testors Acry Flat Gull Gray paint color suggested by deankleines (which is a near-perfect match) and the masking technique used by Kroll777.
Posted: Thu Dec 24, 2009 11:29 am
by vulgarvulture
Very nice job.
Everyone seems to be converting these birds over into really nice pieces with relative ease.
NO NO - Not same foam!!!!
Posted: Thu Dec 24, 2009 2:55 pm
by deankleines
pcoughran wrote:aferguson wrote:exactly what do you mean by 'sponges'? Can you post a pic?
Aferg,
here's a pic of what he used from his flickr photo site: (I think you could just use those foam paint applicators that you see all over Michaels or Lowes - looks like they are the same foam just have a stick in them to hold - the texture might be different though I guess)
courtesy deankleines
The make-up foam is much softer and less porous that the paint brush foam - which is a key factor in the success of this method. It leaves no trace and looks just like you airbrushed it. I would try the other foam types, but don't count on the same quality of finish
Type of foam to apply paint is very important!!!
Posted: Thu Dec 24, 2009 2:57 pm
by deankleines
The make-up foam is much softer and less porous that the paint brush foam - which is a key factor in the success of this method. It leaves no trace and looks just like you airbrushed it. I would try the other foam types, but don't count on the same quality of finish.
Dean
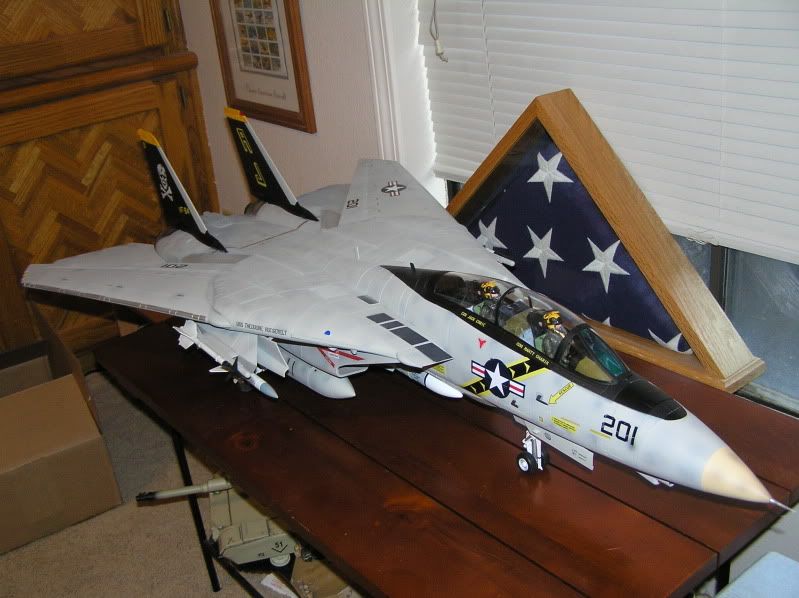
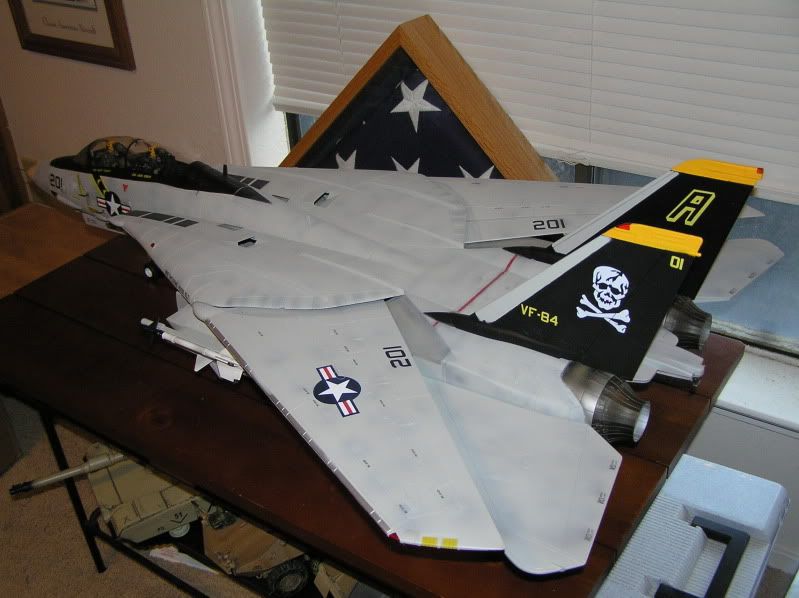
WOOOOHOOOOO....Just got my tomcat from the wife!!!
Posted: Thu Dec 24, 2009 4:30 pm
by ww2collecter
OK...I knew ahead of time and just bought the paint this morning to delete the spots.
Will post pics when done. As it sits now...this thing is AWSOME..spots or no spots
Posted: Thu Dec 24, 2009 7:11 pm
by aferguson
Dean......did you use Modelmaster acrylic paint or just the regular paint?
Posted: Thu Dec 24, 2009 7:56 pm
by raymond woods
In his e-mail he said he used enamel. I believe these are correct for the body and nosecone respectively.
Flat Gull Gray Model Master Enamel FS36440
Radome Tan Model Master Enamel FS33613
Posted: Thu Dec 24, 2009 9:39 pm
by tmanthegreat
aferguson wrote:Dean......did you use Modelmaster acrylic paint or just the regular paint?
Obviously I'm not Dean, however, if this helps, I used Testors Model Master Acrylic Flat Gull Gray (#4763) for my custom job. Acrylic paint is much easier to clean both when used in an airbrush or if one has to clean up runoff. The Flat Gull Gray color is only a shade off from the color JSI used for their base coat. When blended well, the differences are hardly noticable. I thinned the paint about 50/50 with water and sprayed lightly in a somewhat random manner to blend in the spots while brushing in the more confined areas with a soft bristle brush. All markings were masked using Tamiya masking tape, though in some places I did use P47fan's index card masking idea with success.
Posted: Thu Dec 24, 2009 9:53 pm
by Sabrefan
Tman your F-14 looks great, you have the look I am going for on the F-14 model.
Posted: Thu Dec 24, 2009 10:30 pm
by deankleines
tmanthegreat wrote:aferguson wrote:Dean......did you use Modelmaster acrylic paint or just the regular paint?
Obviously I'm not Dean, however, if this helps, I used Testors Model Master Acrylic Flat Gull Gray (#4763) for my custom job. Acrylic paint is much easier to clean both when used in an airbrush or if one has to clean up runoff. The Flat Gull Gray color is only a shade off from the color JSI used for their base coat. When blended well, the differences are hardly noticable. I thinned the paint about 50/50 with water and sprayed lightly in a somewhat random manner to blend in the spots while brushing in the more confined areas with a soft bristle brush. All markings were masked using Tamiya masking tape, though in some places I did use P47fan's index card masking idea with success.
Dean: I used the Enamel Paint. I think it would be good to try the acrylic and compare the two. I do know that the enamel works perfectly.
Posted: Thu Dec 24, 2009 11:26 pm
by mountian-man
Obviously I'm not Dean, however, if this helps, I used Testors Model Master Acrylic Flat Gull Gray (#4763) for my custom job. Acrylic paint is much easier to clean both when used in an airbrush or if one has to clean up runoff. The Flat Gull Gray color is only a shade off from the color JSI used for their base coat. When blended well, the differences are hardly noticable. I thinned the paint about 50/50 with water and sprayed lightly in a somewhat random manner to blend in the spots while brushing in the more confined areas with a soft bristle brush. All markings were masked using Tamiya masking tape, though in some places I did use P47fan's index card masking idea with success.
T-Man,
If you used Acrylic paint and it did a good job adhering to the surface, that must mean that the factory paint on the F-14 is acrylic/water based as well?
If it was Acrylic on Enamel I think there would be significant problems with the paint adhering.

Posted: Fri Dec 25, 2009 11:23 am
by tmanthegreat
I'm not sure on that one. I believe most manufacturers use enamel based paints, but on this project and some other customized armor I've done, I've always used acrylic paints and have had very few problems with adherence. Acryl paints work very well on softer rubbery plastics, which the enamel based paints can corrode. Where problems occurred, it was usually because there was some sort of residue on the plastic that I did not clean off. On my F-14 project, there were only a couple small areas on my plane where the paint did not adhere correctly, but I was ultimately able to fix it by letting the area dry, lightly sanding it, and then repainting.
Posted: Fri Dec 25, 2009 9:13 pm
by mountian-man
Found a simple but good page detailing basic do's and don'ts of modeling paint...
http://www.naritafamily.com/howto/paint.htm
Also, for those using Model Master Paints, this may be handy...
http://www.testors.com/faq
Posted: Sat Dec 26, 2009 3:24 pm
by tkjaer21
Has any tried the Tamiya, Moder Master or Testors spray cans? If so, how far away do you spray the plane so that the paint will not blotch or run. Also, should it painted with the enamel or acrylic paint cans?
Best method
Posted: Sat Dec 26, 2009 3:51 pm
by bpxbrian
So far, for us that don't have air brushes or the pro modeller setup, I think deankleines method of the Model Master Flat Gull Grey and the "makeup" sponge applicators seems to be the "easiest." His test shots look great in sunlight and in doors. I am anxious to see his "final product."
Also, no brush marks and it seems like one would have more precision around decals.
Here's my thought. Use the deankleines method and then if you want "weathering," use the Pro Modellers Weathering Wash. It is clay based and washable.
What do you think?
Posted: Sat Dec 26, 2009 6:07 pm
by mountian-man
Tried Dean's method with Model Master Acryl. Started on a drop tank and found that paint was very thin. I couldn't achieve a mark free surface with the makeup wedges. I image Dean's enamel paint works better, maybe it is a bit thicker in consistency? Brushes may work better with Acryl.
I've decided to airbrush instead, here are a couple more useful links for those who want to use Acrylic paint or live in Canada!
About thinning Acrylics for airbrush:
http://www.reapermini.com/TheCraft/15
and by Testors (A bit bias):
http://www.hubhobbyshop.com/hint21.htm