
Sorry if there is already a thread. Move this if you know of one.
I was painting a Tomcat this weekend and while watching paint dry in between parts I decided to try out a Bell X-1 kit from Pegasus in 1:18. I was skeptical, had no idea what I was in for, wondered if the gear worked at all and if so did they work well. all that jazz. But I cracked it open and dove in.
Immediately I found that indeed the gear are supposed to work. Cool I thought. So I began painting. 2 days later (and frankly not much assembly) the Bell X-1 was complete and you know what... IT's very very cool. It's a kit toy but I tell you its a great little add to the collection.
Anyone have other experiences or thoughts on the subject?
Pegasus Bell X-1
-
Birddog
- Officer - Brigadier General

- Posts: 1919
- Joined: Tue Dec 07, 2004 10:06 pm
- Location: Georgia
- Contact:
I had a blast assembling mine too. I still have to finish painting mine, but I loved the fit and ease of putting the Bell X-1 kit together.
I hope we get to see more 1/18 scale subjects in kit form from Pegasus like the Bell X-1 in the future.
I hope we get to see more 1/18 scale subjects in kit form from Pegasus like the Bell X-1 in the future.
Go Ugly Early in 1/18!!
Still waiting and wishing for a 1/18 A-10 Warthog.
Still waiting and wishing for a 1/18 A-10 Warthog.
-
gburch
- Officer - Captain

- Posts: 678
- Joined: Fri Mar 27, 2009 3:45 am
- Location: Houston, Texas
- Contact:
Mine just arrived yesterday and I opened it up at the office to take a look. Naturally I couldn't resist and opened the bag that held the fuselage halves. I was very impressed by the fit. Looks like there will be a minimum of putty work.
I'm kicking myself, though, because I just did a big Tower Hobby supply buy and didn't think to include the International Orange I'll need.
Here's a question: How flat/gloss should the finish orange be?
Now if only they'll do an X-15!!! So many things to do with that -- little engine, big engine X-15, 2A ... three different tail numbers ... at least four distinct versions in all, and would look great with an F-104 NASA chase plane.

-
tmanthegreat
- Officer - Brigadier General
- Posts: 11238
- Joined: Tue Oct 05, 2004 7:38 pm
- Location: Central California
I got the kit immediately when it came out and had mine assembled by early January. It is a really cool and very easy kit to assemble. My biggest problem was getting the two fuselage halves together without leaving a huge gap, but pounding them together with a soft mallet and using putty did the trick. Painting the canopy framing was also a challenge, but masking off the clear parts worked out. Painting the fuselage and wings was a breeze (I used Testors International Orange) and there is no need for weathering. It is difficult to fit a figure into the cockpit, but the S1 "midget" P-51 pilot works OK. I love the fact that the model has retractable landing gear and that it is very durable. In the end, I was pleased with my results and have no need to get the eventual pre-painted version 
Here are the pictures I posted in a couple earlier threads about the Pegasus Bell X-1:
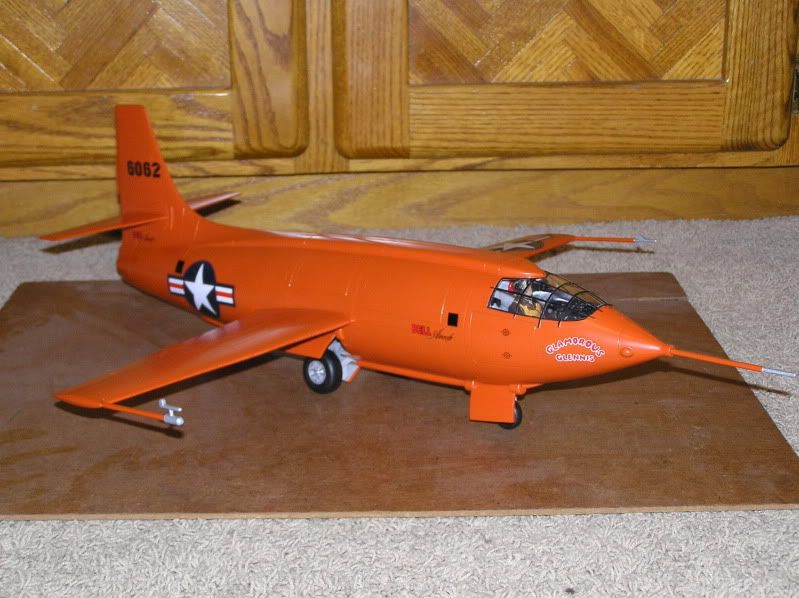
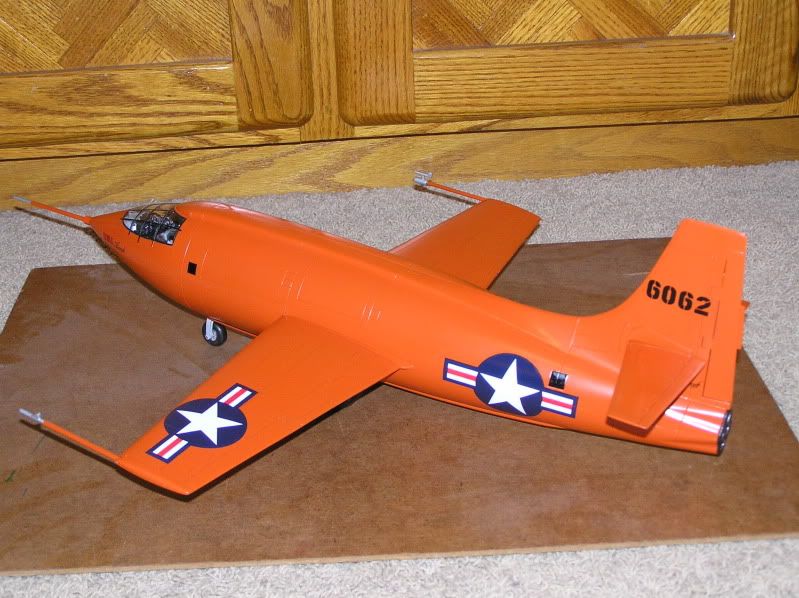
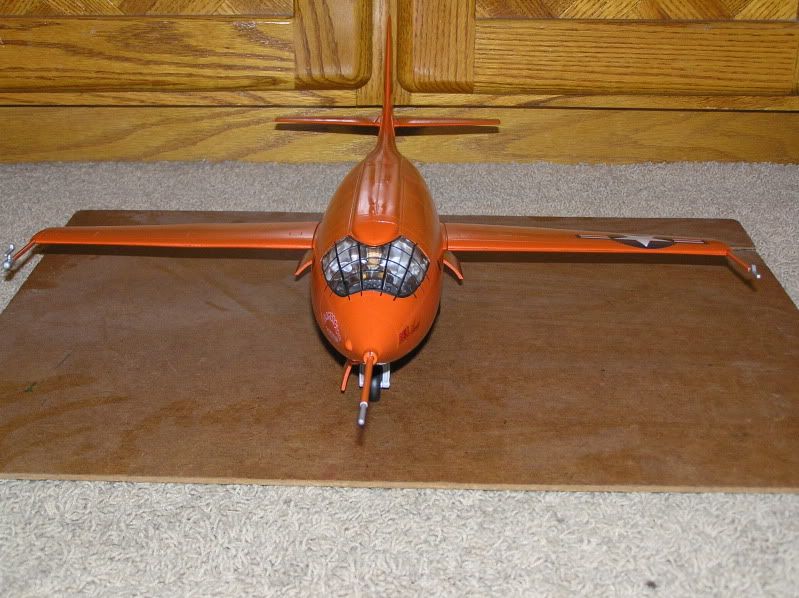
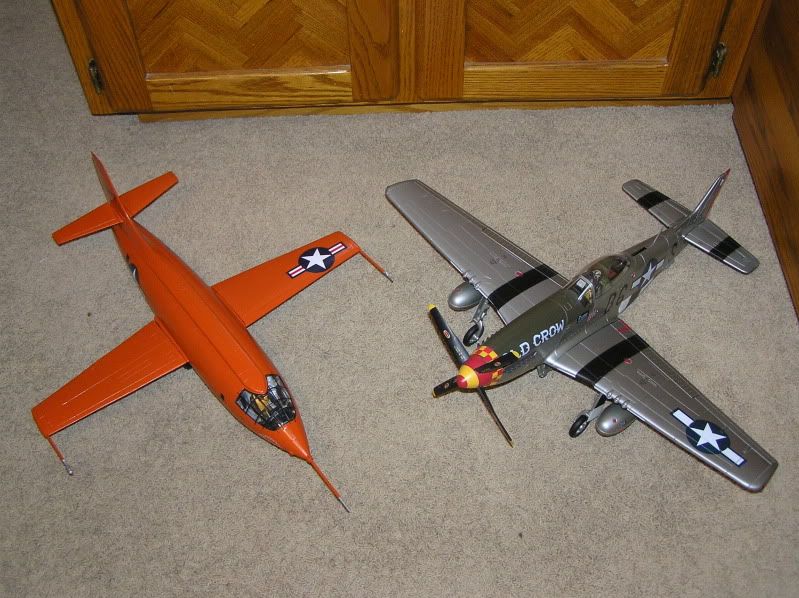
Here are the pictures I posted in a couple earlier threads about the Pegasus Bell X-1:
"If you fail to plan, you plan to fail."
-
ClickClack
- Private First Class

- Posts: 3
- Joined: Tue Mar 09, 2010 11:00 am
-
ClickClack
- Private First Class
- Posts: 3
- Joined: Tue Mar 09, 2010 11:00 am
Sorry tko211, learning the board.
Yes sir the Pegasus X-1 turned out to be a pleasant surprise. I finish mine a week ago in gloss dayglow orange, then decals, weathering and an over coat of clear flat. It makes for a nice addition to the rather dry 1/18 scale market. If I figure out how to post pics, I’ll add them.
Yes sir the Pegasus X-1 turned out to be a pleasant surprise. I finish mine a week ago in gloss dayglow orange, then decals, weathering and an over coat of clear flat. It makes for a nice addition to the rather dry 1/18 scale market. If I figure out how to post pics, I’ll add them.
-
AMERICAN_GRENADIER
- Officer - Brigadier General
- Posts: 2022
- Joined: Wed Nov 12, 2008 12:33 pm
- Location: USA

HEY Pickelhaube or SkyWorks
I, like I think several other guys have been waiting with hope that Pegasus will come out with a pre assembled/painted one. It might not happen so would one of you guys be willing to buy/assemble/paint these and sell them as complete units?
I am first in line...
I am first in line...
-
ClickClack
- Private First Class
- Posts: 3
- Joined: Tue Mar 09, 2010 11:00 am
One-0 nine, bare with it, they do work and rather nicely once you get it figured out. I had to grind out some of the wheelwell to allow room for the wheel to fully retract. Also be sure to pay attention to side numbers (1 or 2) that are on the right/left side gear, they must match or things will not fit properly.
-
tmanthegreat
- Officer - Brigadier General
- Posts: 11238
- Joined: Tue Oct 05, 2004 7:38 pm
- Location: Central California
The landing gear do fully retract without the need to modify them. It all comes down to where one places the support pin that sits above the main strut.
When positioned in the manner the assembly instructions indicate, the pin will hold the landing gear strut in the extended position by pressing the end of the pin back past the raised ledge on the top of the main gear strut. However, as one retracts the main strut, the pin will fold up on top of it and this prevents the wheel from folding into the landing gear bay completely.
The solution to allow the gear to fold up correctly is simple. Assemble the landing gear according to the instructions. Once completed, with the landing gear in the extended position, push the support pin back far enough so that its end now sits behind the main gear strut. That will take some pressure and you will hear and feel click once it is past the strut. One will now be able to fold the gear up completely. To lock the gear in the extended position, use a screwdriver, icepick or hook of some sort (I use a bent nail) to pull or pry the pin outward so that the end sits on top of the gear, locking it in place.
It is not the most perfect method and it is difficult to pull the pin into the extended position, but it allows the landing gear to fold correctly without modification. Since I have the plane hanging and not on its gear very often, my method works well for me
"If you fail to plan, you plan to fail."
-
gburch
- Officer - Captain
- Posts: 678
- Joined: Fri Mar 27, 2009 3:45 am
- Location: Houston, Texas
- Contact:
I'm still in the rattle-can stage of model-building as far as paint spraying goes. So here's a question -- is there a rattle can of the correct International Orange available? I've looked on Tower Hobbies' website, and all they have is Testors bottle enamel. Ideally, I'd like acrylic. Anyone know if such a thing exists?
-
vmf214
- Officer - Brigadier General
- Posts: 1581
- Joined: Tue Oct 05, 2004 7:23 pm
- Location: USA
- Contact:
Spray cans are generally either enamel or laquer. Tamiya sprays are a primarily laquer base and are outstanding. Laquer dries whereas enamel must "cure" (solvents contained in the enamel must outgas) first. Depending on how many coats you use this can take up to a week to cure properly. Laquer is good to go in about 3 hours. Squadron is a much better resource for model supplies, imo. Best inventory and awesome customer service.
i'am useing Tamiya TS-12 spray comeing out greatgburch wrote:I'm still in the rattle-can stage of model-building as far as paint spraying goes. So here's a question -- is there a rattle can of the correct International Orange available? I've looked on Tower Hobbies' website, and all they have is Testors bottle enamel. Ideally, I'd like acrylic. Anyone know if such a thing exists?
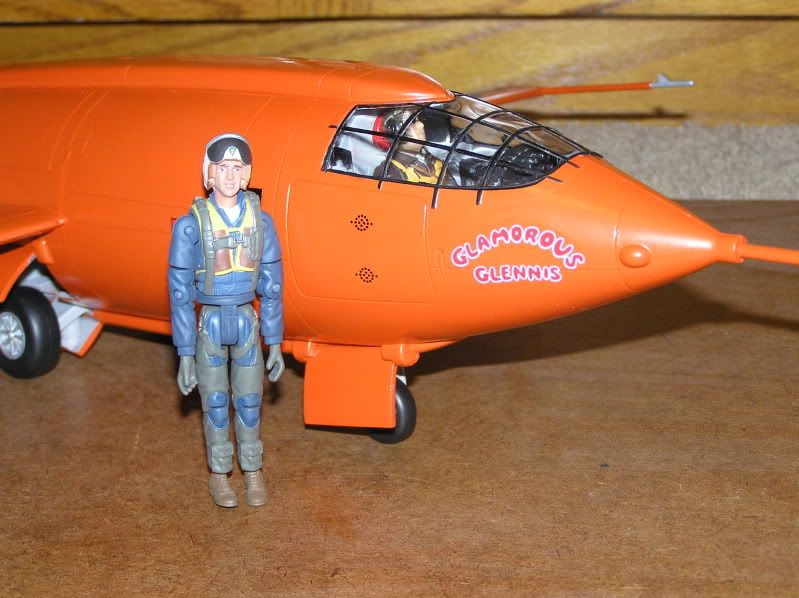
I will also echo that the Tamiya TS-12 orange paint is PERFECT for the X-1. I have a nose art replica piece that was done by Gary Velasco, a nose art expert, historian, and author on the subject. He was able to perfectly match the paint on his nose art to the actual X-1 in the Air and space museum in DC... I matched this panel to find the EXACT right orange and the Tamiya TS-12 paint is DEAD on! spray with confidence!mikeyt wrote:i'am useing Tamiya TS-12 spray comeing out greatgburch wrote:I'm still in the rattle-can stage of model-building as far as paint spraying goes. So here's a question -- is there a rattle can of the correct International Orange available? I've looked on Tower Hobbies' website, and all they have is Testors bottle enamel. Ideally, I'd like acrylic. Anyone know if such a thing exists?http://www.tamiyausa.com/product/catego ... 500&page=4
cockpit details added
 added detail to the control column and panel wires