is this realFolkwulfe wrote:I don't know....you think maybe they started to use this paint scheme and....well changed their mind half way there?
I can just smell the exhaust now....hhhmmmmm.....
POST JSI F-14 SPOT REPAIR IDEAS HERE
-
Black_Dragon_One
- Officer - Brigadier General

- Posts: 2032
- Joined: Sat Dec 11, 2004 1:23 pm
- Location: California


there are now some decent spot repair ideas. Aside from the repaint method, there's rubbing off the spots with somthing like Gojoe and airbrushing over them.
My airbrush is on the fritz and i really don't feel like buying another. I've develped a method where i can used canned spray paint. I just cut a hole in the middle of a sheet of paper and place the hole over the area i want to paint....the rest of the paper masking the areas i don't want to paint. By adjusting the height of the paper from the model's surface i can increase or decrease the amount of feathering of the sprayed paint; varying from hard edged to very soft edged.
My airbrush is on the fritz and i really don't feel like buying another. I've develped a method where i can used canned spray paint. I just cut a hole in the middle of a sheet of paper and place the hole over the area i want to paint....the rest of the paper masking the areas i don't want to paint. By adjusting the height of the paper from the model's surface i can increase or decrease the amount of feathering of the sprayed paint; varying from hard edged to very soft edged.
i never met an airplane i didn't like...


Actually, the nose cone itself is in 2 parts. Just unscrew the yellow / sand piece from the gray piece and you can spray out the nose with no masking required. That's how I am doing these here.aferguson wrote:did you mask the nose cone or did you brush paint it?
FOr those using Gojoe, it really wouldn't work on the nose cone because it will strip of the yellow somewhat as well.
P47faninchicago, I can still see the spots on your model, but agree it looks quite a bit better. Maybe a little more blending, or a little darker and the spots wouldn't be visible as spots at all. I was really hoping your technique is something like what JSI might have done when the spot detailing turned out so bad, ie, attempt to make it look weathered with not nearly as bad a look as leopard spots. BTW - you've got the 'Cat in posed flight but w/wings folded back in carrier storage position. Thanks for sharing the Tamiya paint code and your methodology.
-
P47faninchicago
- Sergeant

- Posts: 107
- Joined: Mon Jul 21, 2008 9:13 pm
I used Tamiya flat flesh on the nosecone. No masking. Just remove and airbrushed flat flesh. The camera and flourescent lighting really accentuate things. The sky grey actually blends very well-it works so well that I suspect that that was what JSI was going for. As I was spray painting and watched it all flow together I was like, "Wow! I get what they were trying to do." Just a little too ambitious a paint scheme for them to attempt with low skill, low paid workers. I really didn't want to make a monocolor factory fresh plane. Actually there are parts I wish I hadn't spraypainted so much. The semigloss of the original paint and the flat of the Tamiya paint (the difference isn't seen when it is photographed) really bring out the detail and make the whole thing seem far more realistic and sort of 3 dimensional. In the areas I spray painted a lot this gloss variation is lost and makes it look like what it really is-a huge hunk of plastic.
Last edited by P47faninchicago on Fri Dec 18, 2009 9:25 pm, edited 1 time in total.

-
diegomenendez
- Corporal

- Posts: 80
- Joined: Sat Dec 05, 2009 6:29 pm
- Location: Atlanta Georgia
 img]
img]
Spot removal
On the F/a-18 I used Naptha to remove
alot of the spotty spray. But Be warned
If there is paint under the spot it will remove it. do a test spot.
alot of the spotty spray. But Be warned
If there is paint under the spot it will remove it. do a test spot.
-
pcoughran
- Officer - 1st Lieutenant

- Posts: 596
- Joined: Mon Jun 30, 2008 10:58 am
- Location: 1, USA, MO, St. Louis
Yes, someone please post more detailed instructions. Did you do circular swirls or back and forth rubbing, etc... Did you use a cotton cloth with water and GoJo or tissues, papertowels? How much GoJo did you put on at a time?diegomenendez wrote:Can somebody, anybody, please post how to use the GoJoe stuff?
My Tomcat will be here Tuesday, and my P.M. Black Weathering Wash Wed.
I'd like to get started right when she gets here
I don't know for sure if I'm going to do this or just get it repainted, but I'd like to try it on an attachment or fuel tank to see how much work and what is involved.
Also, the only place I've been able to find GoJo Orange Pumice is Advanced Auto Parts.
"Where's dat waskily wabbit?"
____________________________________________
Good Trades: Ostketten, Pickelhaube, Cornbreadfred, Sledgehammer, Pizzaguy, caesarbc3,jwcarpenter
____________________________________________
Good Trades: Ostketten, Pickelhaube, Cornbreadfred, Sledgehammer, Pizzaguy, caesarbc3,jwcarpenter
well, thanks to some innovative people and the impressiveness of the plane itself, things seem to be calming down on the spotcat front, at least so far as this board is concerned.
I wonder how the gen. pop. is feeling about their spotted Tomcats? For many it would come as a total surprise, having not been forewarned by production pics from the factory, nor etailers' pictures.
At least for us there are now 3 decent options which, although not perfect, will vastly improve the model to the point that most will be able to live with it.
I'm still undecided between the gojoe and the airbrushing solutions, but i'll probably do the airbrushing as it will be a bit less labour intensive, i think.
For those that can repaint or afford to pay for a repaint that's clearly the best option, but the other two are excellent as well.
I think P-51 needs to hand out some Commendations to TKO, P47faninchicago and Gojoe toyktdlgh for their efforts and bright ideas.
i never met an airplane i didn't like...
-
parrish333
- Officer - 2nd Lieutenant

- Posts: 360
- Joined: Tue Oct 05, 2004 10:13 am
- Location: NE Chicagoland, Illinois
No masking?
P47Fan:
Wow - I really like that look of that! For some reason finding a way to incorporate the spots and let them come thru a bit more looks really great - like you said, must have been what they were going for!
But did you really mean that you did no masking? I know NOTHING about painting, but how did you not paint over all the little markings and details? It sounds like TKO has to do a pretty labor-intensive process to prevent that (hence 3 hours per bird), but you said you had yours done in 45 mins?!?!
What am I missing?
he probably just set his airbrush on fine spray and zapped each and every little dot individually with his airbrush. It would just cover a very small area with each spray, so you'd only need to be careful close to markings, which you could mask off, or just hold a piece of paper over to prevent overspray.
i never met an airplane i didn't like...
-
P47faninchicago
- Sergeant
- Posts: 107
- Joined: Mon Jul 21, 2008 9:13 pm
I just sprayed over large areas in a random manner. The dots just seemed to meld together on their own as I sprayed. I would not suggest doing each dot individually-it won't blend together and I think that would just make the small dots into REALLY big dots. I held an index card(you know, like you use in school to write notes on) in my left hand. When I came across an area I didn't want to paint I held the index card against the area with my left hand while I sprayed with the right to avoid overspray. In areas where there was still overspray the Tamiya paint is water soluble until it dies so I just had a wet paper towel handy to wipe it off immediately. ESPECIALLY area where the overspray would look obvious such as the black near the canopy. After it dries you need to use an Acrylic thinner. I would definitely suggest DILUTING the paint 50/50 and using a good acrylic paint like Tamiya rather than enamel which is more difficult to clean up. I will say I have a pretty good airbrush (Iwata dual control) which allowed me to vary the output of the air and the paint so I could use a lot near open areas and slow it down near areas I needed more control. Start in a large area where you can have more room to experiment until you get the hang of it. Some areas (especailly all the "no step" insignias on the wings were impossible to avoid overspray. I airbrushed these areas so lightly that the insignias would still be present, just not quite as sharp which looked fine for me. Very little spray is needed actually- they start to disapppear almost immediately after you start spraying. If you overspray just wipe it it off with your wet paper towel -no reason to make things difficult. Oh, and it is also easier to do it while it is disassembled since you can move all the parts around easier.
-
STARMAN 352
- Corporal
- Posts: 47
- Joined: Sat Apr 18, 2009 1:37 pm
- Location: CALIF
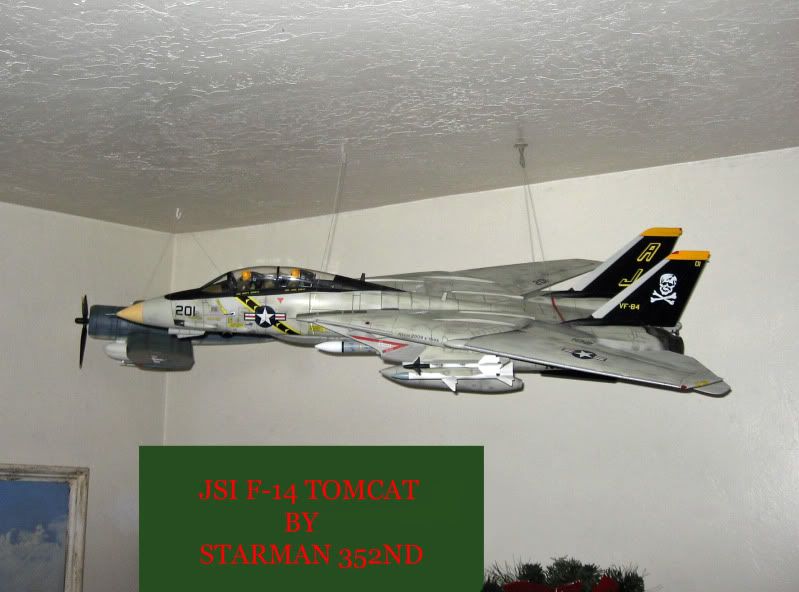
and here she is all done...It turned out very nice and much better then the spots all over it.
I weathered her with Pro Modeller Black weathering wash and it works great. All you need to do is brush it on wait about half hour and wipe with a wet rag and this is what you get..
Afgter the holidays i will do a repaint on another F-14 like Zach did with his but i really like the looks of this too.
Enjoy.
JP
http://www.thediecasthangarpub.com
-
iflabs
- Officer - 2nd Lieutenant
- Posts: 292
- Joined: Thu May 31, 2007 12:28 am
- Location: Minne-sota-apolis
No airbrushing required?STARMAN 352 wrote:and here she is all done...It turned out very nice and much better then the spots all over it.
I weathered her with Pro Modeller Black weathering wash and it works great. All you need to do is brush it on wait about half hour and wipe with a wet rag and this is what you get..
Afgter the holidays i will do a repaint on another F-14 like Zach did with his but i really like the looks of this too.
Enjoy.
JP
-
pcoughran
- Officer - 1st Lieutenant
- Posts: 596
- Joined: Mon Jun 30, 2008 10:58 am
- Location: 1, USA, MO, St. Louis
Starmann,
How long did it take you to do the whole plane? I just did a fuel tank to see what it looks like and probably spent 30-40 minutes on that.
How long did it take you to do the whole plane? I just did a fuel tank to see what it looks like and probably spent 30-40 minutes on that.
"Where's dat waskily wabbit?"
____________________________________________
Good Trades: Ostketten, Pickelhaube, Cornbreadfred, Sledgehammer, Pizzaguy, caesarbc3,jwcarpenter
____________________________________________
Good Trades: Ostketten, Pickelhaube, Cornbreadfred, Sledgehammer, Pizzaguy, caesarbc3,jwcarpenter
-
STARMAN 352
- Corporal
- Posts: 47
- Joined: Sat Apr 18, 2009 1:37 pm
- Location: CALIF
Thanks Guys,
I took my time with it over the weekend because i had to do Christmas shopping as well. I did use GoJoes on it and then in some areas of it i used a fine sand paper to feather things out and then i put the Black wash on it after i was done with the wash i used Dullcoat on it and and it all turned out really great. No airbrushing was using on this job.
I took my time with it over the weekend because i had to do Christmas shopping as well. I did use GoJoes on it and then in some areas of it i used a fine sand paper to feather things out and then i put the Black wash on it after i was done with the wash i used Dullcoat on it and and it all turned out really great. No airbrushing was using on this job.
http://www.thediecasthangarpub.com
-
deankleines
- Corporal
- Posts: 84
- Joined: Mon Dec 21, 2009 6:22 pm
Now You See em - Now You Don't!!!
I just stumbled across an incredibly simple way to make all of the spots disappear - "No Fuss - No Muss" -
All you need is -
one bottle of Model Master FS36440 Flat Gull Grey
one pad of post it notes
one bag of non-latex, non-toxic foam make-up wedges
step 1: Mask off your panel with post-its
step 2: Dip narrow end of wedge into puddle of paint
step 3: Dab wedge until excess paint is absorbed into wedge
step 4: Dab surface of plane until spot is gone
No brush strokes - no airbrush - no color variation
Blends right in!!!!
Try it on a sample surface until you are comfortable with the process.
Then, HAVE AT IT!!!