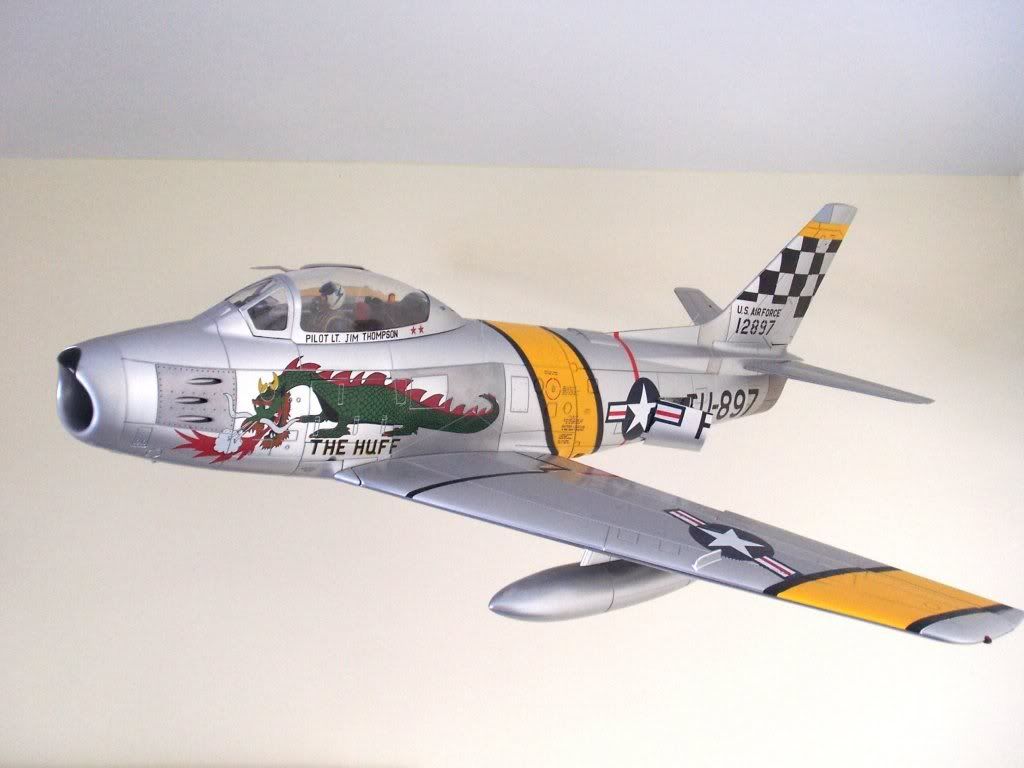
Check out these images of 21st C's big Sabre. Picked up several of these over the Christmas break. Only mods made were cosmetic.
I masked and painted gun metal to the blast panels, titanium to the exhast areas, magnisum to the mid fuselage engine panel and anodized shading to the wing walks. Have dissassembled another one of these and am reworking the panel lines (a little deep) adding rivets and cockpit detailing.
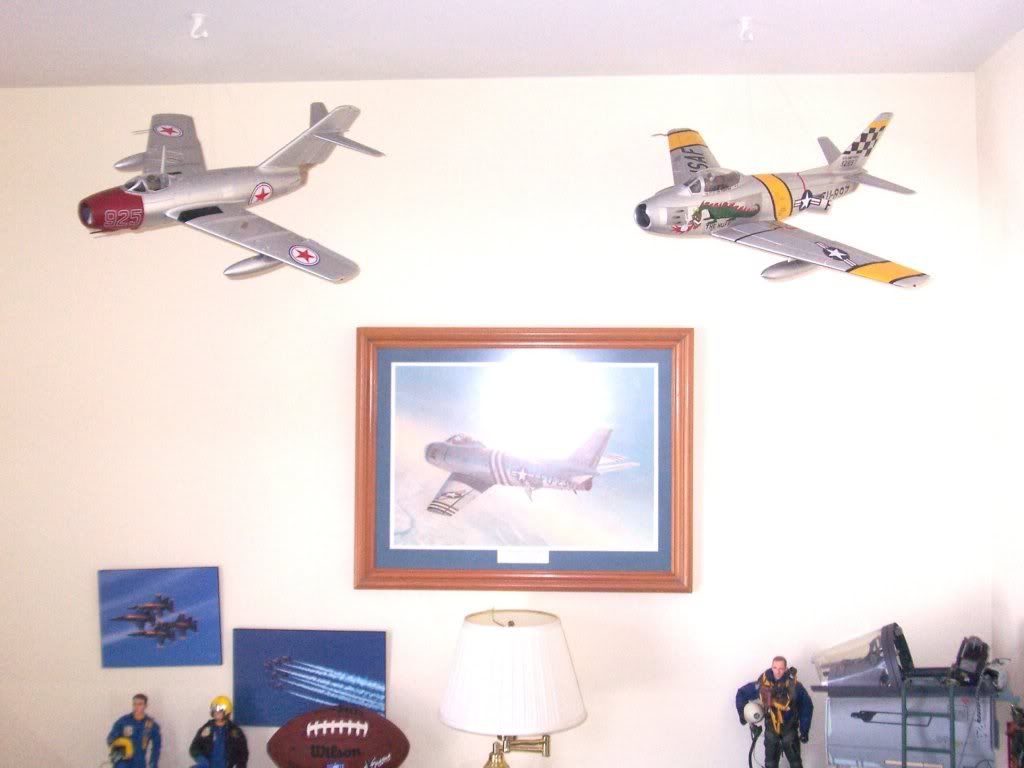
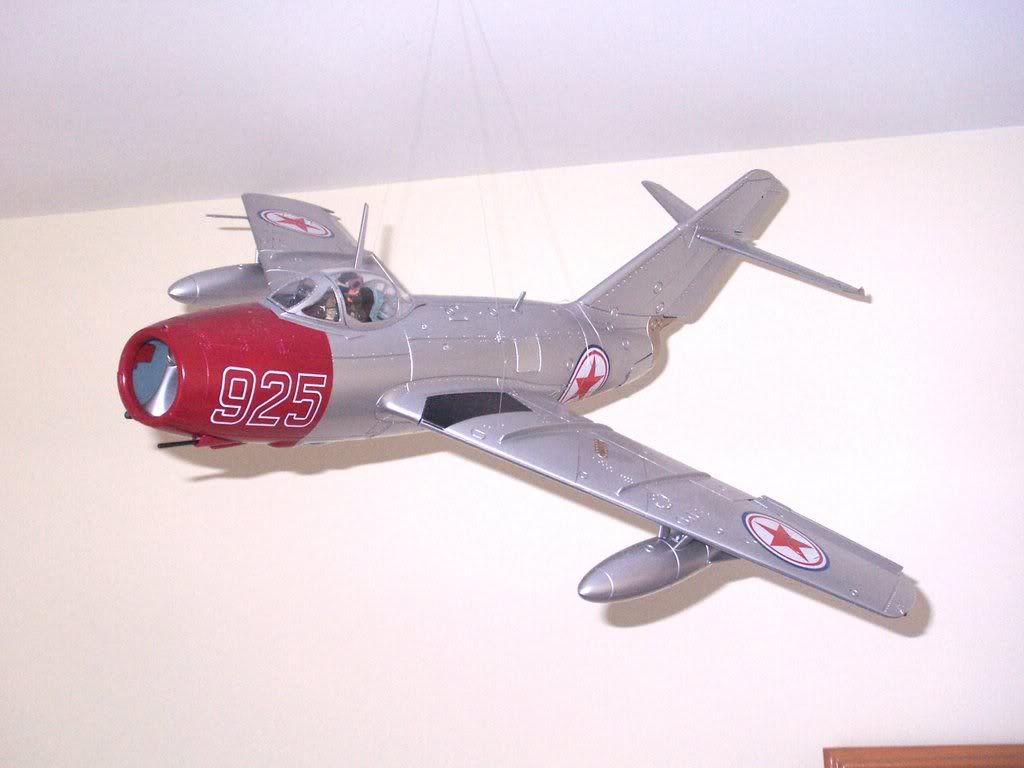
I'll include some Mig-15 shots as well. Notice the 48th Hasegawa F-86 to get an idea of the size of these birds!
<img src="http://i160.photobucket.com/albums/t197 ... re2009.jpg">
<img src="http://i160.photobucket.com/albums/t197 ... Mig009.jpg">
<img src="http://i160.photobucket.com/albums/t197 ... bre015.jpg">
<img src="http://i160.photobucket.com/albums/t197 ... bre020.jpg">
<img src="http://i160.photobucket.com/albums/t197 ... re2013.jpg">
<img src="http://i160.photobucket.com/albums/t197 ... bre025.jpg">
<img src="http://i160.photobucket.com/albums/t197 ... re3019.jpg">
BIG Sabre
-
C-7A Caribou
- Corporal

- Posts: 48
- Joined: Mon Jan 22, 2007 7:40 pm
- Location: South Central Michigan
- Contact:


That object on the left wing is called a "fence". It is sort of a air-flow dam to compensate for the swept wing and the removal of the leading edge "slats" that were on the earlier "A" and "E" model Sabres.
Most of the panels were simply masked off with low tack tape. The Dragon however required using MicroMask: http://www.bare-metal.com/decals/microscale_2.html You just brush it on let it dry then paint. Then peel it off. The trick on the fire breathing beast is to use a very fine brush and a magnifying glass to get it right.
Really pretty easy once you get the hang of it.
Regards,
Mike

I could be wrong, but I think he meant the baby bird, not the fence.mcaulk wrote:That object on the left wing is called a "fence". It is sort of a air-flow dam to compensate for the swept wing and the removal of the leading edge "slats" that were on the earlier "A" and "E" model Sabres.
Nice work on the Dragon!
Good work.
Also you tied your strings in a different way than I did. I never thought of that when I hung my planes. haha
Also you tied your strings in a different way than I did. I never thought of that when I hung my planes. haha
[imgae]http://i62.photobucket.com/albums/h108/bdr_ws6/Sigsandavatars/sigxd.jpg[/imgae]
1:18 car collecter for years, turned very casual collecter of XD airplanes and a few groundpounders.
1:18 car collecter for years, turned very casual collecter of XD airplanes and a few groundpounders.