Page 5 of 6
Posted: Tue Apr 22, 2008 9:33 pm
by VMF115
I am here.

Posted: Tue Apr 22, 2008 9:34 pm
by VMF115
I am here.
Posted: Wed Apr 23, 2008 9:41 am
by Killerf6
pickelhaube wrote:Thanks Killer 66. What do you think of the step by step was it too long and drawn out?
I just got the box with more RTV in today so I will be making molds of everything. I have never made a cast as something as large as the fuse. But I will give it the ole Cajun try. I am not really Cajun I just thought I will throw that in.
Personally I don't think there was enough of the step by step, I love stuff like that. Could you get someone to follow you around with a camcorder?
Posted: Fri Apr 25, 2008 4:50 am
by pickelhaube
Killerf6 wrote:pickelhaube wrote:Thanks Killer 66. What do you think of the step by step was it too long and drawn out?
I just got the box with more RTV in today so I will be making molds of everything. I have never made a cast as something as large as the fuse. But I will give it the ole Cajun try. I am not really Cajun I just thought I will throw that in.
Personally I don't think there was enough of the step by step, I love stuff like that. Could you get someone to follow you around with a camcorder?
Great idea

I could call the show: Orleans Parish Plastic Choppers and Customizers . I just need to get an inside man for the Discovery Channel. I don't yell and shout alot but that can be my wifes part. My son can play Mikey . But he does not have the scraggly hair and is about 100 pounds lighter. I can quit my day job and start collecting vintage muscle cars and of course more XD.
If only it was this easy . Sighhhhhh ................
Posted: Fri Apr 25, 2008 9:00 am
by Killerf6
PH, I know my response was tongue in cheek, and I hoped that people got a chuckle out of it.
That being said, I really do enjoy the detailed explanation of just how you work the magic that you do. The level of patience that you display amazes me, and I'm no stranger to doing custom work. The differance is mine are usually 1:1, and made from steel.
This is a simpit that I'm working on.

And this is a Cummins 6BTA I put into my '91 Ford F350.

You can see the build from start to finish here:
http://rides.webshots.com/album/296084011IFsRxQ
And you thought you took a lot of pics.

Posted: Fri Apr 25, 2008 4:42 pm
by pickelhaube
Hey Raider,
I can not work on cars I have no mechanical know how what so ever. I know that I can make the tools out of a billet of steel with just hand tools. I have done this . Now if I take the tools I made I could not barley use them . That engine project you have done is something I would or could never take on. My hat is off to you. I will stick with the 1/18 toys.
P. S. I LOVE 4X4s. I have had a few of them.
78 Dodge Power Wagon This was a kind of rare Little Red Wagon. They made plenty in 2X form but not much of them in 4x4
82 Dodge D-50 this was the first Dodge mini truck in 4x4
84 Branco II This is when they first came out. This little SUV was one of my most favorit rides I have ever had. These came before anybody ever coined the phrase SUV.
Posted: Tue Apr 29, 2008 4:13 pm
by pickelhaube
Vacuform success. I had to get rid of the stock finger pump and I made it better

I drilled holes in the bottom of the suction plate and hooked up my shop vac and there is so much vacume pressure that if I put my hand over the vacume table I can almost pick up the whole thing. This is a good thing.
I tried 5 times to get the timing right for the plastic. After the plate warms up it takes right at 7 mins. to get to the right plastic softness. It works great !!!! Man this opens a lot of doors in customization.
Here is a shot of the holes in the bottom of the plate. I got carried away when I was drilling and went outside of the suction tube. I went back with some sharpened wooden plugs and CA glued them. There is a coupling tube that hooks the shop vac hose to another and this fits perfectly.

Here is the hose hooked to the machine.

Final product looks great. This is the second run . There is a small problem for some reason dusts get caught under the plastic. I need to have a clean table and everything dusted when it is vacuform time .

This is a major step in the right dirrection.
Posted: Wed Apr 30, 2008 7:28 am
by Killerf6
Cool deal PH.
I never considered dust being a problem, but I guess if you have a shop vac going it is going to suck everything it can to it. The piece that you did looks nice in the photo.
How big of an item can you do, are you restricted by the height of your buck? I'm sure I'll think of more questions later, it's just too early in the morning for me now.
Posted: Sat May 03, 2008 1:08 pm
by pickelhaube
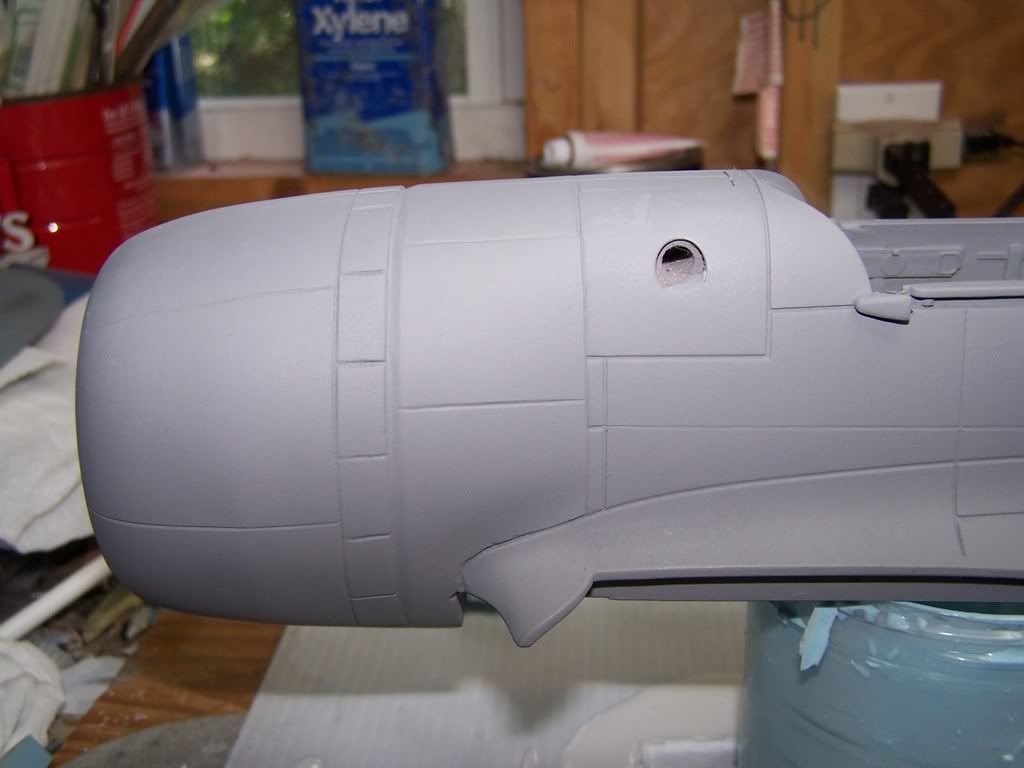
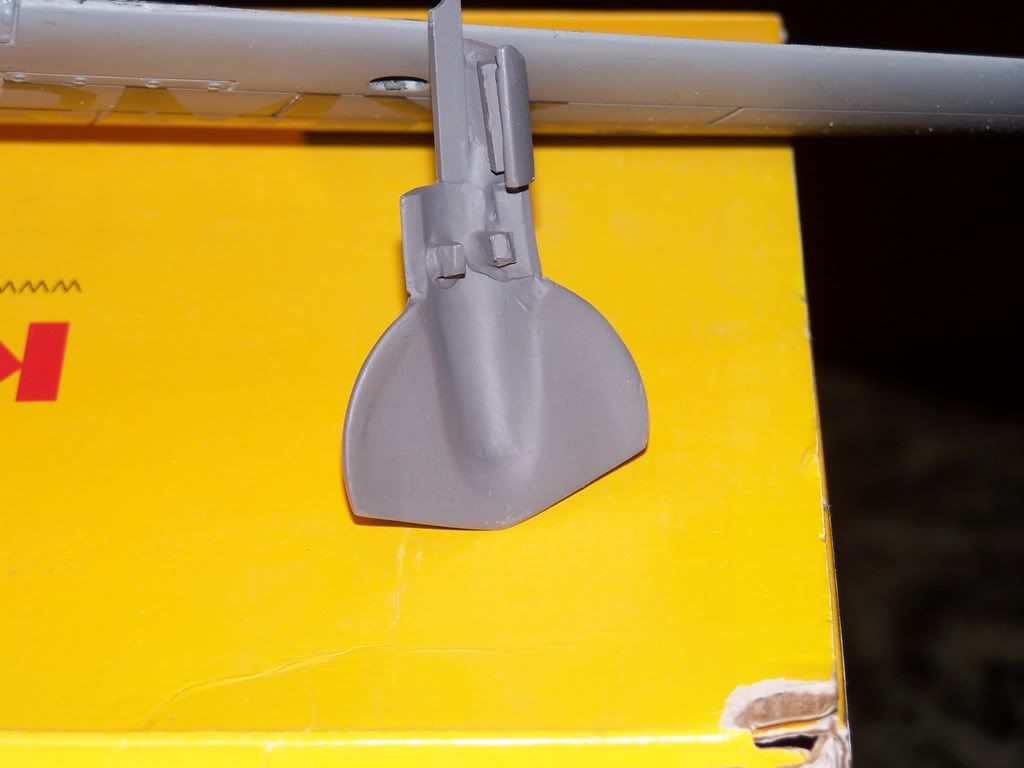
Panel lines finally done .Here we go with the end results of the exaust flaps .
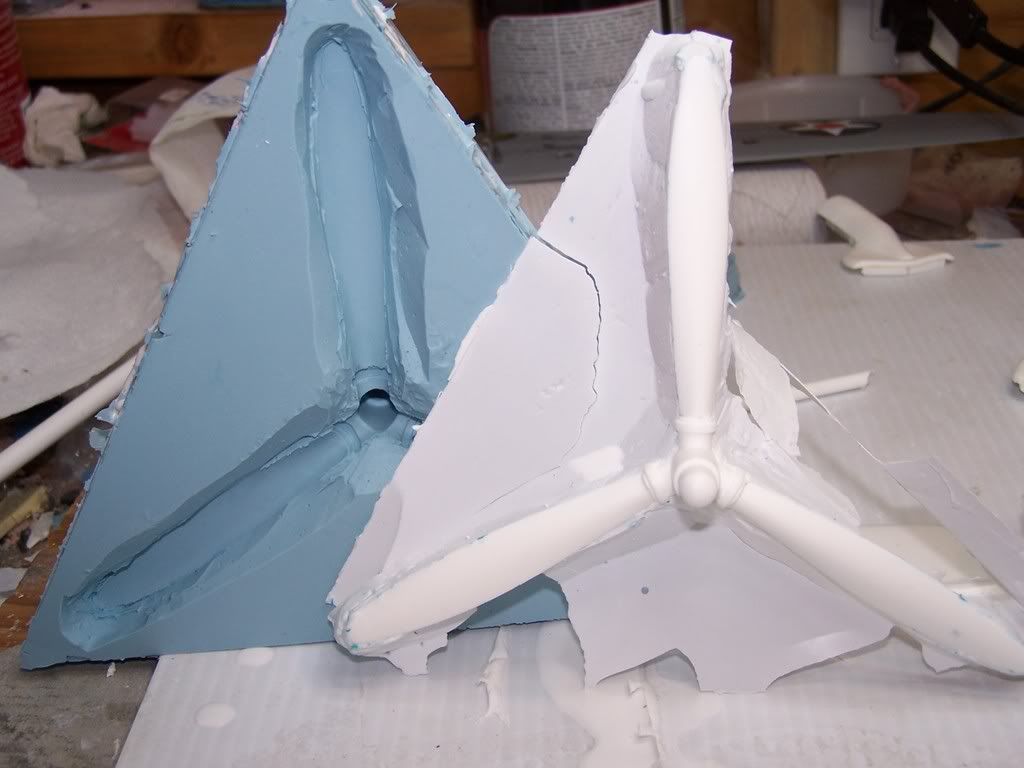
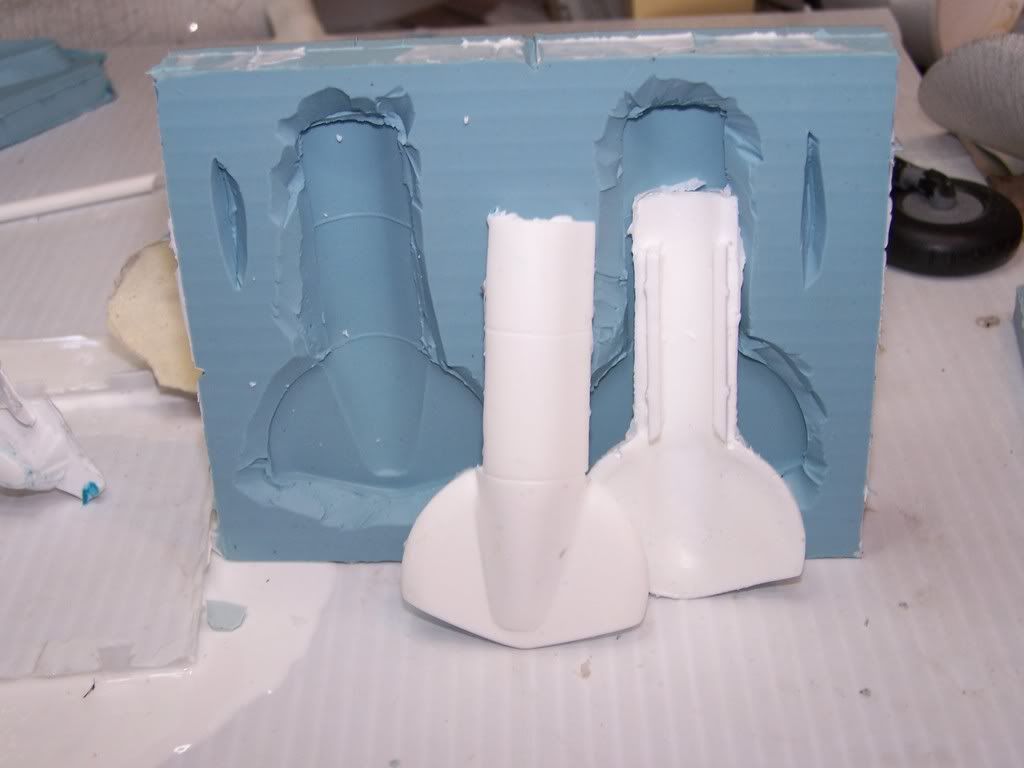
Well into the parts casting. I am trying to do all of the small stuff first before I tackel the fuse. I used small Legos for the form boxes . They work good with almost no bleed through. This is a lot easier than making forms from plastic and wood and they are reusable. I picked these Legos at the second hand store they had a lot of them and they are CHEAP.

Proped fresh out of the mold.
Some of the small stuff. Small chin exaust blister and machine gun fairing.I will put the blast tube in after final assembly.

Wheel covers.
Posted: Sat May 03, 2008 1:15 pm
by pickelhaube
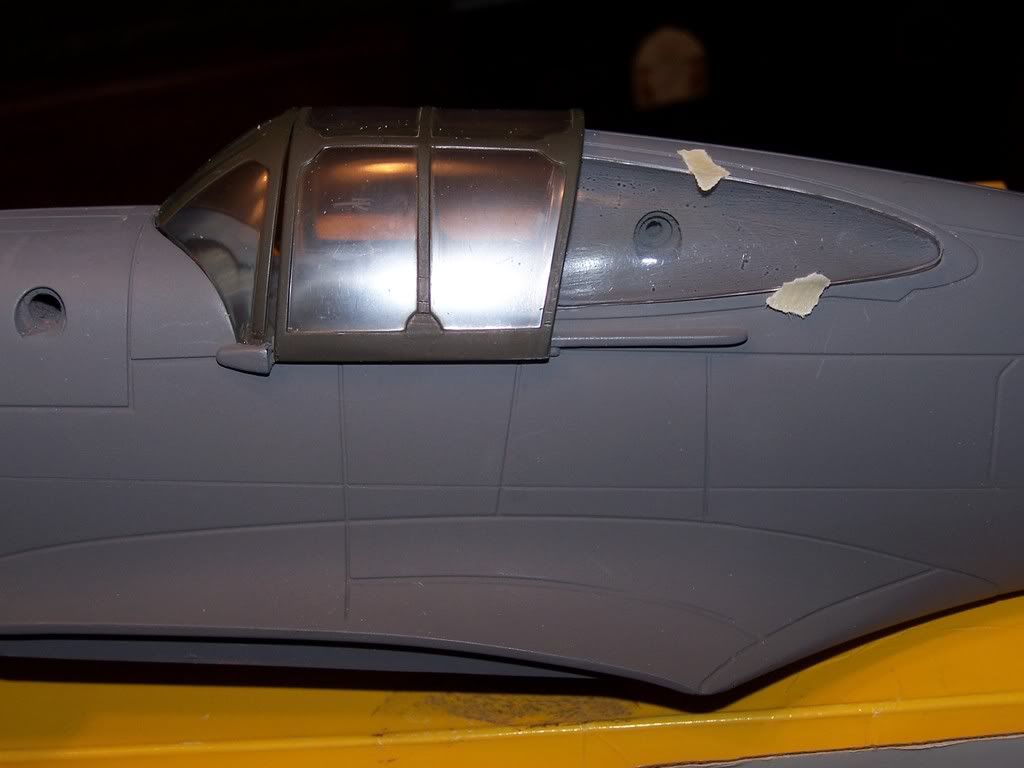
This one snuck up on me. After looking at some of the pics of the P-36 interior I noticed that the head pad in the cockpit was more of an triangle rather than a retangle like the P-40's. Here is the new headrest cast with the old headrest cut off and waiting for final assembley. It is a tad fuzzy. But you get the idea.

Posted: Sun May 04, 2008 5:28 pm
by pickelhaube
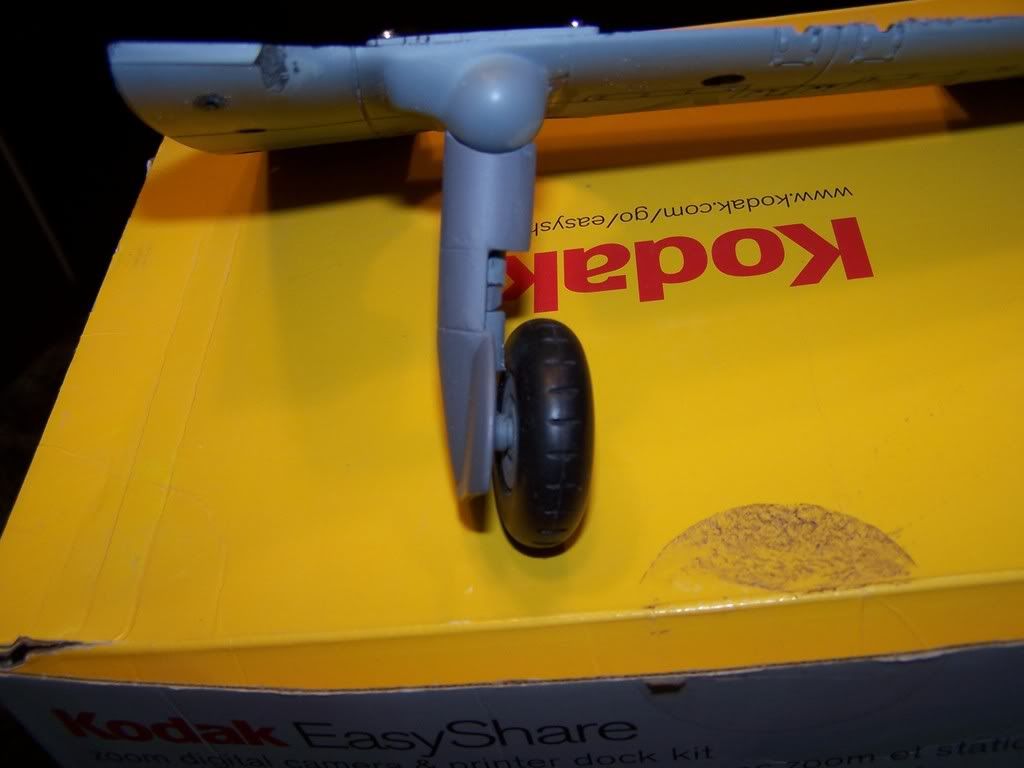
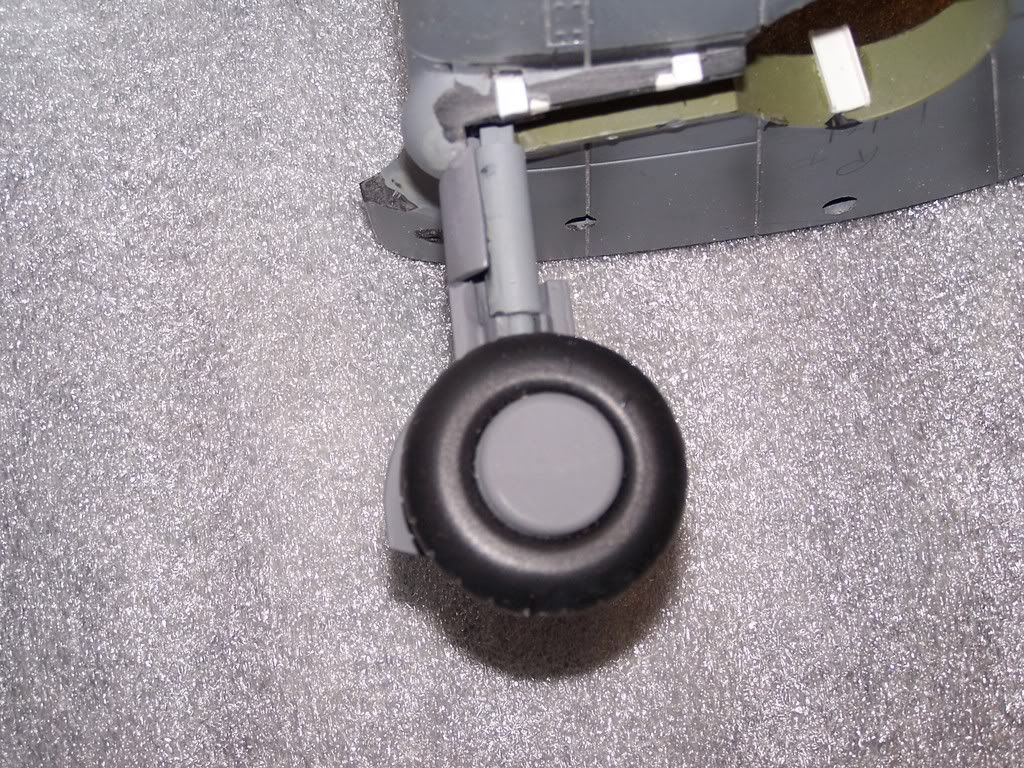
Alright guys here is the way I hopefully solved the multi tasking wheel covers. As I said before I will make 2 pairs od the doors . Opened and closed. I have posted the closed already here is a shot of the covers. The only thing that I did not due is the little cap were the bump on the front of the gear fairing. This is kind of like a clam shell were that bump splits. I can do this as a add on if I have to.
What do you guys thing do the little clam shell thingy or don't worry about it?
Front
Side

The back with attaching studs.
By the way these covers were the biggest pain in the tail. For some reason they were the hardest thing to go on the whole project. I gave up a few times on them and it took 3 attempts togo back on them to get them done. Probably about 14 total to get them were they are now. NOT FUN.

Here is a shot of the hub caps I made. The 21st Flying Tiger had stickers hiding the steel axel . By making thses hub caps and casting them , I can paint them what ever color and simply glue them on.
Posted: Sun May 04, 2008 10:28 pm
by olifant
Posted: Wed May 07, 2008 2:47 pm
by pickelhaube
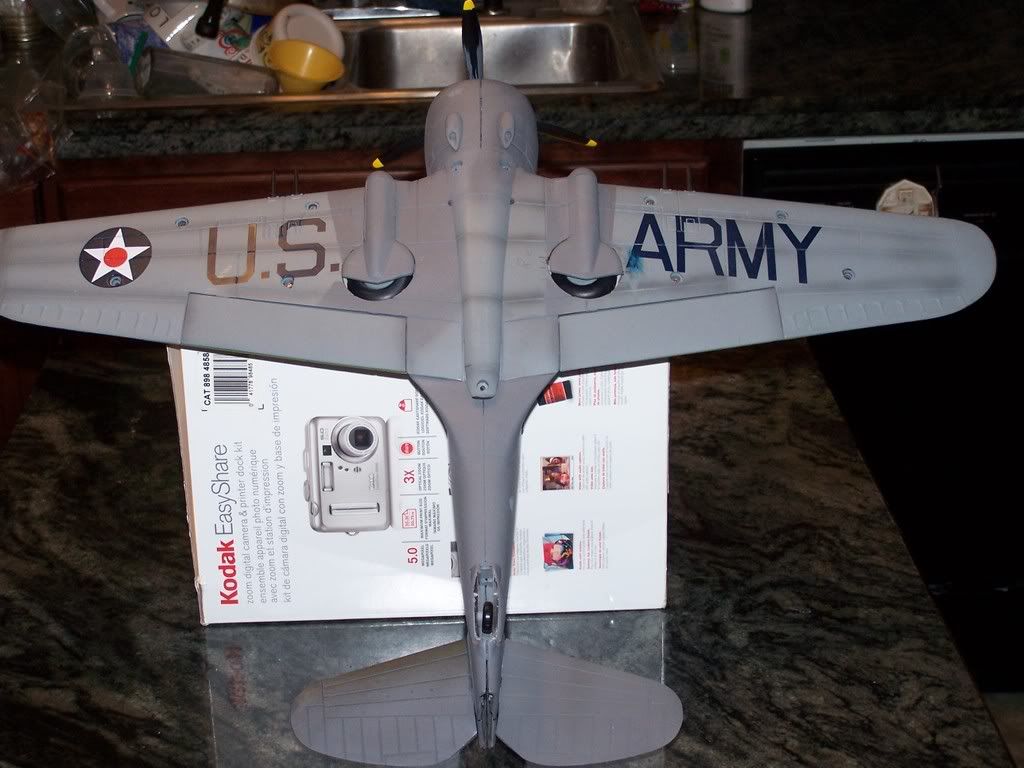
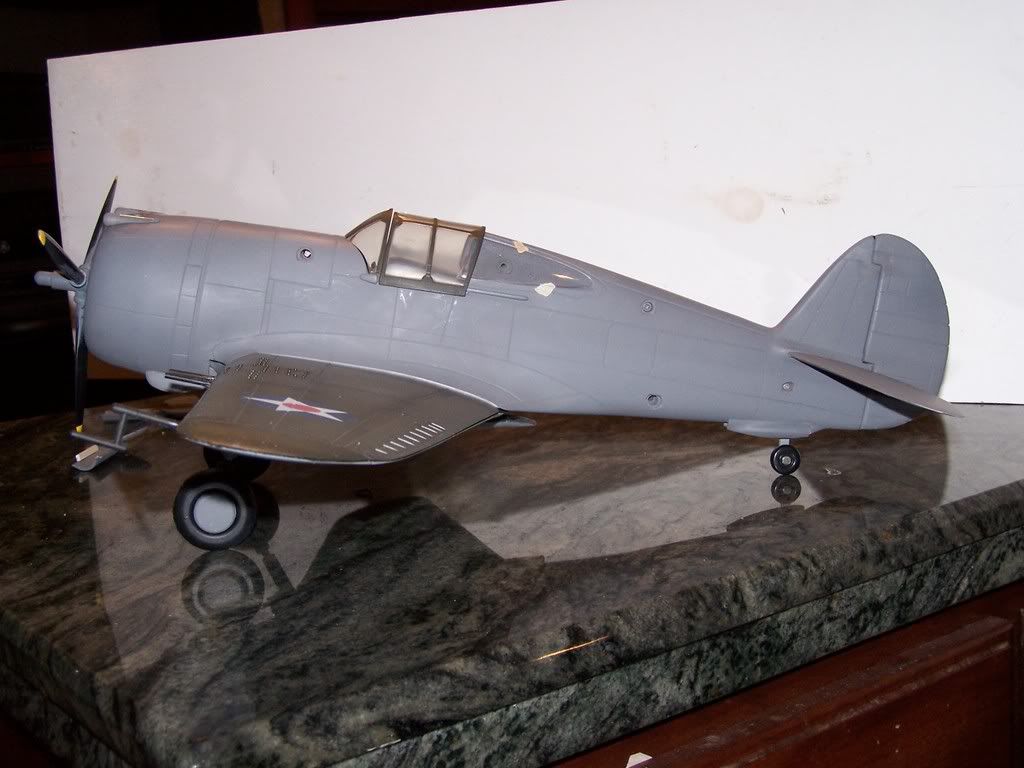
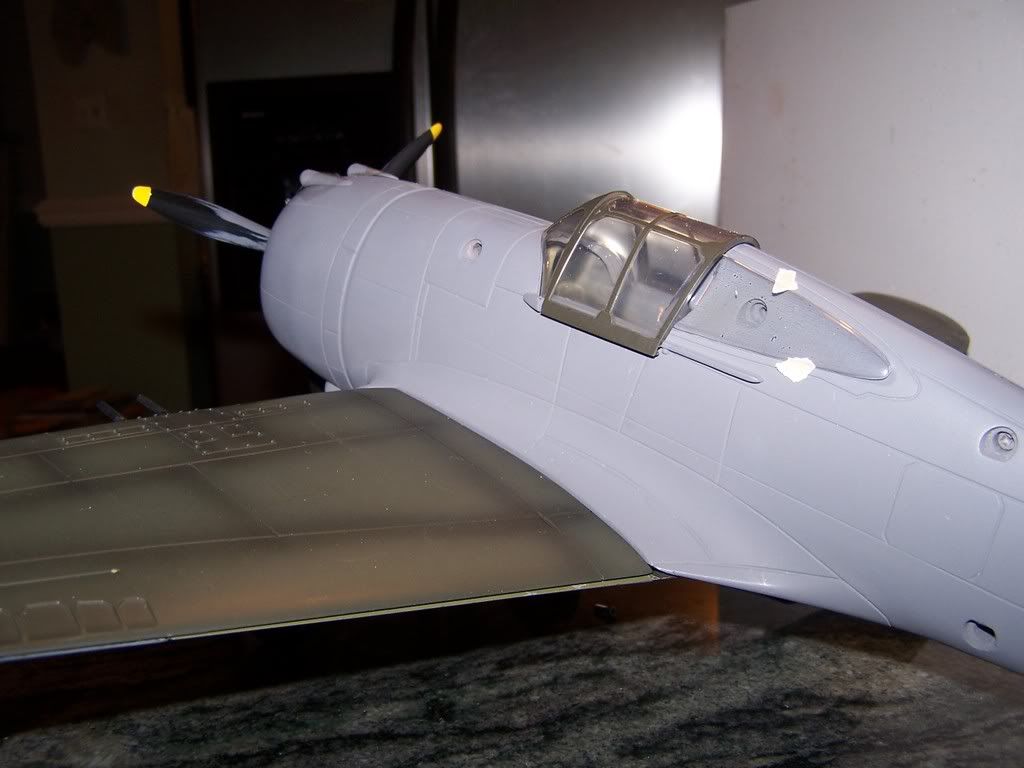
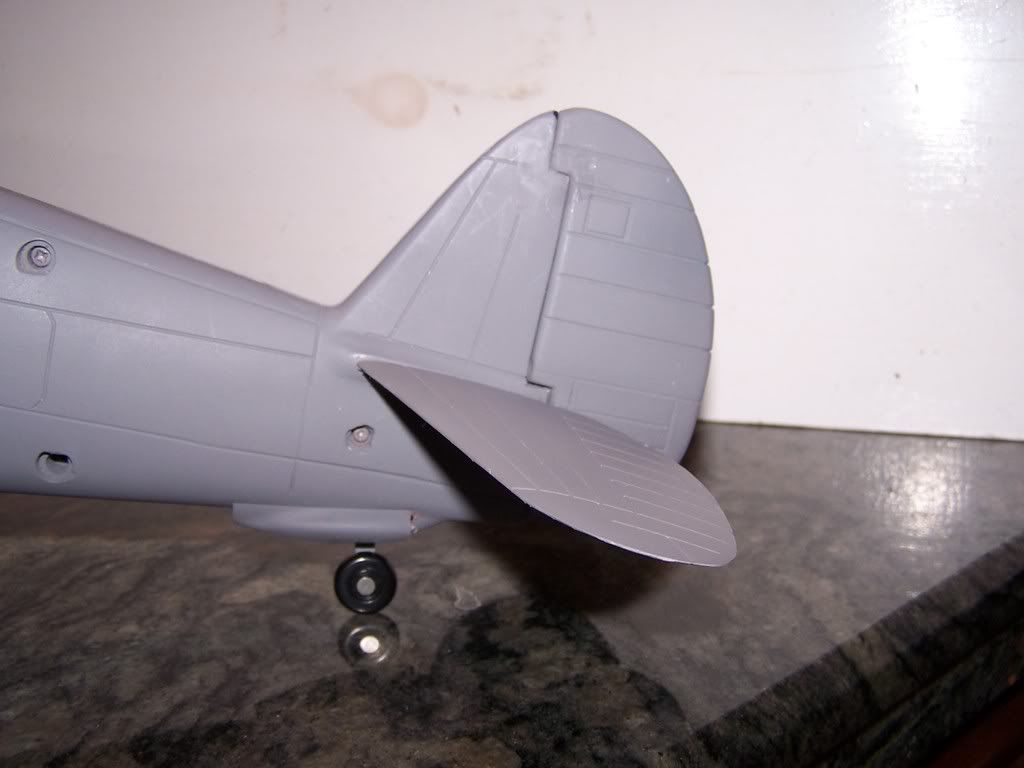
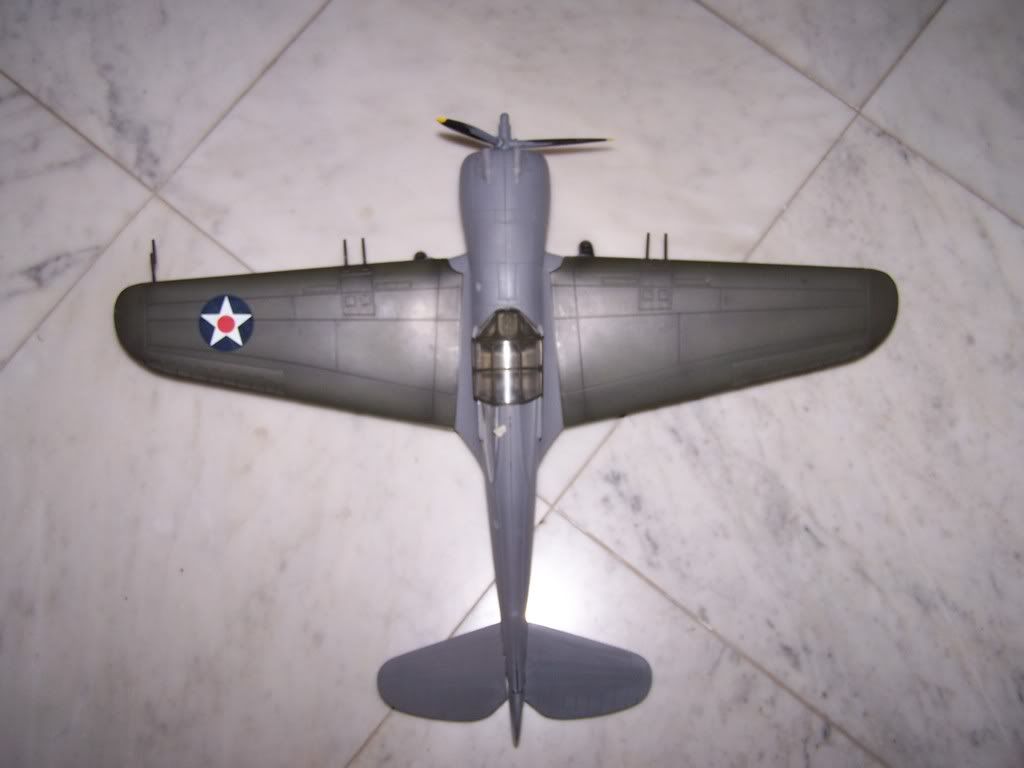
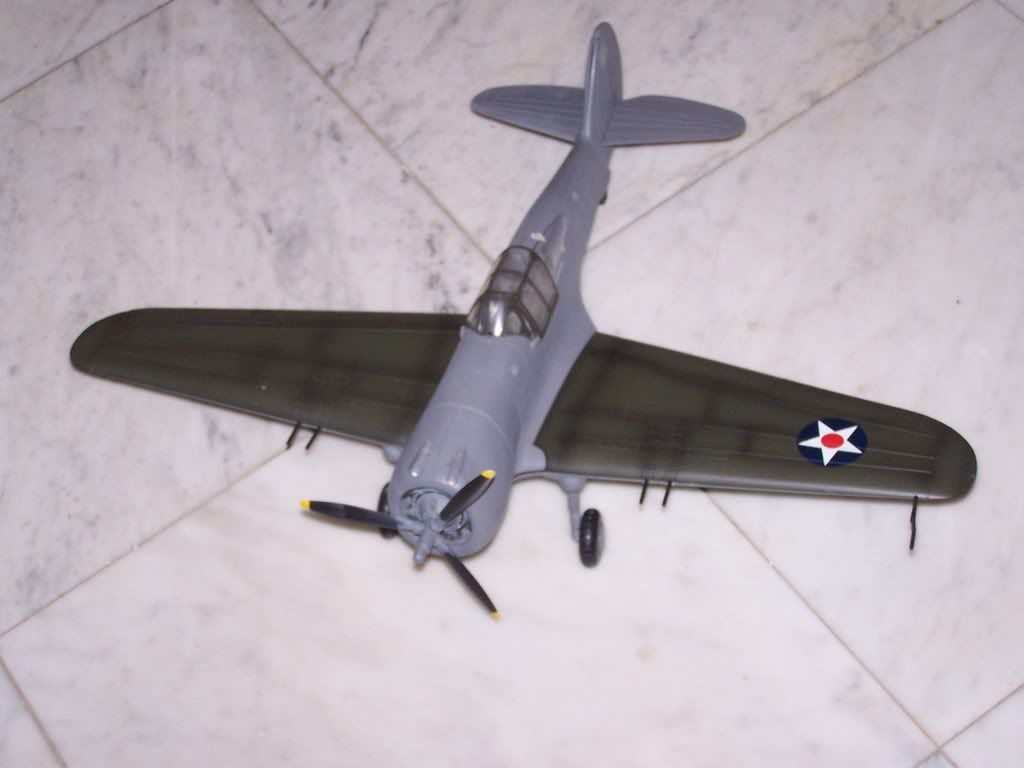
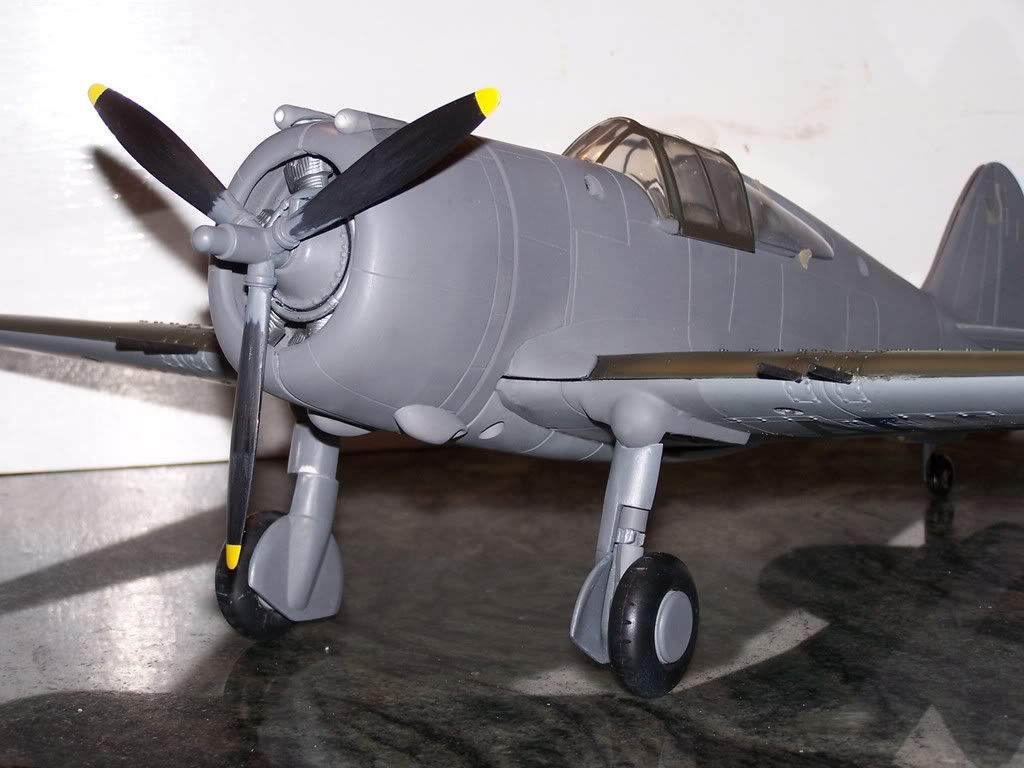
Well guys the build is done. Here are some pics of the finished build.
The only thing left to do is try to make a mold and cast the whole fuse. I have made molds of all the NEW parts in the project. I will able (if the fuse is a success) to make this project in a kit.
Here you go.
Rear vacuformed glass
Exaust fairings
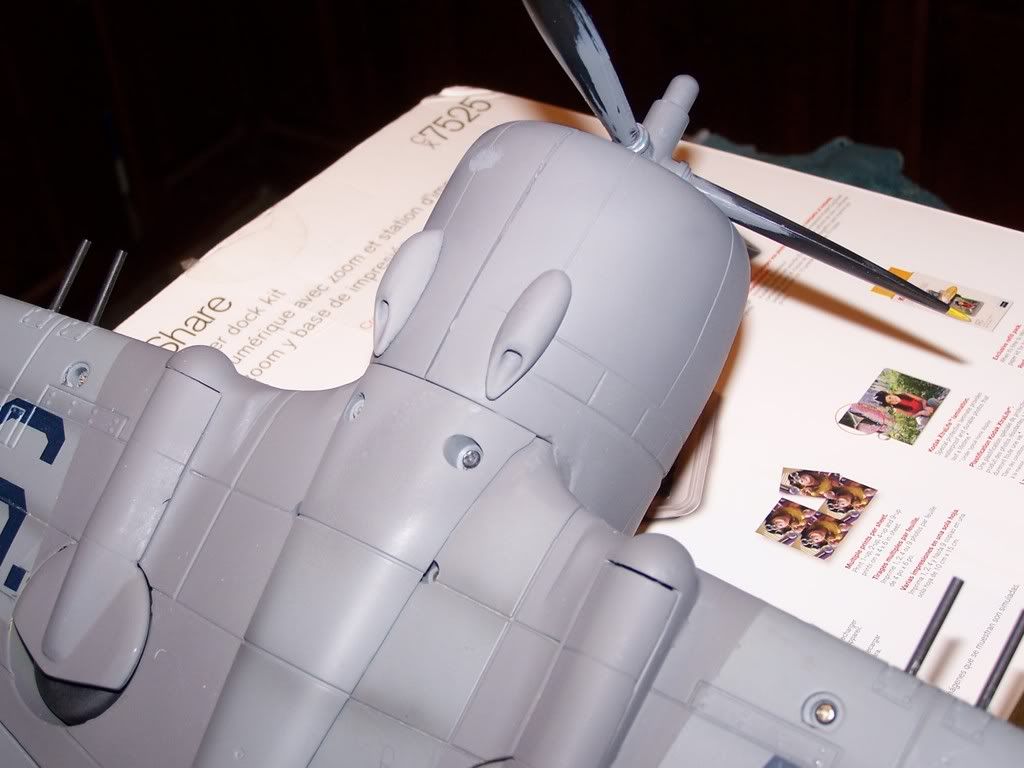
Shot of the bottom with closed gear doors.
Profile
Rear of plane with completed rudder and tail wheel fairing.
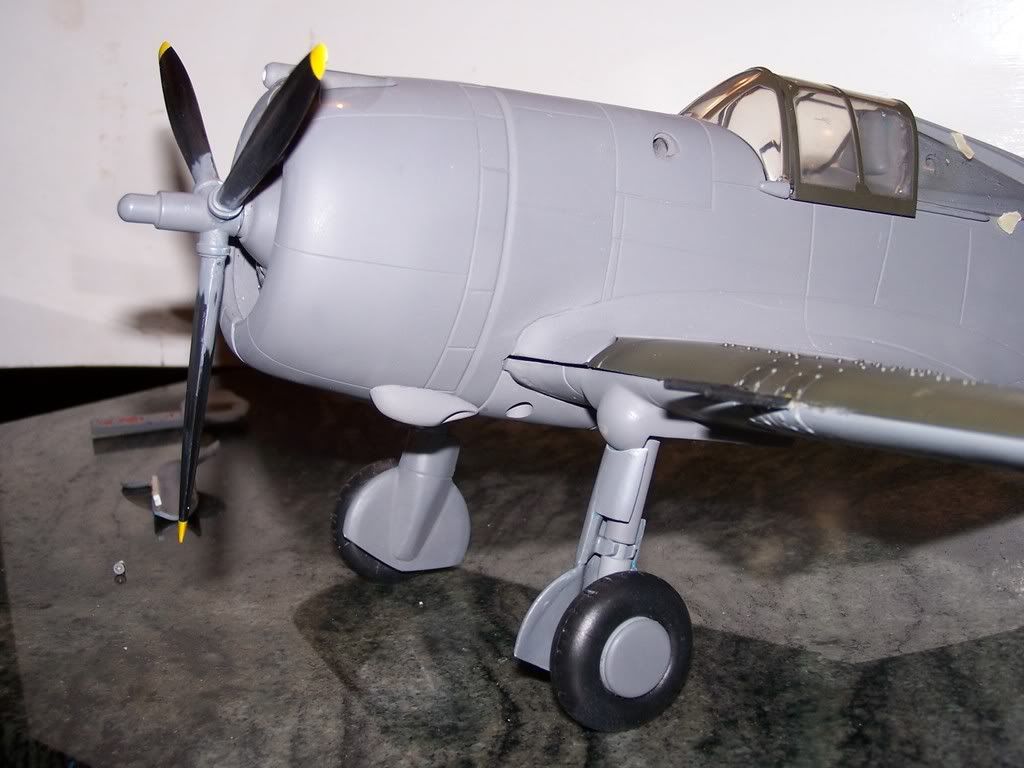
Pic of the front with wheel pants exaust and machine gun tubes.
Posted: Wed May 07, 2008 3:01 pm
by pickelhaube
This has been fun for the most part. I have learned a lesson on this project. Some how some way try to keep everything in the same box. There has been a few things that have simply dissapered.
1. One of the sides of the rear glass. This was no big deal because I could not have used them anyway.
2. I lost one of the rear stabs. Again no big deal .I put a little fillet at the trailing edge near the rudder so I made a cast of the stab and they fit both sides.
3. I lost almost evey single screw.
I have only 6 left. In the pics I have only 1 holding the wings on the bottom of the fuse !!!
The only thing that I have left is to make copies of the fusalage as I said before and then PAINT. Would you guys be interested in a step by step on this or just see the finished results when it is done?
I hope you guys got some ideas on how to do yours. I learned a thing or 2 myself. I like planes very much but my real passtion is armor. But I need to get back on that Tony. Of course , after this is painted.
Plane
Posted: Wed May 07, 2008 4:21 pm
by thehun
Pickel,
2nd to none craftmanship, It looks good now but it will be Beautiful once it's painted, I tip my hat to you sir---For you are a true Customizer---

TheHun
Aka TheWoofer
Posted: Wed May 07, 2008 5:08 pm
by RED
Hey brother!!!SWEEEEET!!! Cant wait to see it when its done --- hell it looks good now!!!

---RED---
Posted: Wed May 07, 2008 7:09 pm
by olifant
Beautiful PH! Now, when are you going to be making these for MTS?
Posted: Wed May 07, 2008 8:03 pm
by Airacobra
Looks awesome, and please try to make a kit of this. Heck, try to kit that KI-61 when your done with that one as well. I am just starting my P-39 scratch build and I hope you don't mind if I ask you a bunch of questions.
Posted: Wed May 07, 2008 9:43 pm
by nooker21
I've been loving all the progress on this...please continue with the step-by-step for the painting as well...
Posted: Fri May 09, 2008 5:32 pm
by pickelhaube
I got off of the phone with Jackson and he will be doing the decals for the P-36. Here is the first one I will do,

Here is the other one I will do. I don't know how to pull the picture up but here is a e-bay auction with the paint sheme I will do.
http://cgi.ebay.com/Academy-1-48-Curtis ... 18Q2el1247
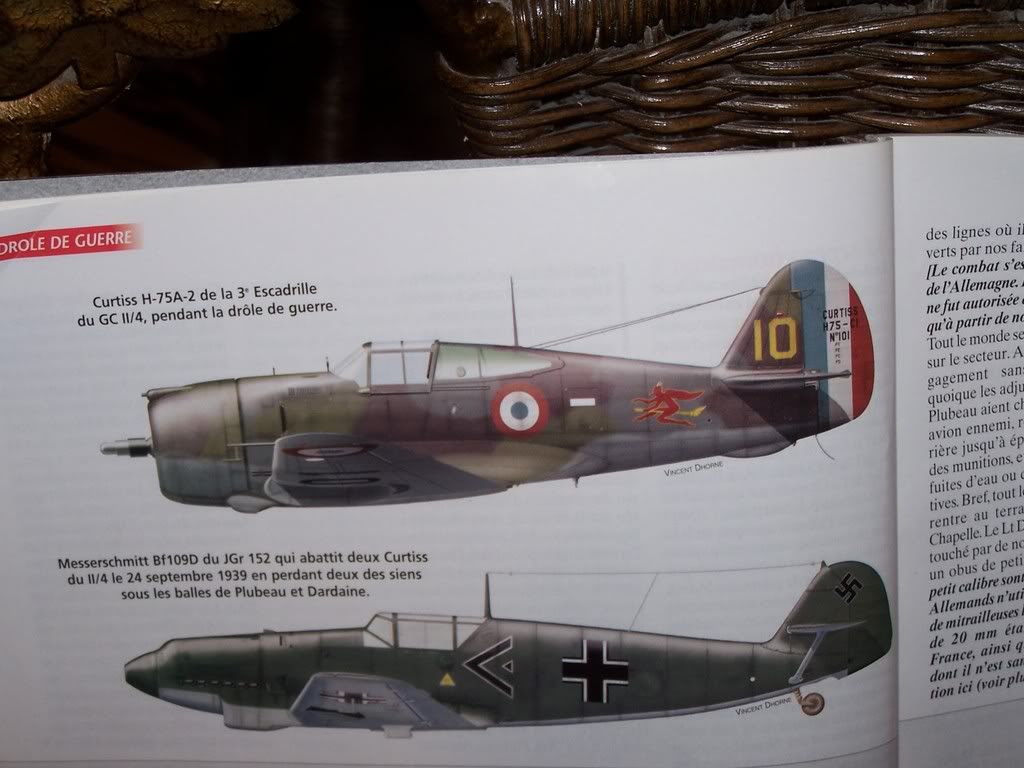
Thanks to Supersonic fifi here is the French version I will do.
I have run out of RTV (again) and am waiting to make molds of the fusalage.
With all of the talk about MTS and there new customizer. I will give you guys a small break down of the cost of this P-36 custom.
1. About 6 months of work. Not a full six months but working on it almost every weekend and quite a few weekdays as well. I would guess about 600 hrs give or take so if I made a minimum of $5 an hr that is about $3000

2. A 21st p-40 $45
3. A 1/32 P-36 off of e-bay $60
4. Enitial RTV and Resin $150
5. Production RTV and Resin. $250
Total for materials $505
total man hours
$3000.
If we did not love it we would not do it.
Posted: Fri May 09, 2008 11:09 pm
by tmanthegreat
Amazing work on the P-36, simply amazing
I can't wait to see the final, painted version!
Posted: Fri May 09, 2008 11:51 pm
by Jackson
0101
Posted: Sat May 10, 2008 12:21 pm
by pokeyjtc
Your work on this plane is really fantastic! Congrats on a job well done. I have been following along and I am most impressed with your work. It's beautiful, man! Great job.
Posted: Sat May 10, 2008 1:18 pm
by pickelhaube
Thanks guys for all of the positive feed back. I can't wait to get the RTV so I can cast the fuse halves. After this is done then I will paint. I am kind of excited myself to see the finished job. I really want to see the Pearl Harbor defender paint scheme but I tell you that French paint scheme will be an eye catcher . I kind of wish that I would have over nighted the RTV. The first American kill of WW2 and the First European kill of WW2 against the Axes powers . This is one little plane with alot of history behind it.
Posted: Sat May 10, 2008 6:03 pm
by aae83
Super job, pickelhaube!
It is really cool to see it all pulled together at last. You've really captured the look of this bird.
If you're game, would love to see what comes next: the mold-making, the casting of copies, the painting.
Another scheme that would be interesting to see would be a Finnish one.
Thanks so much for sharing...
aae83