1/18 BBI Pave Hawk
-
- Officer - 1st Lieutenant
- Posts: 596
- Joined: Mon Jun 30, 2008 10:58 am
- Location: 1, USA, MO, St. Louis
1/18 BBI Pave Hawk
I finally got around to knocking most of this custom out (a BIG thanks goes out to Pickelhaube for all the beautiful parts - FLIR/Radome, window inserts, fuel probe, M134 miniguns, and new winglets).
I matched the paint, filled the screw holes, canted the tail rotor, removed cabin seating, added two .50 cal mounts and guns, a litter, a fastrope/rappelling bar/rings in the interior of main cabin (no pics of this), and fire extinguishers. I still need to do the hydraulic lines along the fuel probe, add a jungle penetrator, and some more interior detail - radios, etc..
I also weathered it a bit.
Here's some of my "inspiration pics."
Last edited by pcoughran on Wed Mar 10, 2010 6:27 pm, edited 1 time in total.
"Where's dat waskily wabbit?"
____________________________________________
Good Trades: Ostketten, Pickelhaube, Cornbreadfred, Sledgehammer, Pizzaguy, caesarbc3,jwcarpenter
____________________________________________
Good Trades: Ostketten, Pickelhaube, Cornbreadfred, Sledgehammer, Pizzaguy, caesarbc3,jwcarpenter
-
- Officer - Brigadier General
- Posts: 11238
- Joined: Tue Oct 05, 2004 7:38 pm
- Location: Central California
-
- Officer - Brigadier General
- Posts: 9649
- Joined: Mon Jan 22, 2007 5:52 am
- Location: New Orleans
-
- Officer - 1st Lieutenant
- Posts: 596
- Joined: Mon Jun 30, 2008 10:58 am
- Location: 1, USA, MO, St. Louis
Pickel,
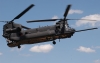
pickelhaube wrote:Man the pylon stubs look GREAT !! It looks like they grew on the helo . How did you match the paint ? How did you paint the nav lights ?
GREAT JOB !!!
After you and DeanKleines figured out you can get Home Depot to paint match and I successfully did my F14 with his make-up pad method, I decided to use this on the pave hawk.
When you go to Home Depot (I brought the rear tail elevator as it has all three colors) just ask for the "sample" size container of Acrylic and make sure you get the "flat" finish - I think it is Behr brand - he only asked if I wanted Flat or "semi-gloss" I think - so go for flat it matches great, especially after doing a ProModellers Wash over everything. The grey has some weathering that BBI did so if you don't weather afterwards you may have a lighter grey if you paint an area near their weathered grey. After I post weathered with ProModeller's Wash (black) I couldn't tell at all.
I didn't glue anything on yet, as I wanted the option to put on the extended range fuel tanks and their winglets, or remove the fuel probe. The window inserts fit snug enough to not need glue. On the center mounted FLIR pod or Radome, I cut your panel section off as it was just too thick and looked a little "toyish" and sanding it was taking to long so just trimmed it off completely.
For the Nav Lights, I tried unsuccessfully to do a clear light using various methods (glues, decopauge, etc..) I was going to paint clear red and clear green over these but could never get the right shape to the finished result so just used your (Pickel's) Nav Lights and used a ModelMaster Stop Light Red and a Dark Green.
"Where's dat waskily wabbit?"
____________________________________________
Good Trades: Ostketten, Pickelhaube, Cornbreadfred, Sledgehammer, Pizzaguy, caesarbc3,jwcarpenter
____________________________________________
Good Trades: Ostketten, Pickelhaube, Cornbreadfred, Sledgehammer, Pizzaguy, caesarbc3,jwcarpenter
-
- Officer - 1st Lieutenant
- Posts: 596
- Joined: Mon Jun 30, 2008 10:58 am
- Location: 1, USA, MO, St. Louis
Yeah, I have another pave hawk I want to convert to a DAP. I've been trying to talk Pickel into doing yet another winglet for this DAP version and a 30mm Chain gun and rocket pod. So far no luck. Are you doing the DAP or the SOAR troop carrier version?Tambo wrote:Nice job. I'm working on my 160th version right now.
What color black are you going to use. I was looking at colors the other day and I think Tamiya Acrylic NATO black might be good or there was another Grey called German Grey I think that was pretty good. The flat black is just too black. Need to find a good match for the CARC black. Let me know what you think.
"Where's dat waskily wabbit?"
____________________________________________
Good Trades: Ostketten, Pickelhaube, Cornbreadfred, Sledgehammer, Pizzaguy, caesarbc3,jwcarpenter
____________________________________________
Good Trades: Ostketten, Pickelhaube, Cornbreadfred, Sledgehammer, Pizzaguy, caesarbc3,jwcarpenter
I'm using some flat black CARC paint in a can that we use on the 1:1 versions. I'll see if I can get some more. I'm doing the MH-60M our newest one with just the mini-guns. I'm also custom making all 50 of the dam antennas.
Good trades: C00per, pcb122605, digger, vulgarvulture X2, General Blasto X2, Light.Inf.Scout, V2 Man, Sentinel, xddave, grunt1
[img]http://216.77.188.54/coDataImages/p/Groups/230/230828/folders/190465/2439227TAMBOSIGsmall.JPG[/img]
[img]http://216.77.188.54/coDataImages/p/Groups/230/230828/folders/190465/2439227TAMBOSIGsmall.JPG[/img]
-
- Officer - 1st Lieutenant
- Posts: 596
- Joined: Mon Jun 30, 2008 10:58 am
- Location: 1, USA, MO, St. Louis
Guess nothing beats the real deal. If your going all out on Antenna I'm guessing your doing all the IR sensors and extra Chaff dispensers as well? If so, it's going to look sweet.Tambo wrote:I'm using some flat black CARC paint in a can that we use on the 1:1 versions. I'll see if I can get some more. I'm doing the MH-60M our newest one with just the mini-guns. I'm also custom making all 50 of the dam antennas.
Mine still looks naked, maybe I'll get around to making some more add ons eventually.
"Where's dat waskily wabbit?"
____________________________________________
Good Trades: Ostketten, Pickelhaube, Cornbreadfred, Sledgehammer, Pizzaguy, caesarbc3,jwcarpenter
____________________________________________
Good Trades: Ostketten, Pickelhaube, Cornbreadfred, Sledgehammer, Pizzaguy, caesarbc3,jwcarpenter
Yup...chaff, flares, UHF, VHF, FM, HF, SATCOMs, PLS, Stormscope and on and on. I even made all the cockpit displays. (I can send you a set if you want)
Good trades: C00per, pcb122605, digger, vulgarvulture X2, General Blasto X2, Light.Inf.Scout, V2 Man, Sentinel, xddave, grunt1
[img]http://216.77.188.54/coDataImages/p/Groups/230/230828/folders/190465/2439227TAMBOSIGsmall.JPG[/img]
[img]http://216.77.188.54/coDataImages/p/Groups/230/230828/folders/190465/2439227TAMBOSIGsmall.JPG[/img]
-
- Officer - 1st Lieutenant
- Posts: 596
- Joined: Mon Jun 30, 2008 10:58 am
- Location: 1, USA, MO, St. Louis
Oh, I think I saw you post JPEGs of these in another thread a long time ago - they looked cool. I appreciate your offer and I'll keep it in mind but I probably won't be getting to my next project for a long time and may not even tear into the cockpit at all.Tambo wrote:Yup...chaff, flares, UHF, VHF, FM, HF, SATCOMs, PLS, Stormscope and on and on. I even made all the cockpit displays. (I can send you a set if you want)
If you post a progress thread on yours, I'll follow it anxiously!
Thanks,
Phil
"Where's dat waskily wabbit?"
____________________________________________
Good Trades: Ostketten, Pickelhaube, Cornbreadfred, Sledgehammer, Pizzaguy, caesarbc3,jwcarpenter
____________________________________________
Good Trades: Ostketten, Pickelhaube, Cornbreadfred, Sledgehammer, Pizzaguy, caesarbc3,jwcarpenter
-
- Corporal
- Posts: 38
- Joined: Wed Mar 17, 2010 9:01 am
-
- Officer - 1st Lieutenant
- Posts: 596
- Joined: Mon Jun 30, 2008 10:58 am
- Location: 1, USA, MO, St. Louis
Thanks vince_chua and welcome aboard! But most of the talent is in Pickelhaube's court as he is the one who built the custom window inserts, mini-guns, fuel probe, and FLIR/radomes. I mostly just painted except for the .50cal mounts, litter, and the FRIES (fast rope insertion/extraction system).vince_chua wrote:Wow!!! Amazing work.
You are so talented.
Will be looking out for more of your customs.
"Where's dat waskily wabbit?"
____________________________________________
Good Trades: Ostketten, Pickelhaube, Cornbreadfred, Sledgehammer, Pizzaguy, caesarbc3,jwcarpenter
____________________________________________
Good Trades: Ostketten, Pickelhaube, Cornbreadfred, Sledgehammer, Pizzaguy, caesarbc3,jwcarpenter
-
- Corporal
- Posts: 71
- Joined: Wed Mar 17, 2010 7:34 pm
-
- Officer - 1st Lieutenant
- Posts: 596
- Joined: Mon Jun 30, 2008 10:58 am
- Location: 1, USA, MO, St. Louis
Fred,PLASTICFANATIC wrote:Amazing and superb work, this is a great looking machine!!
Thanks for the kind words - means a lot coming from someone as talented as you. I only wish I had half your talent - even 1/4.
Phil
"Where's dat waskily wabbit?"
____________________________________________
Good Trades: Ostketten, Pickelhaube, Cornbreadfred, Sledgehammer, Pizzaguy, caesarbc3,jwcarpenter
____________________________________________
Good Trades: Ostketten, Pickelhaube, Cornbreadfred, Sledgehammer, Pizzaguy, caesarbc3,jwcarpenter
pcoughran, How did you tilt the rear rotor? I know you've posted it before, but I can't find it.
Also, since Pickel now has the nav lights seperate, does anyone know how to size the bbi winglet lights to fit and still be clear? Do you just sand them to size then polish to get them shiny and clear?
[url=http://www.fighting118th.com]Fighting118th:[/url] Joe Deserves Better!
-
- Officer - 1st Lieutenant
- Posts: 596
- Joined: Mon Jun 30, 2008 10:58 am
- Location: 1, USA, MO, St. Louis
pcsguy88,pcsguy88 wrote:pcoughran, How did you tilt the rear rotor? I know you've posted it before, but I can't find it.
Also, since Pickel now has the nav lights seperate, does anyone know how to size the bbi winglet lights to fit and still be clear? Do you just sand them to size then polish to get them shiny and clear?
you just pull the tail rotor out. There is already a "canted" section there you just have to "saw" the foward portion off where the tail rotor first touches with a very fine tooth modelling saw.
Next I drilled out the hole with what I believe was a 5/32 drill bit (you have to drill at the angle you want - it should match the canted section of the connection which you just sawed to. Finally I had to use a piece of spare aluminum tubing that is 5/32 outer diameter and inner diameter matched the tail rotor "pipe" exactly. This is tubing I got at my local hobby shop for other projects just happened to fit the tail rotor perfectly and then drill out the 5/32 hole and it slides in.
If you have a local hobby shop that has stuff for RC planes just take in your tail rotor and goto the aluminum rods bin and find your match there.
For the winglet nav lights I just used Pickel's supplied lights and painted them. I tried to make my own clear ones which I could use clear red and green paint on to no avail - too many failed attempts so I gave up.
If you have any other questions let me know or if you need pics.
Good Luck
"Where's dat waskily wabbit?"
____________________________________________
Good Trades: Ostketten, Pickelhaube, Cornbreadfred, Sledgehammer, Pizzaguy, caesarbc3,jwcarpenter
____________________________________________
Good Trades: Ostketten, Pickelhaube, Cornbreadfred, Sledgehammer, Pizzaguy, caesarbc3,jwcarpenter