1/18 Ho-229 Building Instructions Wing Const. Helpful Hint

Your Main Forum For Discussing 1:18 Scale Military Figures and Vehicles.
pickelhaube
Officer - Brigadier General
Posts: 9638
Joined: Mon Jan 22, 2007 5:52 am
Location: New Orleans

1/18 Ho-229 Building Instructions Wing Const. Helpful Hint

Post by pickelhaube » Sat Jan 14, 2012 11:49 am

Here we go.

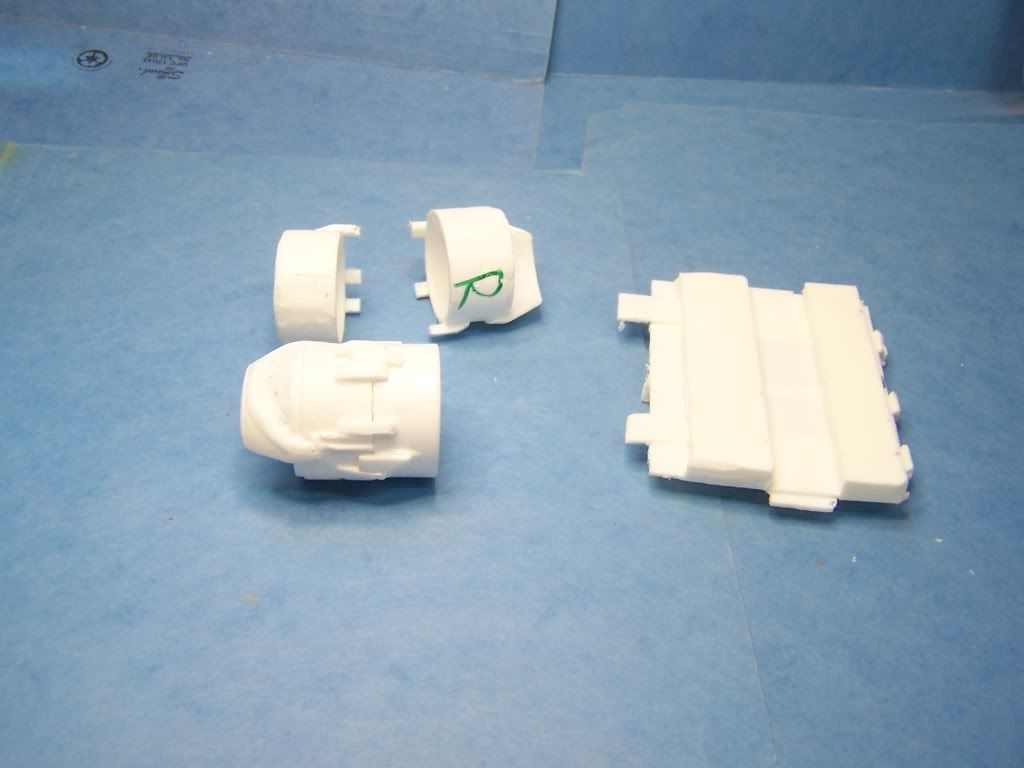
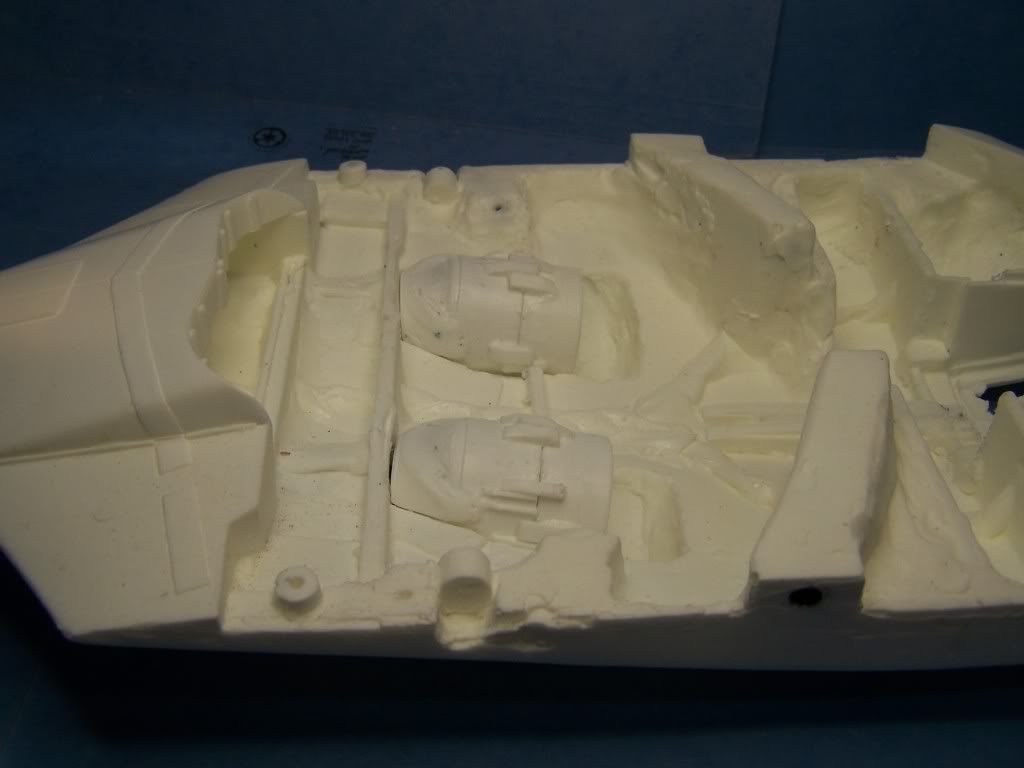
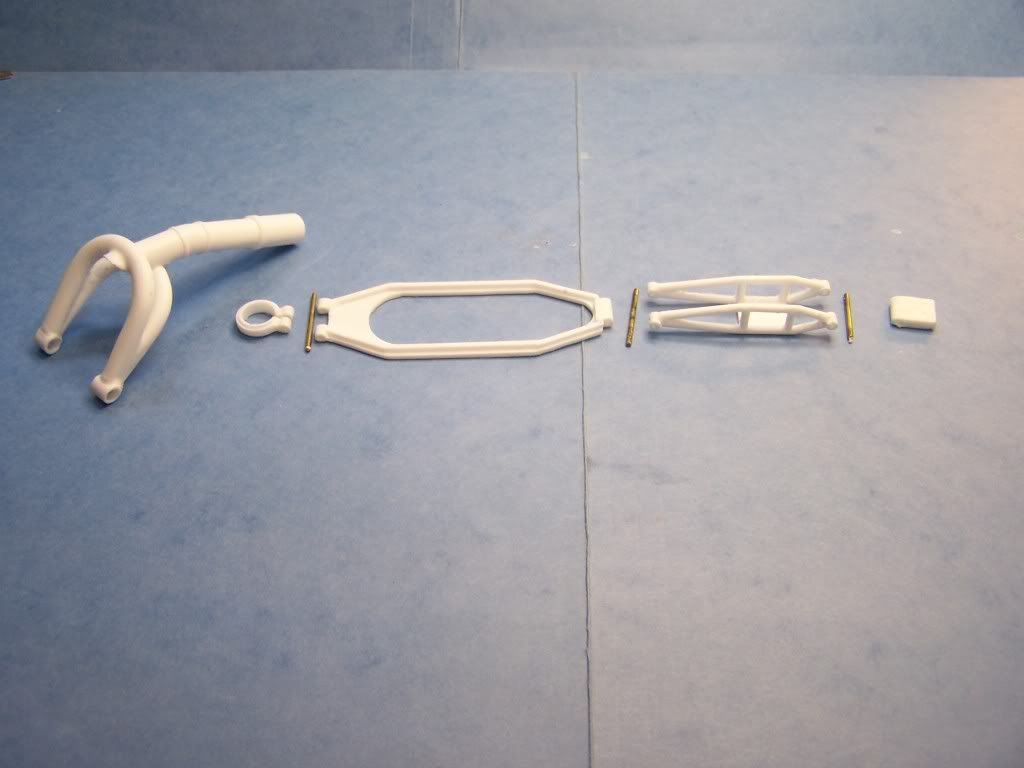
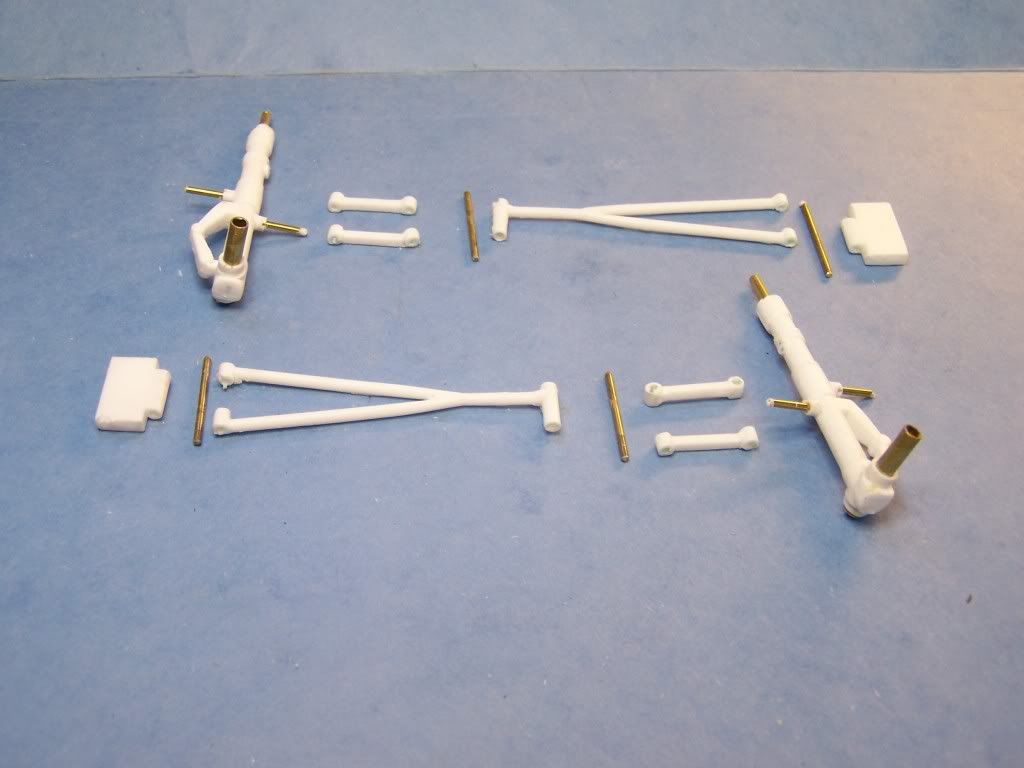
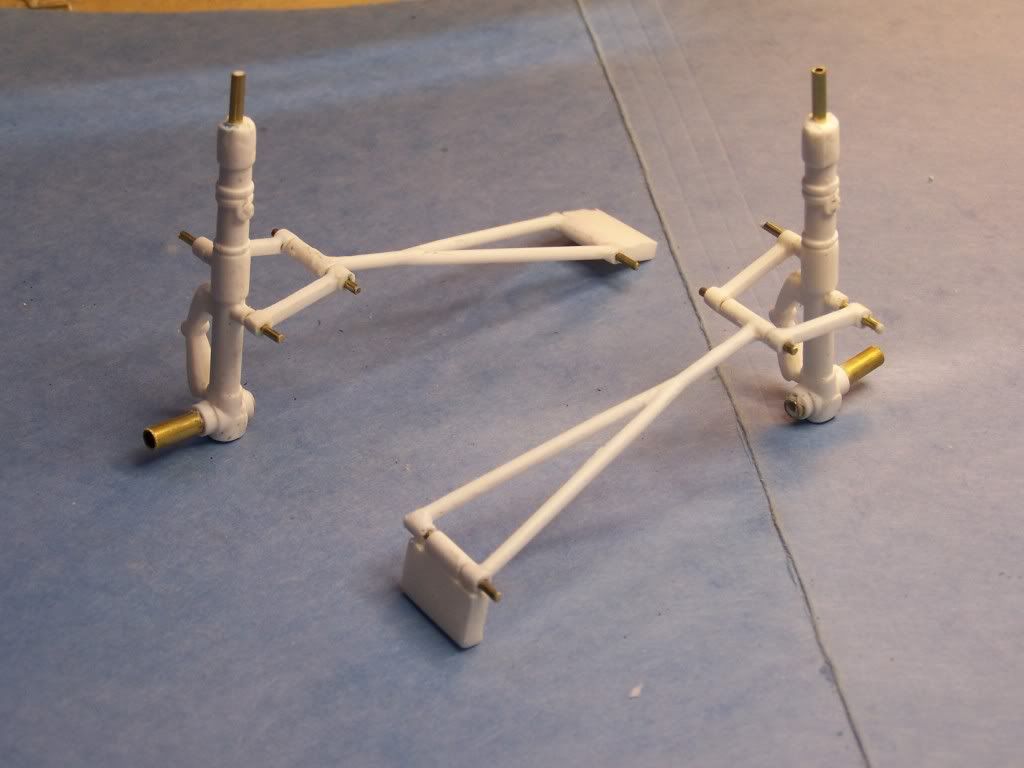
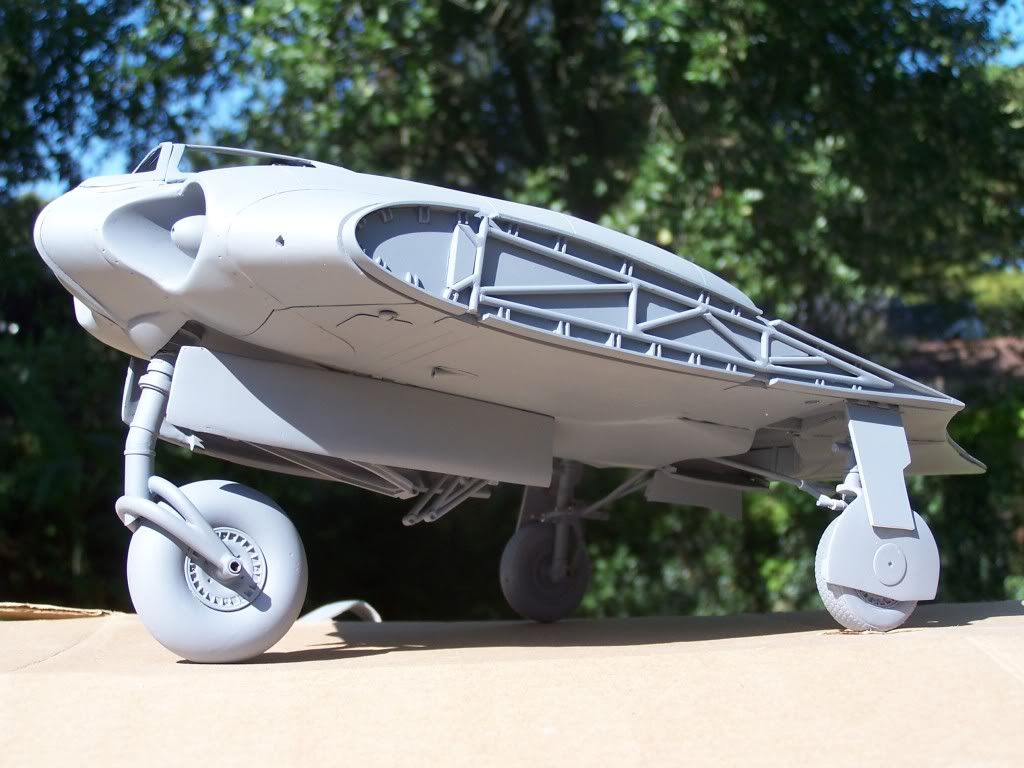
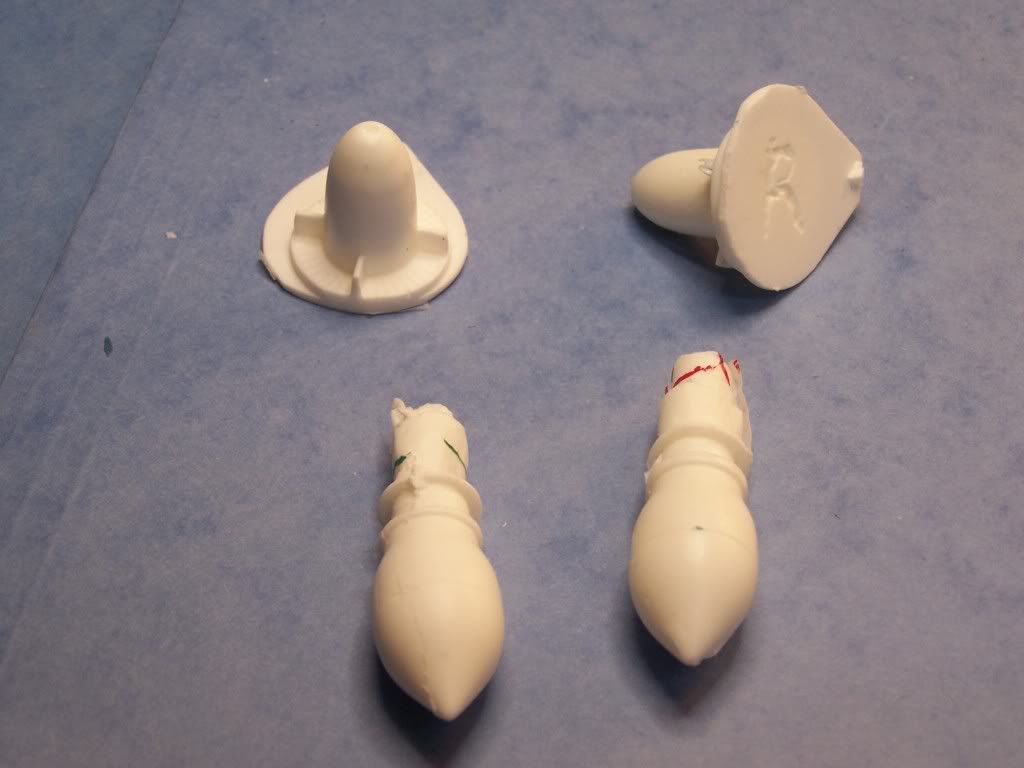
There are about 75 parts to the Horten kit.

First before we do anything remember always wash resin parts before you fill or sand anything. The pouring process has an oily residue that needs to be washed off. Dawn Dish washing detergent works fine. I also use denatured alcohol if I do not have time for the pieces to dry.

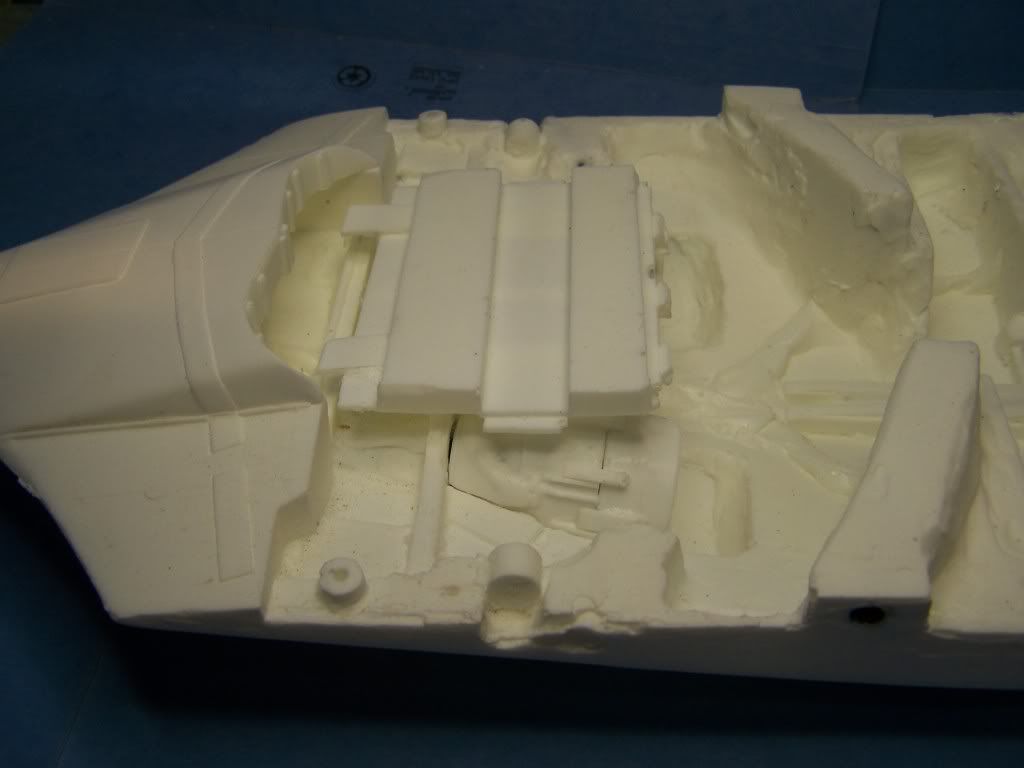
This is the instructions so many of the parts I am using have not been sanded or finished to speed instructions.

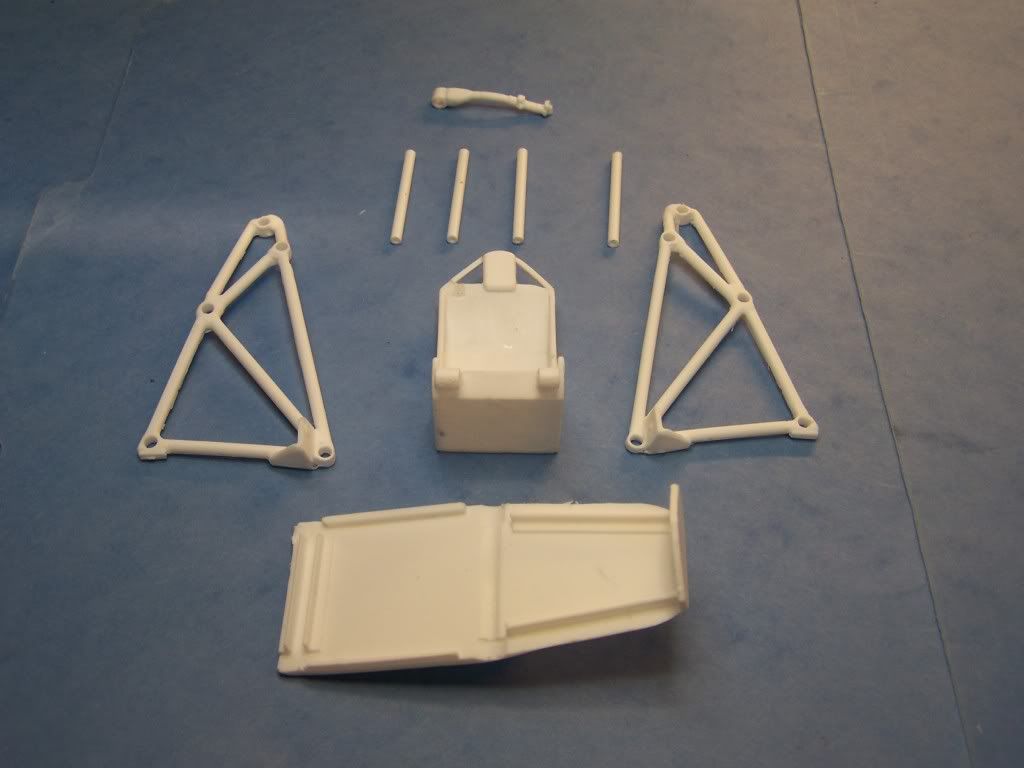
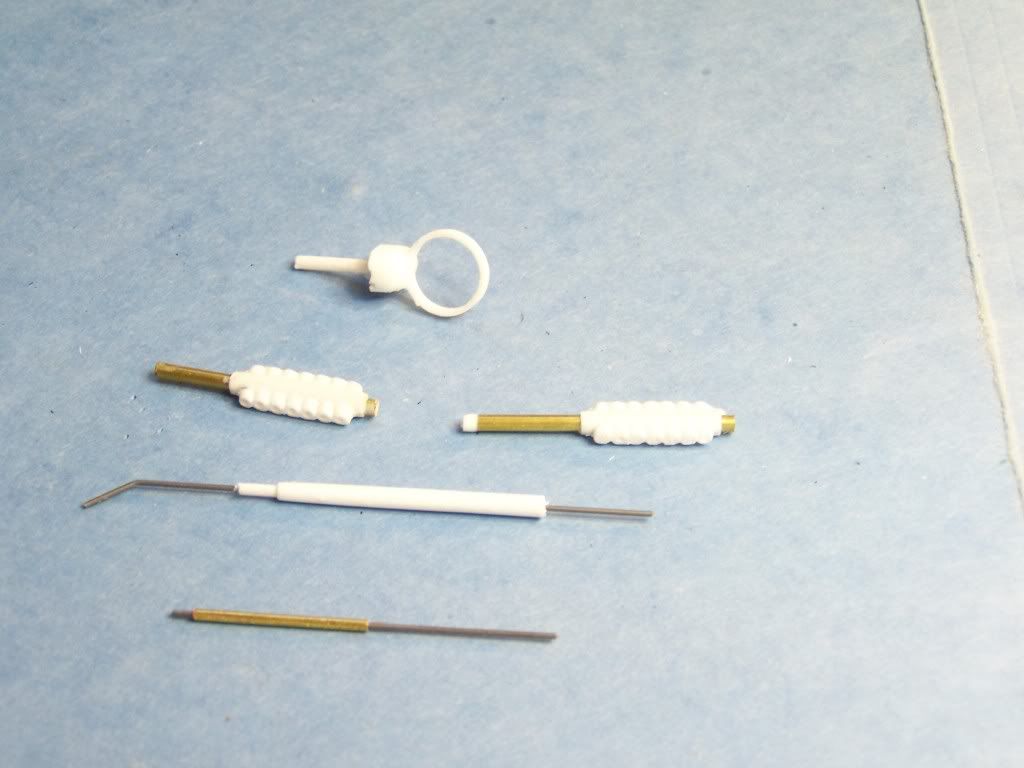
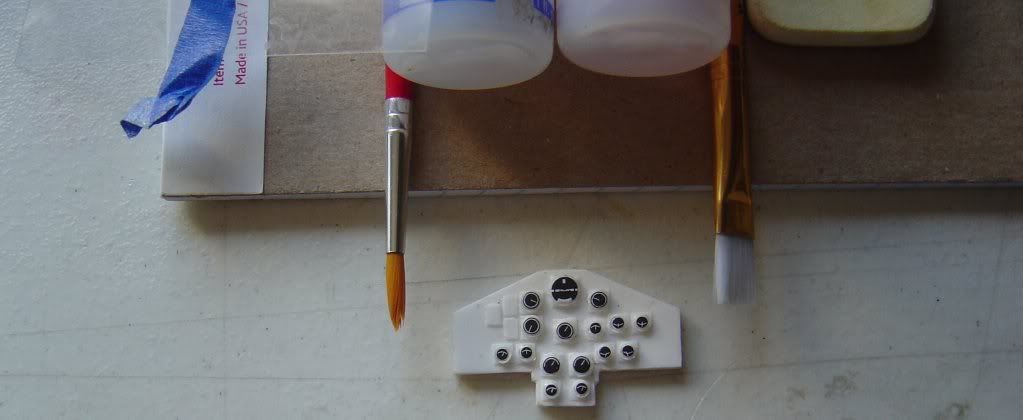
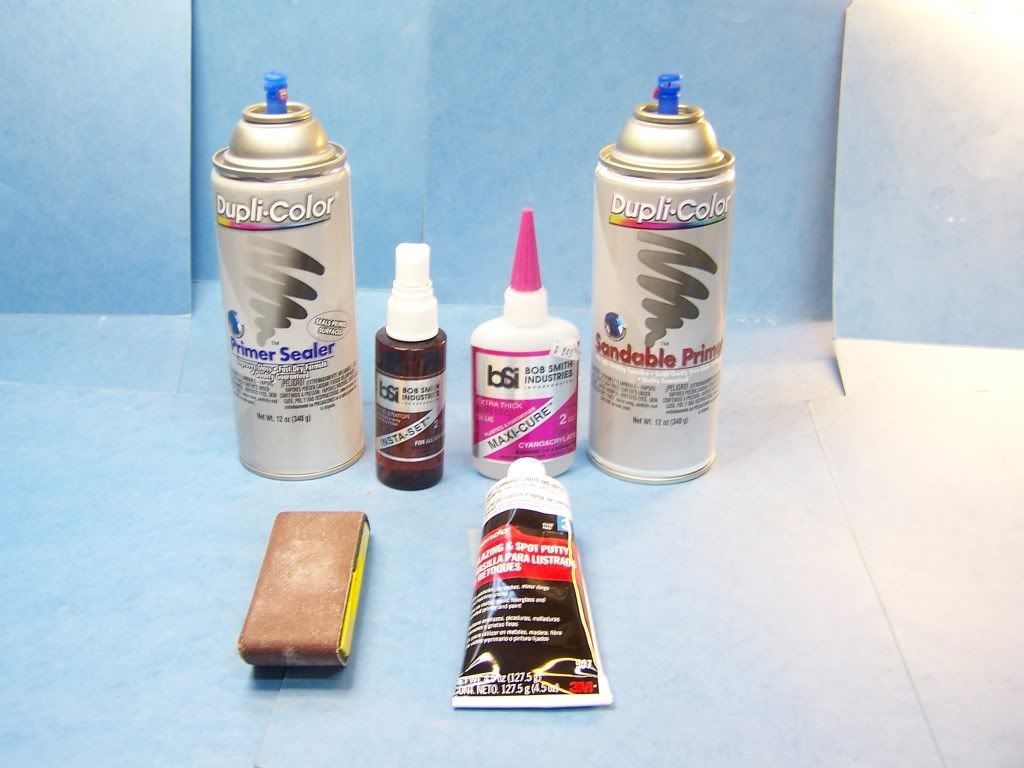
This is what you need to get started.

Filler -- I use Bondo glaze Squadron White or Green stuff works as well.
Primer paint --I use automotive
CA glue thick -- This is the only glue that will work on resin
Kicker-- This activates the CA glue instantly
Sanding block.

Image

Lets get started.

Step 1
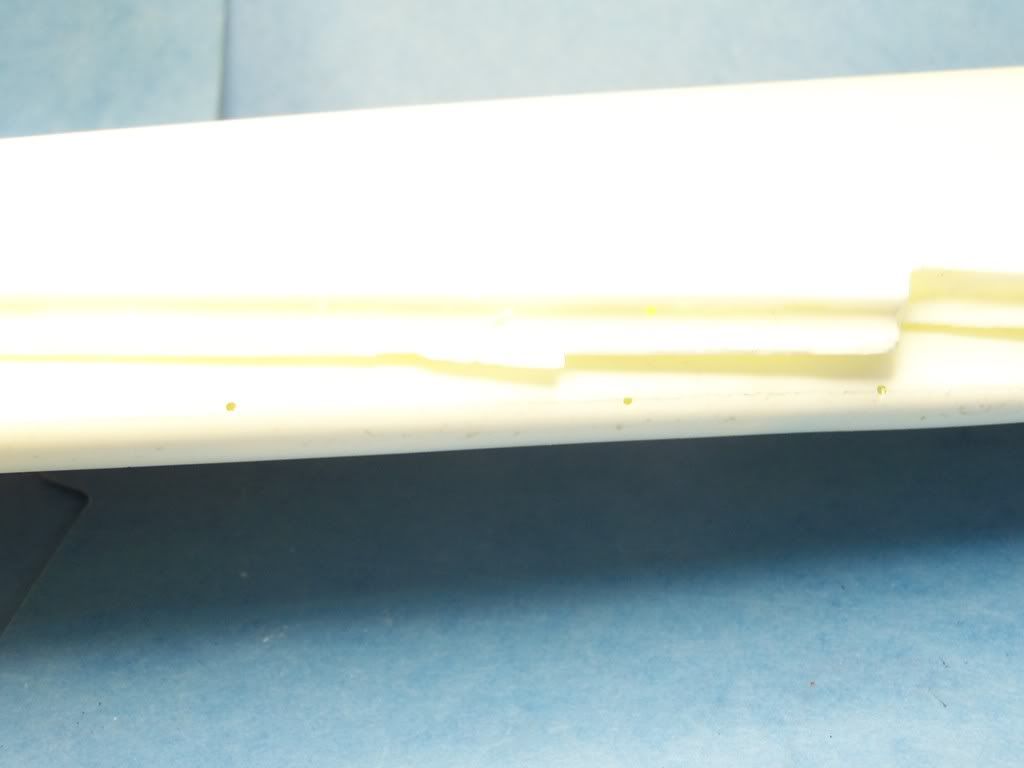
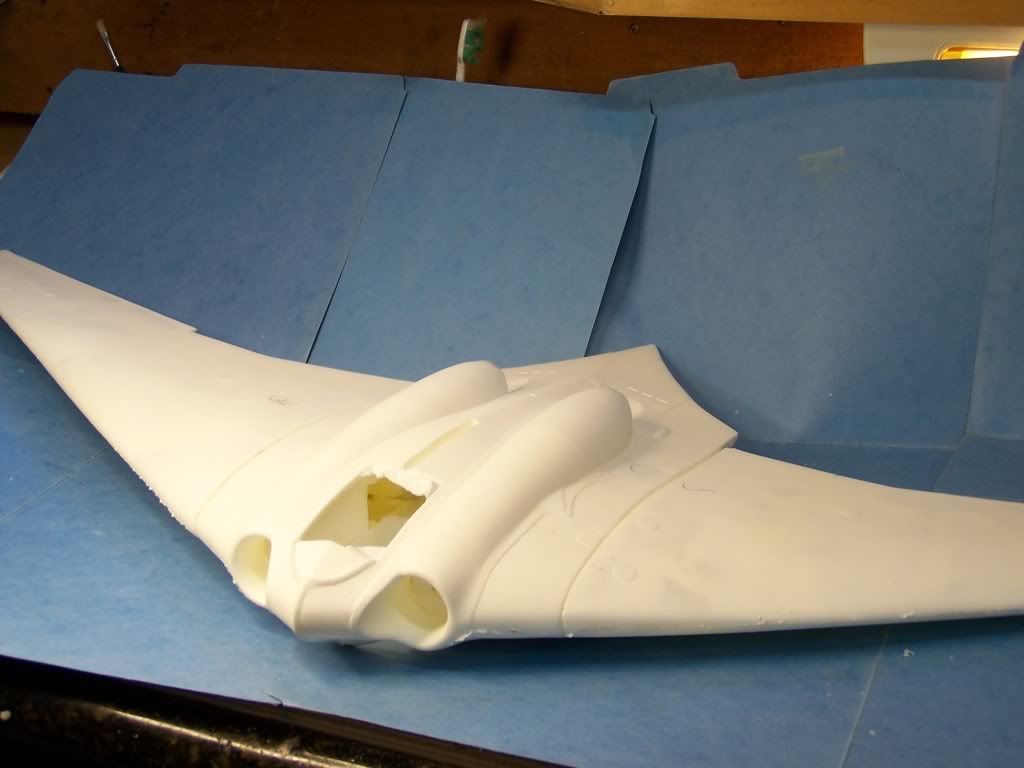
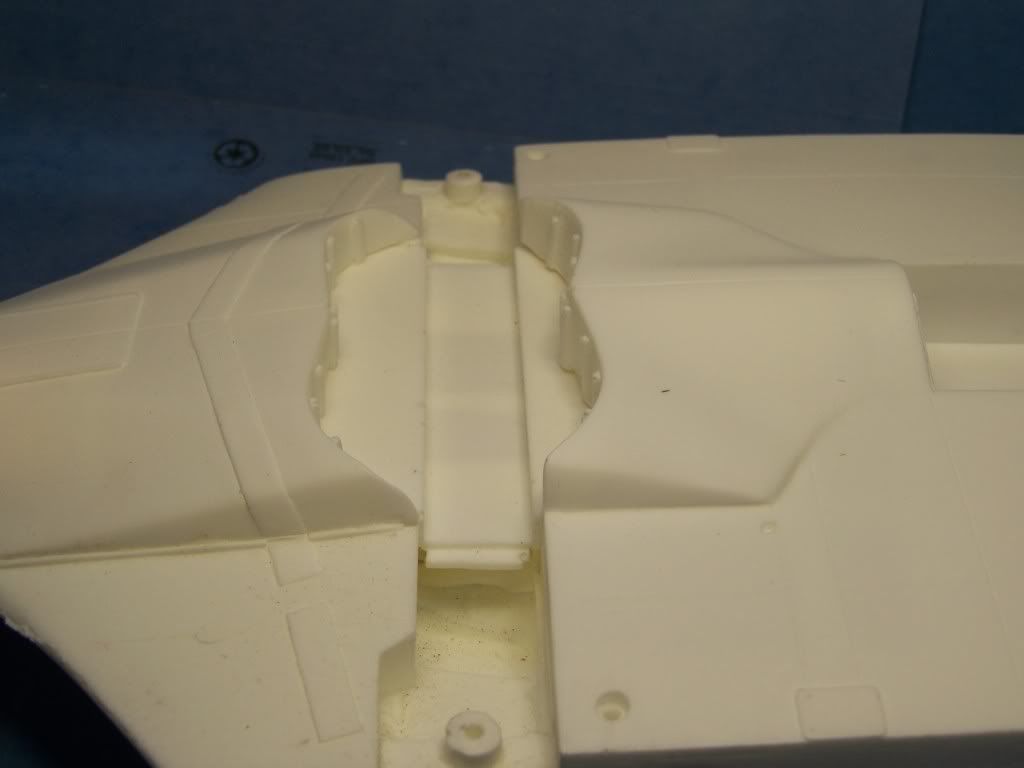
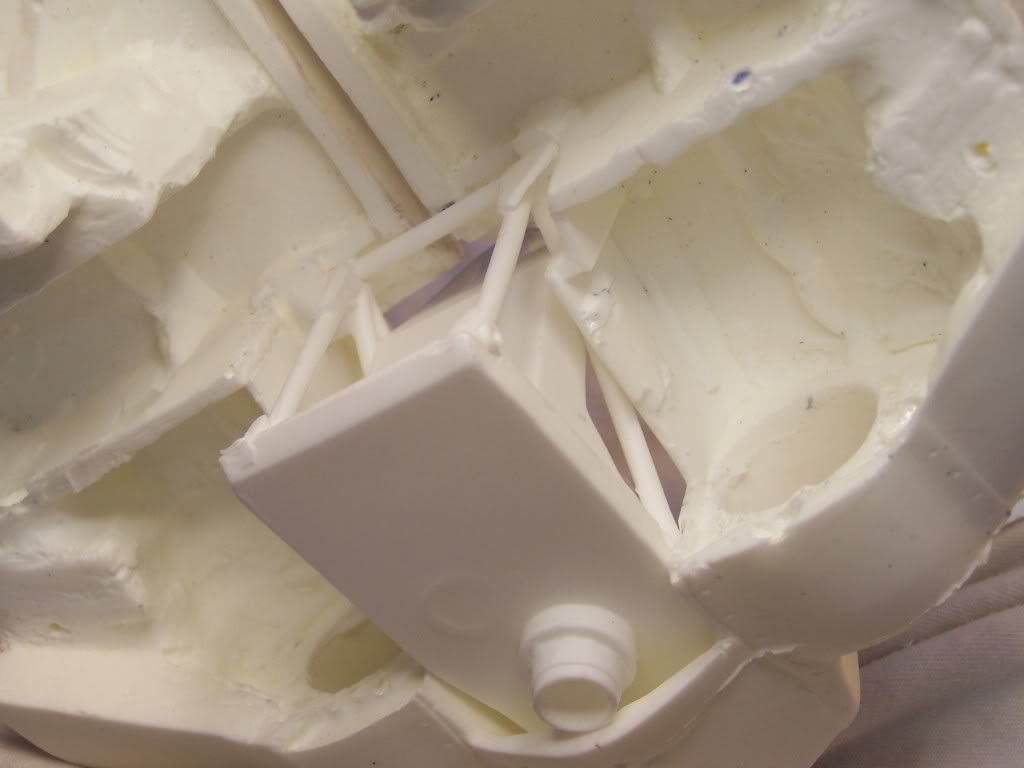
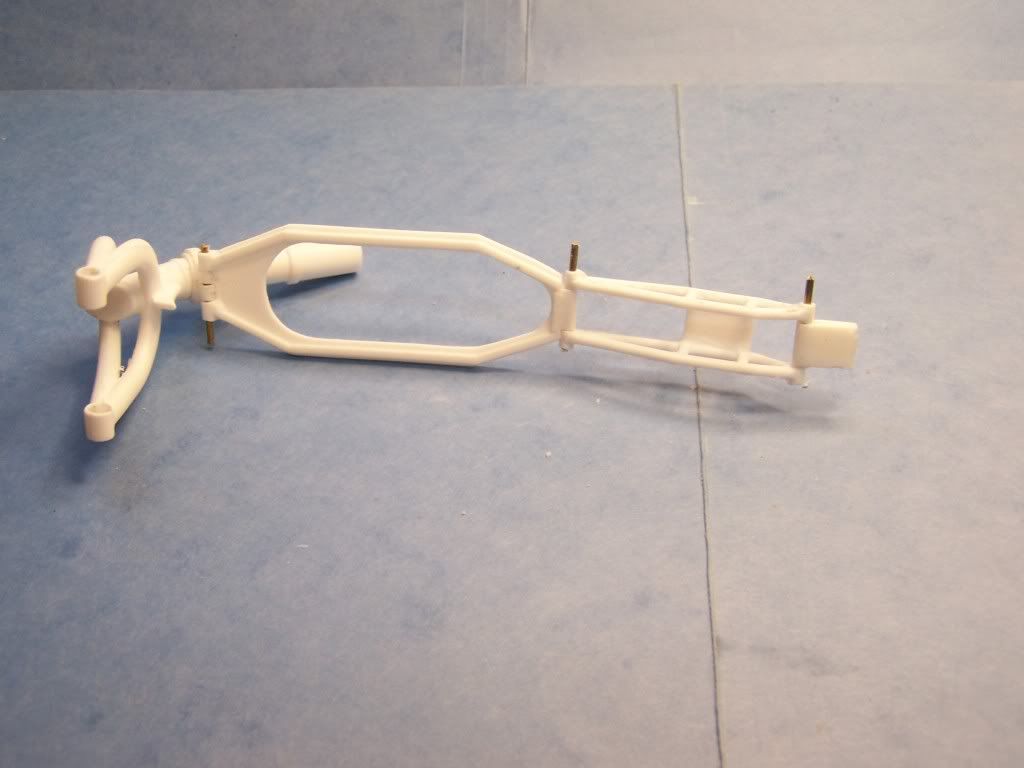
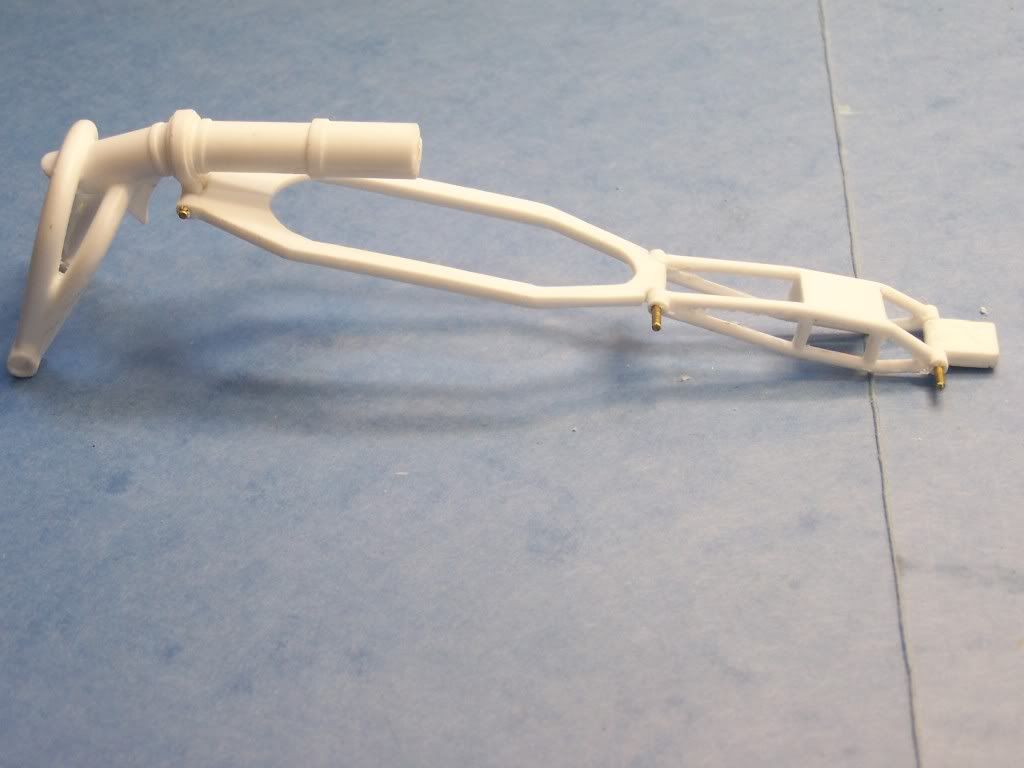
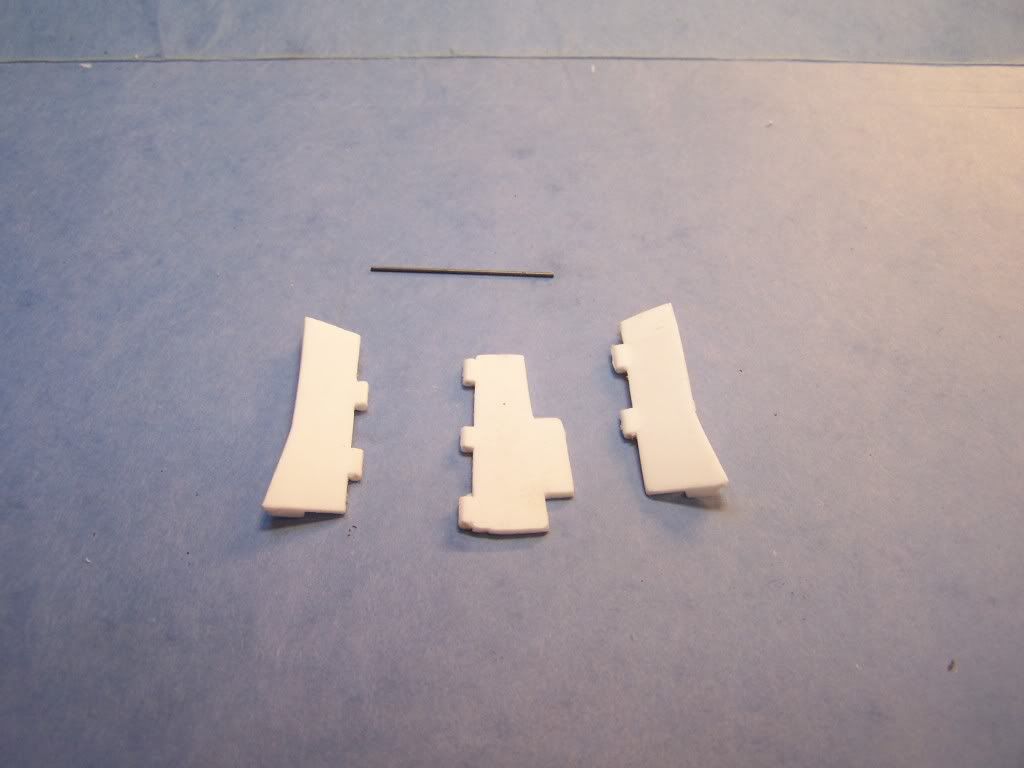
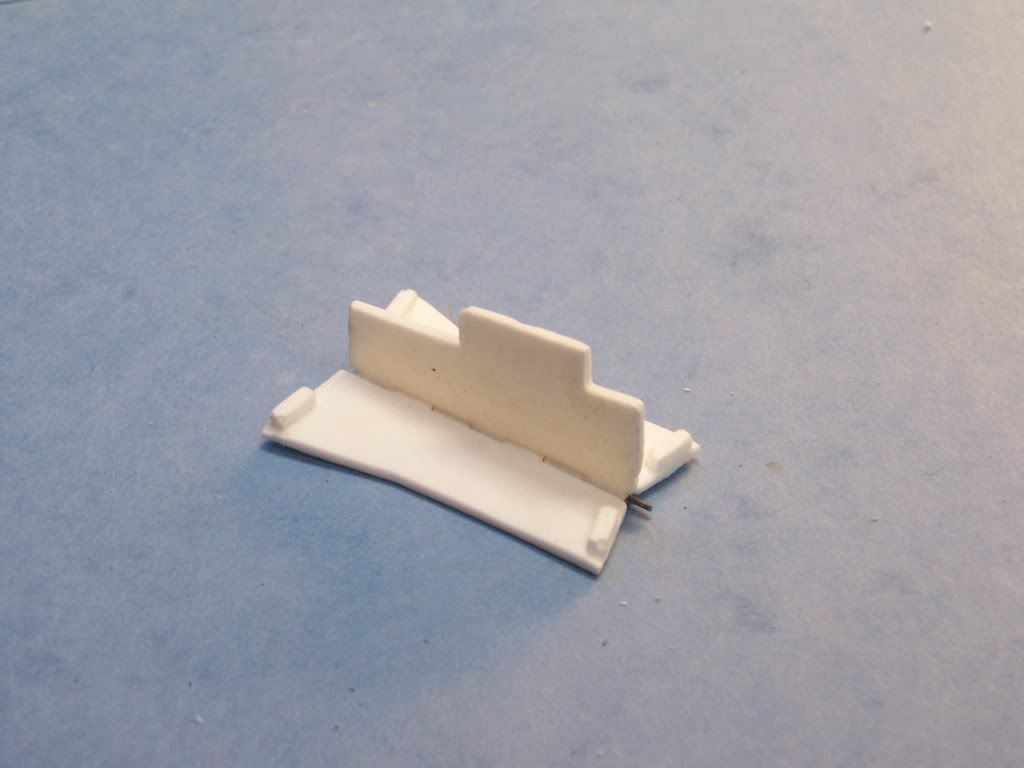
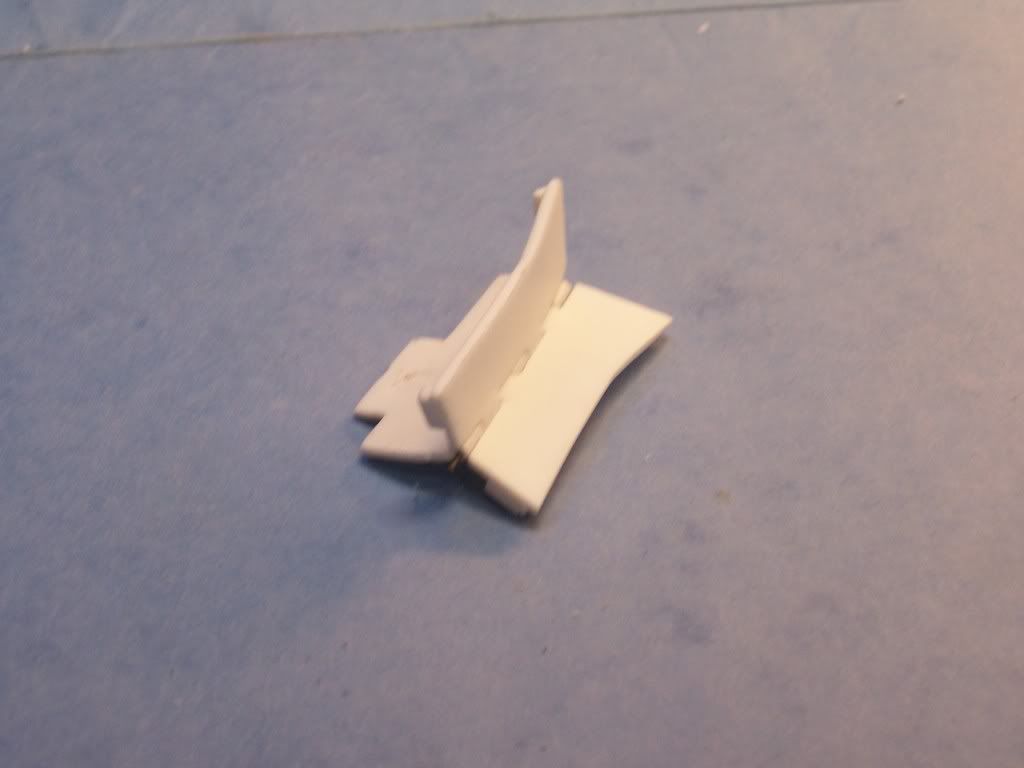
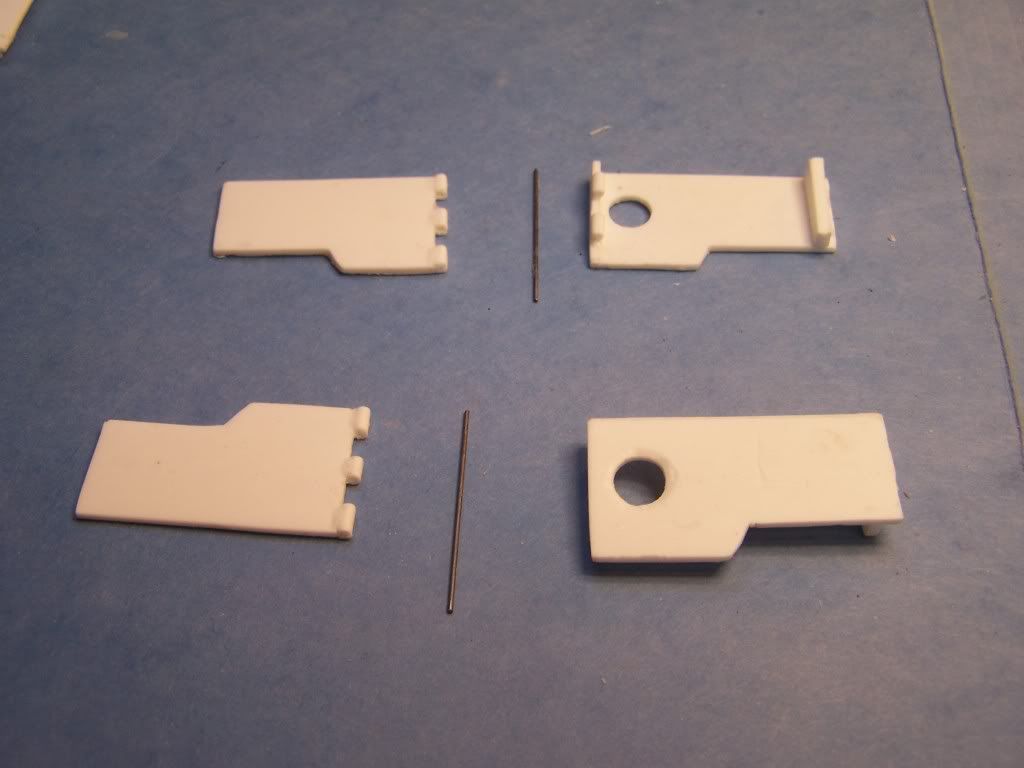
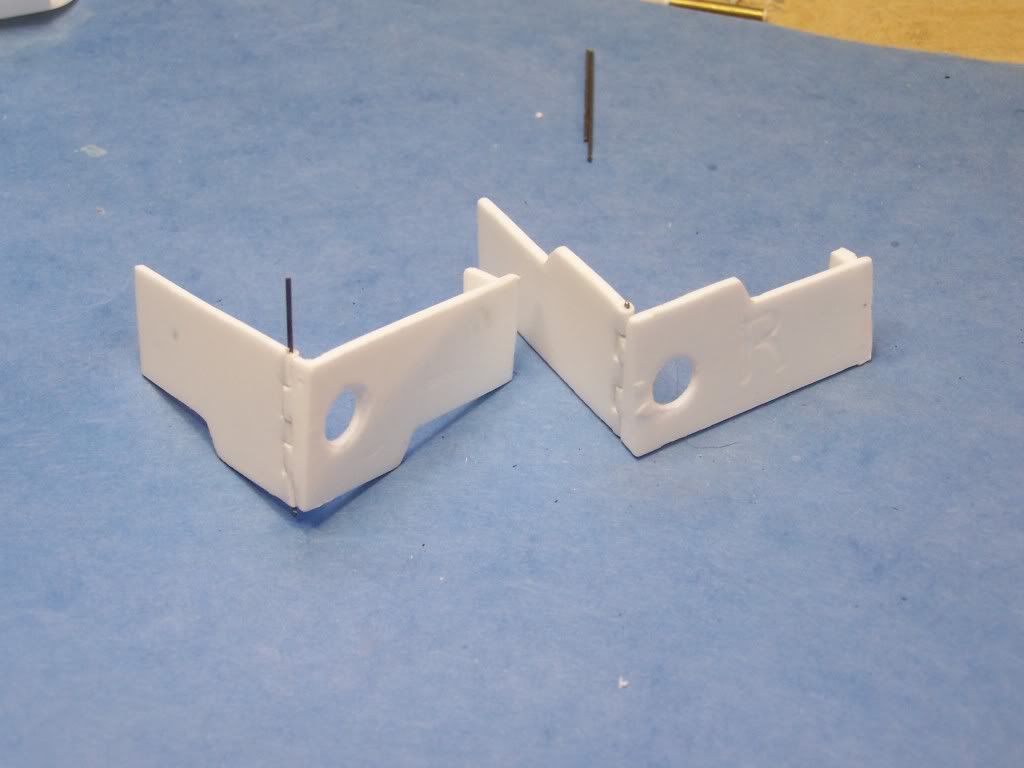
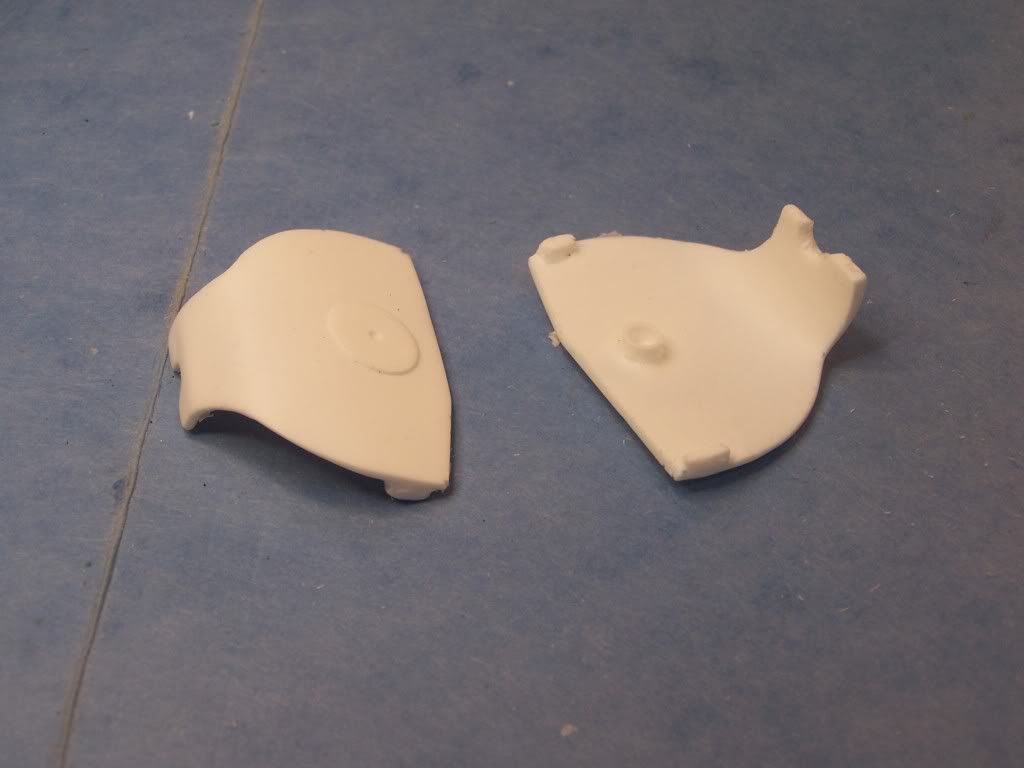
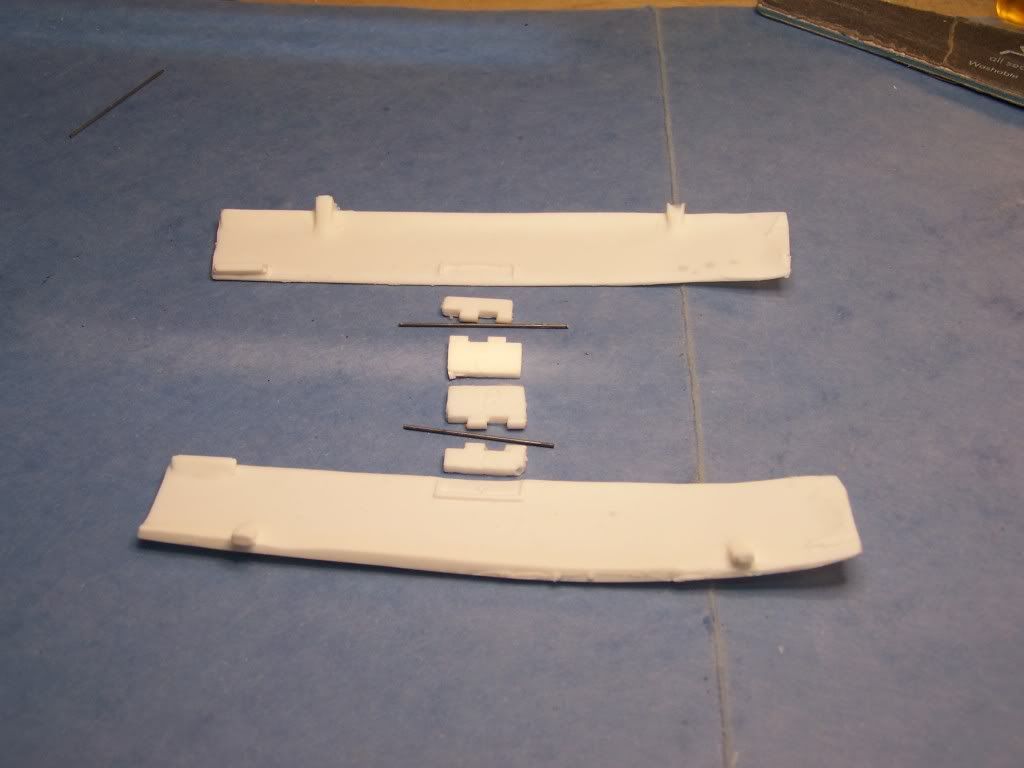
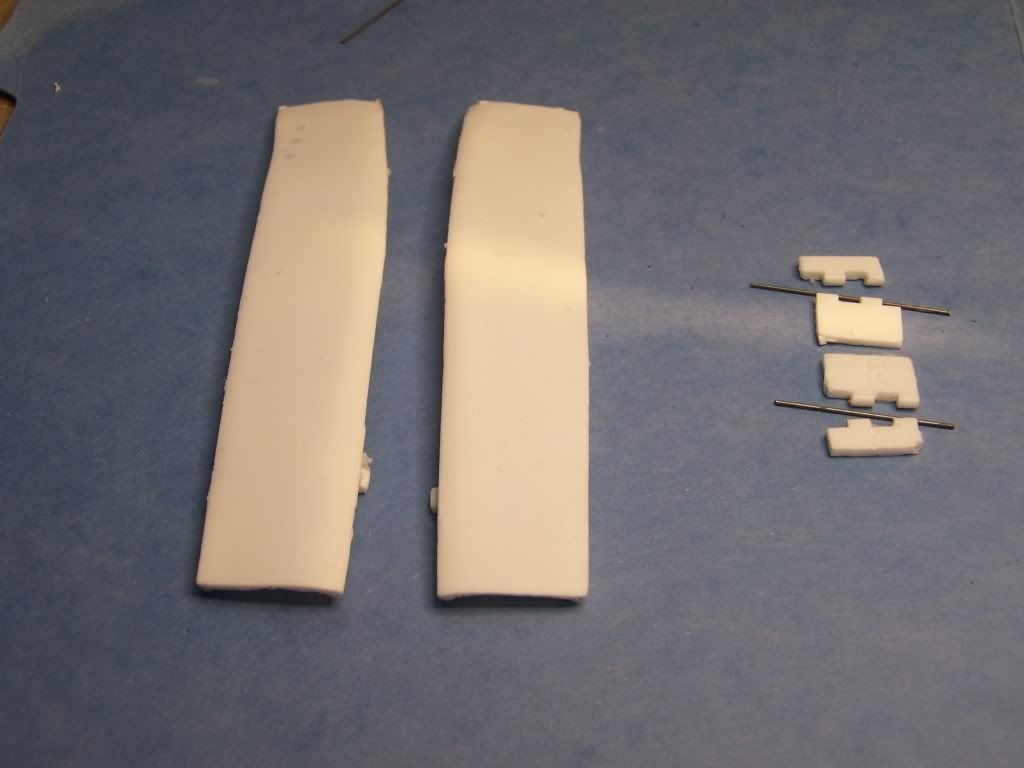
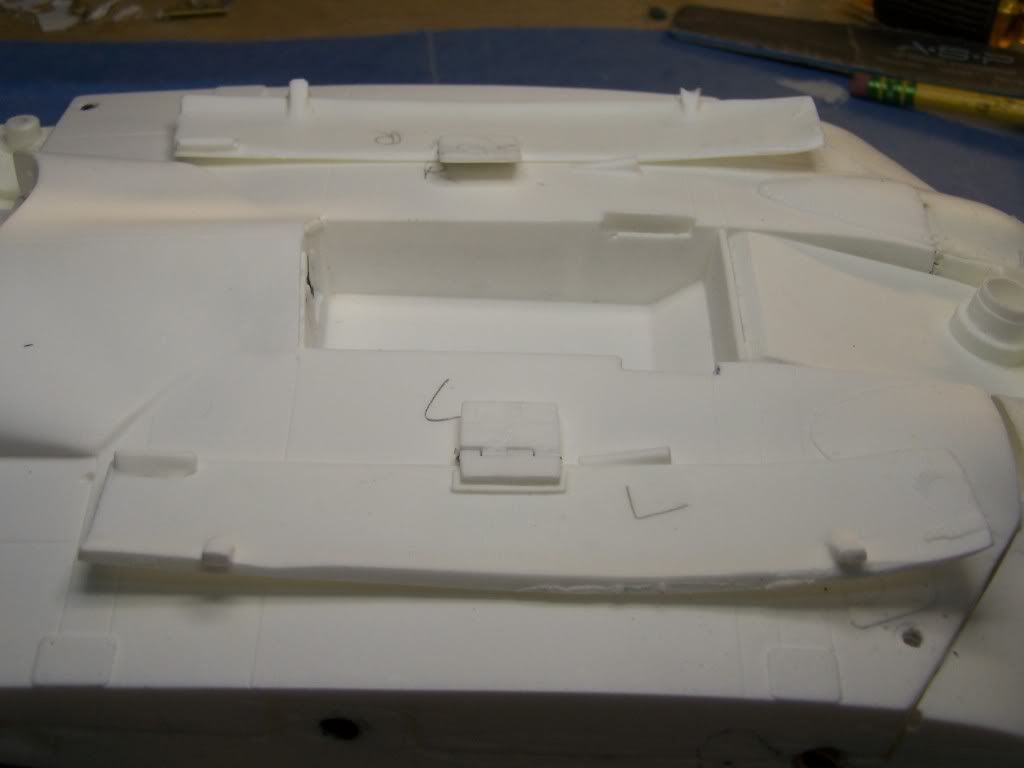
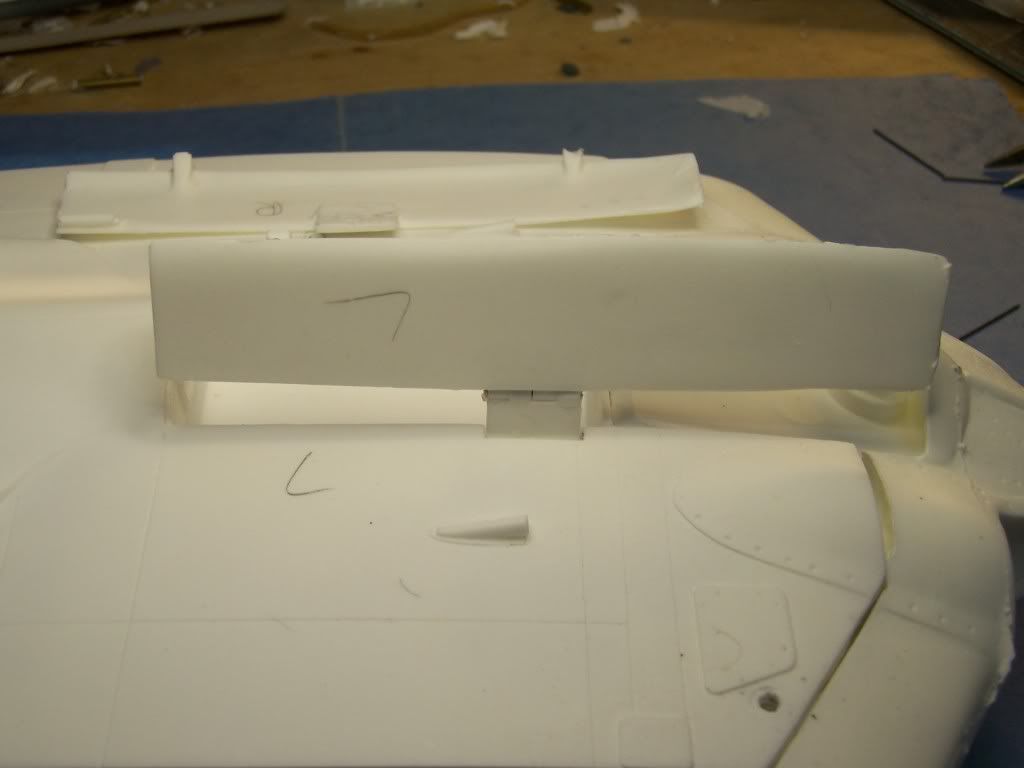
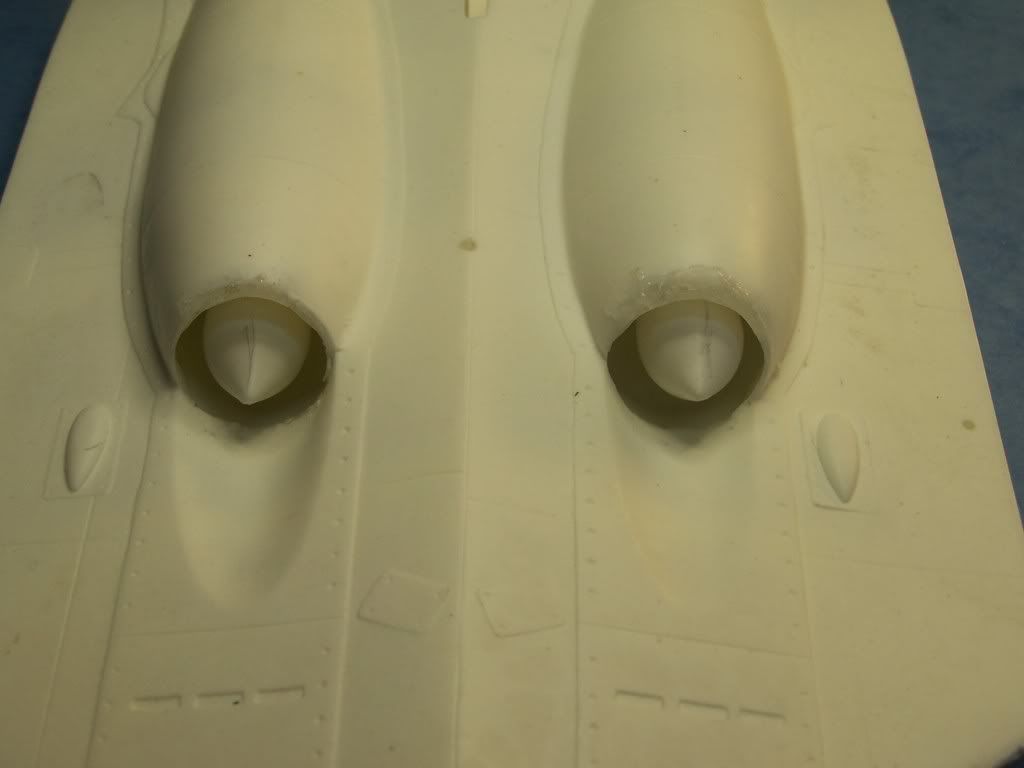
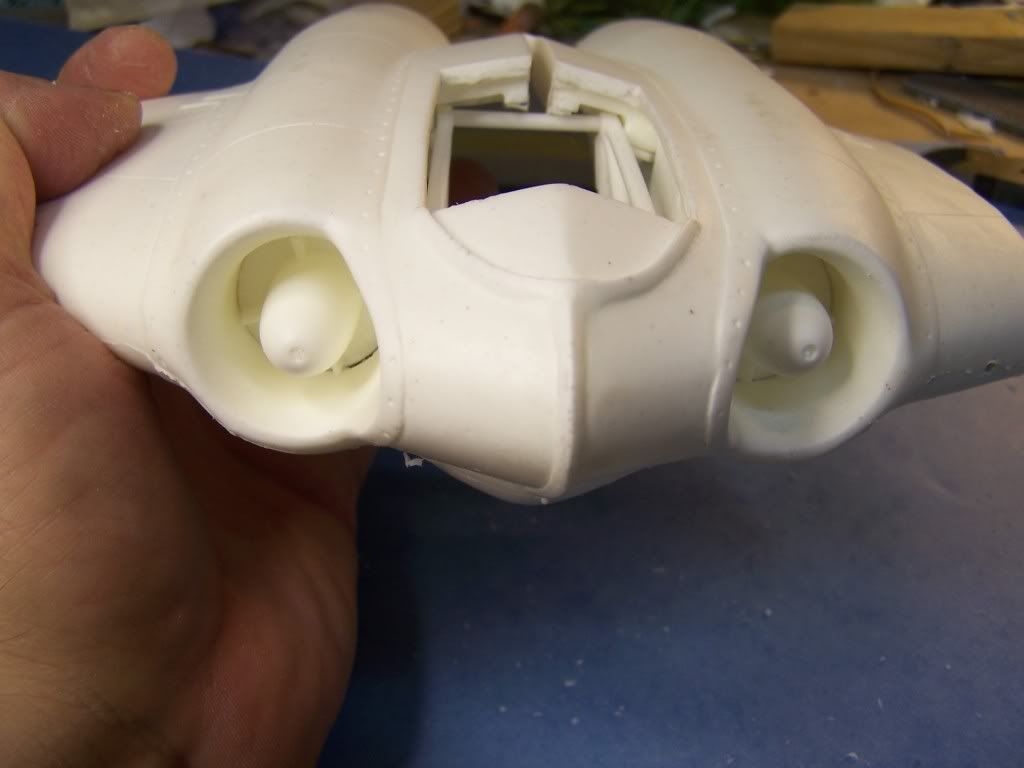
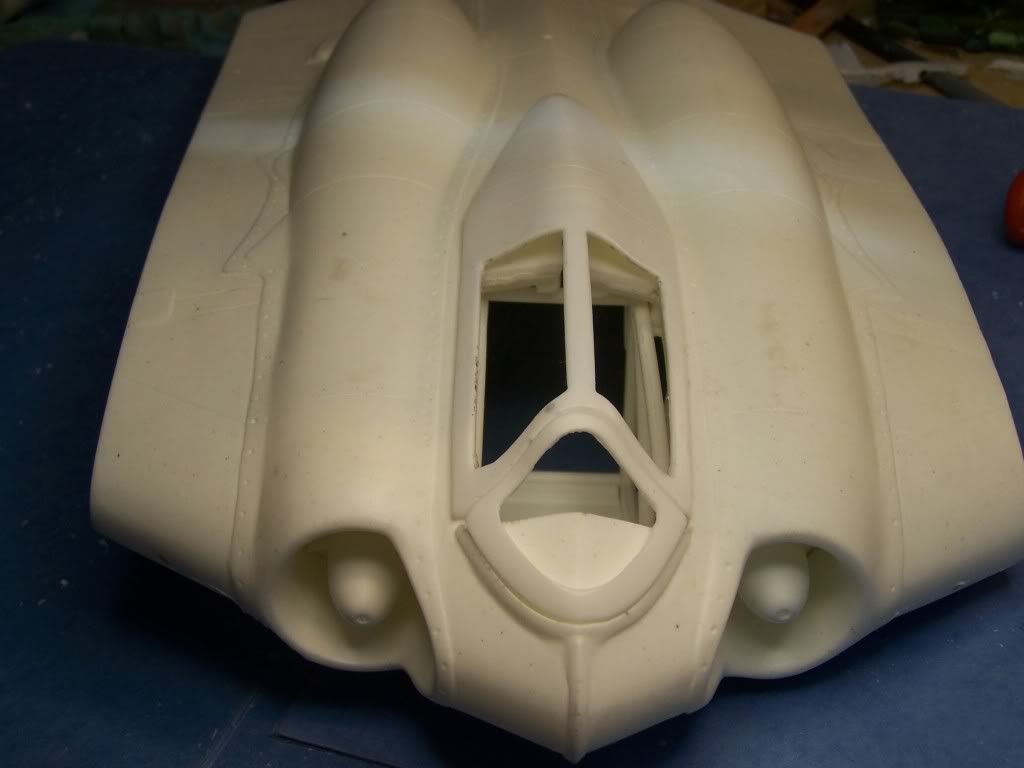
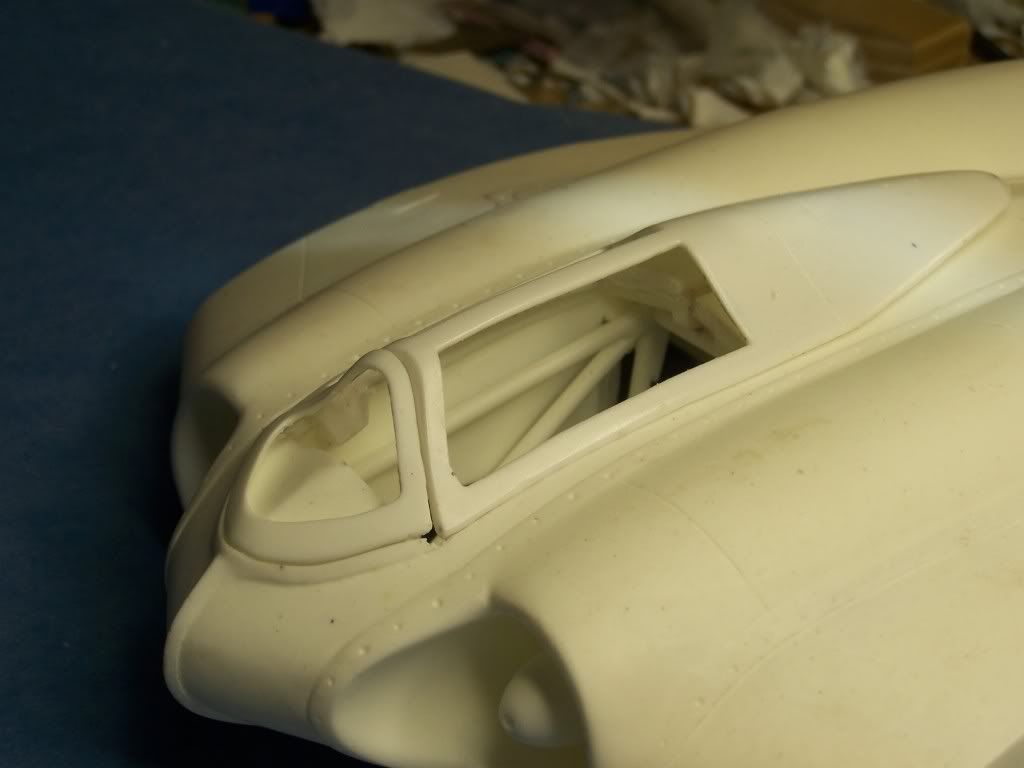
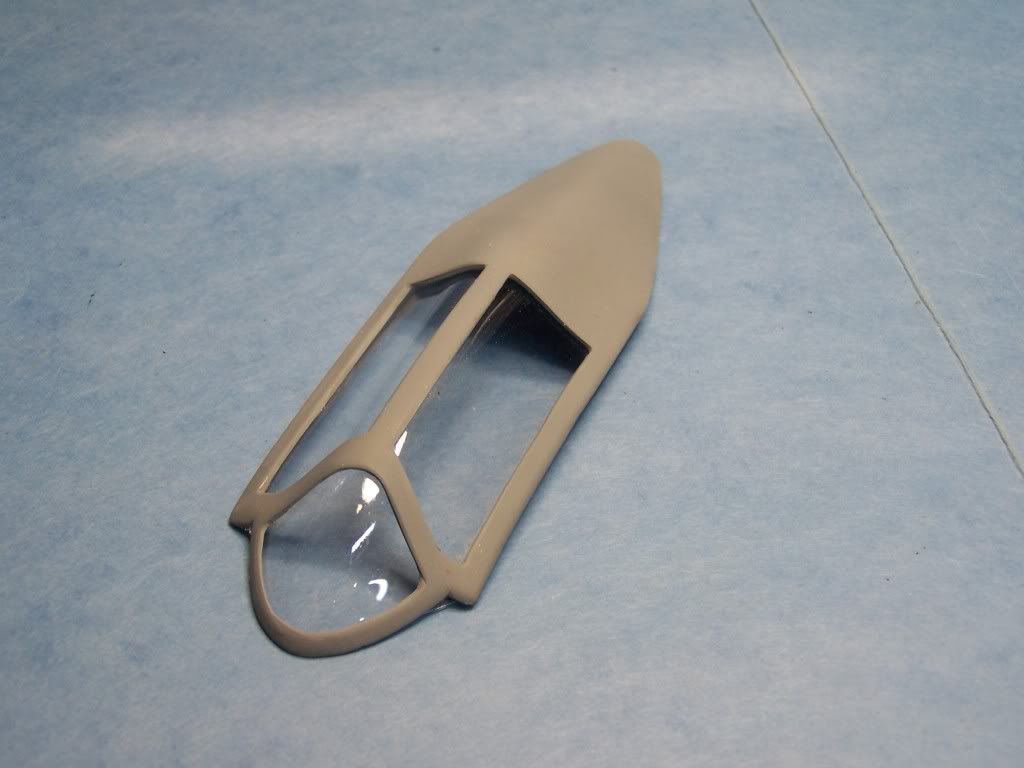
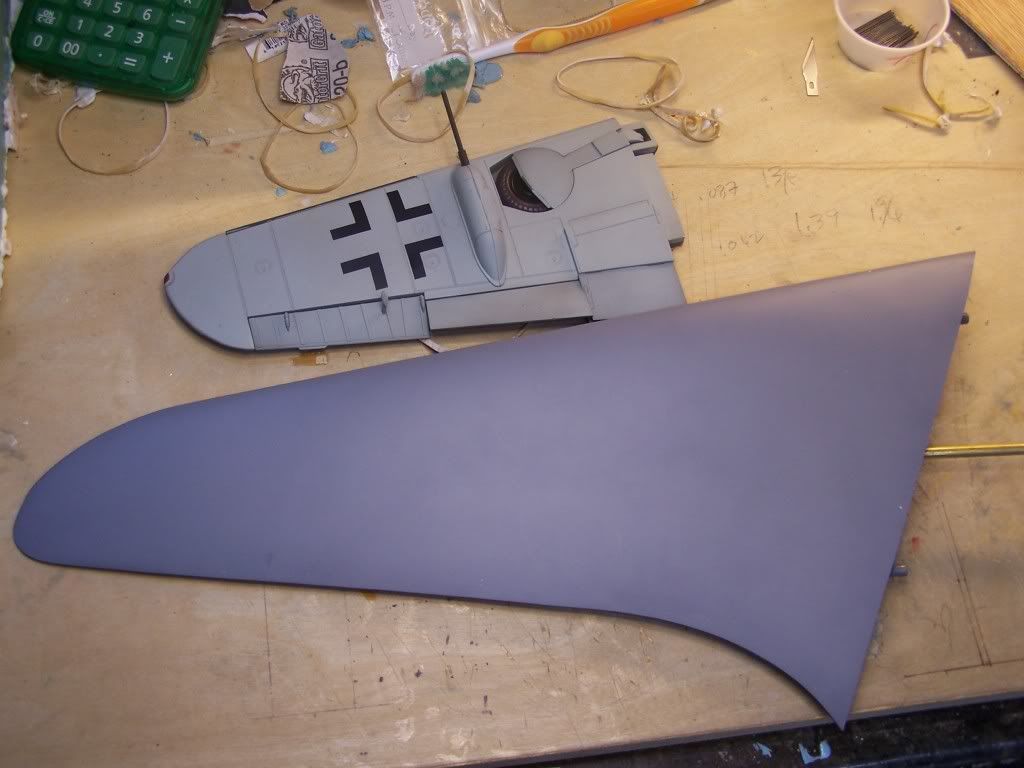
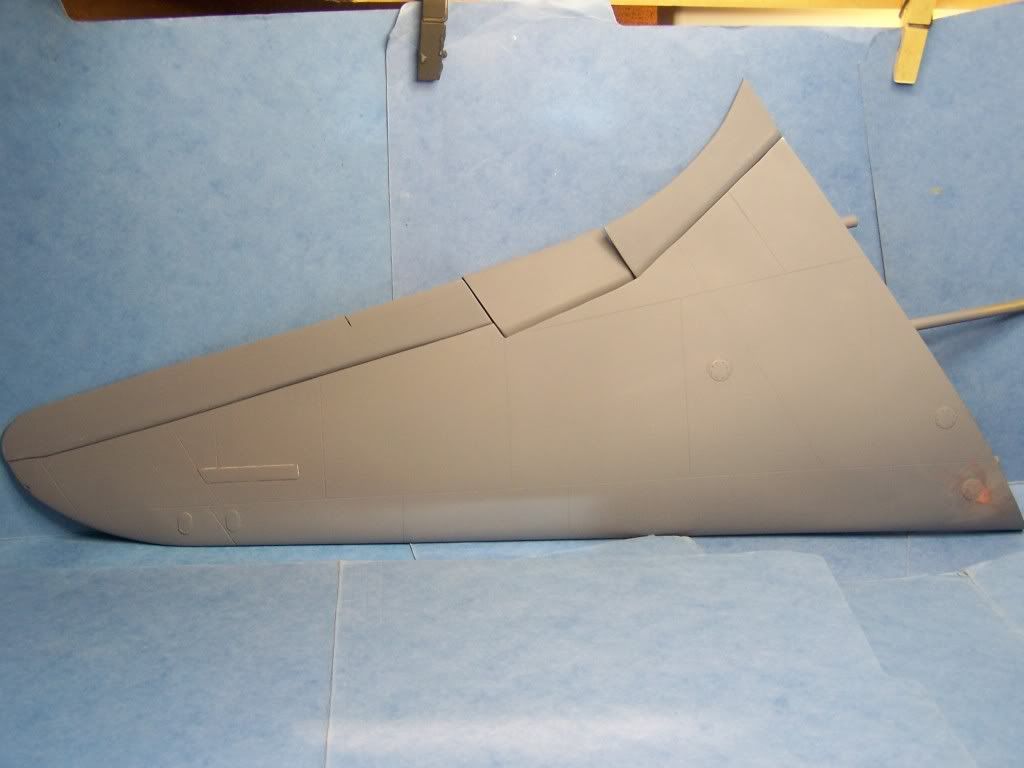
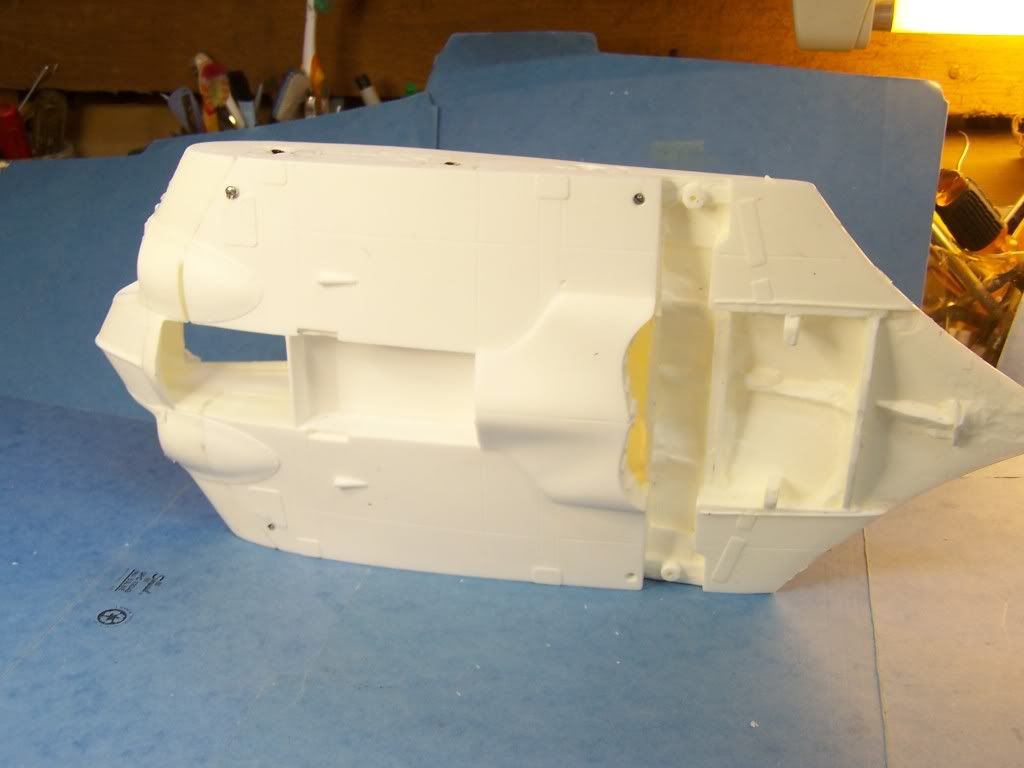
Sand off all of the flash off of the main and the bottom section fit them together . Make sure everything is aligned.
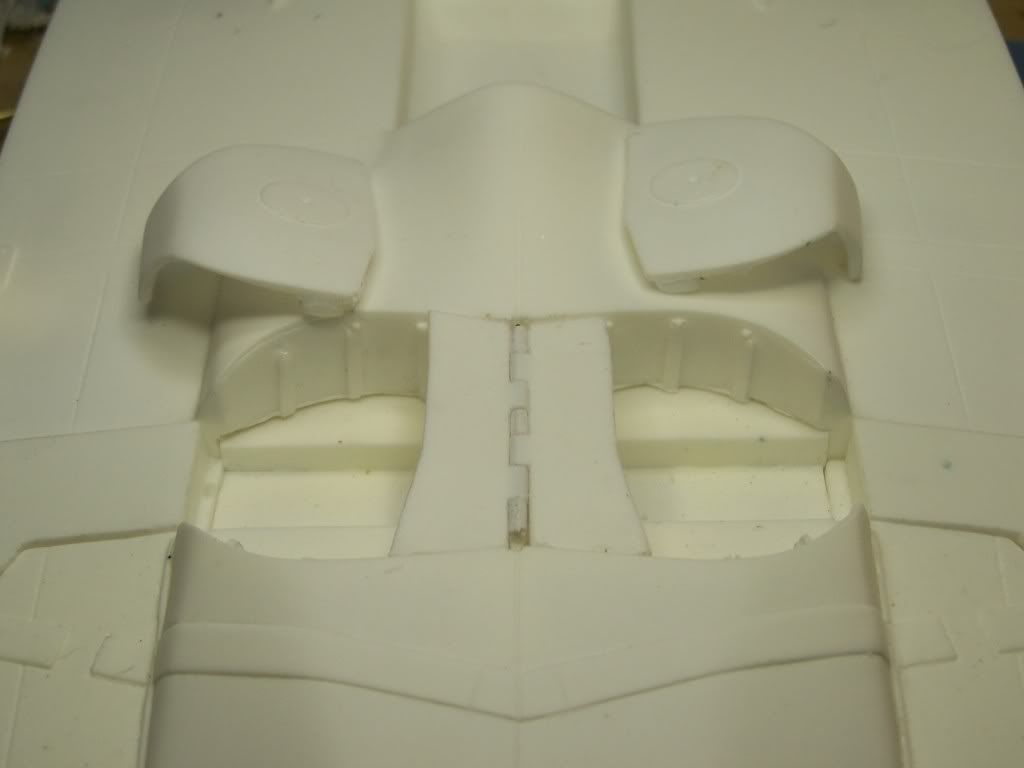
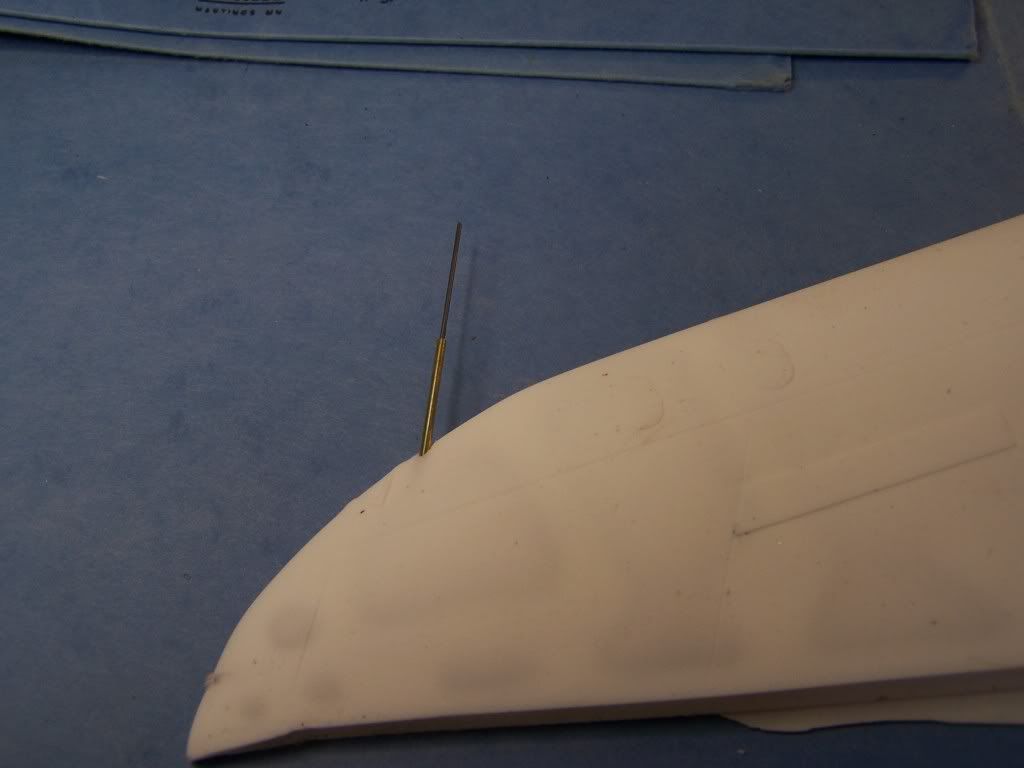
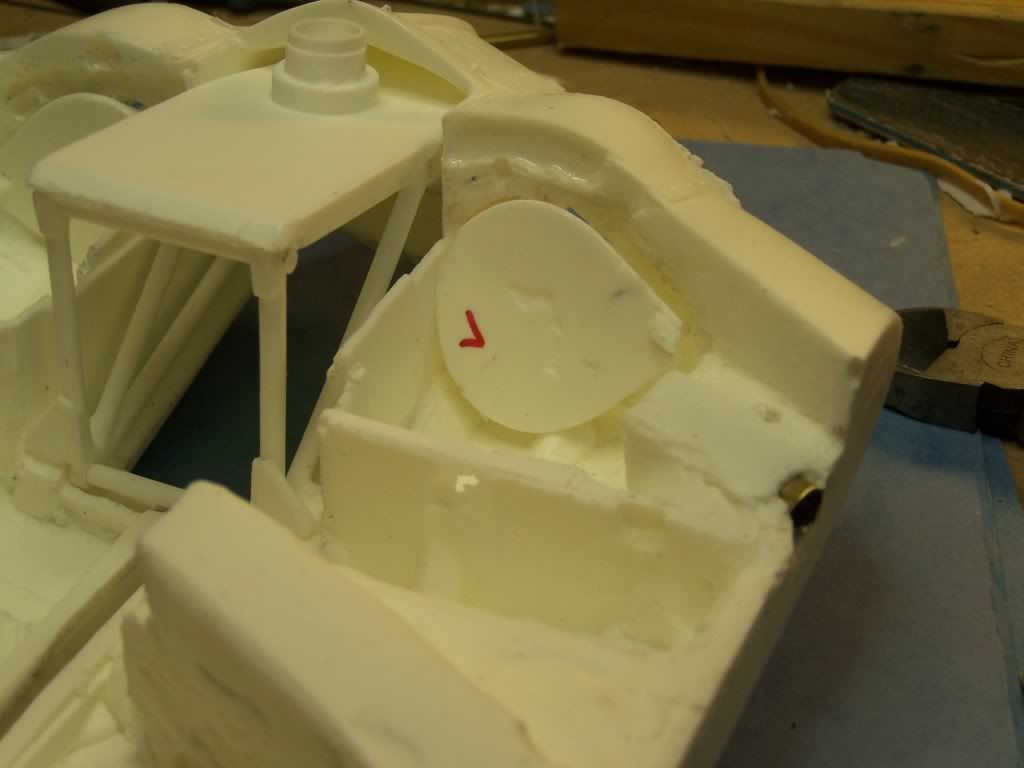
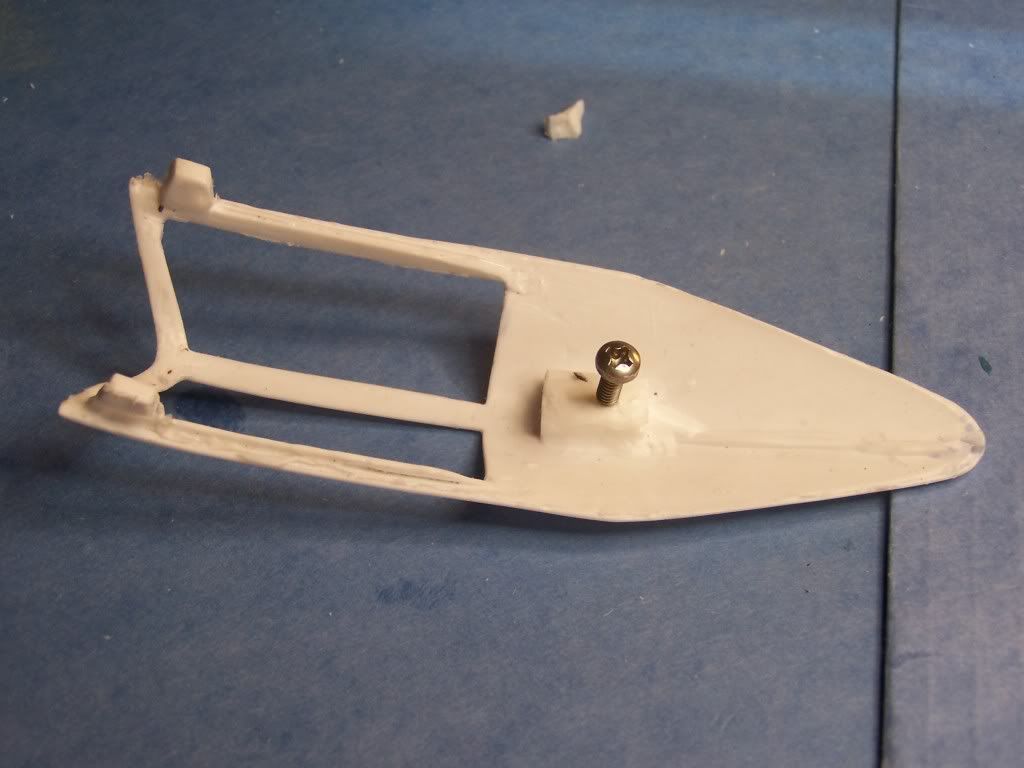
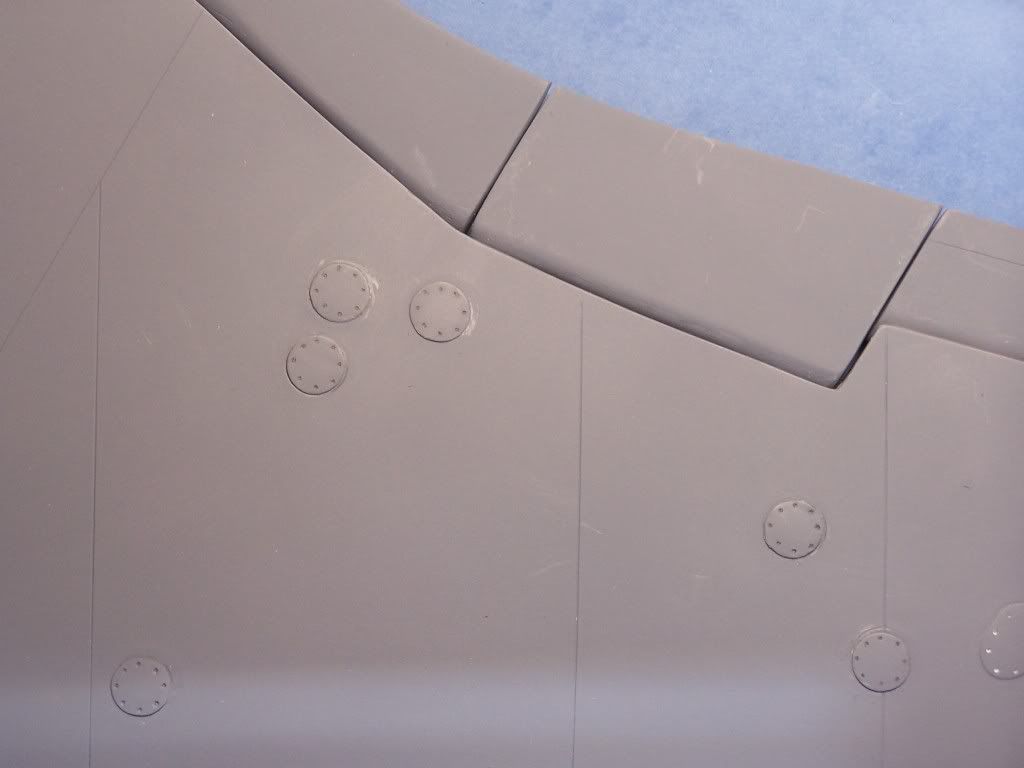
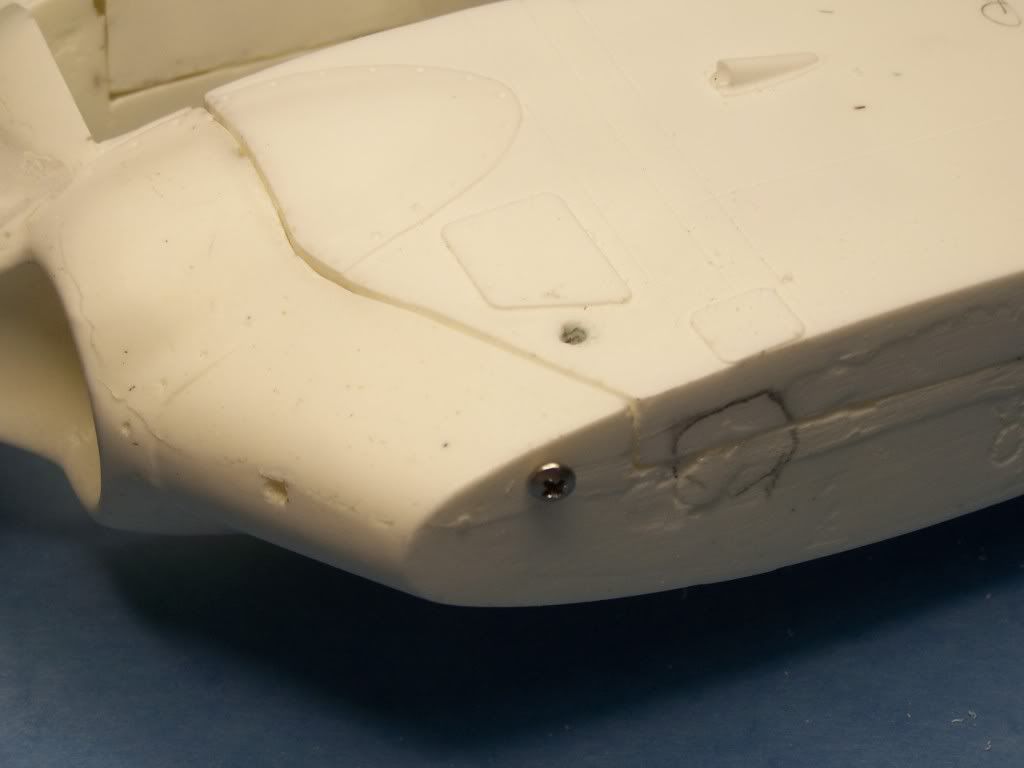
Tack glue the front leading edge size hit it with kicker to hold in place. It helps to circle were you Tacked glued it.
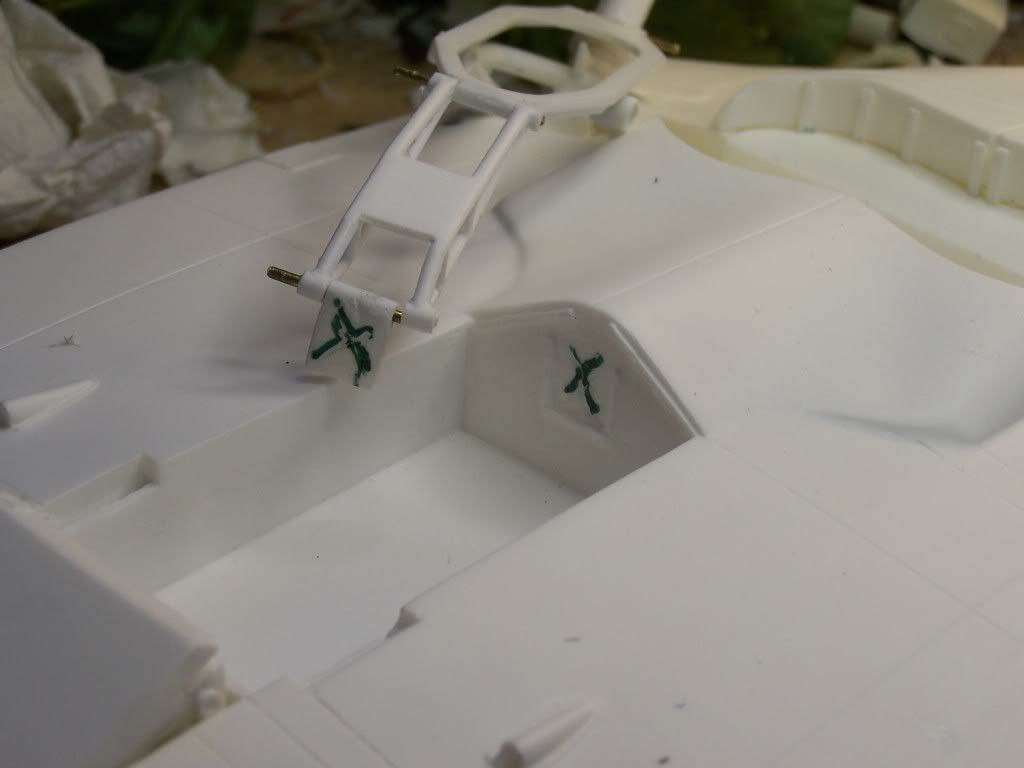
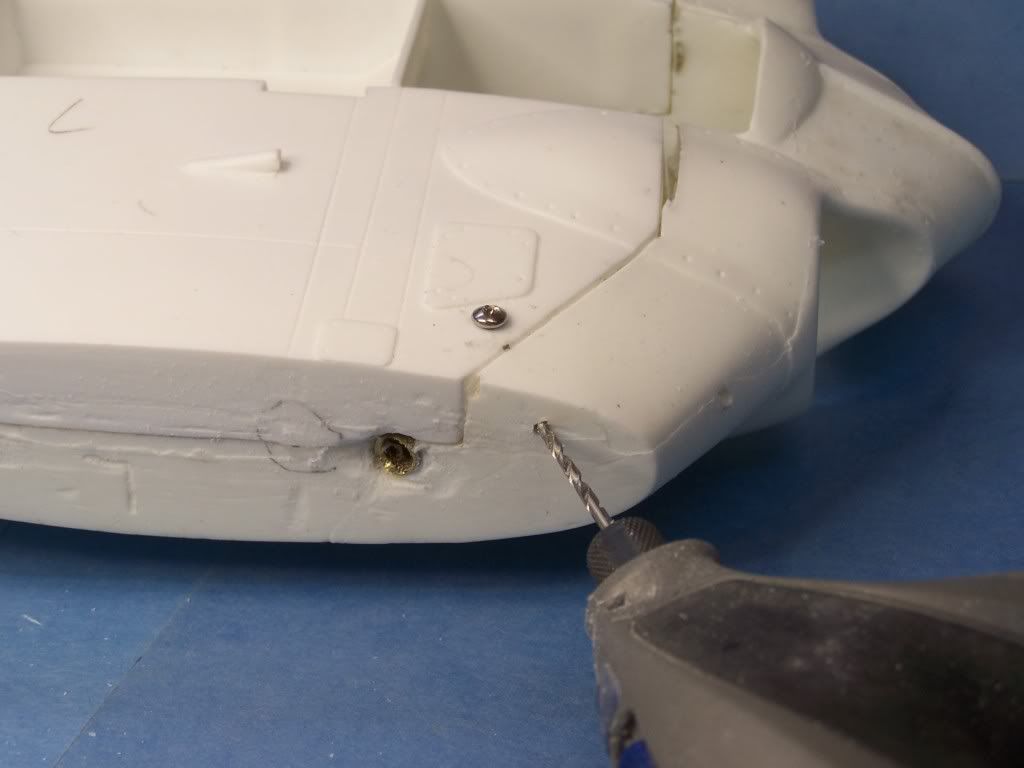
Step 2
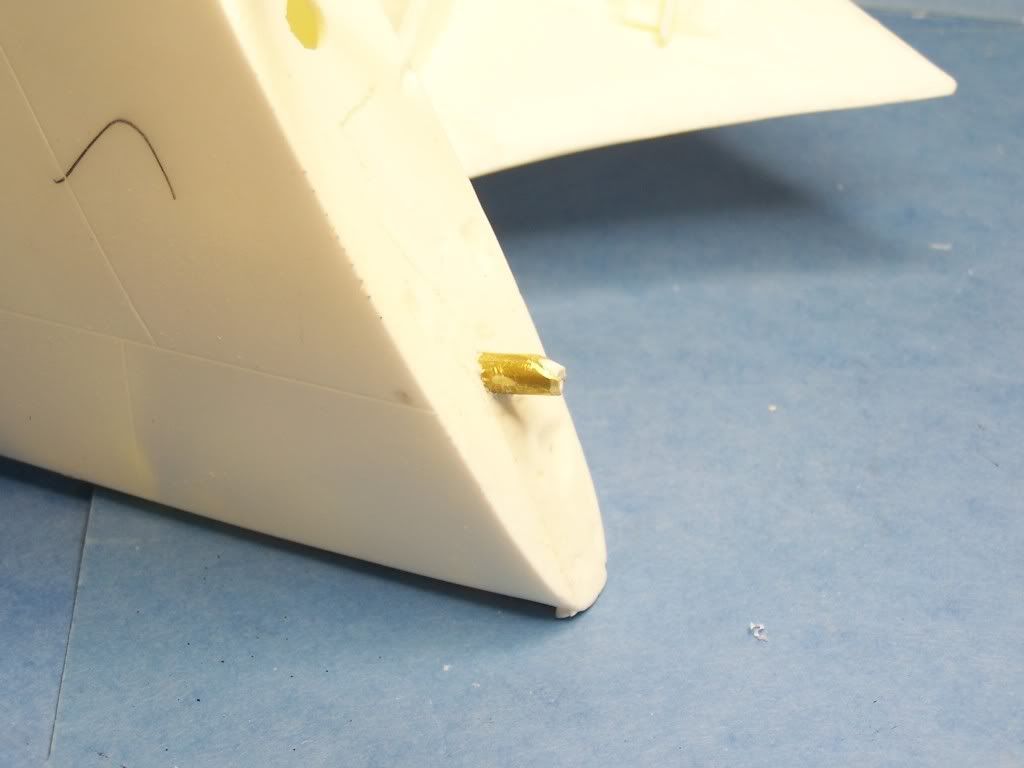
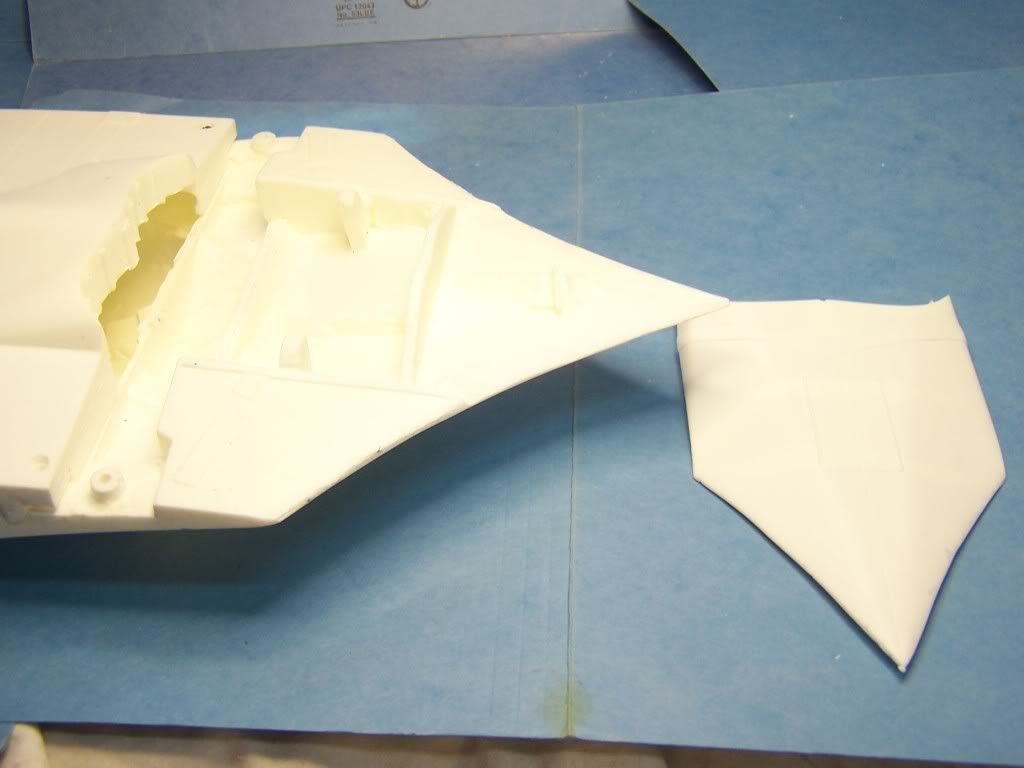
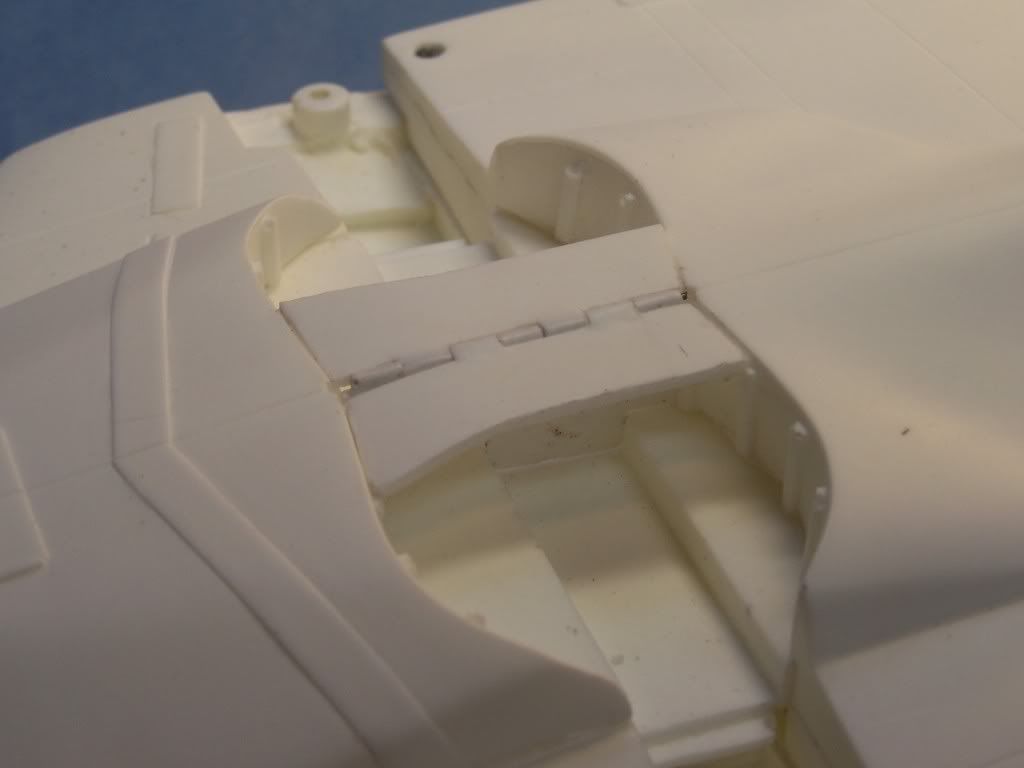
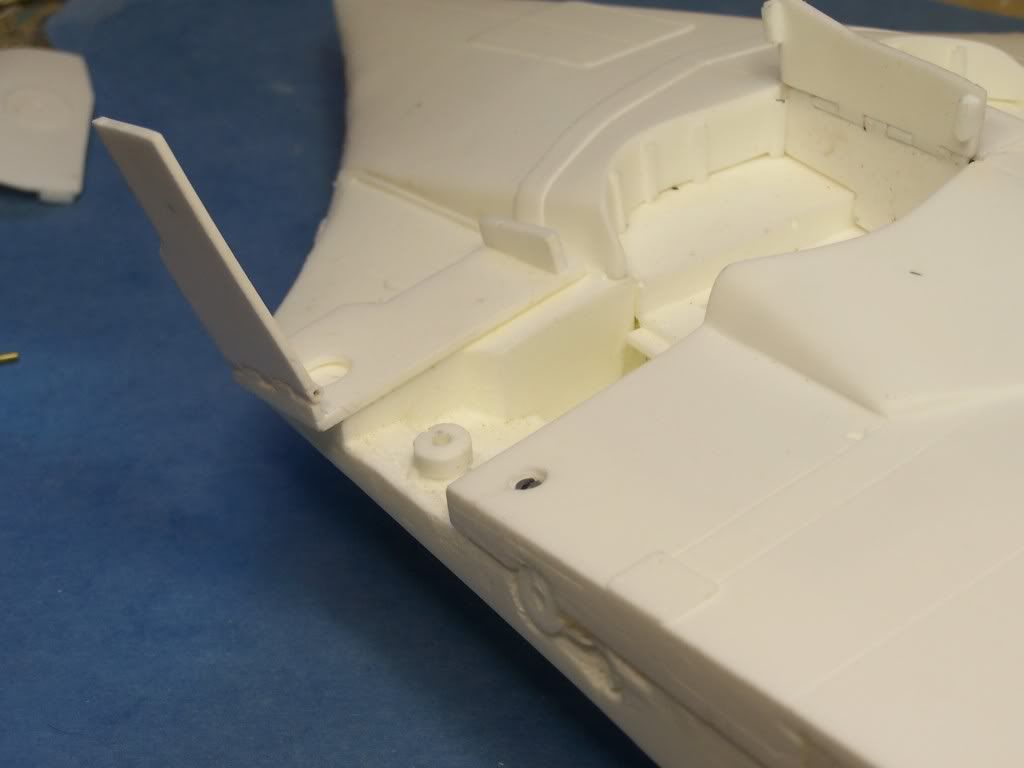
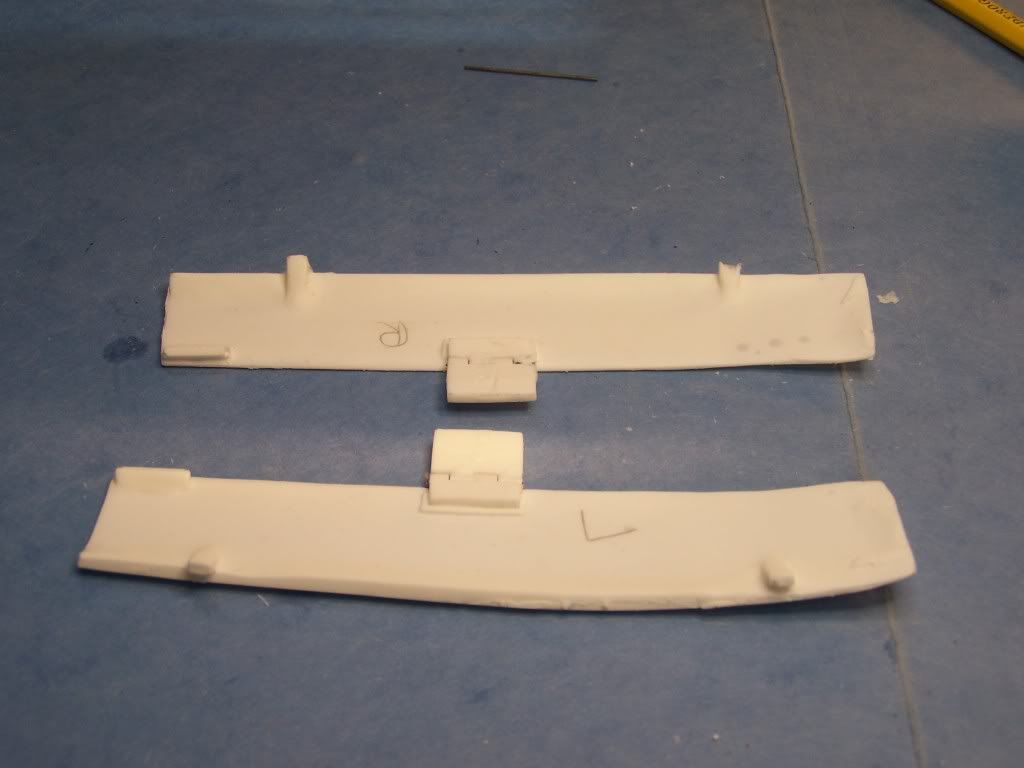
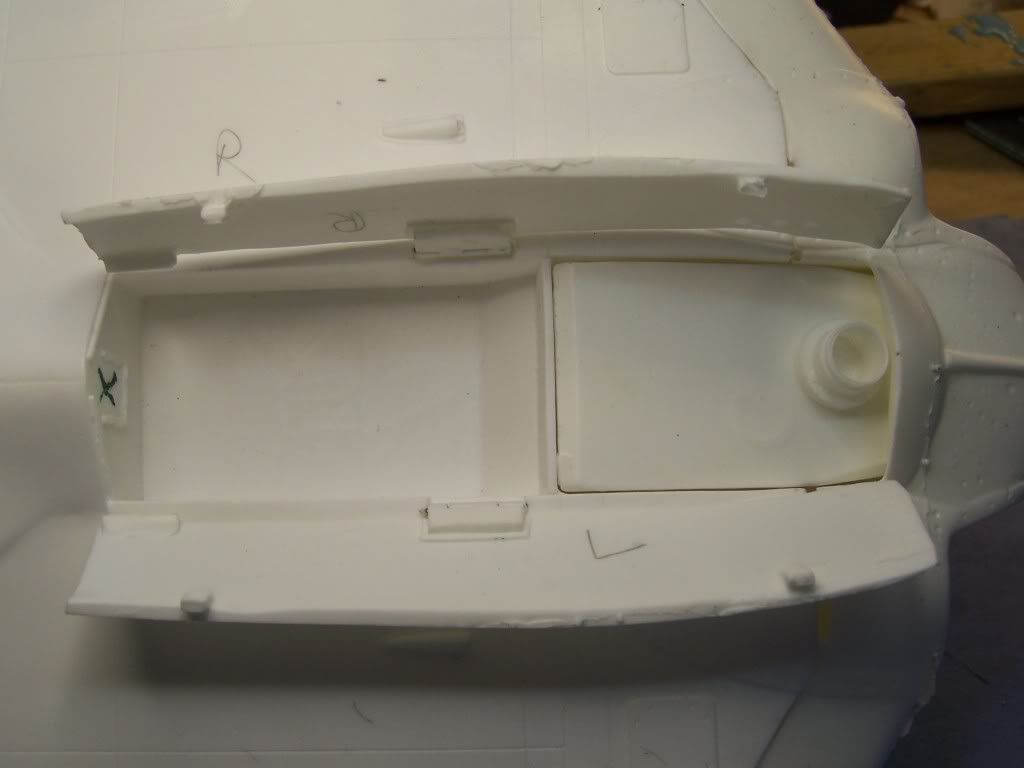
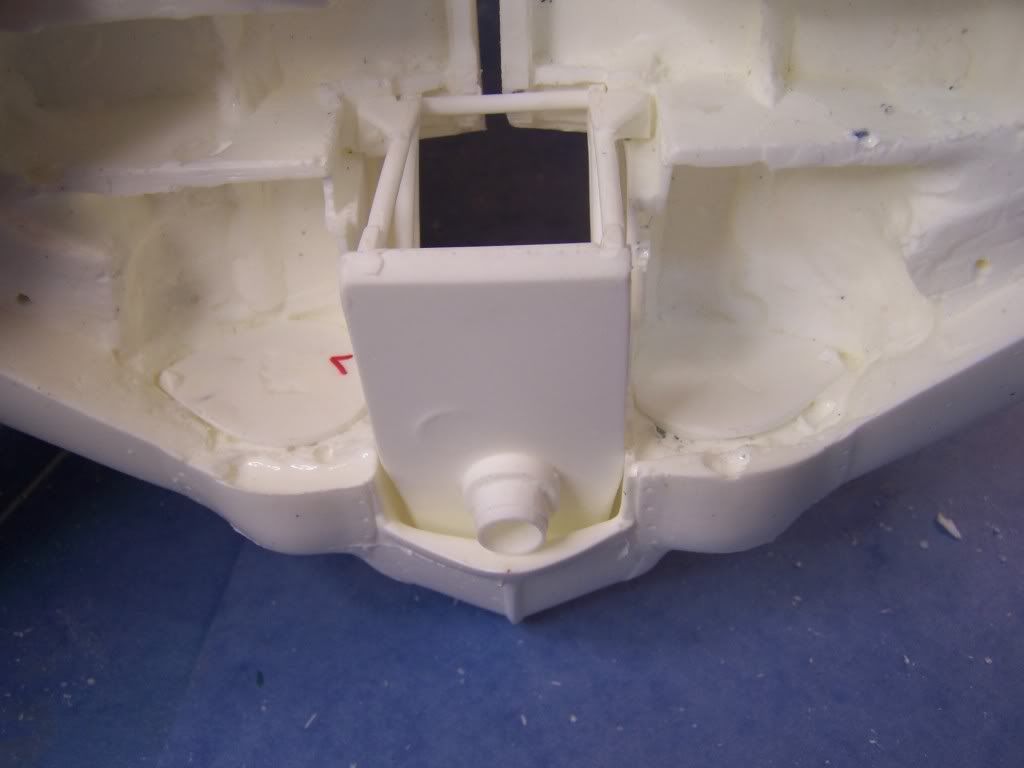
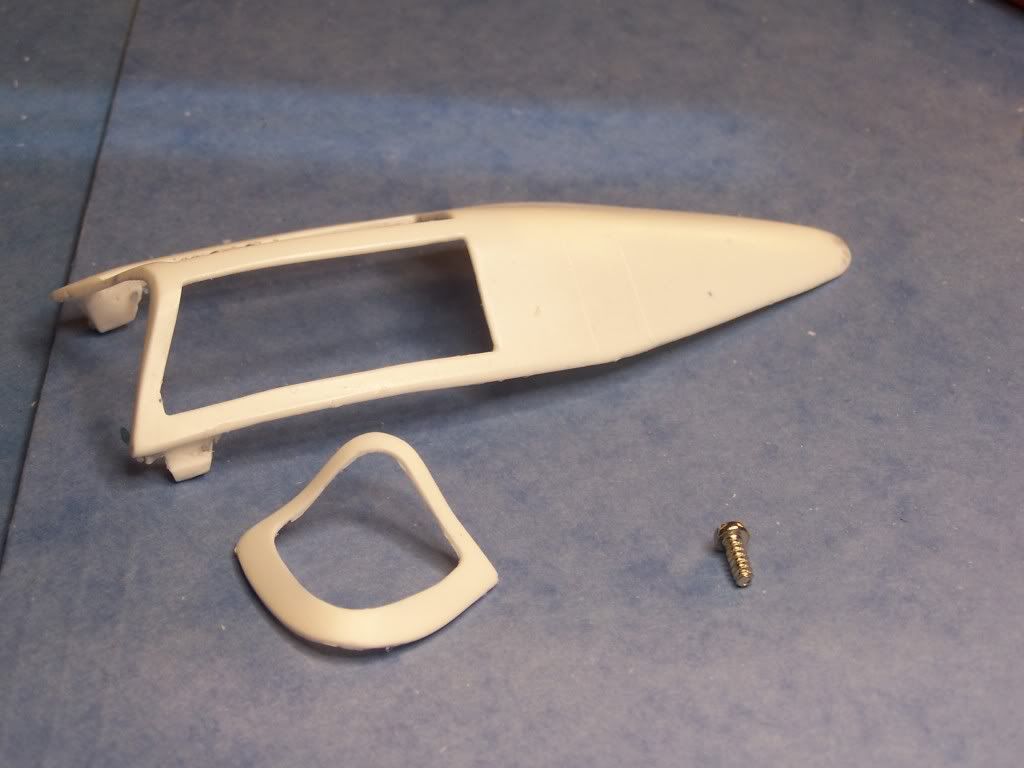
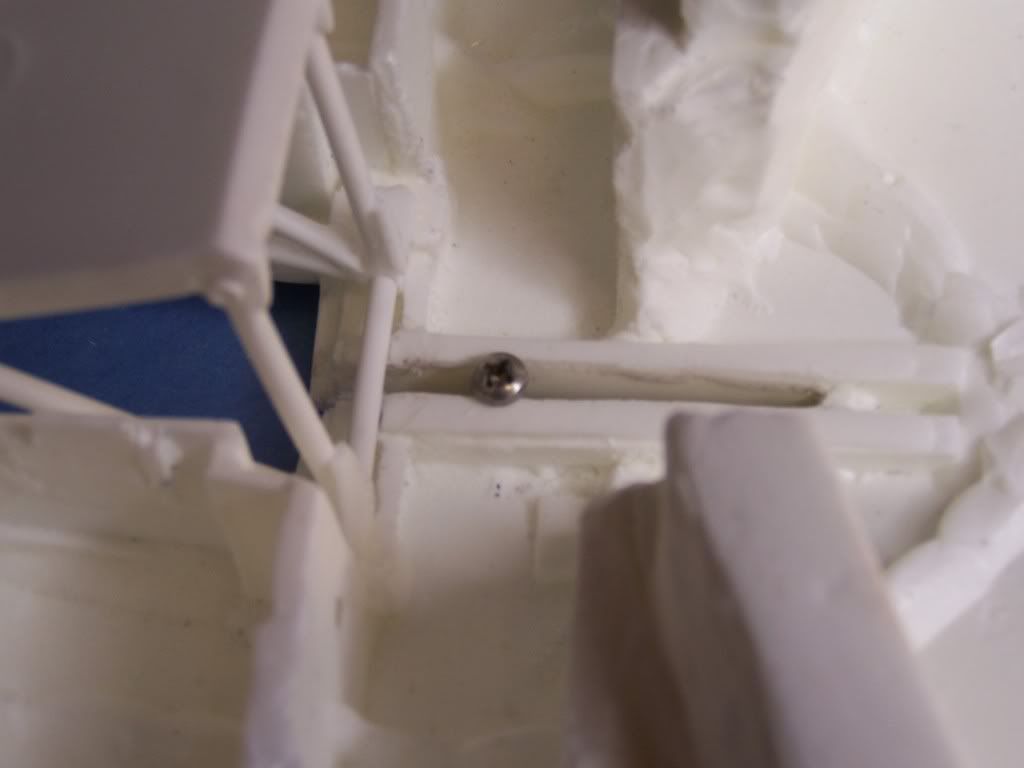
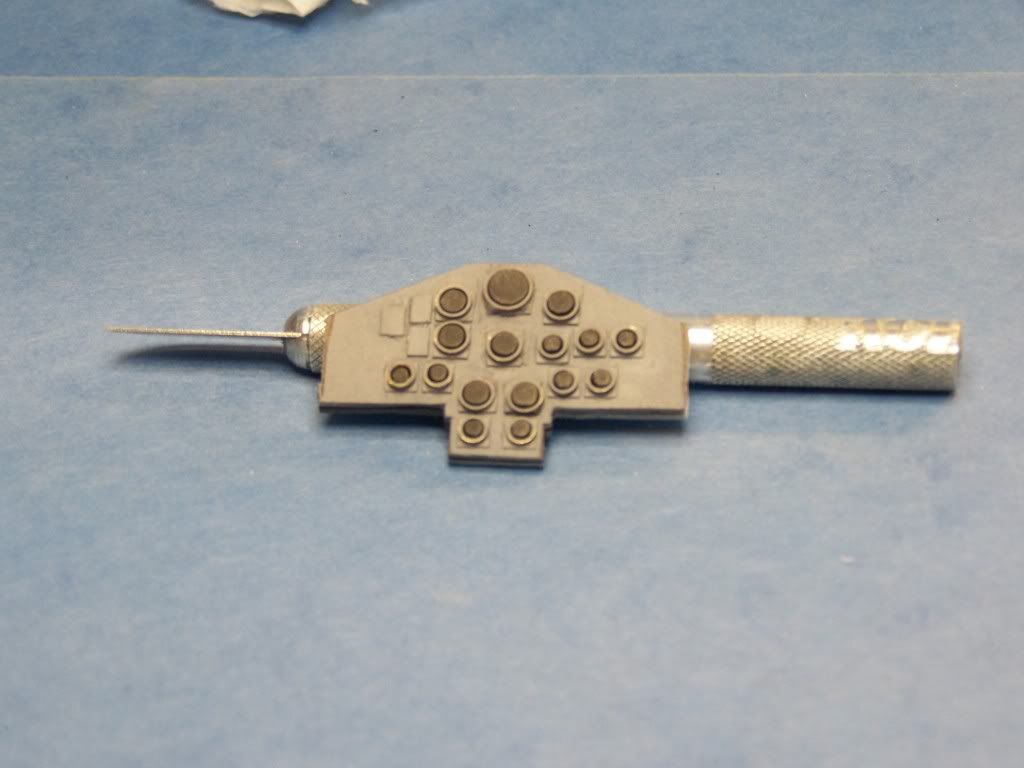
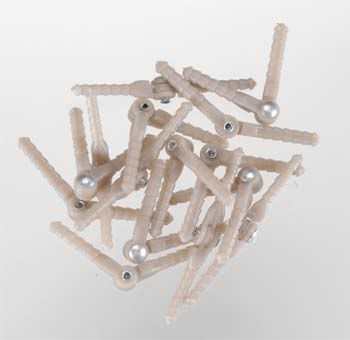
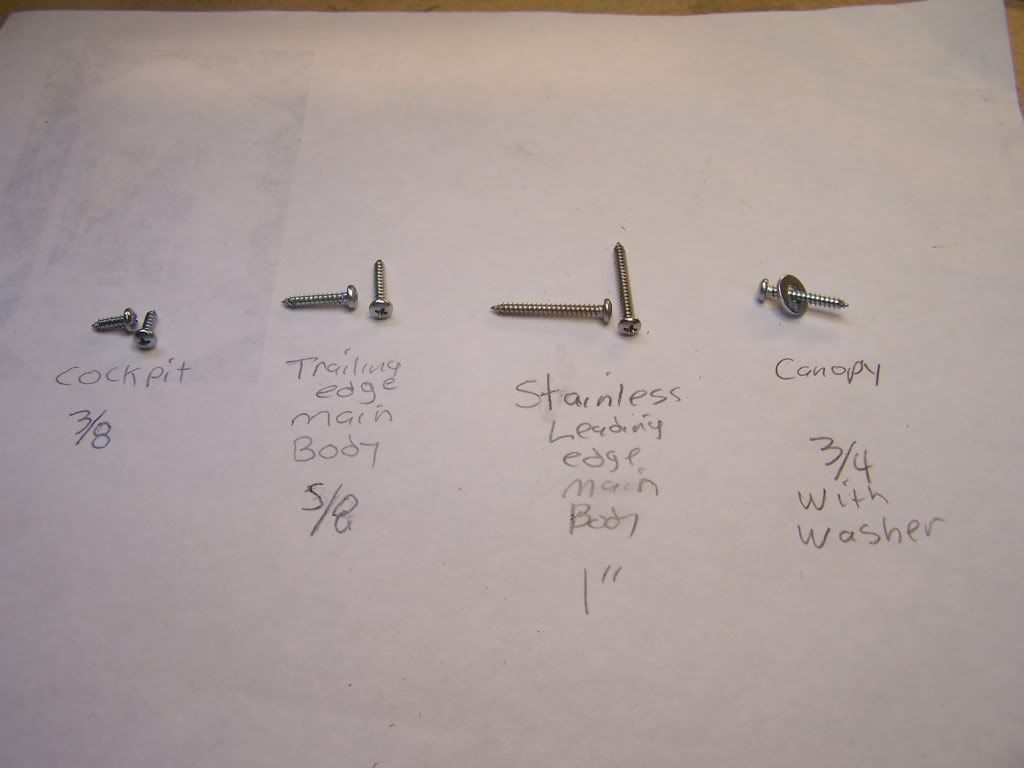
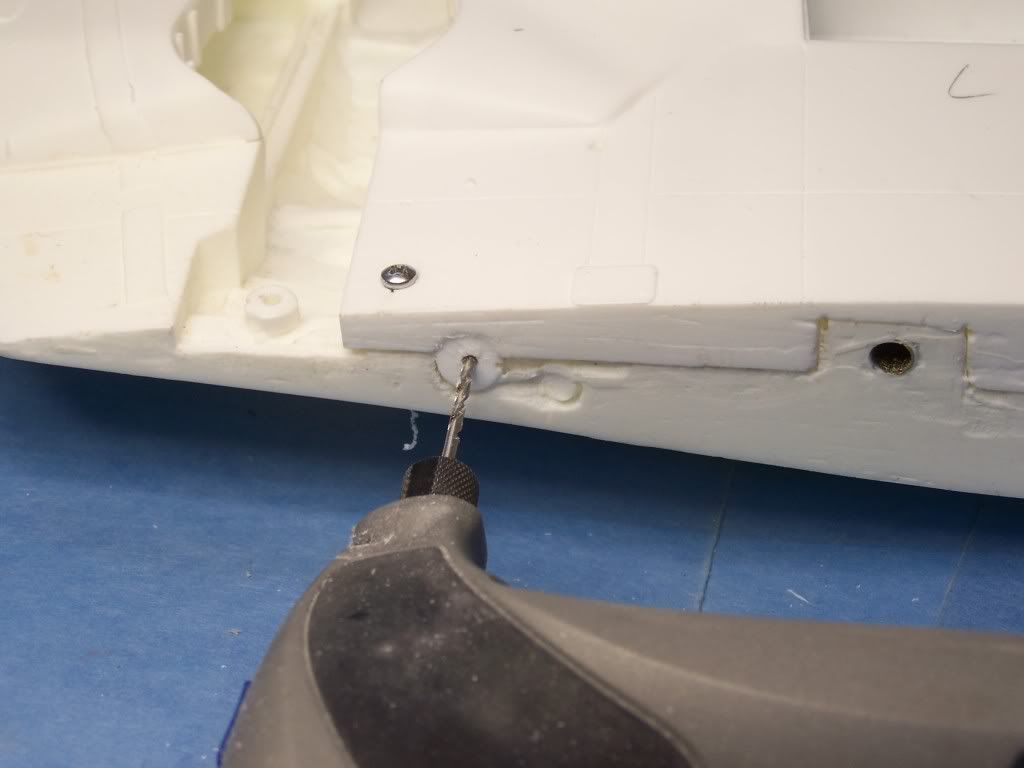
Drill the screw holes on the front leading edge only. I use a drill bit the same size of the shaft on the screw. NOT BIGGER THAN THE SCREW'S SPIRAL TEETH.

I broke one of the screws off :evil: so you probably should pop the pieces apart and prime the screw holes individual before you cinch the parts together.

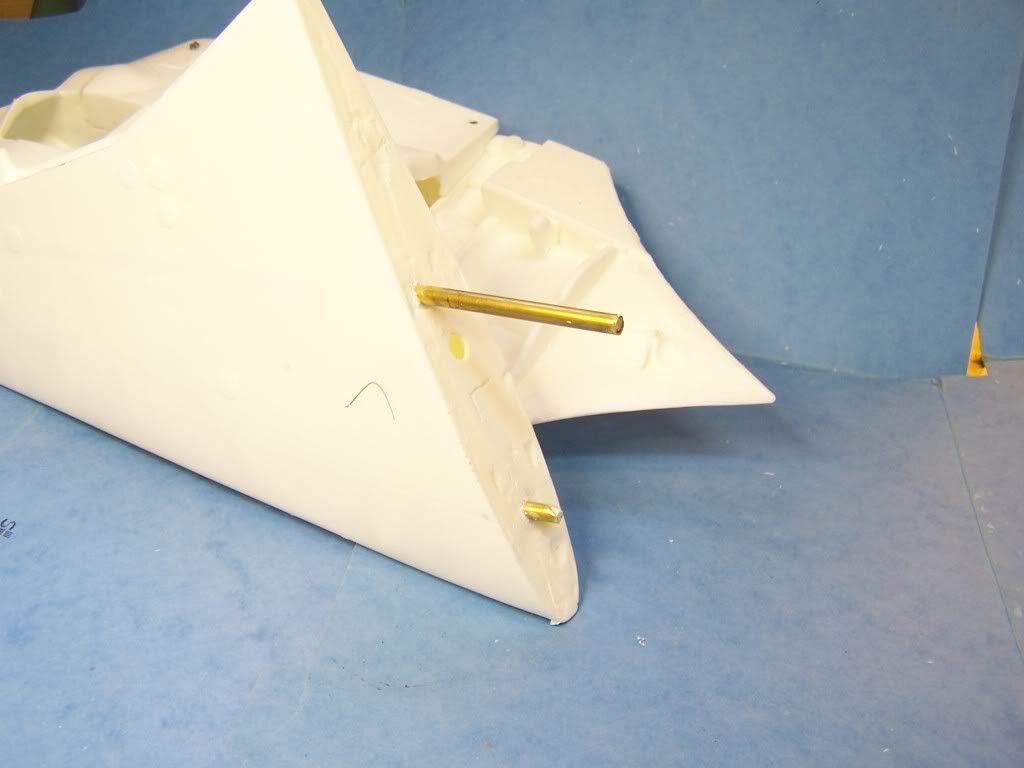
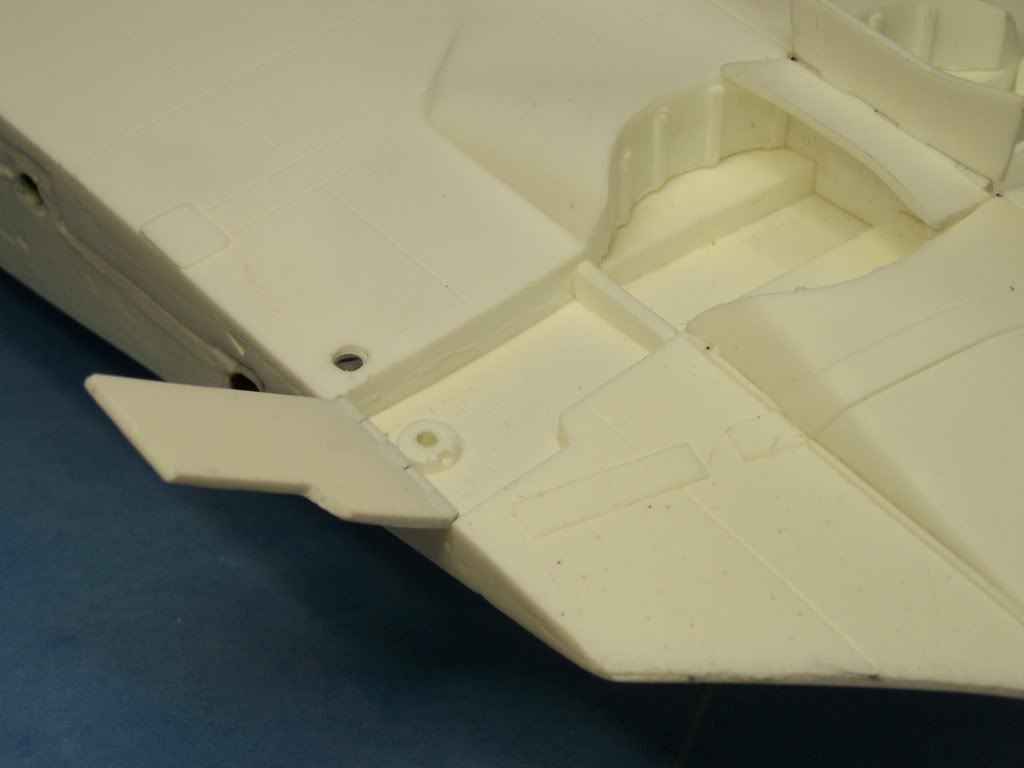
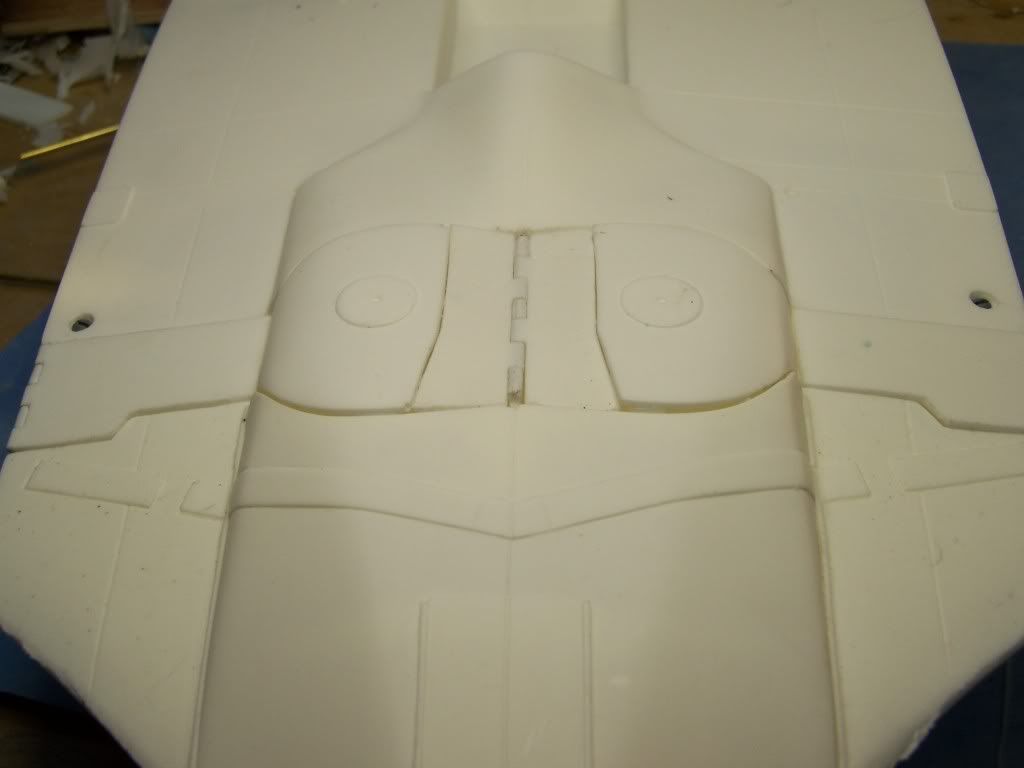
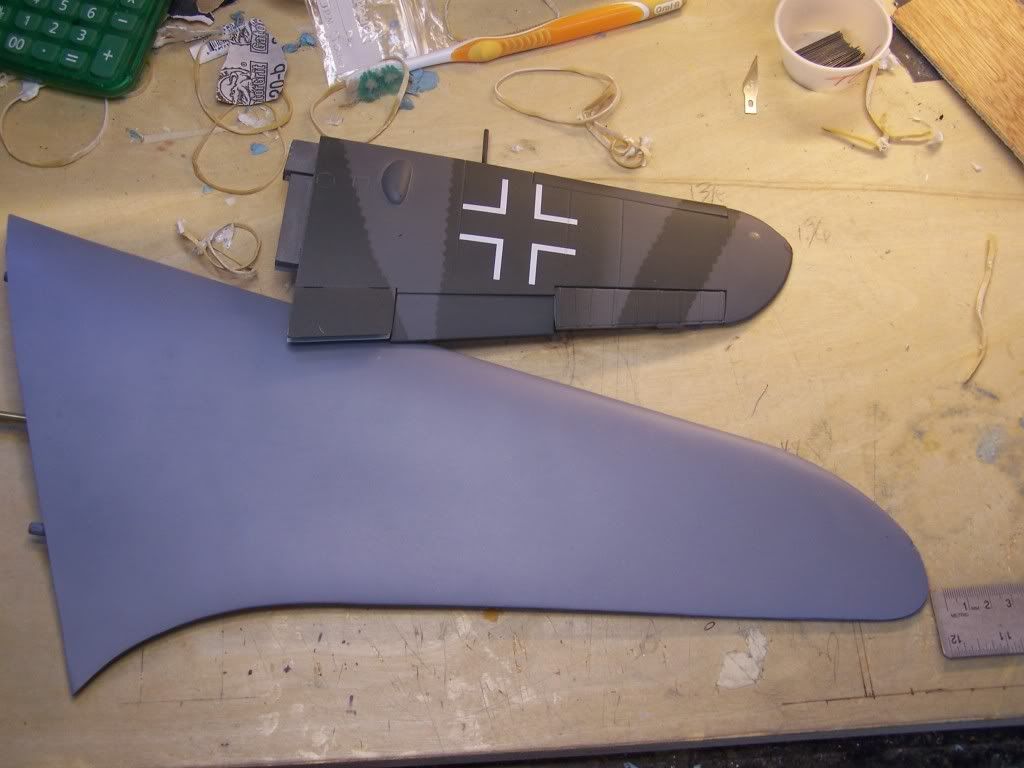
Once the leading edge is done do the rear.
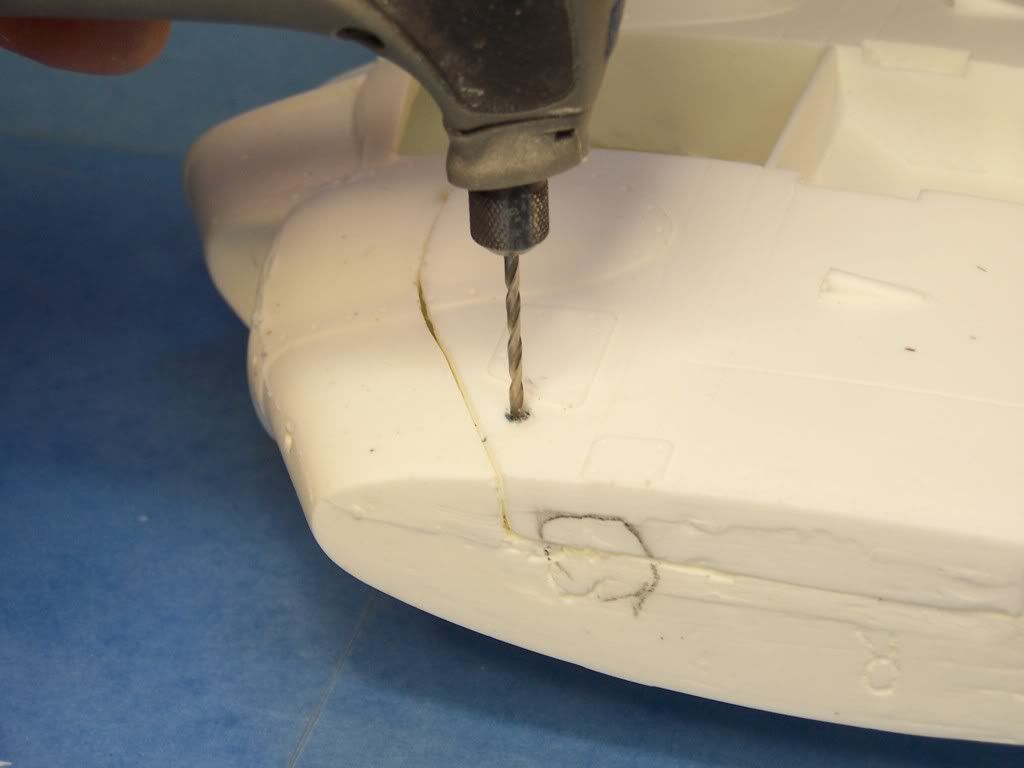
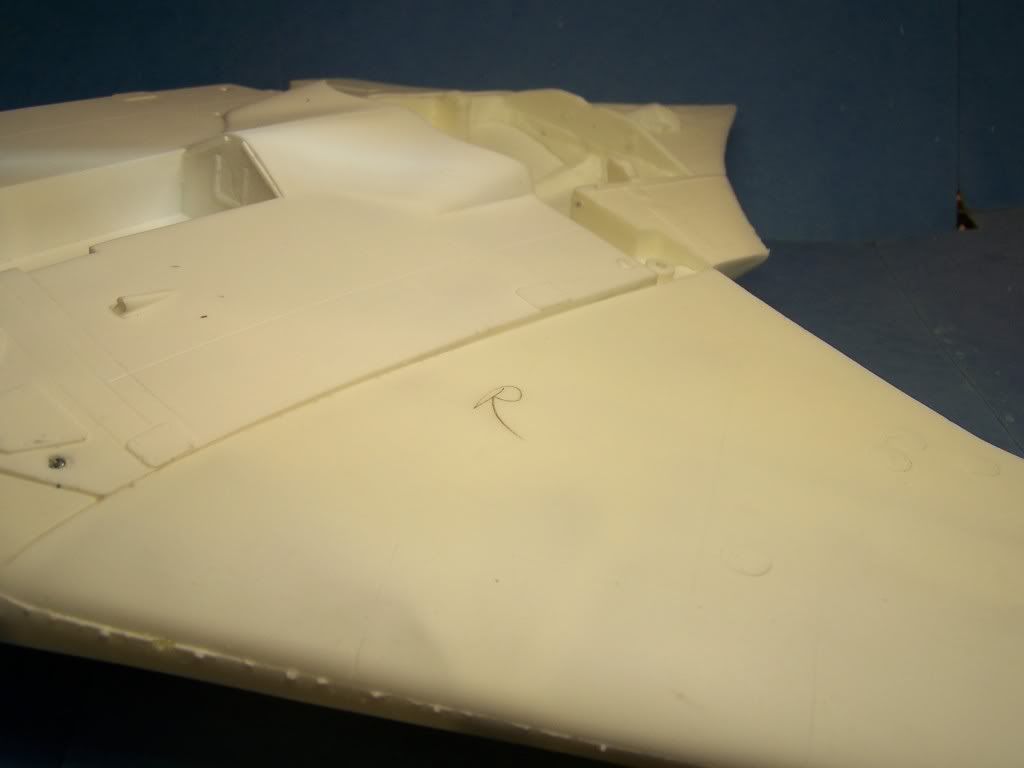
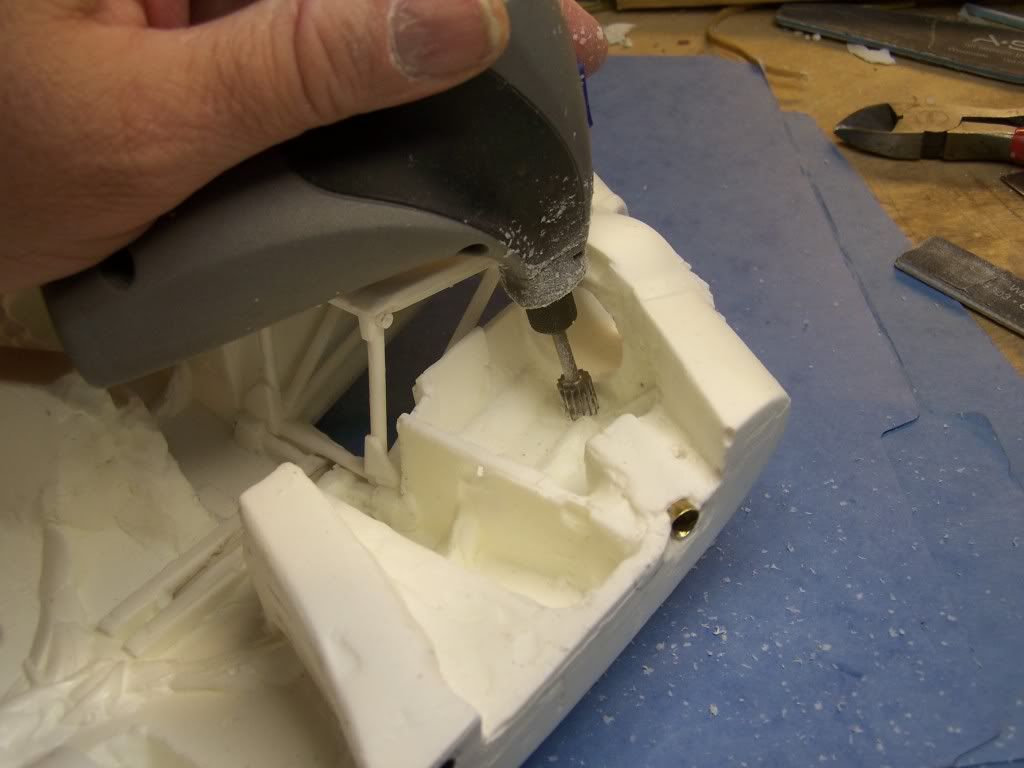
Image

Image
Image

MPORTANT !!!

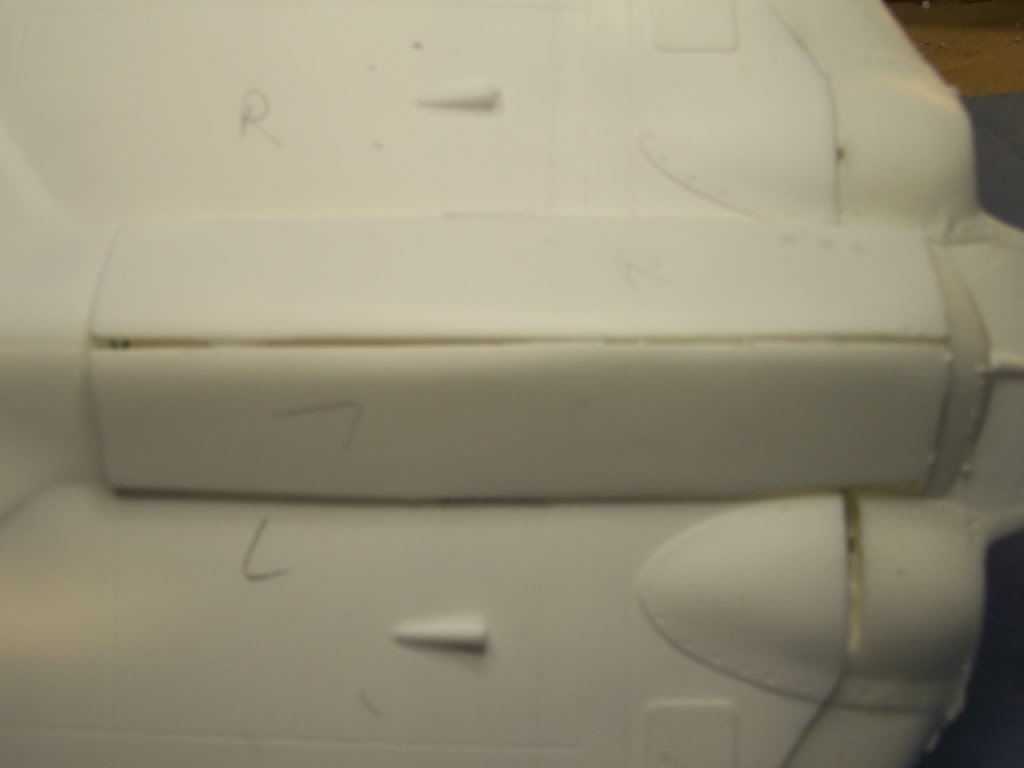
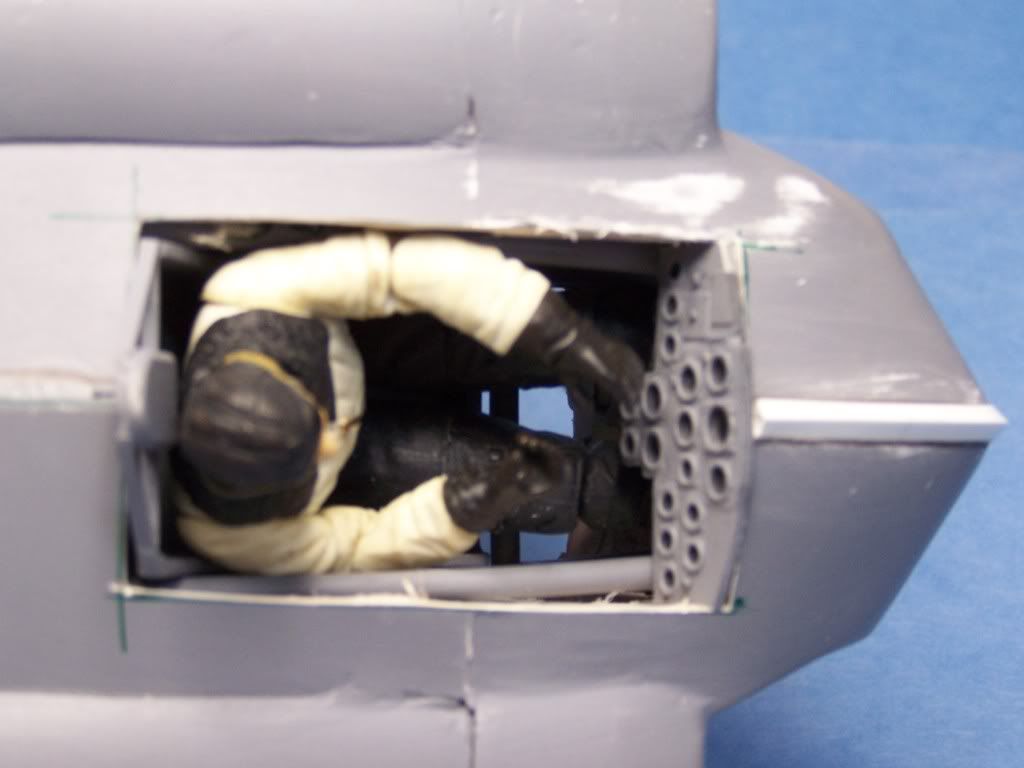
THE TOP AND THE BOTTOM HALVES NEED TO BE TAKEN APART TIME AND AGAIN.
MAKE SURE THAT THE SCREWS TURN FREELY.IT IS A GOOD IDIA TO REAM THE HOLES ON THE BOTTOM HALF SIDE (under the screw head ) SO THE SCREWS DO NOT BIND .
Last edited by pickelhaube on Mon Feb 27, 2012 1:07 pm, edited 12 times in total.
Kirk Douglas : Mine hit the ground first
John Wayne : Mine was taller


Image

pickelhaube
Officer - Brigadier General
Posts: 9638
Joined: Mon Jan 22, 2007 5:52 am
Location: New Orleans

Re: 1/18 Ho-229 Online Building Instructions

Post by pickelhaube » Sat Jan 14, 2012 12:01 pm

When preparing the wings you will notice tiny holes drilled in the leading and trailing edges. These were drilled to allow the trapped resin gasses to escape . Fill the leading edge but leave the trailing edges OPEN. These will not be seen after you install the flaps and ailerons.

Also when I made the master I made 2 alignment pegs along with the brass main spar. The wings do not fit on with both pegs so I omitted one on each wing.

Some wings may have went out with the dual pegs. Once you get them you could simply cut the ones off to correspond to the center section.

Image

Step 3
Wing fit . For some reason the right wing slid right on . The left is a little tighter. I guess the balsa wood master had a little give to it and the resin does not. I had to sand the alignment peg to ease the join.
When working the full builds I also found that the LEFT wing brass spar was about 1/4 inch long on almost each LEFT wing. So you will probably have to cut that 1/4 inch off of yours.


Image
Image

Fit one wing at a time . It is hard to handle everything with both wings on at the same time.

Check the fit you may have to do some touch up sanding to get a tight fit. If your particular kit has a bigger seam than you would like use thin styrene strip to fill the gap . If any.

Step 4

Once you fit the wings on you may have to check the fit on the top and bottom center section to see if it is flush with the bottom wing.

Simply take off the wing and unscrew the top and bottom . In order to have a tighter fit , you may have to spot sand here and there to get a proper fit.

Image

Image
Last edited by pickelhaube on Thu Feb 23, 2012 9:40 pm, edited 5 times in total.
Kirk Douglas : Mine hit the ground first
John Wayne : Mine was taller


Image

pickelhaube
Officer - Brigadier General
Posts: 9638
Joined: Mon Jan 22, 2007 5:52 am
Location: New Orleans

Re: 1/18 Ho-229 Online Building Instructions

Post by pickelhaube » Sat Jan 14, 2012 1:43 pm

Step 5

Glue on tail rear section.

It should snap into place. Make sure everything lines up. Take the tail trailing edge off and lay down a bead of glue just inside the alignment rails and spritz with kicker.
Then run a bead of glue down the trailing edge joint squeeze the trail edge together and spritz with kicker .
Repeat the other side.

Image
Image
Image


Step 6

Engine pods and main landing gear bay.

Fit pods together left and right . Snap them together and snap them into place. As always a little nip and tuck will nestle them down in place. Once you fit the pods and get them were you want TACK glue them in place

Clean off the landing gear floor and slide into place. This part does not have to be glued because the bottom section will hold it in place tight. But you can Tack glue it in place.

Check the bottom half to see how everything fits.

Image

Image
Image
Image
Image
Kirk Douglas : Mine hit the ground first
John Wayne : Mine was taller


Image

pickelhaube
Officer - Brigadier General
Posts: 9638
Joined: Mon Jan 22, 2007 5:52 am
Location: New Orleans

Re: 1/18 Ho-229 Online Building Instructions

Post by pickelhaube » Sun Jan 15, 2012 2:47 pm

Step 7

Cockpit area.The cockpit are is fairly simple. Start with the seat run. Run a tube through one side then slip on the joy stick then through the other side of the seat . DO NOT GLUE !!!
Run the tubes through the rest of their holes into the cage sides. Then pop assembly onto cockpit floor.

The cockpit floor should align everything.

Once you've placed the cage on the floor and have everything situated.

TACK GLUE the bottom rail to the floor.

Later on in the build yo may have to micro adjust the cage to aline with the canopy.

Image
Image
Image
Image
Image
Image

Notice the tabs on the upper top of the cage left and right of the seat. Those are the glue / screw tabs. Once you pop the assembly into the cockpit area you will have to drill the fastening holes through these tabs into the small mounting blocks. The use of screws will make it so you can take the cockpit in or out.

Once screwed into place DO NOT GLUE ANYTHING . When it is time to install the canopy, things may need micro adjustment to line up . If you glue at this time adjustment will be limited.

Image
Image
Image
Last edited by pickelhaube on Tue Jan 17, 2012 8:05 am, edited 1 time in total.
Kirk Douglas : Mine hit the ground first
John Wayne : Mine was taller


Image

pickelhaube
Officer - Brigadier General
Posts: 9638
Joined: Mon Jan 22, 2007 5:52 am
Location: New Orleans

Re: 1/18 Ho-229 Online Building Instructions

Post by pickelhaube » Sun Jan 15, 2012 3:10 pm

Step 8

Nose wheel assembly.

Slide the axle through one side of the strut , then through a axle center ring. then the main wheel . Then another axle center ring, out through the other side of the strut. No glue needed.

Image
Image
Image

Next the main wheel retraction linkage.

Assemble in order according to the pic.
CAUTION !!!! Slide the collar down the shaft of the strut . If you open it up and try to snap around the strut if could break in two. The only part you will need to glue is the hinge tab with the green X. To the location ( green x ) located inside wheel bay area.

CAUTION !! It would be best to link the smaller ladder looking linkage before you glue. Once glued in place it will be near impossible to link this area together .

Image
Image
Image
Image
Image
Last edited by pickelhaube on Mon Jan 16, 2012 4:52 pm, edited 1 time in total.
Kirk Douglas : Mine hit the ground first
John Wayne : Mine was taller


Image

pickelhaube
Officer - Brigadier General
Posts: 9638
Joined: Mon Jan 22, 2007 5:52 am
Location: New Orleans

Re: 1/18 Ho-229 Online Building Instructions

Post by pickelhaube » Sun Jan 15, 2012 3:19 pm

Step 9

Main gear assembly

Assemble the main gear to the strut. Check out the brass skeleton of the landing gear strut. This is what is cast into the main strut. But it would be a good idea to actually glue the tire to the strut itself. ( were the tire touches the strut )

This bird is heavy so by gluing the tire to the strut will give you that much more reinforcement.

Image
Image

Image

Gear retraction assembly

NO GLUEING needed this assembly

First we should do the center mount for the strut retraction. The center piece also has the inner wheel doors mounted to it.

Image
Image
Image

It slides down into slots casted into the main middle section and rear tail feather fairing.

Image

Image

Retraction system.

Note that the wheel point out and the scissor struts points backwards.
Also the long end of the triangle attachment points backwards as well.

Image
Image
Image
Image

Once you get everything were you want it you can trim off the brass pins. They were made longer to help with the casting.
Kirk Douglas : Mine hit the ground first
John Wayne : Mine was taller


Image

pickelhaube
Officer - Brigadier General
Posts: 9638
Joined: Mon Jan 22, 2007 5:52 am
Location: New Orleans

Re: 1/18 Ho-229 Online Building Instructions

Post by pickelhaube » Mon Jan 16, 2012 5:08 pm

Step 10

Gear doors

The landing gear for the Horten will be static. The modeler needs to make the choice if the gear will be displayed or in the retracted position.

The modeler can have both options . This could be done if you TACK GLUE THE GEAR DOORS CLOSED. USING THE MINIMUM AMOUNT OF GLUE SO THEY CAN BE POPED OFF AT A LATER TIME. OR BY USING OTHER MEENS TO HOLD THE MAIN DOORS IN PLACE.

Main gear strut doors. Thread the pin through the hinges making sure pin is cut flush this sides. So the doors can be slid into place.

This will be a tight fit so glue will not be needed here.

Image
Image
Image
Image
Image
Image

Main gear wheel doors.

These doors may pop off and car must be taken in TACK GKUEING . because this wheel door attach to the main struts if the gear is to be in the down position.

Image
Image
Image

Main gear wheel cover

Image


Image
Kirk Douglas : Mine hit the ground first
John Wayne : Mine was taller


Image

AJWW2
Officer - 2nd Lieutenant
Posts: 296
Joined: Thu Sep 08, 2011 5:07 pm

Re: 1/18 Ho-229 Online Building Instructions

Post by AJWW2 » Mon Jan 16, 2012 6:17 pm

WOW!!!
it be like dat

pickelhaube
Officer - Brigadier General
Posts: 9638
Joined: Mon Jan 22, 2007 5:52 am
Location: New Orleans

Re: 1/18 Ho-229 Online Building Instructions

Post by pickelhaube » Mon Jan 16, 2012 6:59 pm

AJWW2 wrote:WOW!!!


:D

Actually as I am getting the instructions together this is an easy build :D :D :D

Step 11

Nose gear doors

Make sure you have the hinges for the correct side. the hinges are marked. If you switch them it really will not be a big deal.

The smaller side of the hinge gets glued on the doors.

The larger side slide down into their respective slots.

DO NOT GLUE THE LARGE HINGE INTO THEIR SLOTS . THE HINGE NEEDS TO SLIDE IN AND OUT SLIGHTLY SO THE DOORS CAN SWING OPEN AND CLOSED.

Again make sure you trim the hinge trim tight so the hinge can slide down into the slot.

Image

Image
Image
Image
Image
Image
Image

_______________________________________________________________

From here on the installation has no real order.

These parts are fragile and great care must be taken in installation and handling. So they are not bent , broken or damaged.

YOU CAN EVEN POKE YOUR EYE OUT. :shock:


Step 12
Round antenna, whip antenna, pitot tube, cannons.

I have locator holes through out the model. So this should step.

be an easy The cannons are conjecture. How long you want to leave the barrel is up to you.

The pitot tube should extend 46 mm from the leading edge. The brass tube should extend 23 mm and the wire 23 mm beyond that.


Image
Image
Image

Image
Image
Image
Kirk Douglas : Mine hit the ground first
John Wayne : Mine was taller


Image

pickelhaube
Officer - Brigadier General
Posts: 9638
Joined: Mon Jan 22, 2007 5:52 am
Location: New Orleans

Re: 1/18 Ho-229 Online Building Instructions

Post by pickelhaube » Mon Jan 16, 2012 9:29 pm

Step 13

Rear engine cones.

Let me tell you this next step was the most fiddliest and trickiest of all of the build . THE REAR ENGINE CONES. Because of their location deep in the pods I could not get my fingers in to get them situated.

I have about 10 sets poured and the rest of the sets I will leave the pour stubs on so you guys can twist them to get them settled in.

When done they should be in the middle of the nacelles.

The reason I have them toward the bottom of the construction tutorial is because you will probably want to have the inside of the rear nacelles fitted filled and painted.

Image

I drilled the rear of the cones and glued a styrene tube so I could reach behind the pod and rotate the cones so I could get them in line.

Image

Image

Step 14

Front cones.

These were really easy to pop in. I originally made them to fit so they just popped in. But I had to make a flow vent right behind them in the pouring process that needs to ground out so the front cones will fit in their slots. About 30 seconds with the Dremel will take care of that situation.

Image

Image

Image
Image
Kirk Douglas : Mine hit the ground first
John Wayne : Mine was taller


Image

pickelhaube
Officer - Brigadier General
Posts: 9638
Joined: Mon Jan 22, 2007 5:52 am
Location: New Orleans

Re: 1/18 Ho-229 Online Building Instructions

Post by pickelhaube » Mon Jan 16, 2012 9:49 pm

Almost there guys.

Step 15

Canopy

I do not quite have the production canopy glass ready ,but here is the frame installation.

You should do this step WITHOUT the glass because there is a great danger of scratching it.

The front windshield should be installed with the glass because of the shape it will will be very hard to install the glass with the frame mounted.

The sliding canopy is screwed in from the bottom of the sliding slot on the top of the main section.

DO NOT OVER TIGHTEN.

When gluing the glass to the frame I use Gold CA glue.

DANGER !!!!

THE UISE OF STANDARD CA GLUE WILL FROST THE GLASS !!!
IT WILL ALSO FROST IF YOU USE KICKER.

So cut the glass to fit using a small amount of GOLD CA glue and clamp the glass till the glue sets. Then mount the glass to the windshield . Clamped it it sets as well.

DO THIS AFTER YOU HAVE MOUNTED THE CANOPY FRAME AND UNSCREWED IT FROM THE BODY.

After the glass is done. Remount the canopy with the screw.BEING CAREFUL NOT TO SCRATCH THE GLASS. Slide the glass all the way forward and mount the front windshield WITH GOLD CA GLUE.

Dry fit the windshield because you need to match the face of the sliding canopy.

This could take a little tweaking so check it before you glue.

Image
Image
Image
Image
Image

Prototype glass

Image

Image
Last edited by pickelhaube on Mon Jan 16, 2012 10:11 pm, edited 1 time in total.
Kirk Douglas : Mine hit the ground first
John Wayne : Mine was taller


Image

pickelhaube
Officer - Brigadier General
Posts: 9638
Joined: Mon Jan 22, 2007 5:52 am
Location: New Orleans

Re: 1/18 Ho-229 Online Building Instructions

Post by pickelhaube » Mon Jan 16, 2012 10:08 pm

Finis

Wing caps

After final painting some of you may want to mount the static wing caps.

I have not taken pics of this yet. So when I do I will edit this last post.

Decals.

The decals supplied with the kits have the swastikas and wing crosses. Of course this is all fantasy because the Horten never saw combat. So they are supplied and the modeler will have to decide were they will be mounted.

Instrument panel.

Decals were made for the panel. There are a couple of ways to install the sheet to the panels stubs and trim off the extra film.

OR

Cut out each dial and individually mount them the the panel's stubs. Then pop the rear panel into front.

Once painted and the modeler decides to install a figure , slide the panel through the cockpit opening using the rails as a guide tight against the fire wall.

Image
Image

Image
Image

Image
Image
Image


Ailerons and flaps.

Install the ailerons and flaps the last thing. I popped mine off taking the wing on and off.

If you want movement you can use Dubro hinges. Simply drill the holes ( making sure they line up ) pop them in and CA glue them.

Image


Here is were you can get them.

http://www3.towerhobbies.com/cgi-bin/wt ... LXRWW6&P=7

You can chose to either glue the flaps and ailerons smooth with the wing foil or dropped and split . Modelers choice.

Image

Image
Last edited by pickelhaube on Wed Feb 22, 2012 12:06 pm, edited 3 times in total.
Kirk Douglas : Mine hit the ground first
John Wayne : Mine was taller


Image

pickelhaube
Officer - Brigadier General
Posts: 9638
Joined: Mon Jan 22, 2007 5:52 am
Location: New Orleans

Re: 1/18 Ho-229 Online Building Instructions

Post by pickelhaube » Mon Jan 16, 2012 10:15 pm

So there you go guys.

With a couple more edits the directions will be done.

I know it is hard to fallow without your kits .

Hopefully I covered everything.

I think that a modeler with a medium skill level could have this built in a day.

It all depends on your kit and the amount of sanding and filling/priming of the parts.

It did take over 2 days to make the instructions. But I feel that the build itself would have taken about 4 hours.

For the size of this project there are not a lot of pieces to it . Hopefully making a simple build.

Comments ?
Kirk Douglas : Mine hit the ground first
John Wayne : Mine was taller


Image

tmanthegreat
Officer - Brigadier General
Posts: 11237
Joined: Tue Oct 05, 2004 7:38 pm
Location: Central California

Re: 1/18 Ho-229 Online Building Instructions Done ?

Post by tmanthegreat » Tue Jan 17, 2012 9:10 am

Great instructions and the kit looks amazing :D

A couple questions for those of us getting pre-built versions, like me:

Will it come painted?

How are the landing gear designed to work (static or retractable)? I know the doors will have to be fixed open or cloesed or perhaps send them unattached?

If the landing gear are fixed how will you do the landing gear for the prebuilt version?

Lastly, any timeframe for completion? No hurry, just curious :wink:

Many thanks!
"If you fail to plan, you plan to fail."

Jnewboy
Officer - Brigadier General
Posts: 2124
Joined: Mon Dec 13, 2010 1:46 am
Location: California
Contact:

Re: 1/18 Ho-229 Online Building Instructions Done ?

Post by Jnewboy » Tue Jan 17, 2012 10:47 am

My only question is in regards to wing droop, I was expecting to see at least one wing spare that would go from wingtip to wingtip. Is there droop? I know the wing sections have got to be heavy.

Crazy Kraut
Officer - 1st Lieutenant
Posts: 520
Joined: Mon Jun 08, 2009 12:49 pm
Location: little village near Heidelberg, Germany

Re: 1/18 Ho-229 Online Building Instructions Done ?

Post by Crazy Kraut » Tue Jan 17, 2012 12:50 pm

WOW Pickle, this is amazing.
Looking forward to get it. I still need a Paypal invoice for the second kit.
Thanks, regards from Germany
Wir haben gehurt, gekämpft und gesoffen, des Führers Mühlen verbraucht, sind auf dem Zahnfleisch gekrochen, doch haben wir uns teuer verkauft.
JG300 Wilde Sau

pickelhaube
Officer - Brigadier General
Posts: 9638
Joined: Mon Jan 22, 2007 5:52 am
Location: New Orleans

Re: 1/18 Ho-229 Online Building Instructions Done ?

Post by pickelhaube » Tue Jan 17, 2012 1:42 pm

T-man

The full builds will be fully painted.
As far as the landing gear they are pop in and out. THEY DO NOT RETRACT.
The retract linkages are pinned . So you can use a thin nail push the pins out to take them off or on so you can close the doors.
The only gray area are the covers for the wheels themselves they need to be TACKED GLUED ON THE STRUT OR WHEEL BAY.

J new.

Hopefully the wings will have no droop at all. I have a brass tube running the length of the wing panels that are totally covered with resin.
I also have the female tube totally covered with resin in the center as well .
With dihedral built in.
So there should be NO droop what so ever.

Of course if you hang this up in your attic with 100 plus degrees all bets are off.

Crazy K.

:oops:

Give me your paypal again so I can shoot it out to you ASAP.
Kirk Douglas : Mine hit the ground first
John Wayne : Mine was taller


Image

pickelhaube
Officer - Brigadier General
Posts: 9638
Joined: Mon Jan 22, 2007 5:52 am
Location: New Orleans

Re: 1/18 Ho-229 Online Building Instructions Done ?

Post by pickelhaube » Wed Feb 22, 2012 11:09 am

I changed the screws a little so I will post the different sizes and what they are used for later. I also will describe how to change up the screw hole location for the main section. So that they can be hidden. :D

The way I designed the final hole location will be an easy cover up for either the wing or the framed end caps. :wink:
Kirk Douglas : Mine hit the ground first
John Wayne : Mine was taller


Image

pickelhaube
Officer - Brigadier General
Posts: 9638
Joined: Mon Jan 22, 2007 5:52 am
Location: New Orleans

Re: 1/18 Ho-229 Online Building Instructions Done ?

Post by pickelhaube » Wed Feb 22, 2012 2:01 pm

Here are the production screws.

Image

There was a big discussion about how I was going to hide the screw heads and the best way to do it.

Well I worked it out and never made mention of it. ( maybe I did but I can not remember )

Anyway here it is.

When I built the main body I made a kind of round barrel interlocking stub .

Once you have everything finished and ready to start paint priming drill the hole through that barrel. Take your screw out and turn it into the barrel.

Do the same for the leading edge. Drilling at angle. Avoid drilling into the stainless screw.

You can either counter sink these holes or grind out the wing root or end cap to accept the screw head.

Once you are done simply fill your hole and prime. Then you are ready for your paint finishing !!

Image
Image
Image
Image
Image
Image
Kirk Douglas : Mine hit the ground first
John Wayne : Mine was taller


Image

pickelhaube
Officer - Brigadier General
Posts: 9638
Joined: Mon Jan 22, 2007 5:52 am
Location: New Orleans

Re: 1/18 Ho-229 Building Instructions Screw Head Issue Resol

Post by pickelhaube » Mon Feb 27, 2012 1:05 pm

I am working on the full builds all 10 at a time. I will cut that to 5 so as to be a little easier on me.

Besides that 2 out of the 10 wings worked perfectly with the center section.

8 did not. One of the eight I sanded down the bottom main piece to fit tighter to main top piece.

This took a very very long time to do.

So the rest I used strip stock to bring the thickness up to the center section then used modeler's putty to smooth everything out.

Some how when casting the wings they came out thinner than the original.

Some of the wings matched the top and not the bottom or vice versa.

The build up seems to work fine and not too much work.

I will try to post pics.
Kirk Douglas : Mine hit the ground first
John Wayne : Mine was taller


Image

Star56
Corporal
Corporal
Posts: 59
Joined: Fri Oct 21, 2011 5:18 pm

Re: 1/18 Ho-229 Building Instructions Screw Head Issue Resol

Post by Star56 » Mon Feb 27, 2012 1:48 pm

Oh man pics of the full build progress would be great. I can't imagine how much work this must involve. I could never build this myself. No skills what so ever,

pickelhaube wrote:I am working on the full builds all 10 at a time. I will cut that to 5 so as to be a little easier on me.

Besides that 2 out of the 10 wings worked perfectly with the center section.

8 did not. One of the eight I sanded down the bottom main piece to fit tighter to main top piece.

This took a very very long time to do.

So the rest I used strip stock to bring the thickness up to the center section then used modeler's putty to smooth everything out.

Some how when casting the wings they came out thinner than the original.

Some of the wings matched the top and not the bottom or vice versa.

The build up seems to work fine and not too much work.

I will try to post pics.

pickelhaube
Officer - Brigadier General
Posts: 9638
Joined: Mon Jan 22, 2007 5:52 am
Location: New Orleans

Re: 1/18 Ho-229 Building Instructions Wing Const. Helpful Hi

Post by pickelhaube » Thu Mar 22, 2012 3:04 pm

Hey Guys here are the instuctions.

They were not deleted just on the next page. :wink:
Kirk Douglas : Mine hit the ground first
John Wayne : Mine was taller


Image

JonS
Private First Class
Private First Class
Posts: 2
Joined: Tue Apr 17, 2012 6:29 pm

Re: 1/18 Ho-229 Building Instructions Wing Const. Helpful Hi

Post by JonS » Tue Apr 17, 2012 6:40 pm

pickelhaub I would like to buy an unbuilt kit if you could please shoot me an email with price at [email protected] I will shoot you a paypal with the cash. Thanks.

pickelhaube
Officer - Brigadier General
Posts: 9638
Joined: Mon Jan 22, 2007 5:52 am
Location: New Orleans

Re: 1/18 Ho-229 Building Instructions Wing Const. Helpful Hi

Post by pickelhaube » Mon May 21, 2012 9:53 am

Here is a helpful hint.

For you guys who are building your own.

Do not install the engine pods until the last thing.

The rear pods can be put together and the rear nacelle can be glued in place filled and sanded.
Leave the rear portion and the light bulb out so the rear of the nacelle can be painted.you can align the light bulb to the rear part of the nacelle and glue it to the nacelle. Once glued to the rear part of the nacelle you can take it out as one unit and paint. Then make it permanent when you are ready.

The same goes for the front intake bulb. Make sure it fits ( you will have to do a little grinding of the socket ) then take it out and paint.

By it being out of the way it will be easier to paint the intake tunnel.
Kirk Douglas : Mine hit the ground first
John Wayne : Mine was taller


Image

pickelhaube
Officer - Brigadier General
Posts: 9638
Joined: Mon Jan 22, 2007 5:52 am
Location: New Orleans

Re: 1/18 Ho-229 Online Building Instructions

Post by pickelhaube » Mon May 21, 2012 10:09 am

For a better fit you may have to grind out about 1/18th of an inch so the screw tabs are a little loser fit for the cockpit cage.

Also the bottom of the seat was a little tight on a few. So if you take the Dremel and knock off the sharp edge ( on the bottom of the seat ) it will be a smoother fit.

To the left and right of the screw tabs.

Image
Last edited by pickelhaube on Sat Oct 13, 2012 6:24 am, edited 1 time in total.
Kirk Douglas : Mine hit the ground first
John Wayne : Mine was taller


Image

Post Reply