Wow! Received my F-14 lighted version back from TKO211 last night!
First off, let me give a big "Thank You!" to Zach for a fantastic paint job!
Last night was the first time I put the entire bird together and turned the lights on and I must say that I am very impressed. This is one big beautiful bird. If JSI wouldnt have screwed the spot thing up, and the landing gear issue, it would be worth every dollar. I'm appreciative that JSI took on such a huge 1:18 aircraft and they almost hit it out of the park. Hope they can continue to produce and improve upon their 1:18 offerings.
Again, thanks to TKO211 for such excellent paint work!
POST JSI F-14 SPOT REPAIR IDEAS HERE
-
pcoughran
- Officer - 1st Lieutenant

- Posts: 596
- Joined: Mon Jun 30, 2008 10:58 am
- Location: 1, USA, MO, St. Louis
Dragon53,
I got mine at Walmart in the Women's makeup section.
I just held the ends of the pad together so it was shaped like a "U", then I poured out a little paint onto a plastic plate, not too much at a time. I then dabbed the bottom of the "U" into the paint and then dabbed it onto a paper towel to get "excess" paint off. Then just dab away at the model. I did the whole plane - just masked off the markings really well (about 3-4 hours of work there) and then dab right over everything. It looks fantastic.
I changed the spongepad about every 5-6 panels worth of dabbing to make sure the paint didn't start to dry. Took me about two of the small bottles of paint to complete.
"Where's dat waskily wabbit?"
____________________________________________
Good Trades: Ostketten, Pickelhaube, Cornbreadfred, Sledgehammer, Pizzaguy, caesarbc3,jwcarpenter
____________________________________________
Good Trades: Ostketten, Pickelhaube, Cornbreadfred, Sledgehammer, Pizzaguy, caesarbc3,jwcarpenter
-
deankleines
- Corporal

- Posts: 84
- Joined: Mon Dec 21, 2009 6:22 pm
" A Little Dab L Do Ya"
Or Shall we say "Yabba Dabba Doo"
Congrats on completing your despottation!!!!
Did you use the enamel or the acrylic?
So glad to hear it went well for you!!
Regards,
Dean
Congrats on completing your despottation!!!!
Did you use the enamel or the acrylic?
So glad to hear it went well for you!!
Regards,
Dean
-
worldwar2buff
- Sergeant

- Posts: 128
- Joined: Fri Oct 28, 2005 8:35 am
- Location: Pittsburgh PA
I just want to send out a personal thanks (I think  ) to Dean ("deankleines"). Thanks to his great solution to the spots on the F-14, I took the plunge and just purchased an F-14 about 30 minutes ago (c'mon post office, why haven't you delivered it yet????
  ).
).
I initally had a pre-order on this item but I cancelled it once the true extent of the spots was known. I have virtually no skills let alone equipment when it comes to something this big and at this price. I didn't want to have a spot-cat.
Thanks to his solution (and to the reports of others who have used it), I now have the confidence to to do this.
It'll still be a couple of weeks before I can get to it, but I will let everyone know how it turns out.
Thanks again!
Life is NOT a journey to the grave with the intention of arriving safely in an attractive and well preserved body, but rather to skid in sideways, chocolate in one hand, martini in other, body thoroughly worn out and screaming "WOO-HOO” what a ride!
-
tmanthegreat
- Officer - Brigadier General

- Posts: 11238
- Joined: Tue Oct 05, 2004 7:38 pm
- Location: Central California
-
iflabs
- Officer - 2nd Lieutenant

- Posts: 292
- Joined: Thu May 31, 2007 12:28 am
- Location: Minne-sota-apolis
Targetdragon53 wrote:IFLABS:
Great photos.
Where did you buy your sponges?
http://www.target.com/Studio-Tools-Beau ... ols&page=1
Not bad for $1.79 for a pack of 32.
IFLABS:
Thanks for the link. My Bunker Hill Avenger is going to be delivered on Friday, so I'll try to buy the spot removal supplies on Saturday. I hope Michael's arts/crafts carries the paint---I don't know of many hobby stores in Houston otherwise.
Also, the Target customer gave the sponges a 1-star rating for applying her makeup. Maybe you should give them a 5-star for JSI F-14 spot removing.


-
deankleines
- Corporal
- Posts: 84
- Joined: Mon Dec 21, 2009 6:22 pm
Awesome Job!
Very proud of your work! Great job!
What I am doing for the tabs that are loose is to use super glue and Insta-Set accelerator to coat the tab so it is slightly thicker and fits tighter into the slot. Use a more liquid type super glue instead of the thick gap-filling type. The accelerator cures it instantly.
What I think happend here is the plastic tabs were designed to fit snug into the slots, but shrunk a bit as they cooled from the molding process.
I did this to the tab on the nose strut and it fits very tight now.
If the glue coating prevents the tab from going in, use a small metal file to remove enough to get a tight fit.
A little tedious, but worth the effort.
IFLABS:
My apologies but more questions:
1. For the acrylic gull grey, did you dab the acrylic only on the spots or on the entire F-14?....(Pcoughran's post said he dabbed the entire F-14)
2. For the radome, you used Model Master radome tan #FS33613?
3. Would regular (tan) masking tape be ok instead of the blue model tape?
Last edited by dragon53 on Fri Jan 22, 2010 8:36 pm, edited 1 time in total.
-
deankleines
- Corporal
- Posts: 84
- Joined: Mon Dec 21, 2009 6:22 pm
1. For the acrylic gull grey, did you dab the acrylic only on the spots or on the entire F-14?....(Pcoughran's post said he dabbed the entire F-14)
It's really your call - I dabbed out from the spot until all the overspray from the spot was covered. If I had panel lines, I would put a post-it note on the adjacent panel and cover up to the note.
2. For the radome, you used Model Master radome tan #FS33613, and did you dab it only on the radome spots or the entire radome?
I did the whole radome so it would be entirely uniform from all light angles.
3. Would regular (tan) masking tape be ok instead of the blue model tape?
Either tape is fine as long as the sponge is not soaked with paint. You do not want the paint to creep under the tape, nor do you want an edge to show where the tape was
Hope this helps..
Dean
-
deankleines
- Corporal
- Posts: 84
- Joined: Mon Dec 21, 2009 6:22 pm
Same thing I did - Deaniflabs wrote:Same Model Master Randome Tan dean brought up a few pages back. I also used the acrylic version. Paint doesn't match up the factory so I dabbed the whole thing, looked nicer anyway.dragon53 wrote:IFLABS:
That's a very impressive job you did.
What paint did you use for the yellow radome?
-
iflabs
- Officer - 2nd Lieutenant
- Posts: 292
- Joined: Thu May 31, 2007 12:28 am
- Location: Minne-sota-apolis
Well to add what Dean has already pointed out:dragon53 wrote:IFLABS:
My apologies but more questions:
1. For the acrylic gull grey, did you dab the acrylic only on the spots or on the entire F-14?....(Pcoughran's post said he dabbed the entire F-14)
2. For the radome, you used Model Master radome tan #FS33613?
3. Would regular (tan) masking tape be ok instead of the blue model tape?
1.) I dabbed directly on the spots and then randomly in the vicinity to sort of feather everything out. The coats of paint go on light, so you'll have to go over with a few passes to mute all the spots. I unfortunately was in a rush to get the darn thing assembled; you can still see some hints of the spot on mine in person.
You'll get the idea of the effect after a few tries and adjust accordingly.
2.) Yes
3.) I don't know, but it should work. The only difference I've discerned so far is that painter's tape doesn't leave a sticky residue over a week's period, or so I've been told. I bought the blue tape anyway just for the contrast to tell where and what is masked.
Well whenever you jump on, Dean's method is where it's at. Under $10 and idiot-proof.immeww2 wrote:Those of you who are re-painting their F-14's are doing a great job. I'm just too lazy and to poor to do or have the work done for me which prevents me from getting this bird. Hats off to you all.

WOW!! Just received this bad boy with TKO's spot removal! All I can say is WOW! He has done incredible work making this guy what it should have been to begin with. My heart felt thanks for his stepping up.
Tanks for the memories
Your breachblocks so black
And oodles of track
Here at Grafenwoehr it's so good to be back
Oh, tanks for the memories..
Your breachblocks so black
And oodles of track
Here at Grafenwoehr it's so good to be back
Oh, tanks for the memories..
-
supersonicfifi
- Officer - Colonel

- Posts: 1269
- Joined: Wed Jun 01, 2005 2:47 pm
- Location: FRANCE
LG HELP
here is an idea to help the landing gear :
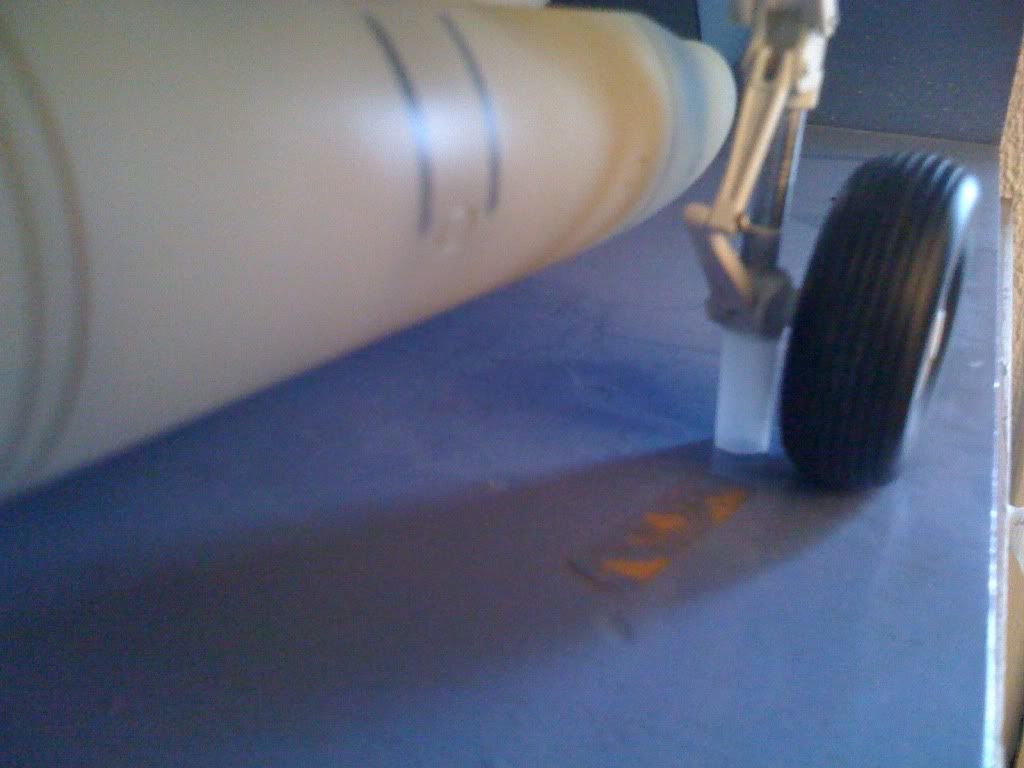
I've glued a clear plastic tube (from a translucid pen body!) under the L shape that was broken during the transportation.
Please note that the landing gear come from skyworks and looks simply amazing (metal tube for the shock absorber !) and i am just angry at the transport guys !!!!!
I've glued a clear plastic tube (from a translucid pen body!) under the L shape that was broken during the transportation.
Please note that the landing gear come from skyworks and looks simply amazing (metal tube for the shock absorber !) and i am just angry at the transport guys !!!!!
1/18 mirage 2000 & RAFALE should i say more ?
-
worldwar2buff
- Sergeant
- Posts: 128
- Joined: Fri Oct 28, 2005 8:35 am
- Location: Pittsburgh PA
I have no modelling skills but using Dean's method, My Spot-cat has gone from this:

To This:


I have poor lighting in the room I took the pictures. Actually looks much better than this. I didn't do it too thick as I wanted a bit of the spots to show through for weathering purposes. Very happy with this and glad I took the plunge. Owe it all to Dean's method! Thanks Dean!
To This:
I have poor lighting in the room I took the pictures. Actually looks much better than this. I didn't do it too thick as I wanted a bit of the spots to show through for weathering purposes. Very happy with this and glad I took the plunge. Owe it all to Dean's method! Thanks Dean!
Life is NOT a journey to the grave with the intention of arriving safely in an attractive and well preserved body, but rather to skid in sideways, chocolate in one hand, martini in other, body thoroughly worn out and screaming "WOO-HOO” what a ride!
-
tmanthegreat
- Officer - Brigadier General
- Posts: 11238
- Joined: Tue Oct 05, 2004 7:38 pm
- Location: Central California
Great job! Dean's method does work well. I used his paint and masking tricks, though my paint application was done with an airbrush as opposed to the sponge. Like you, I applied the paint thinly to only "mute" the spots, not get rid of them completely. It is amazing what a difference the simple paint work makes on the plane, turning it into a real 1:18 scale masterpiece 
"If you fail to plan, you plan to fail."
-
deankleines
- Corporal
- Posts: 84
- Joined: Mon Dec 21, 2009 6:22 pm
-
thatf14guy
- Officer - 1st Lieutenant
- Posts: 521
- Joined: Thu Nov 19, 2009 5:58 am


