Page 2 of 4
Posted: Sun Jan 24, 2010 9:27 pm
by wolfman1973
I also would want them for the pave and the regular green blackhawk
Posted: Mon Jan 25, 2010 5:43 pm
by pickelhaube
Well the prototypes are almost done just some minor tweeking and they will be ready to make moulds.
Only 3 guys want the pylon mounting stubs. That is a little thin for me to make them.
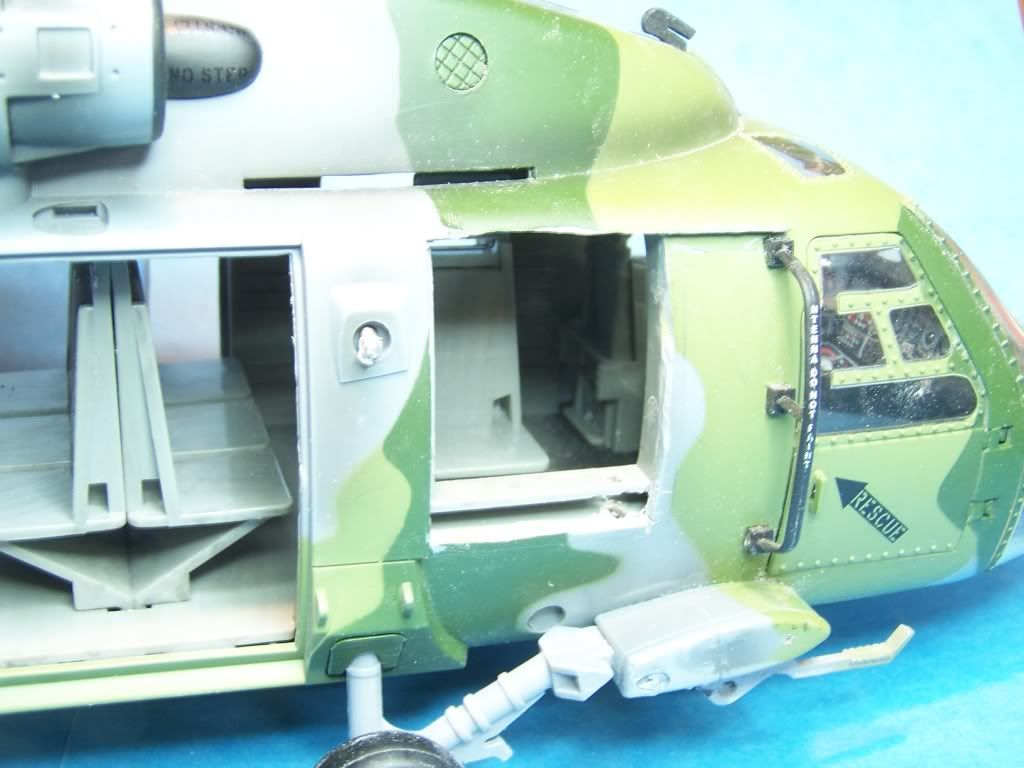
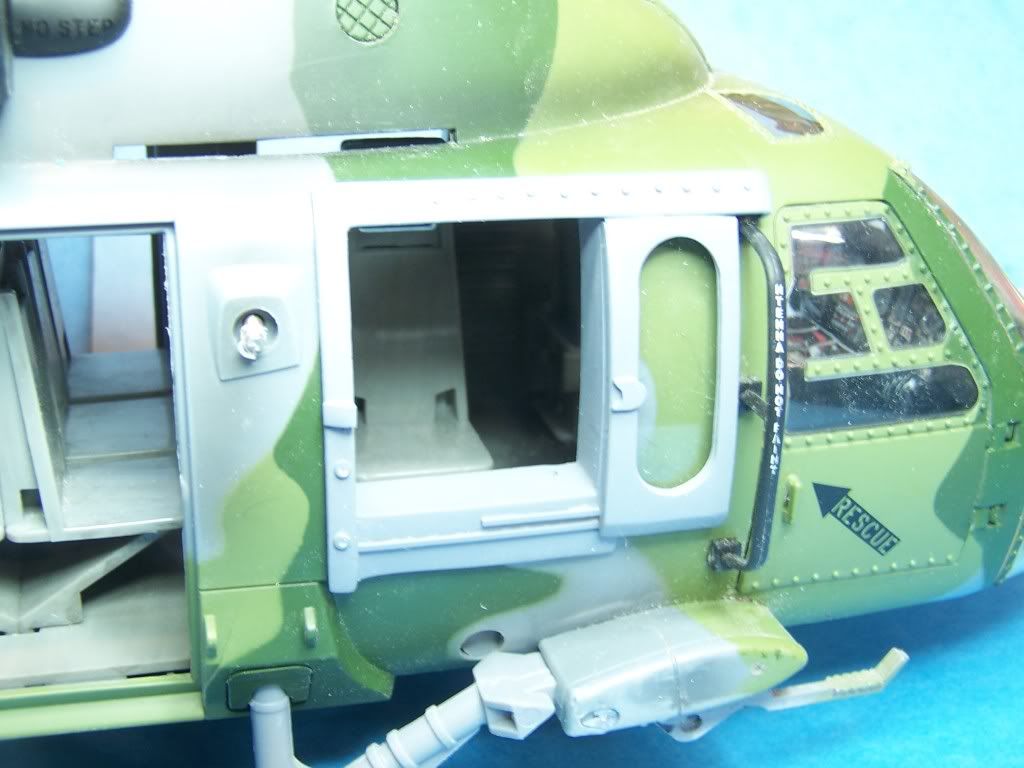
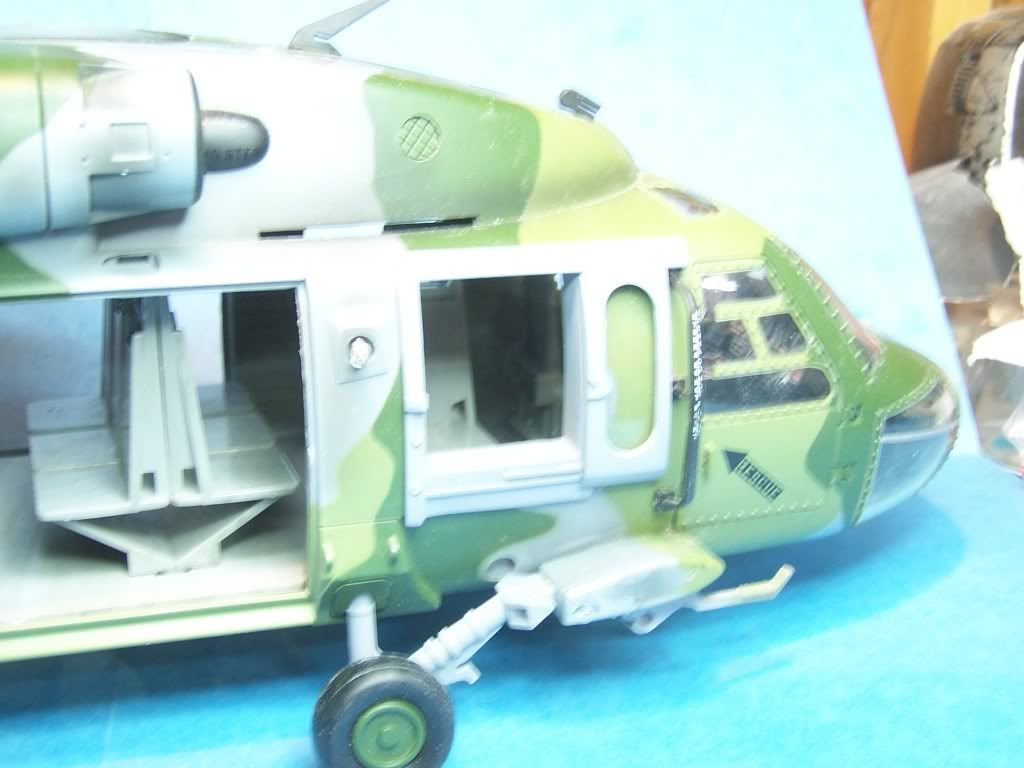
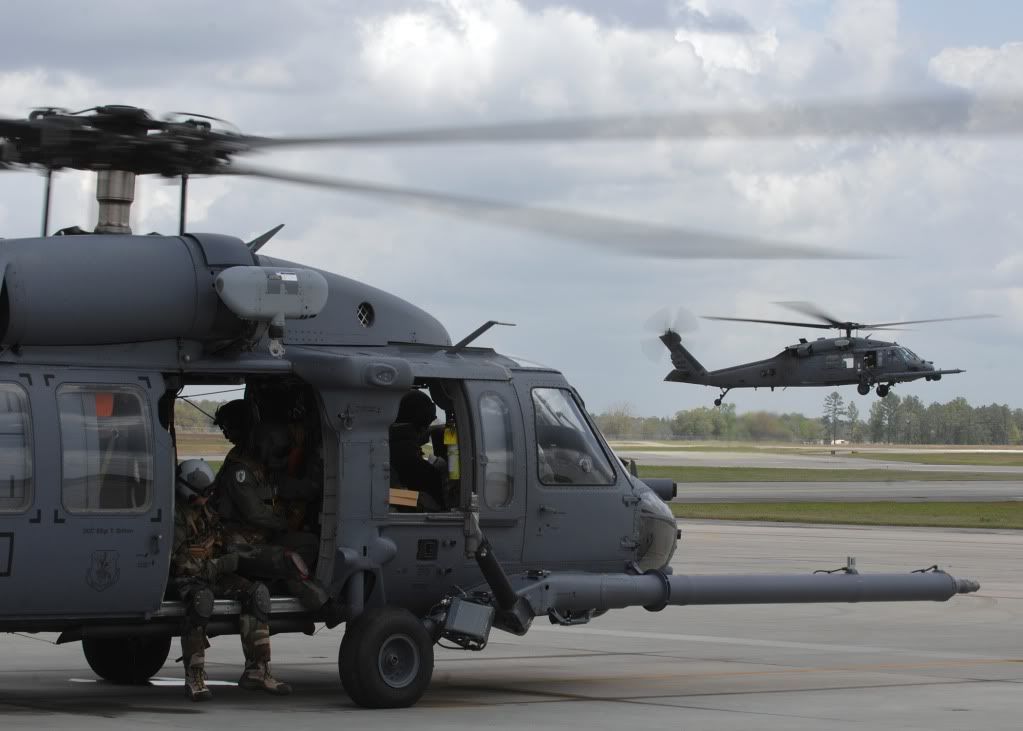
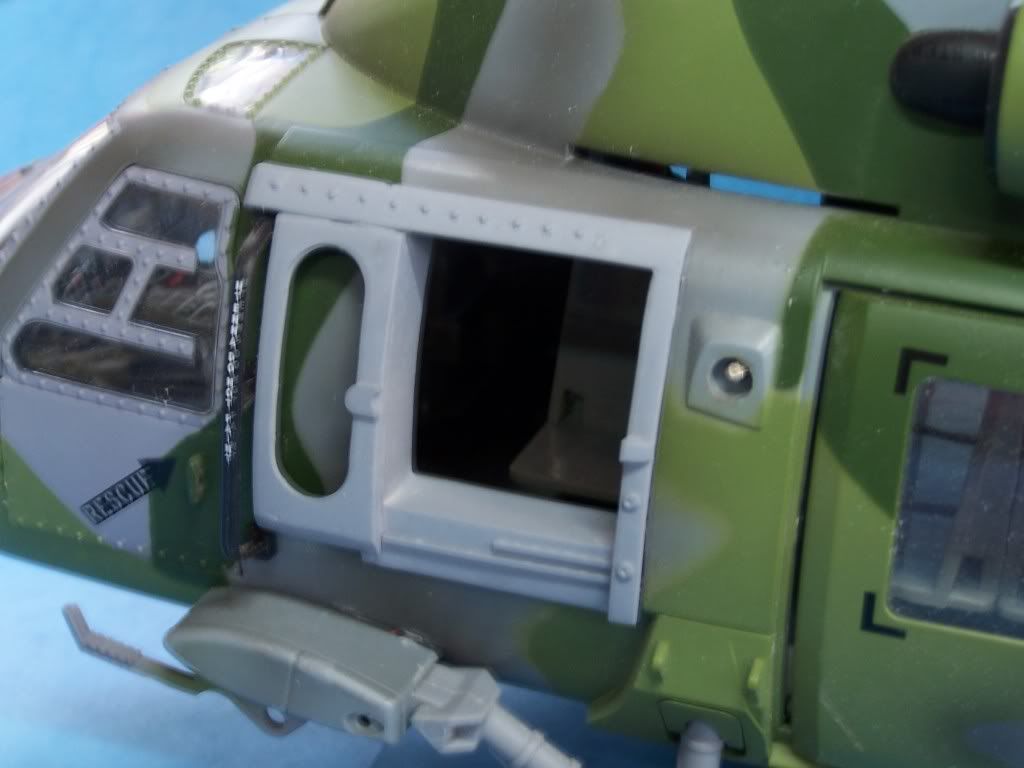
Here are some pics. I made rivets on the top rail to match the windows.
The detail did not come out in the pics. I think that I had the light too close. I will try to take a few better ones . If I can that is.
Posted: Mon Jan 25, 2010 5:43 pm
by pickelhaube
Double post

stubs
Posted: Mon Jan 25, 2010 5:56 pm
by rocky100370
Ok I dont mean to sound stupid but what are the pylon mounting stubs?
Re: stubs
Posted: Mon Jan 25, 2010 6:01 pm
by pickelhaube
rocky100370 wrote:Ok I dont mean to sound stupid but what are the pylon mounting stubs?
The oval thingys that the big gas tanks clip on. It is in one of thpics. It is placed between the main crew doorway and the gunneers doorway.
Yeah the pics do not show the details at all.

Re: stubs
Posted: Mon Jan 25, 2010 6:04 pm
by margras77
rocky100370 wrote:Ok I dont mean to sound stupid but what are the pylon mounting stubs?
My question too

Edit: Thanks for answering above. Is it the cap thing for them?
Also, how did you get the pylon mounts out of the helicopter?
Would the set for the Window and Minigun include right AND left? TBH I have plans for the left, so would you sell just the right side set?
What I would be interested in is this:
Right side Exterior-mounted Minigun
Right side Window pop in
And as I see on the prototype, the door on the pop in has a rail; will it slide?

I will probably have the money for a set on the right. Are we looking at a 15-35 dollar price range, possibly?
Posted: Mon Jan 25, 2010 6:23 pm
by dcway
Very Sweet !!!!!!!!!!!!!!!
Matt did you get my pm"s
Dana
ahhhh
Posted: Mon Jan 25, 2010 6:33 pm
by rocky100370
Ok yes I need that too.....you are going to do the guns with this right?
Posted: Mon Jan 25, 2010 7:00 pm
by pcoughran
Mathew,
Count me in for the window pop ins. They look so much better than your original prototype. The window has been my "stumbling block" on getting motivated to finish.
Your new "finished" version is good enough to save me all the putty work I was dreading.
I already have the miniguns and internal mounts so just need the pop in windows.
I'll send a PM as well.
Phil
Posted: Mon Jan 25, 2010 9:35 pm
by pickelhaube
The windows WILL NOT SLIDE THEY ARE STATIC ONLY.
I designed the pop ins to be one piece with a clear styreen window pane. It will take about 10 mins to cut the original window out and 1 second to pop mine in.
It should cover the hole cleanly. Providing that you did not cut it out with a tamahawk.

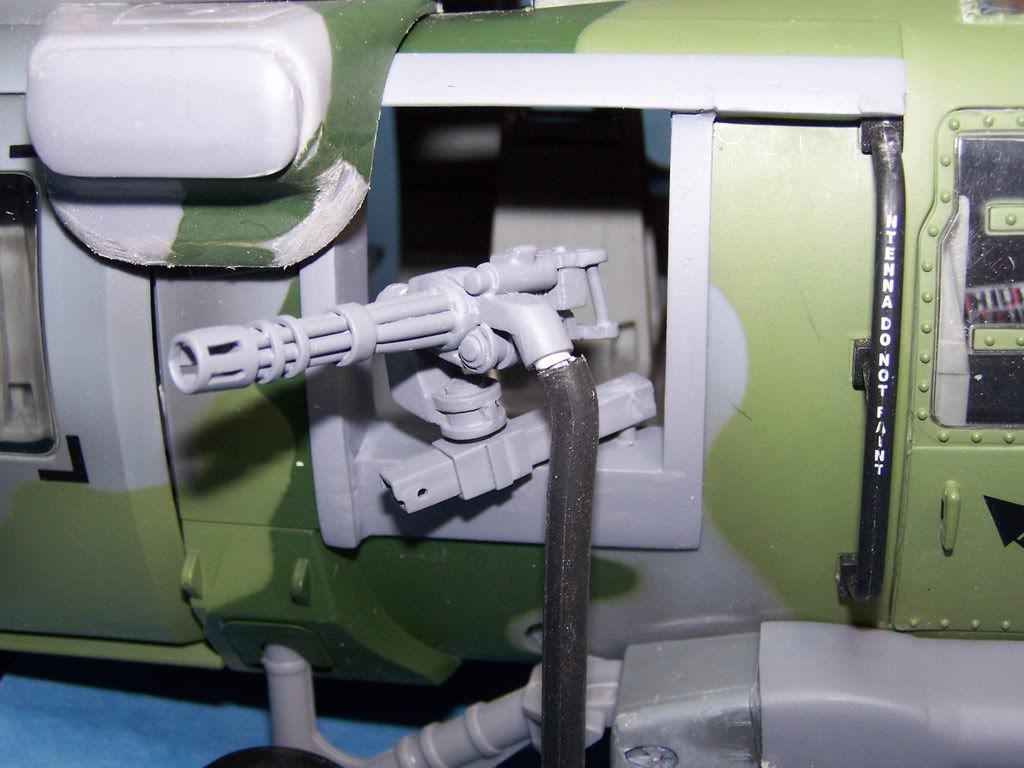
I can sell one side window pop in if you like. Along with a single mini and arm.
I am still making the M-134 minis.
THE MINIS WILL NOT COME WITH THE POP INS.
THEY ARE SOLD SEPERATELY.
I CAN ADD THEM TO YOUR ORDER IF YOU LIKE.

I am trying to get in at about $25-$35 for a set UNPAINTED. Half of that for one.
Not a bad price considering that it took about 2 days to make them over the course of about a year

The pylon stubs should take less than a day to make . I will try to see if I can find some tear drop shape beads to use as the nav lights.
I know I have over 10 guys interested in the pop ins but only 3 or so with the pylon stubs. I think that the stubs should go around $15 for the set. They should be farley easy to replicate.
Hands up to be counted for those stubs . I need about 10 guys so they can be a go.
Posted: Mon Jan 25, 2010 9:43 pm
by Birddog
Awesome Matt!!!
Count me in for a set of window pop ins!!!
Posted: Mon Jan 25, 2010 9:54 pm
by margras77
Is this cap for it the pylon thing?
How did you get them off to put the windows in?
Sorry for all the questions.
Posted: Mon Jan 25, 2010 10:01 pm
by pickelhaube
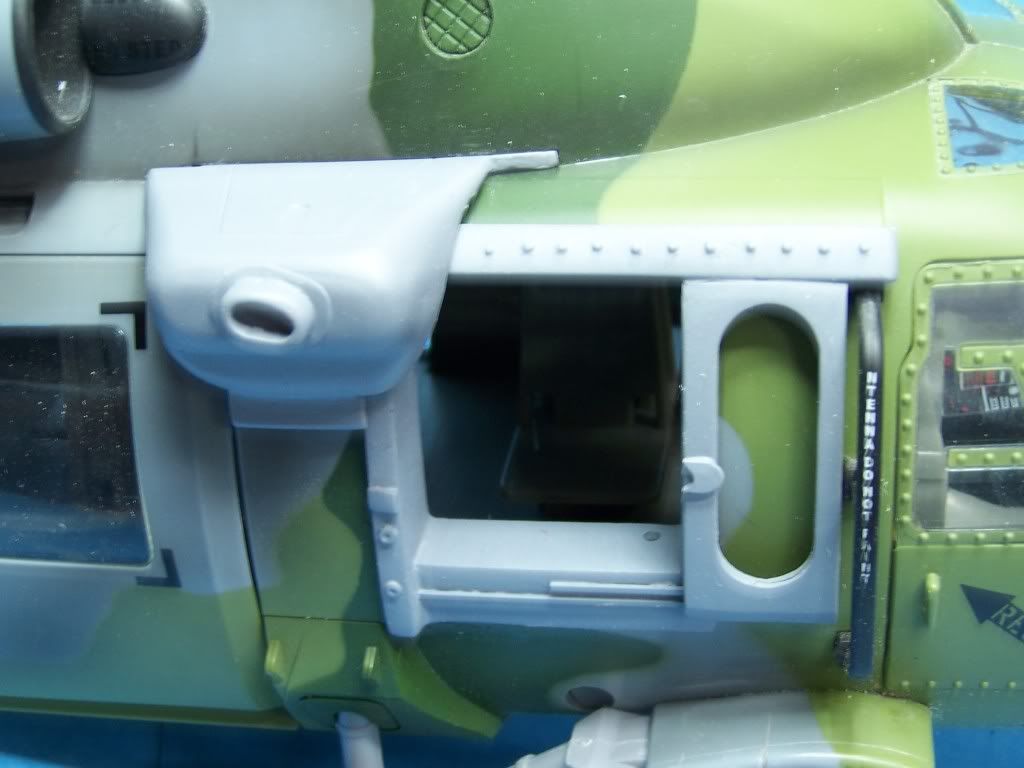
Yep that is the pylon stub. I am going to finish the end with the scale looking cap with a nav light in it.
You just put a screw driver in the slot and wiggle it side to side and it should pop out. Click onto the yellow post on top of the page and it will discuss this. It is very simple and with just a little effort it should just pop out.
Here go to page 4 and it is explaned how to do it
viewtopic.php?t=15176&postdays=0&postor ... k&start=60
Posted: Tue Jan 26, 2010 7:05 pm
by pickelhaube
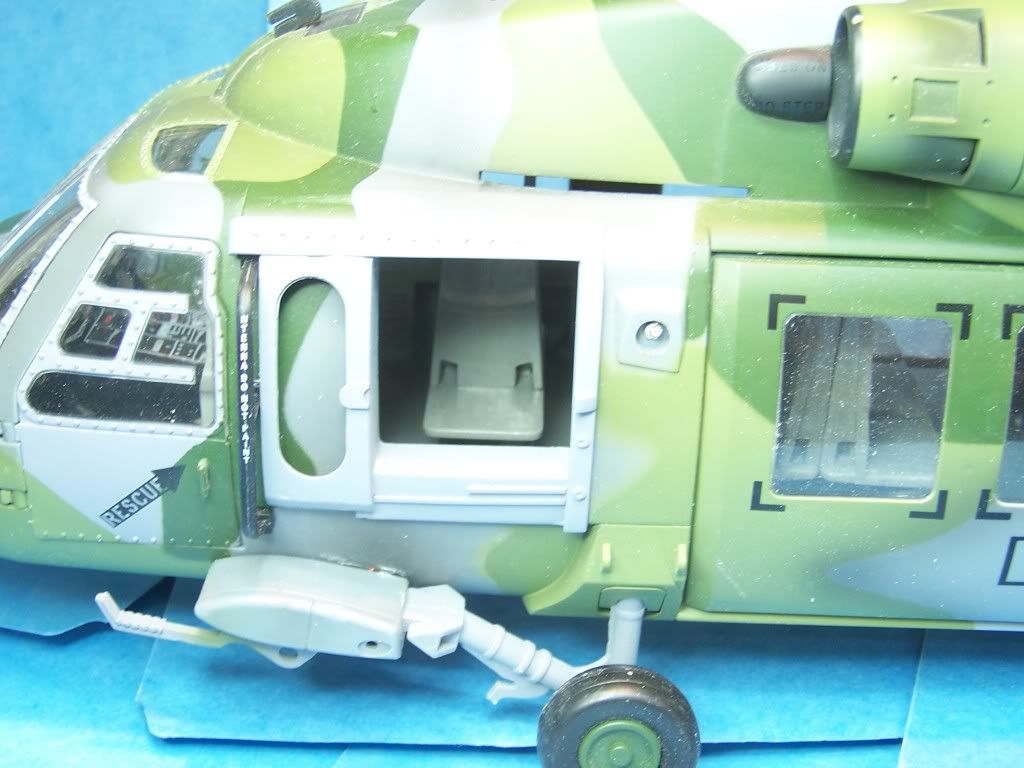
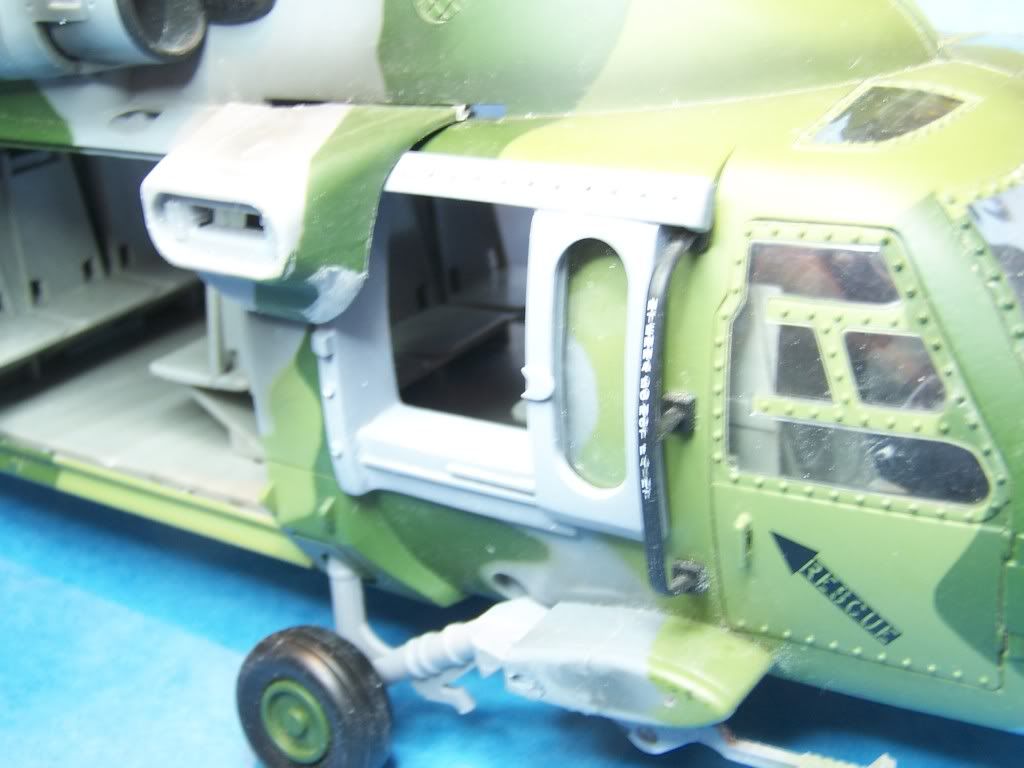
OK I am going to try and post some better pics.
Sometimes I nail them somtimes they are blurry. Let s try these I also made one of the pulon stubs. IT TOOK ME A FULL DAY TO DO..
There are only 3 guys who have said they wanted these. Look at the pics and see what it will look like.
I did not get a chance to go to Michaels for the nav lights so I left the hole open. The socket is at a slant the real one are like this as well.
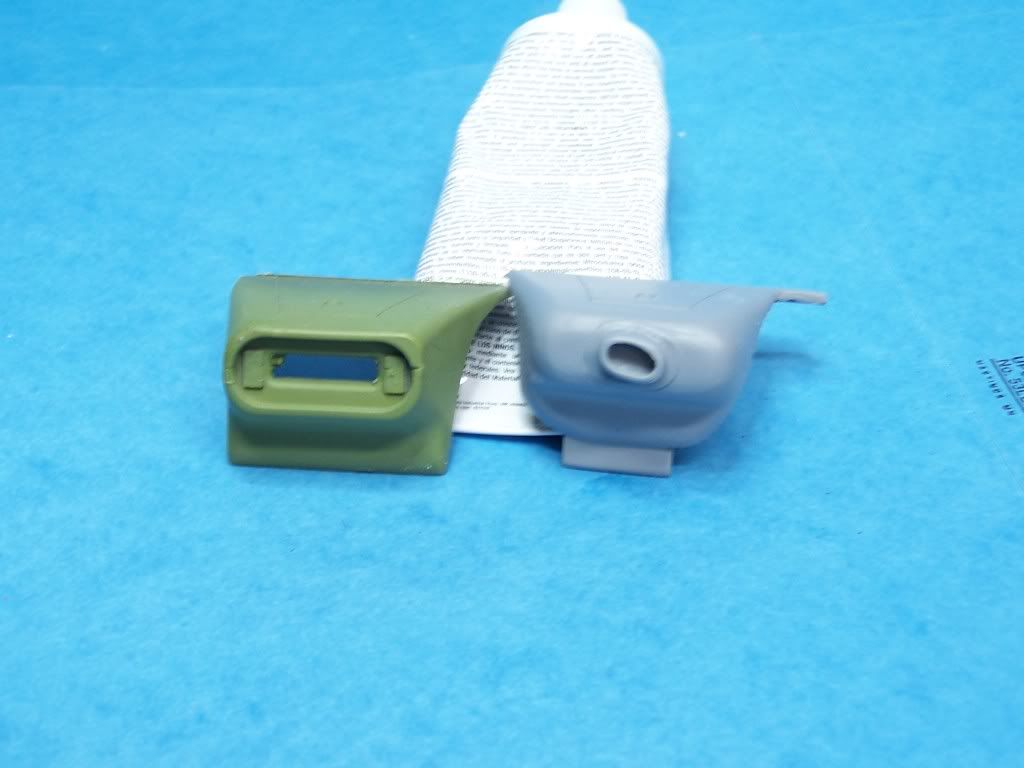
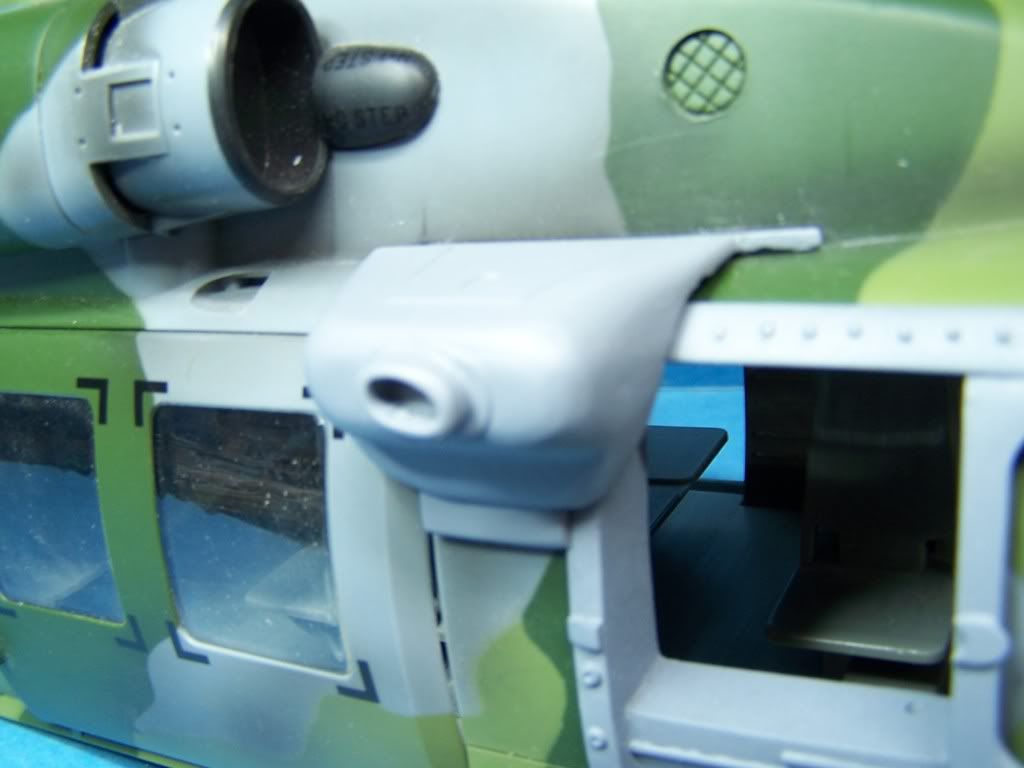

Here is the left side with original stub.
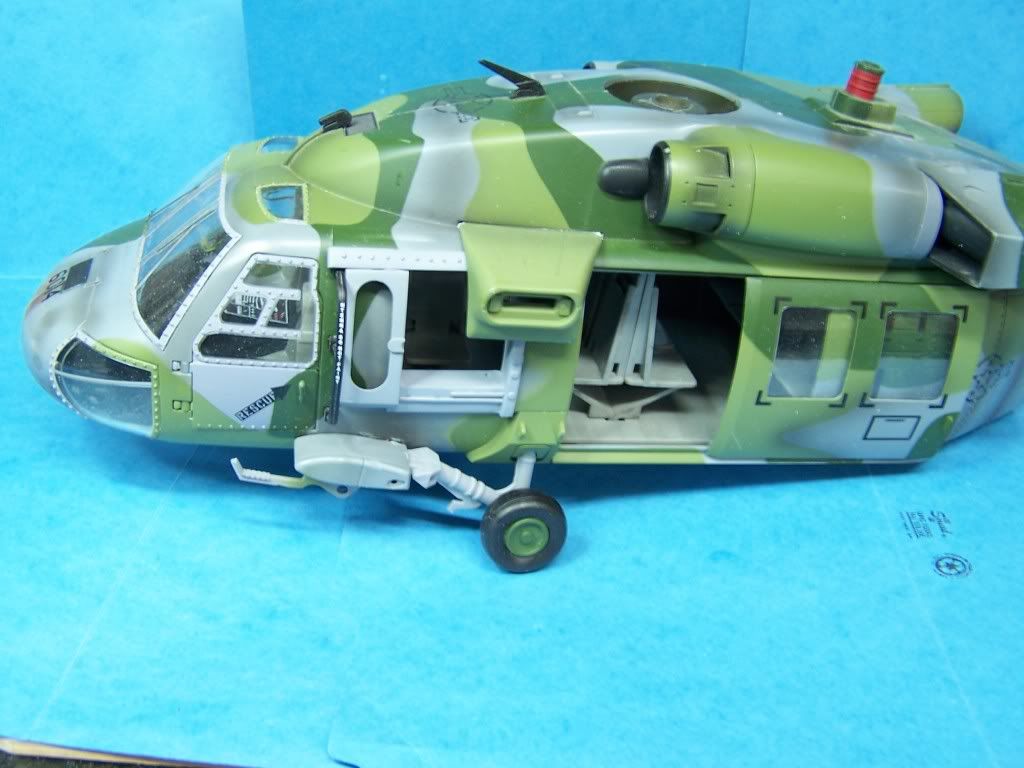
Here is the right side with my stub. I cut about 4 mm out of the center to make it thinner. The originals are way big.
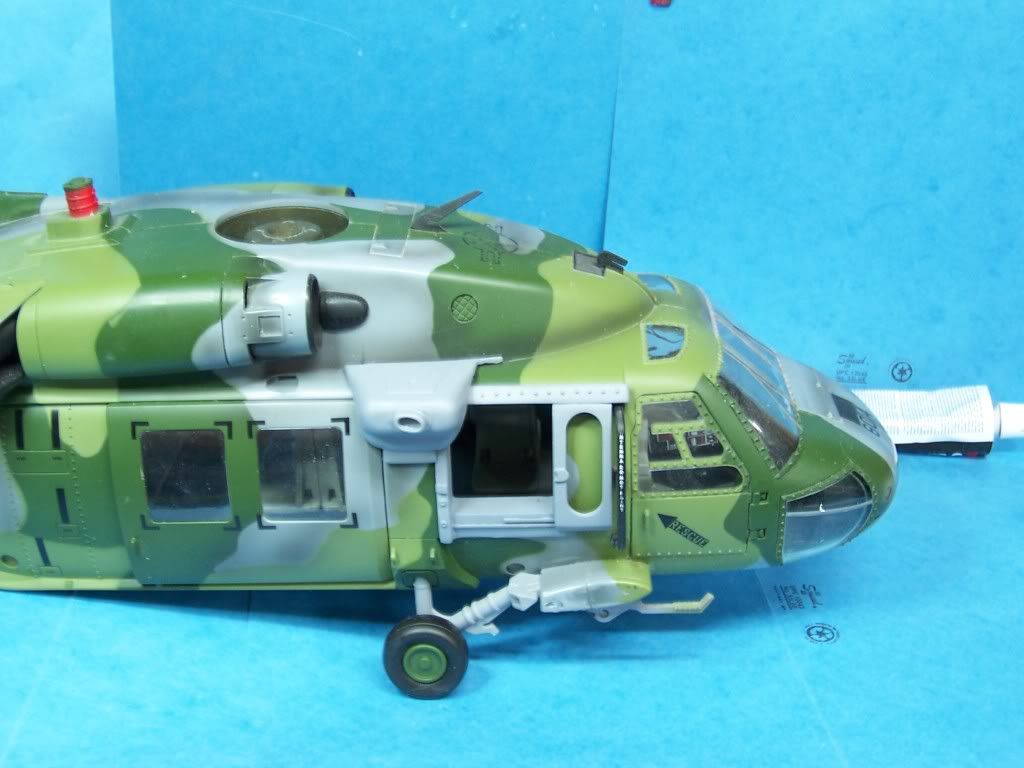
What do you guys think ?
Let me know about those stubs I do not want to spend a full day to make the others. Also these are ready to cast PM me if you guys are ready for them.
Posted: Wed Jan 27, 2010 3:42 pm
by alf
Hi PH,
count me in for the stubs !
Posted: Wed Jan 27, 2010 4:19 pm
by pickelhaube
Well no luck finding the nav lights. I was trying to find a clear plastic tear drop shape ( red and blue )but came up empty. I guess I am just goiung to have to cast them and we will have to paint them blue and red.
The top nav light is painted red on the BBI model. So when in Rome do as the Romans do.
Thanks guys for the show of hands.
It is appriciated in these trying times.
Posted: Wed Jan 27, 2010 4:40 pm
by Ta-152
pickelhaube wrote:Well no luck finding the nav lights. I was trying to find a clear plastic tear drop shape ( red and blue )but came up empty. I guess I am just goiung to have to cast them and we will have to paint them blue and red.
The top nav light is painted red on the BBI model. So when in Rome do as the Romans do.
Thanks guys for the show of hands.
It is appriciated in these trying times.
The "disco ball" isn't a light, it's a a counter measure device.
Funnily enough, neither Bbi got it right on the 2 helos they did that had them or 21st on the Super Cobra.
I don't think 21st even got the position right.
Posted: Wed Jan 27, 2010 7:44 pm
by margras77
I like the pylons...but I am still am wary of taking the first ones out
Posted: Wed Jan 27, 2010 7:48 pm
by pickelhaube
margras77 wrote:I like the pylons...but I am still am wary of taking the first ones out
It will take about 3 seconds to pop it out. Put a screw driver in it tight ratchet it back towards the boom and snap there it is.
WITH NO DAMAGE TO THE HELO !!!!!!!!
Posted: Sat Jan 30, 2010 7:35 am
by pickelhaube
I had a long talk with Dean on the phone last night.
He is the guy who came up with the fantastic idea of sponging out those confounded spots on the F-14.
Way back when I started trying to match some paint on the yellow mk IV panzer. I took the tank to Home Depot and they made some paint for me that was darn near perfect.
I am going to try this with the pavehawk. Nobody makes a perfect match for those 2 tone green camo colors.
When I was playing with the panzer colors I had to do alot of thinning and stuff for it to spray out of the airbrush. So much of a pain I scratched the idea.
But I think that his make up sponge idea will work !!!
That way , if the idea works everybody will be able to camo my parts your parts or any bodies' parts and look fatory applied. Maybe it can be used as touch up as well.
The possibilities are endless.
I will keep you posted.
Sponge Painting Basics
Posted: Sat Jan 30, 2010 7:58 am
by deankleines
Good Morning Matthew!!!
My curiosity has gotten the best of me!!!
I went to my paint shelf and found almost a whole gallon of acrylic latex paint that we had used in our dining room. It just happens to be a medium green satin that could pass for a military color.
I suspect that primer will be the most important factor in making this work as the latex needs to have something to grab onto.
If this works, I think it could revolutionize model building in that you would not have to worry about brush strokes and you would not have to use an airbrush for everything.
I will do a series of tests this morning and post the results.
Later,
Dean
Posted: Sat Jan 30, 2010 9:43 am
by YT
I am in for a set of stubs.
Incredible Results!!!! Applying Paint with a Make-Up Sponge
Posted: Sat Jan 30, 2010 11:08 am
by deankleines
The method was incredible with new bottles of Model Master Enamel and Acrylic paint, but with a nine year old gallon of left-over acrylic house paint??????
Who'd have ever thunk????
Pics worth a thousand words!!!
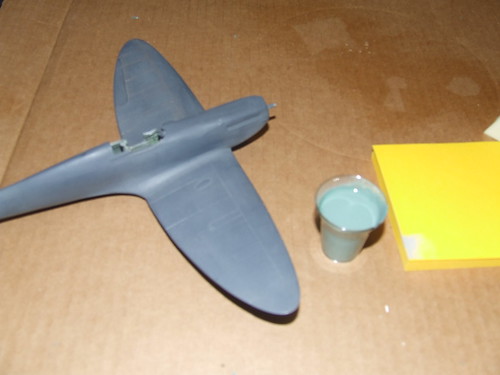
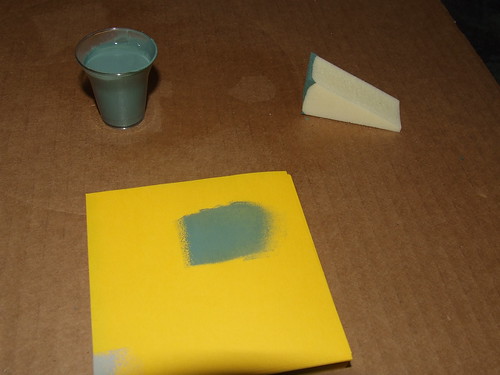
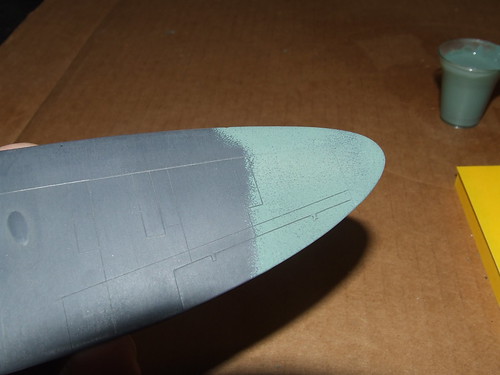
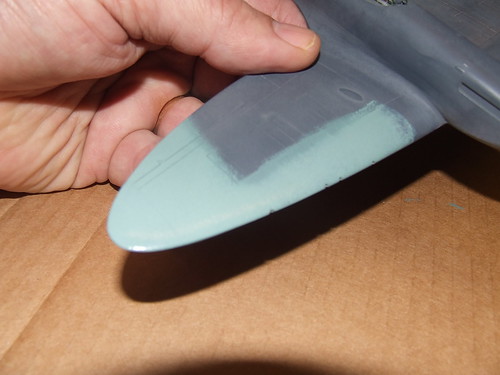
Matt, This is a PERFECT no-brainer method that yields an air brush quality finish!!!!
Go for it!!! Lowes Knows!!![/img]
Posted: Sun Jan 31, 2010 9:01 am
by pickelhaube
He Dean ,
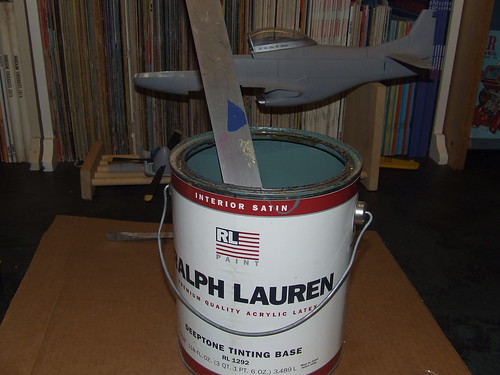
Thanks for the great idea. I went to Lowes yestorday and had them match the Pavehawk greens.
This was done in about 10 mins and cost me only $3 a can.
They call them sample cans. The paint is latex which is actually arcylic .
The sponge application can be concidered Tampo painting. It is done the same way just by hand and not by machine.
If this works it will open all kinds of doors. Like engsina application lettering and a whole bunch of other applications.
All you need is templates. Which you need anyway if you want to paint rather than decal.
I will try and play with it today.
Thanks !!
Posted: Sun Jan 31, 2010 5:57 pm
by pcoughran
I was thinking of using the sponge method on your Stuka cannons, but was concerned about getting in the "nooks and crannies" where the sponge may not reach or if pressed into - may lose the look of being airbrushed.
When I did the F14 with this method, I "dabbed" the whole plane right over my masked off markings as well to ensure I had complete coverage (as oppossed to some who just dabbed the spots). It looked like I airbrushed it - very good results. But, everthing was flat. Don't know how painting something like the winglet stub with the raised nav light fixture or the stuka cannons would turn out using the sponges.
I'm anxious to hear what you guys come up with though.